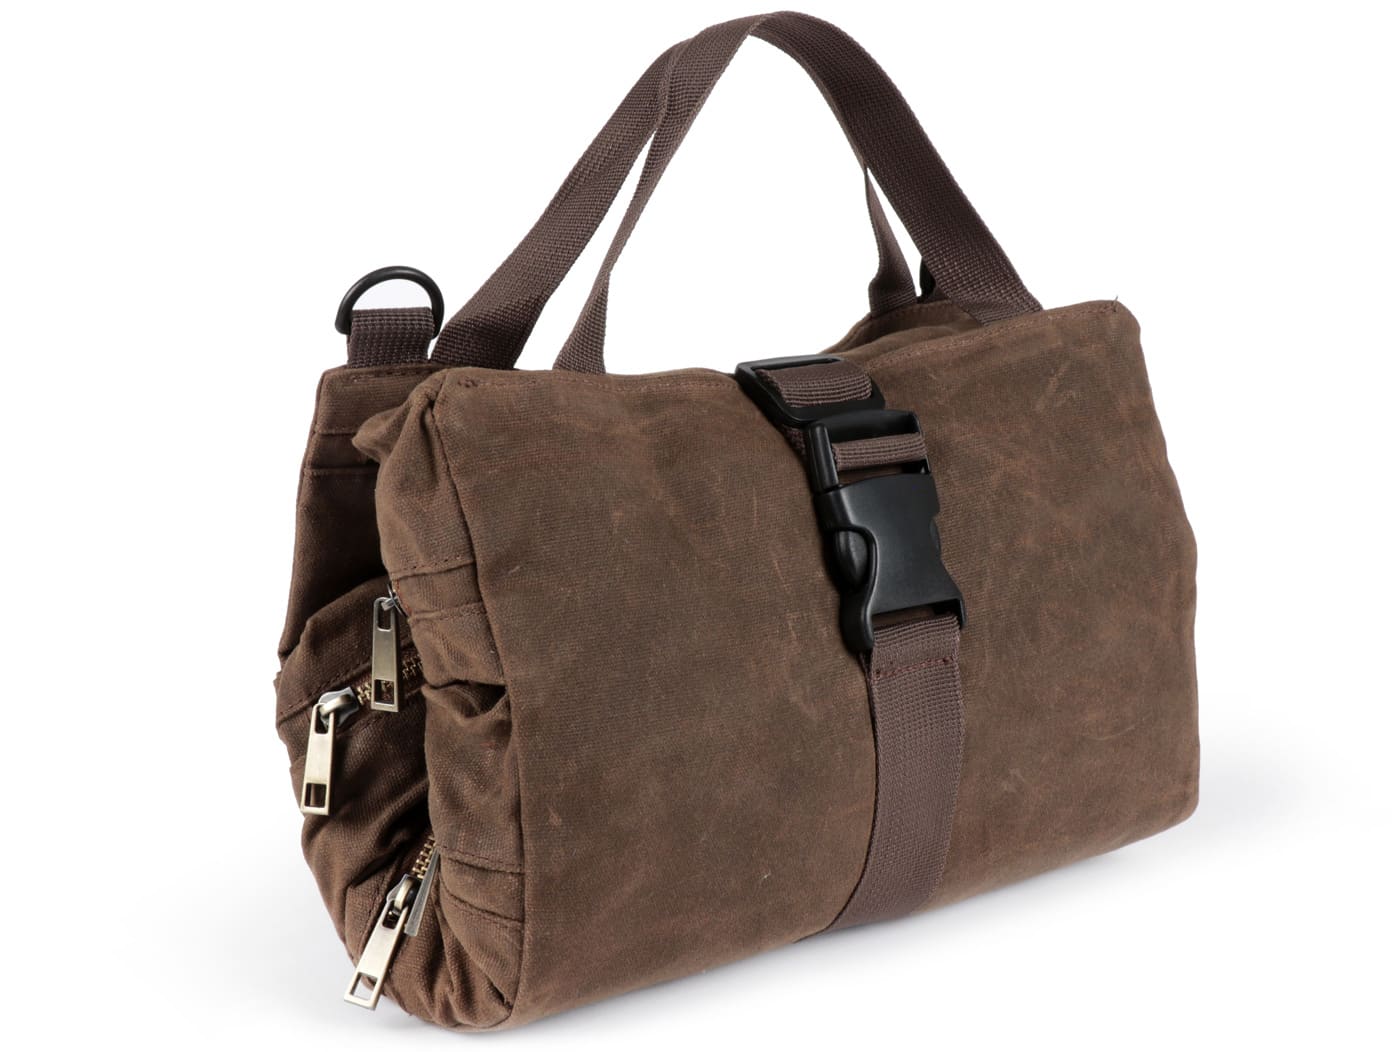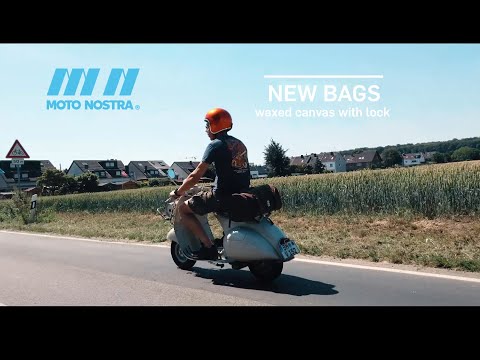
We have new tool bags from MOTO NOSTRA on offer – and as usual at these times, today we have a product presentation from the home office!
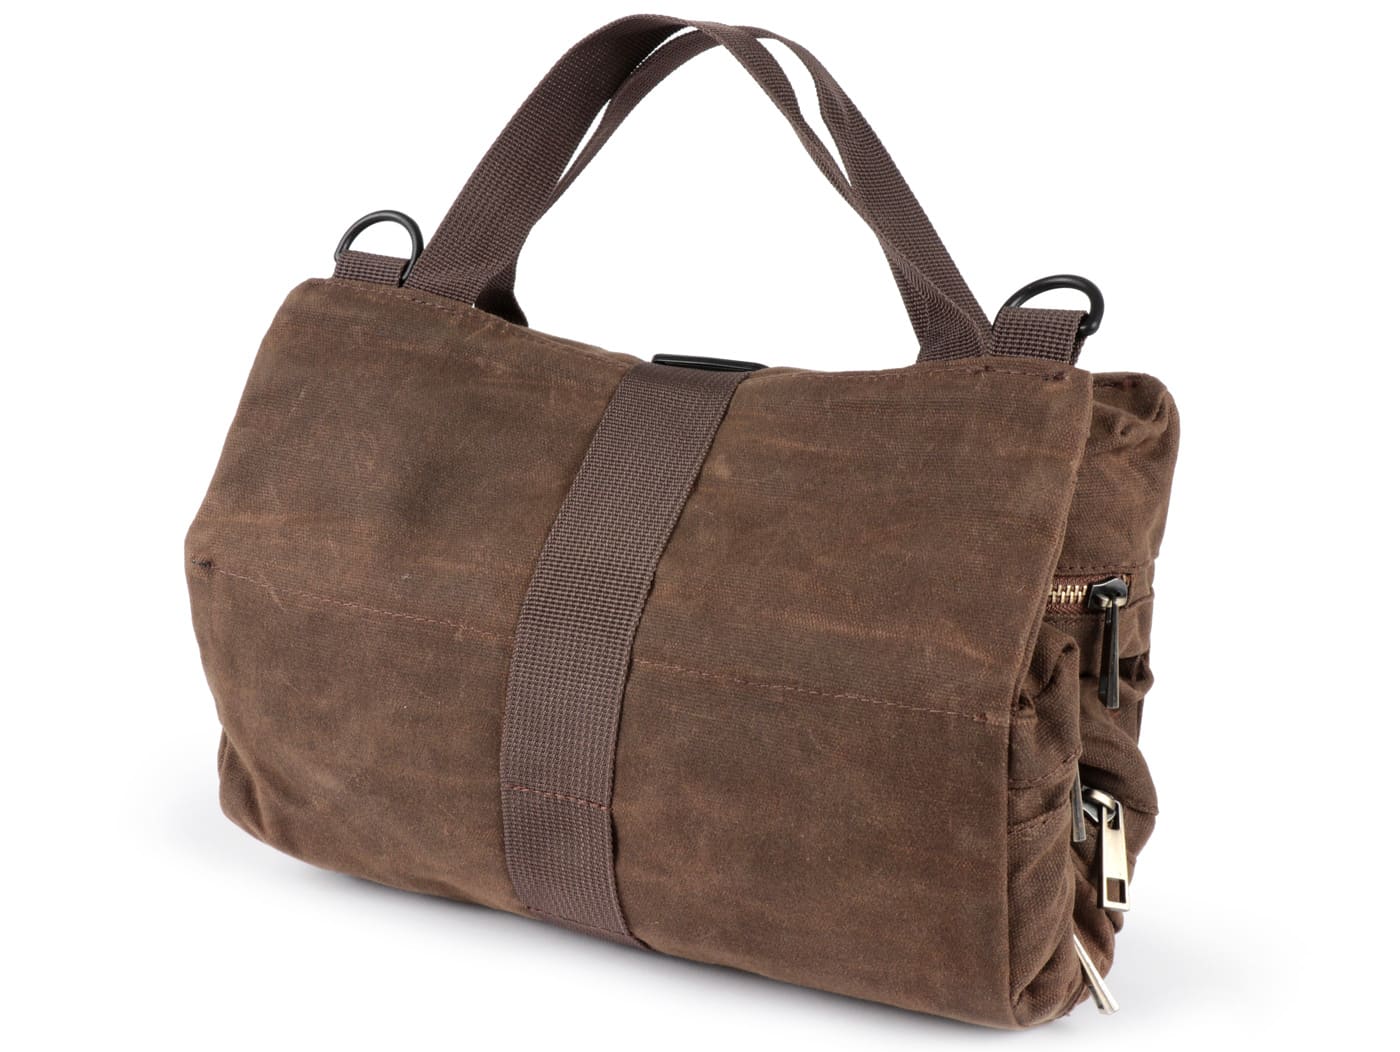
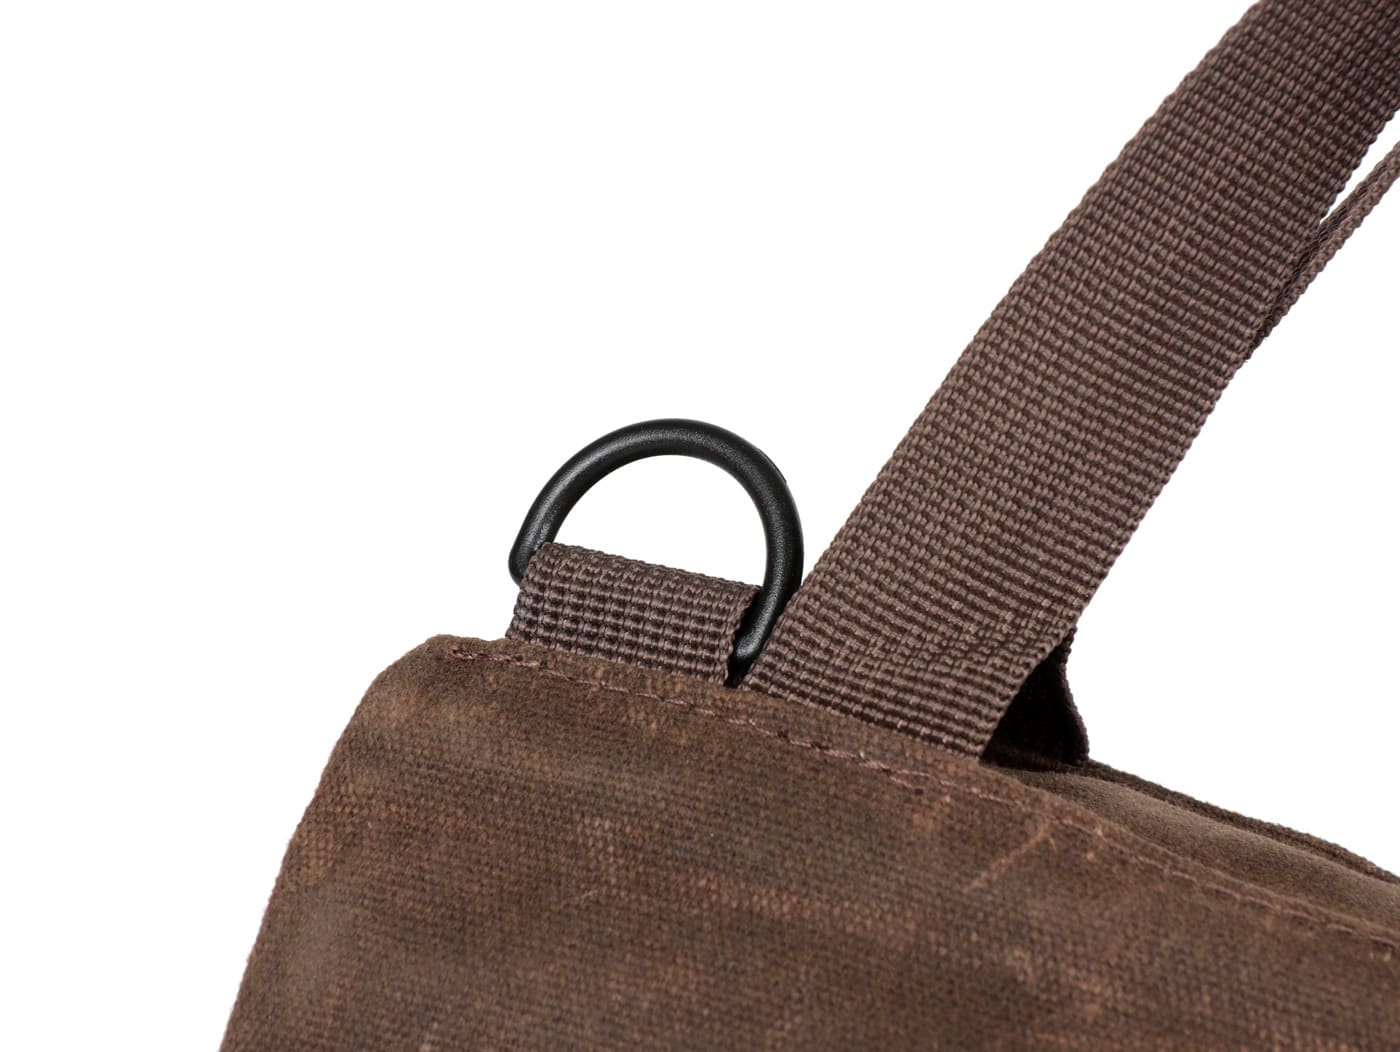
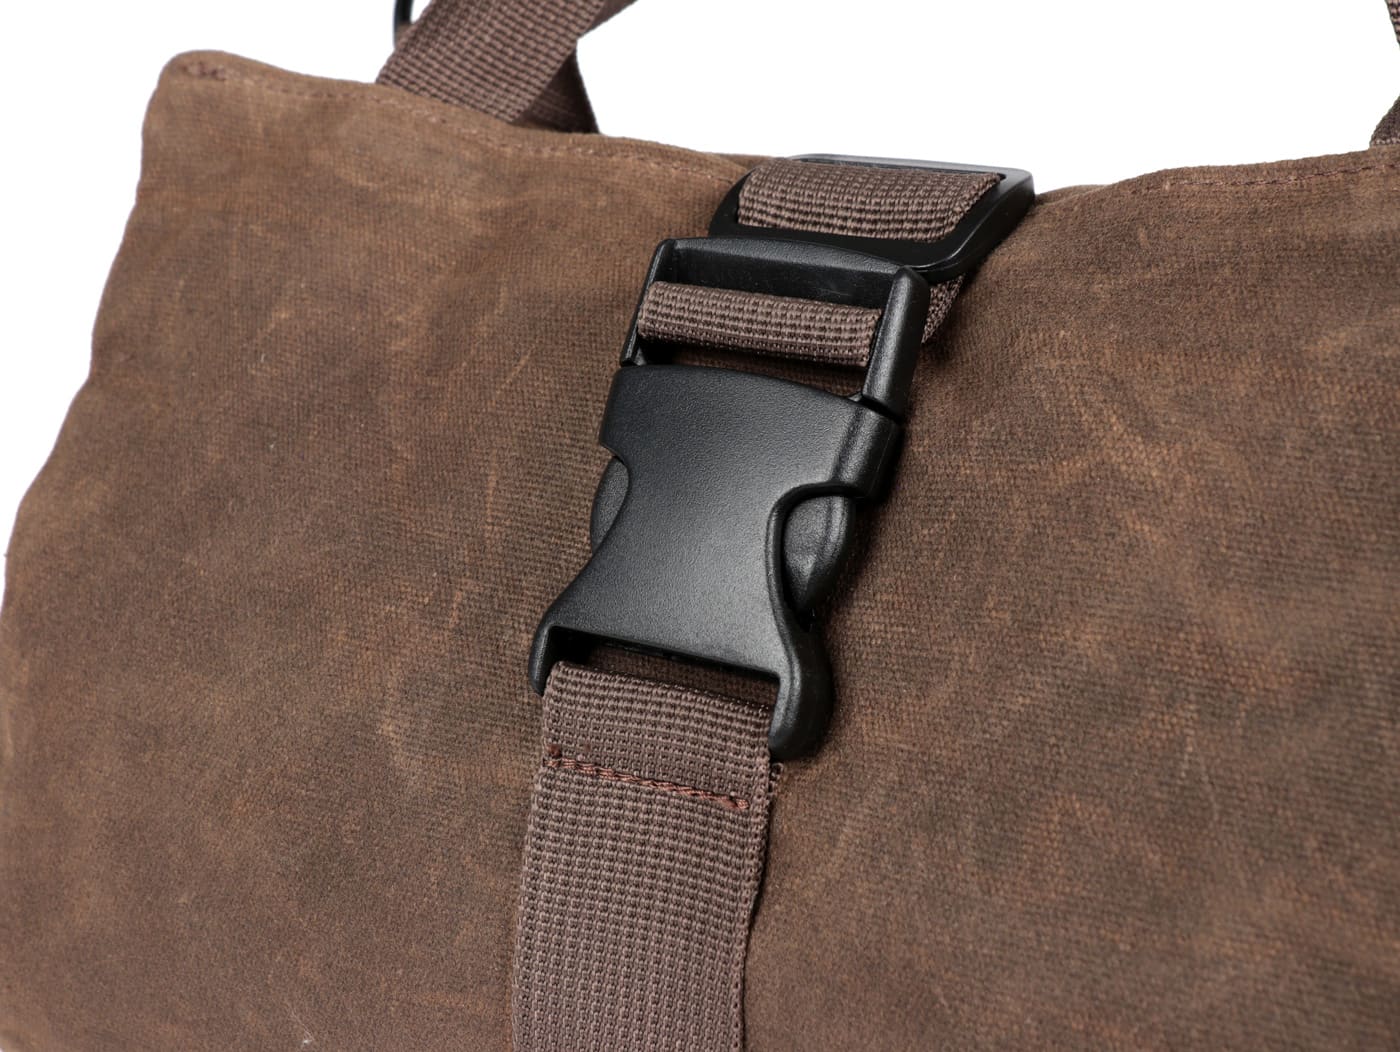
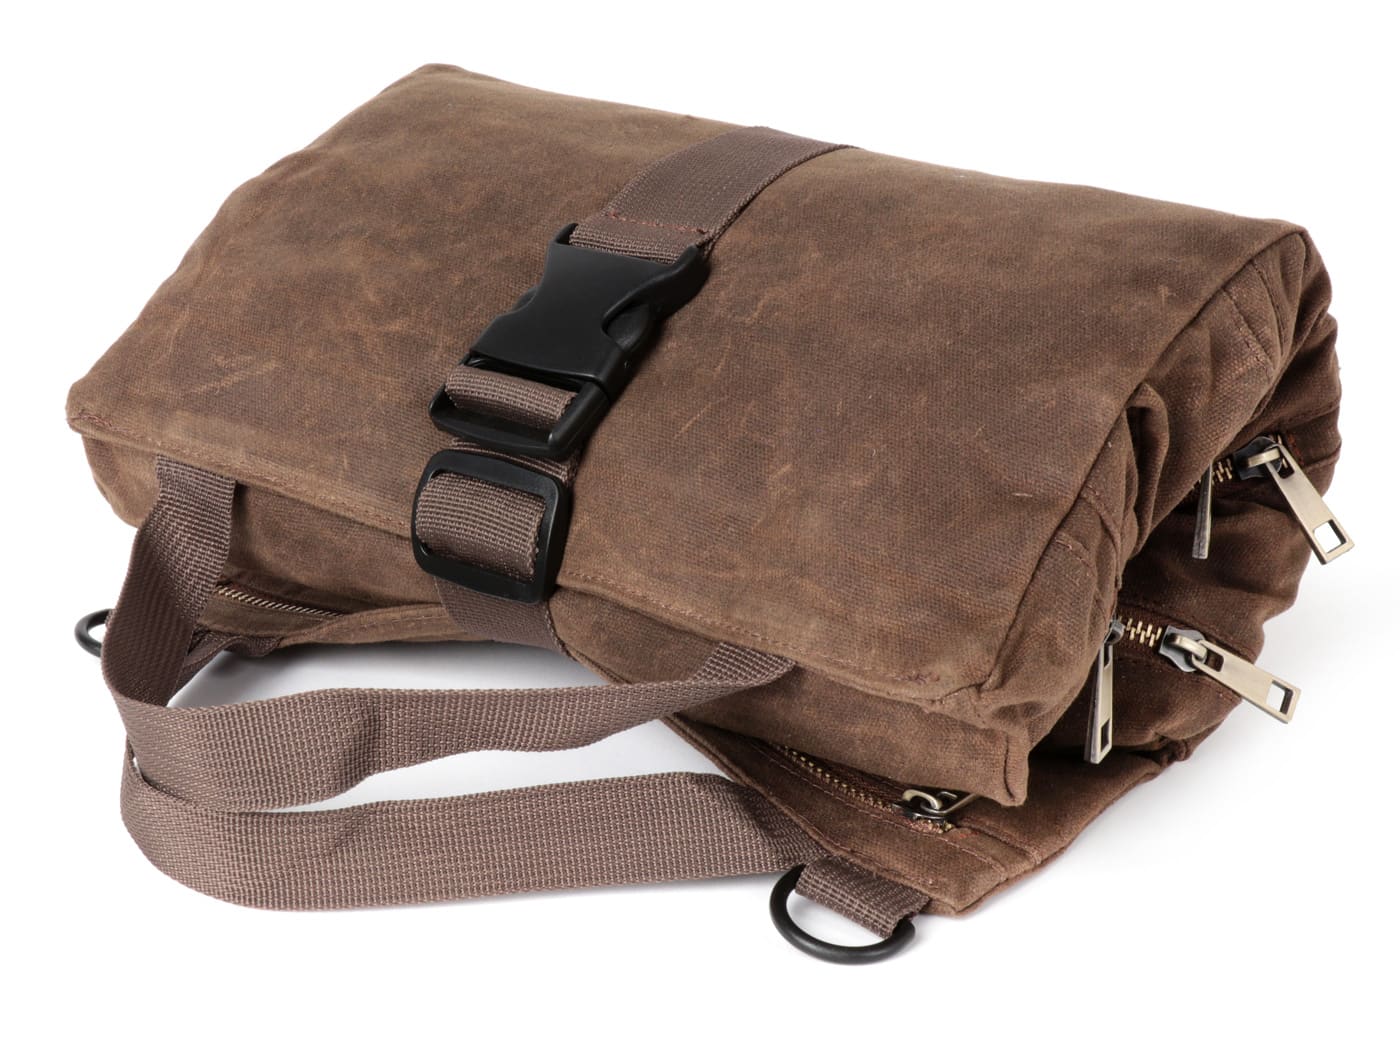
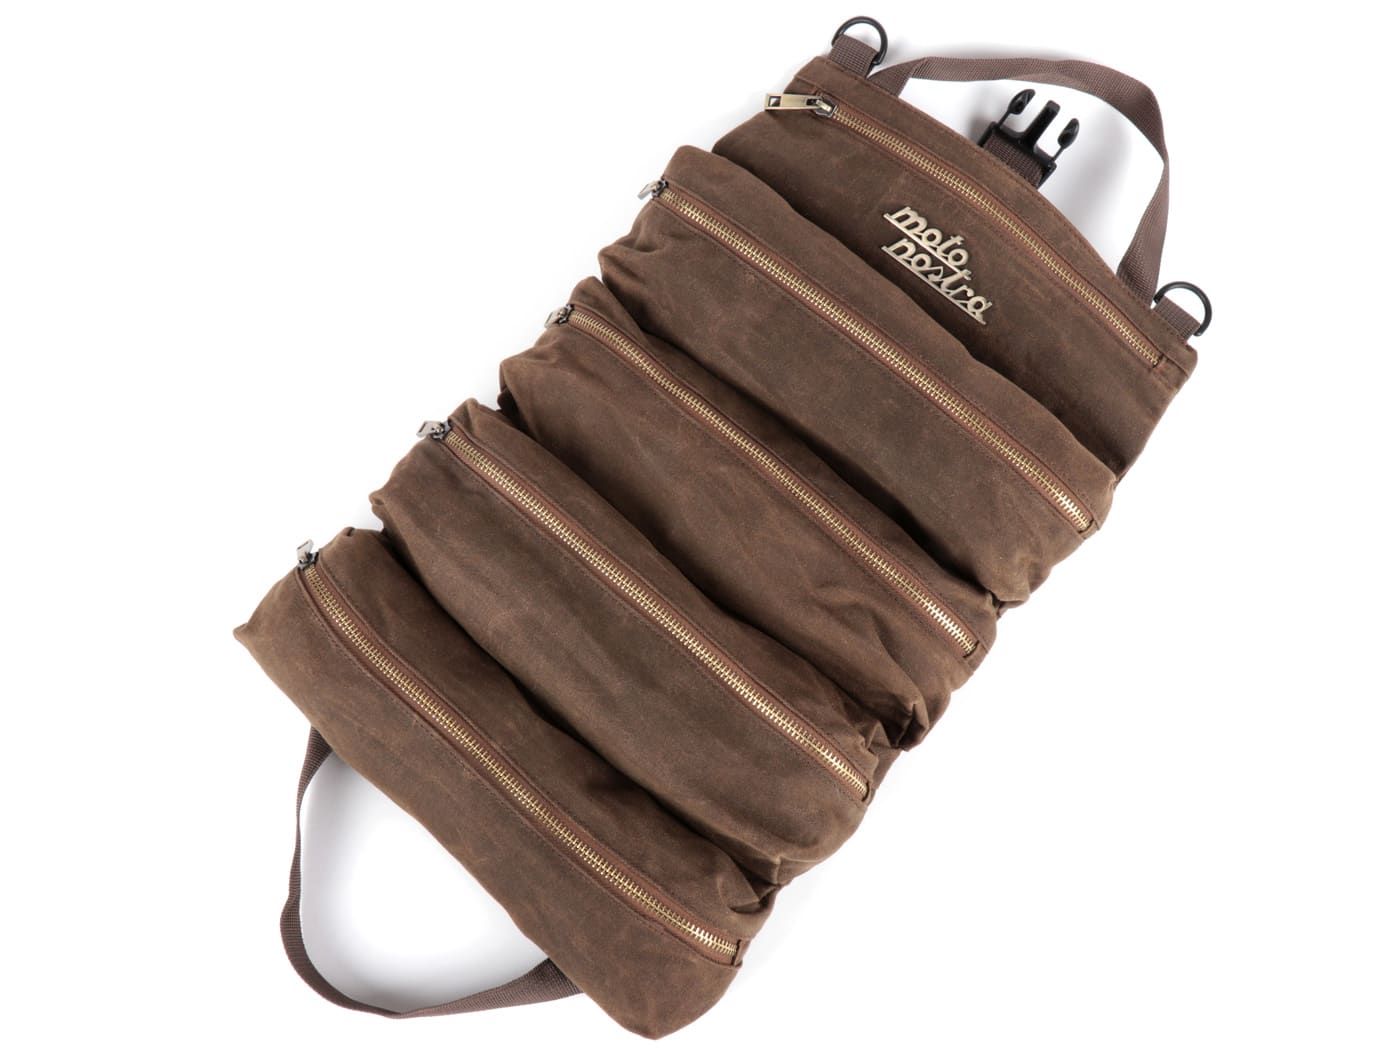
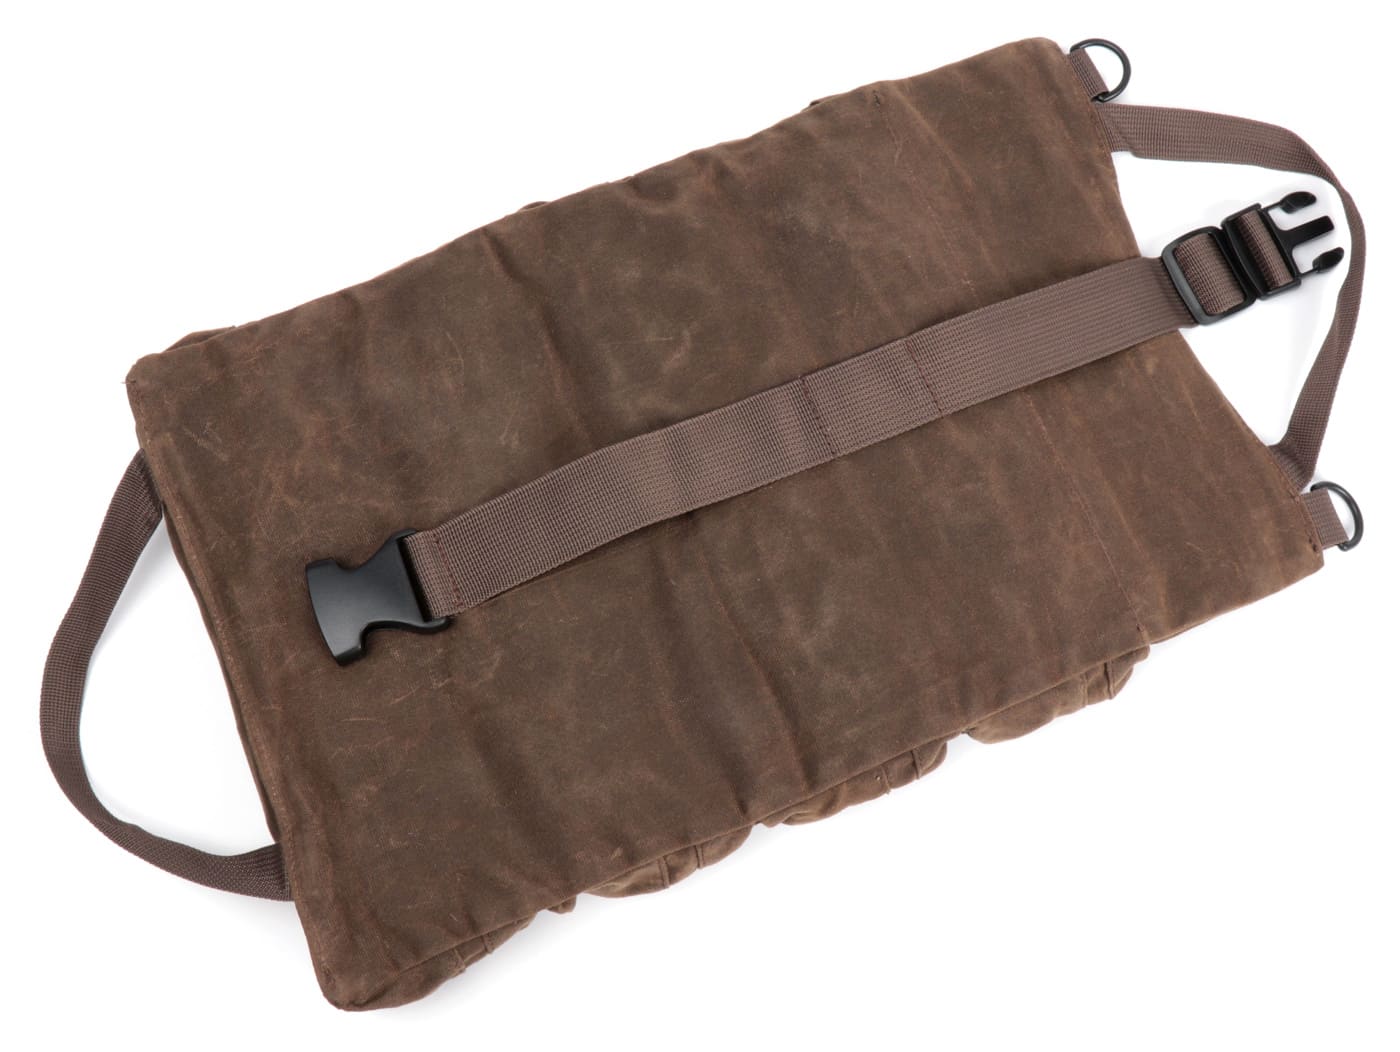
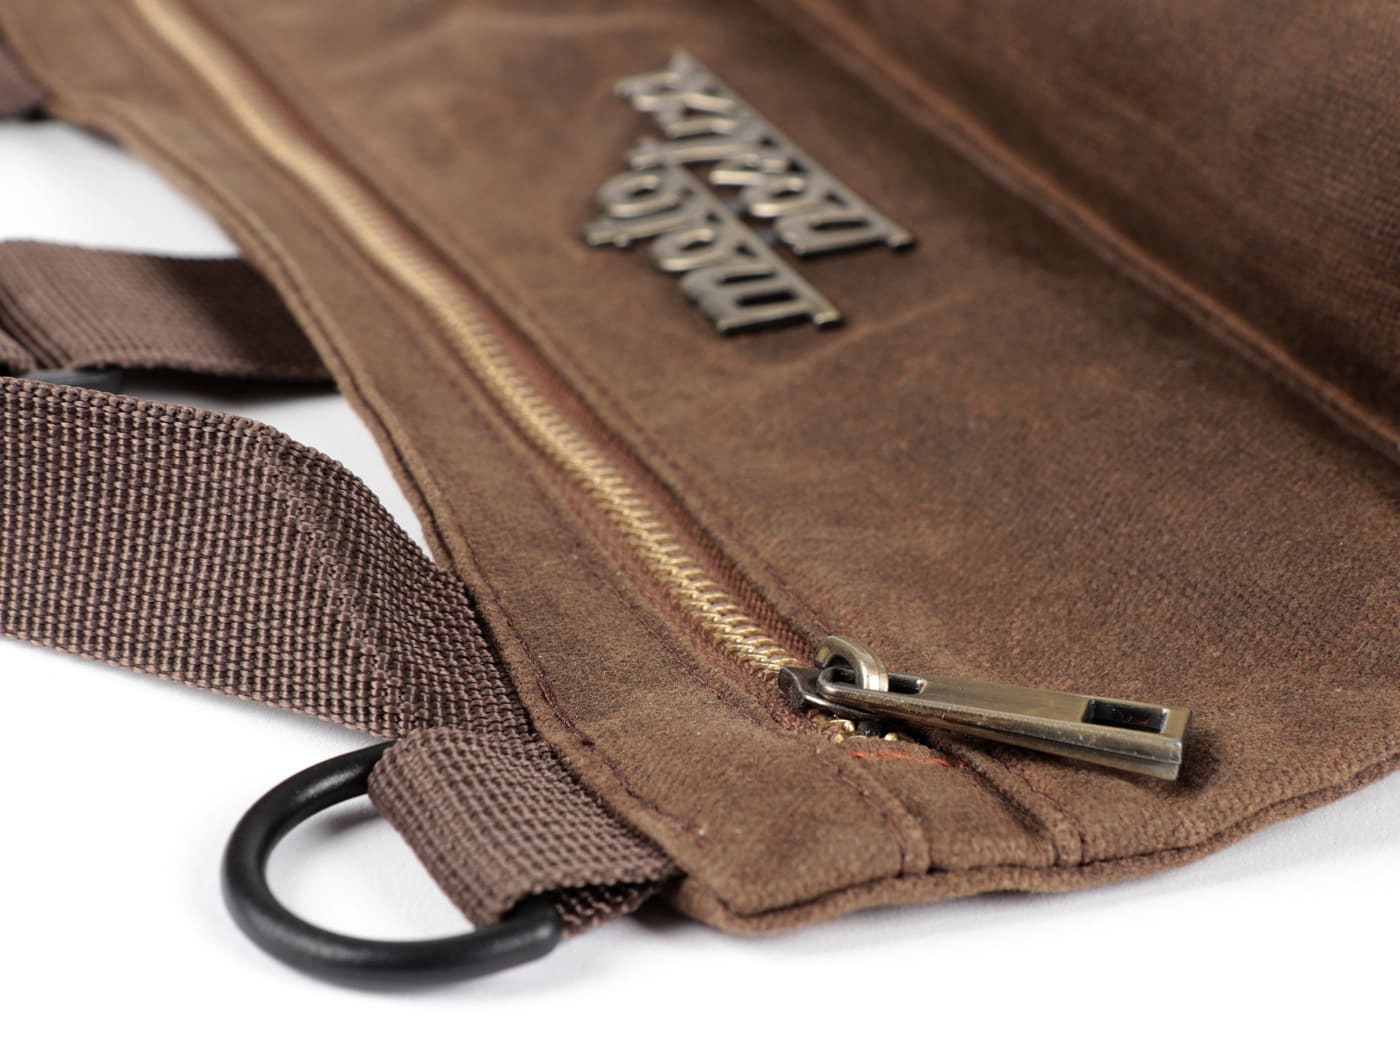
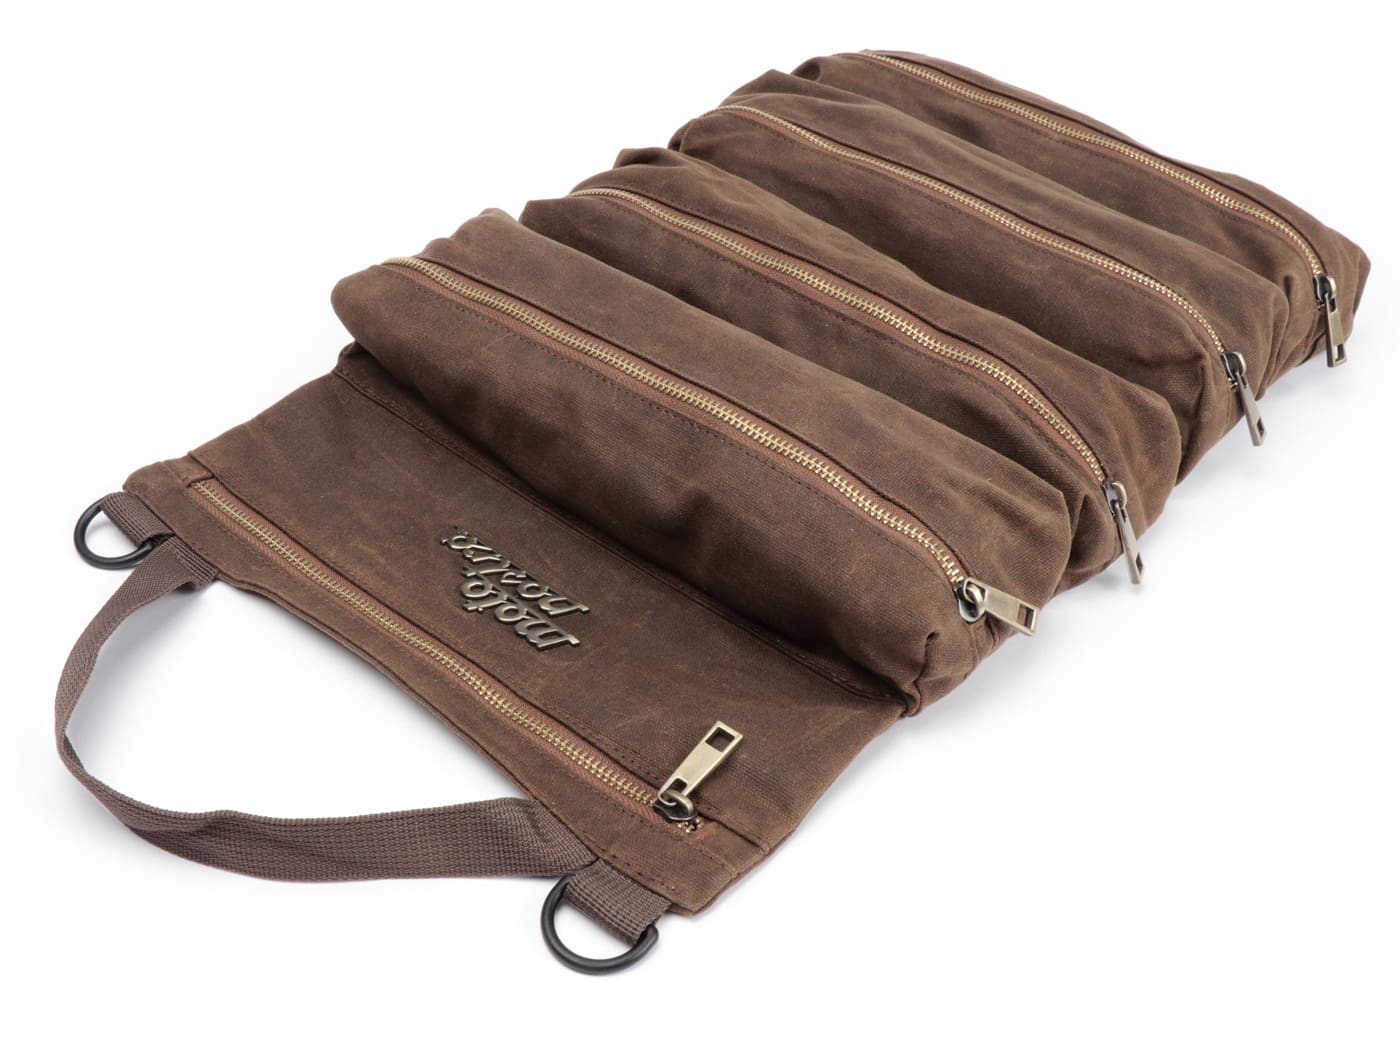
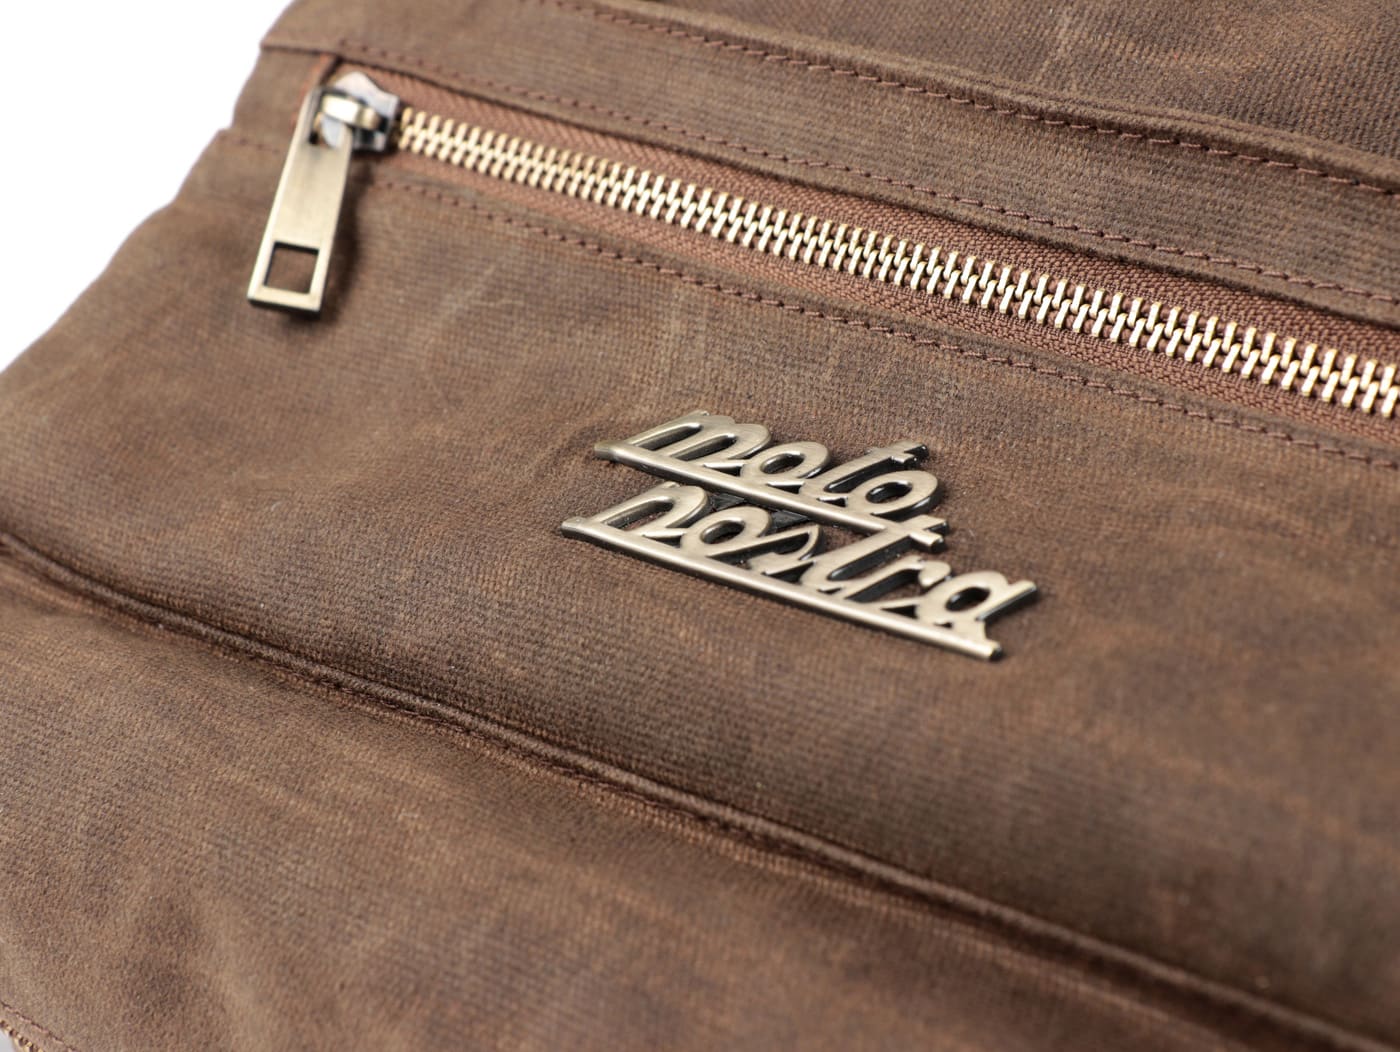
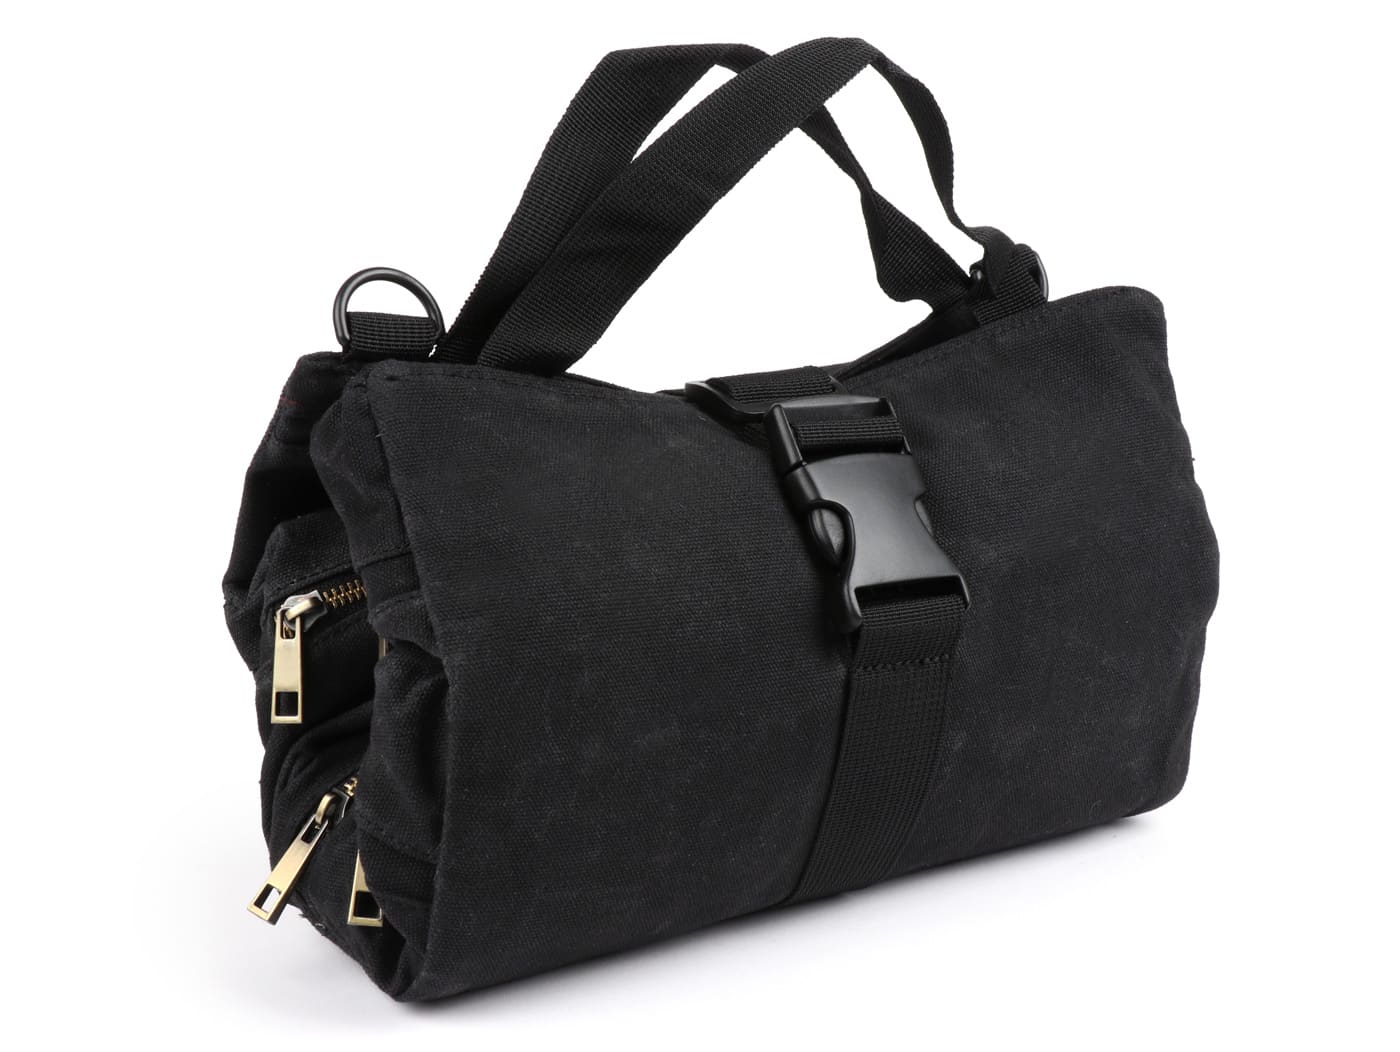
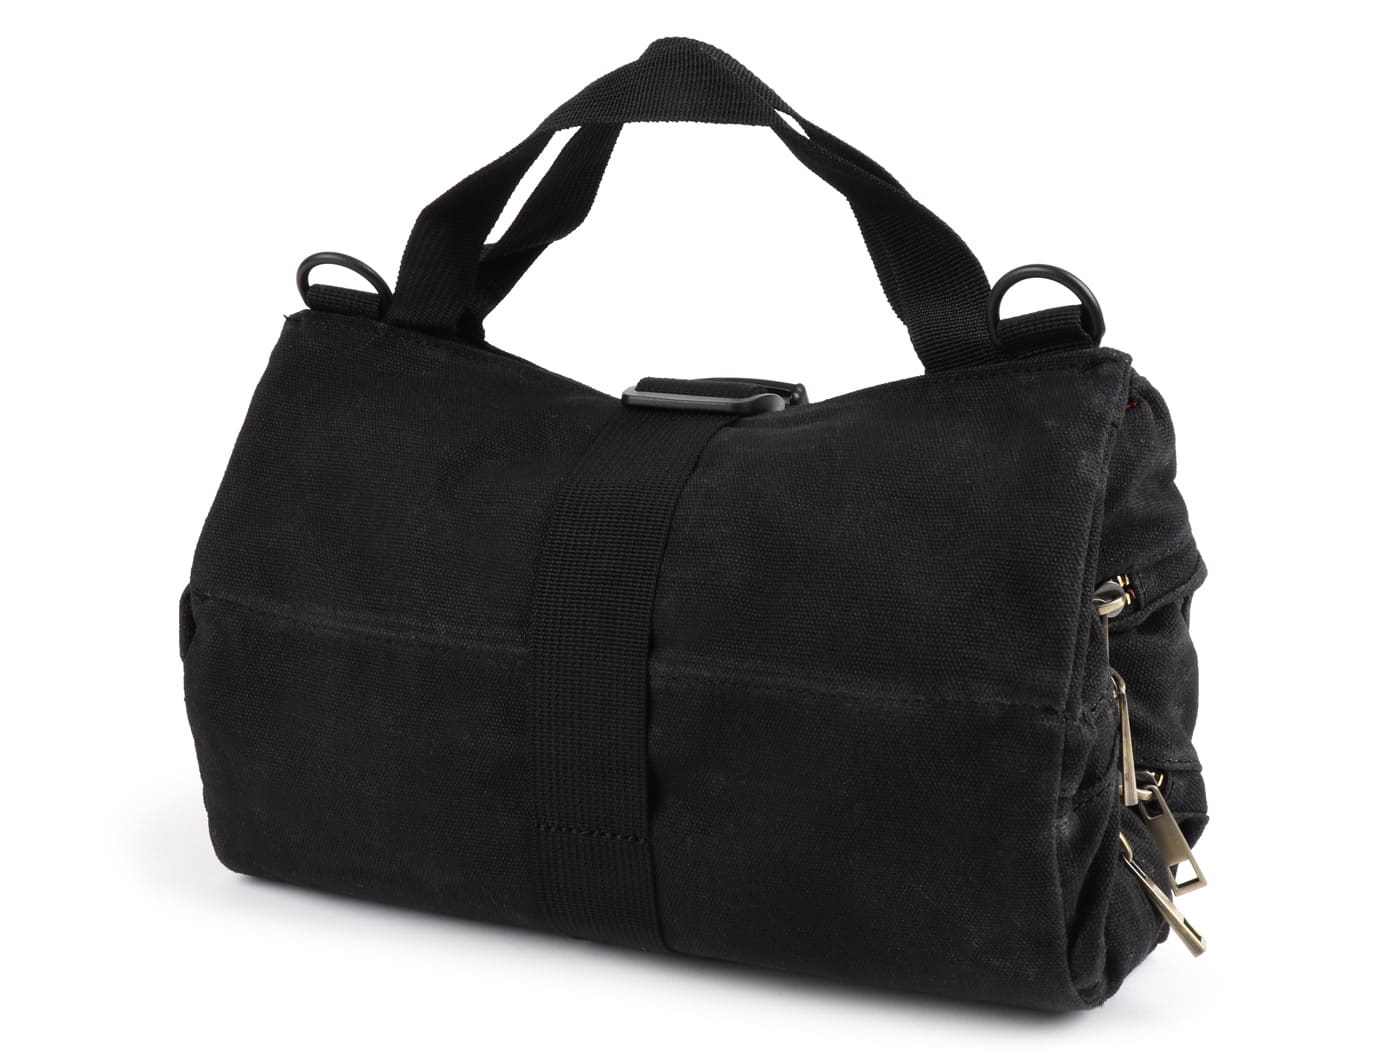
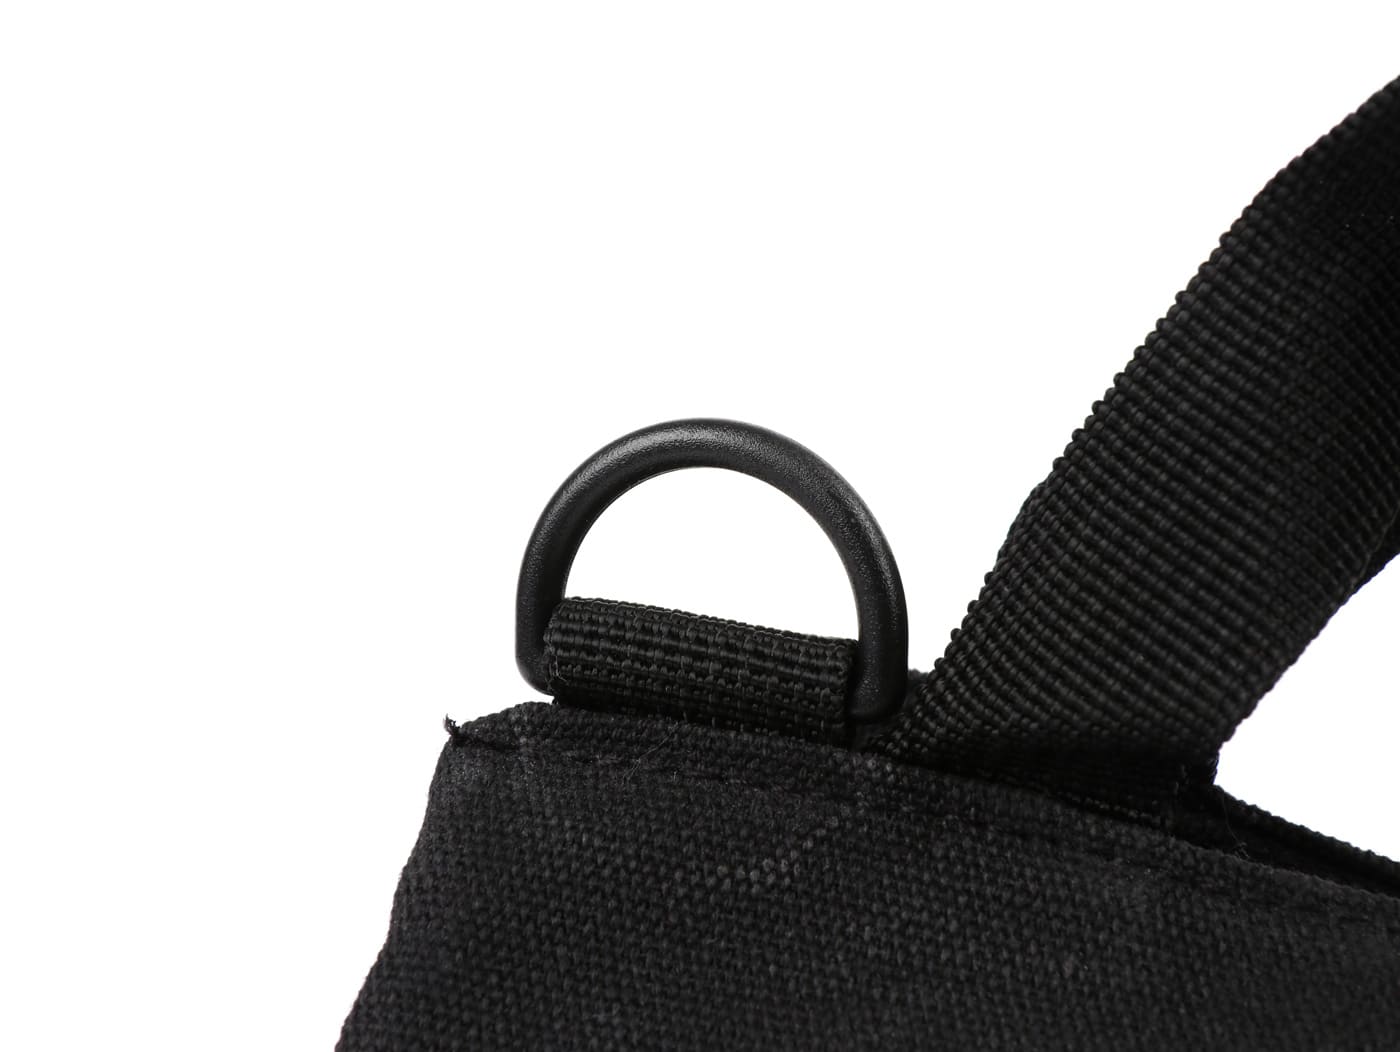
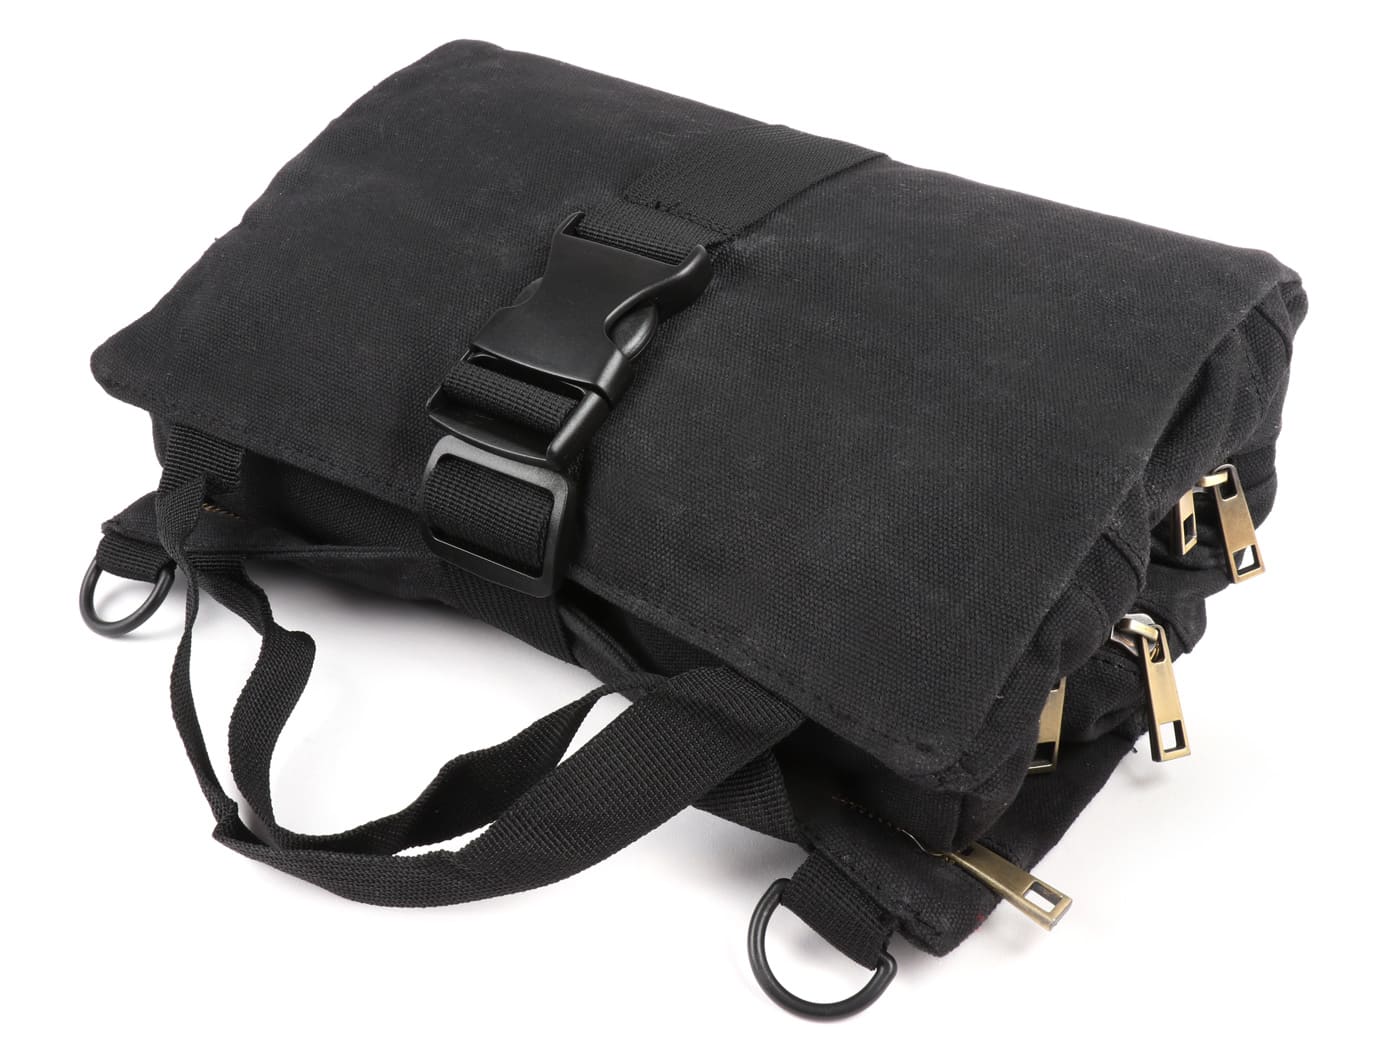
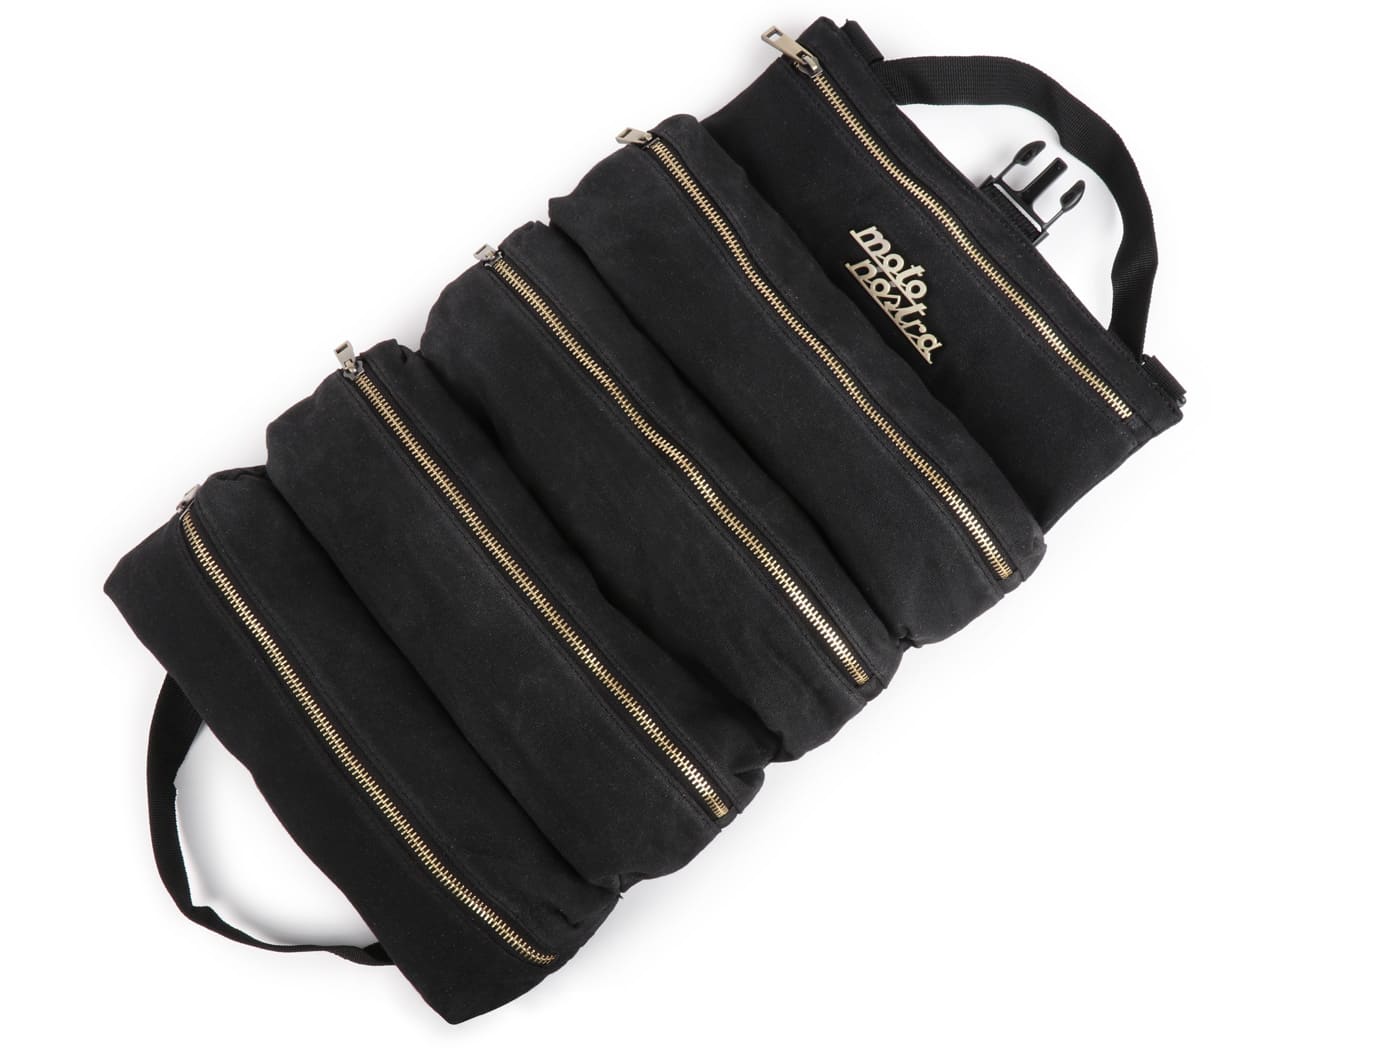
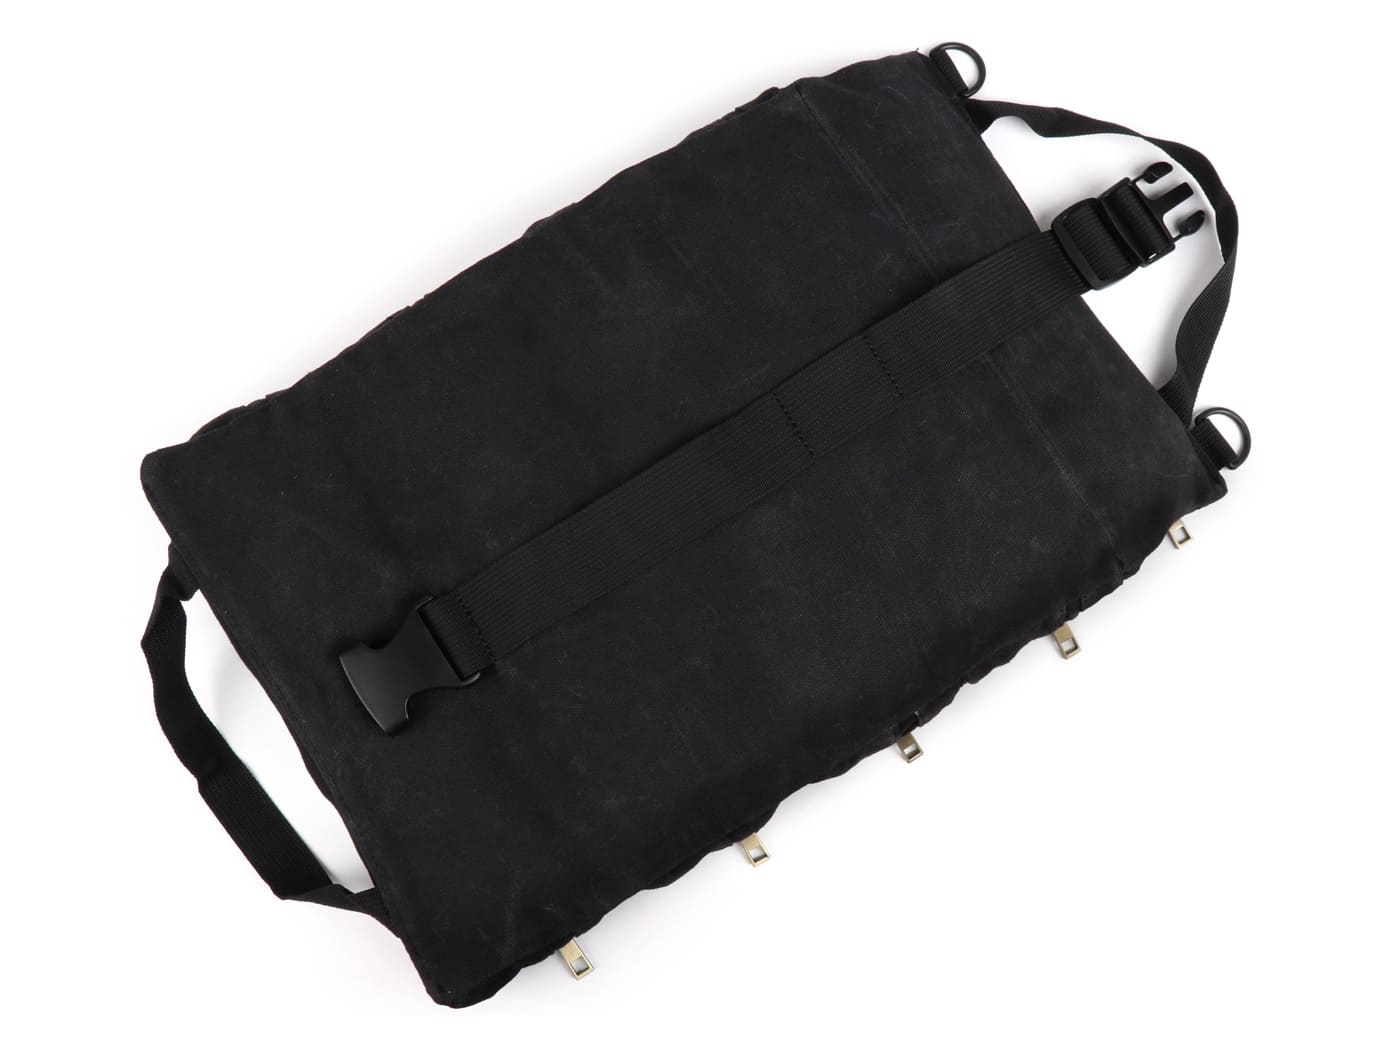
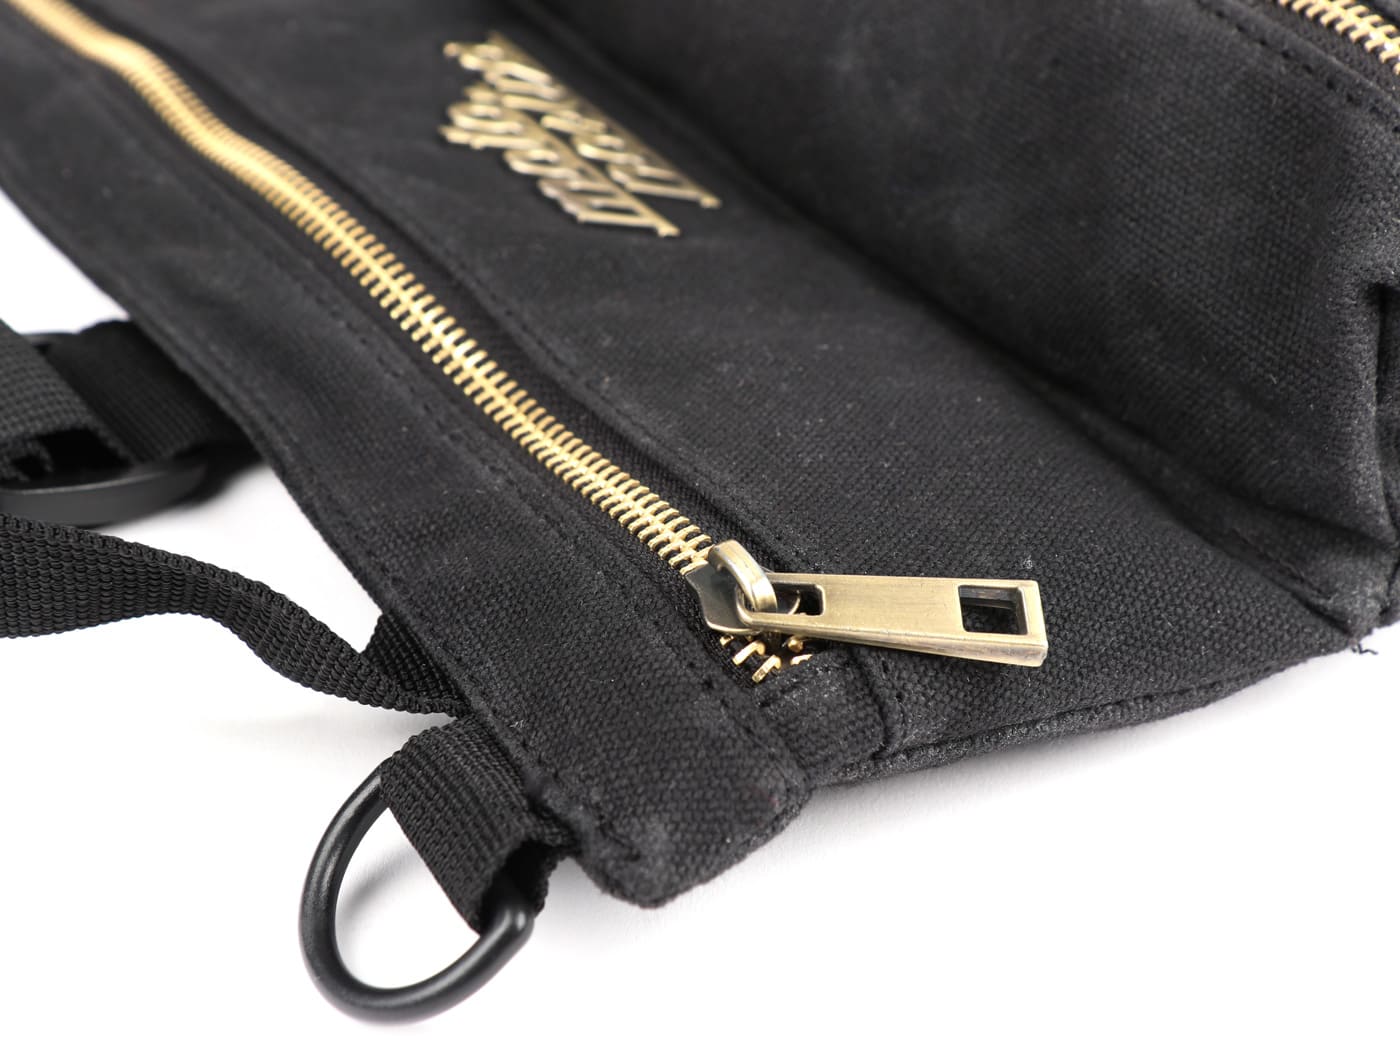
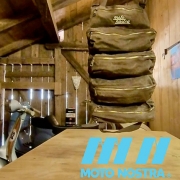
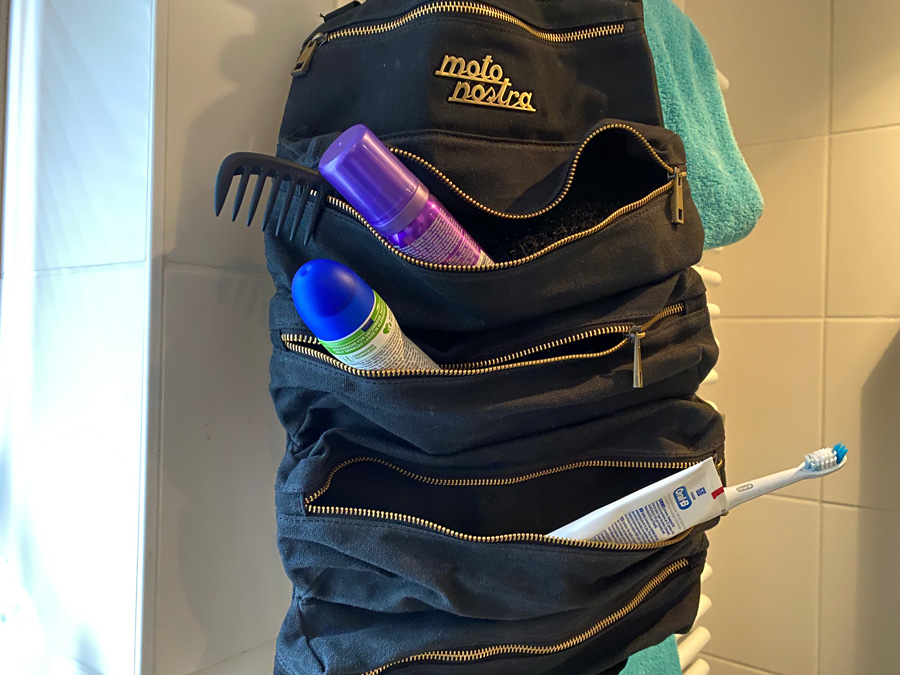
For e.g. classic cars and oldtimers who want to be stylish with their tool storage, we offer this practical tool roll. Of course, they also go great with a modern Vespa GTS or even a motorbike. Robust tool bag made of Waxes Canvas, a hard-wearing and water-repellent material. The tool bag has 5 spacious compartments with large sturdy zips. So the tools stay where you put them. The many compartments create order and offer quick access in an emergency. When rolled up, the bag can be securely closed with a wide strap and sturdy clip and compressed to be as handy as possible. The bag has three handles and two eyelets for fastening or hanging. Available in brown and black and soon also pre-packed with model-specific tools.
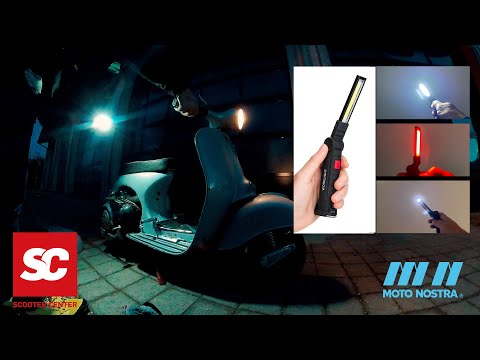
You can find the emergency lamp here: Video of the lamp:
You can find matching bags from Moto Nostra here Video MOTO NOSTRA bags:
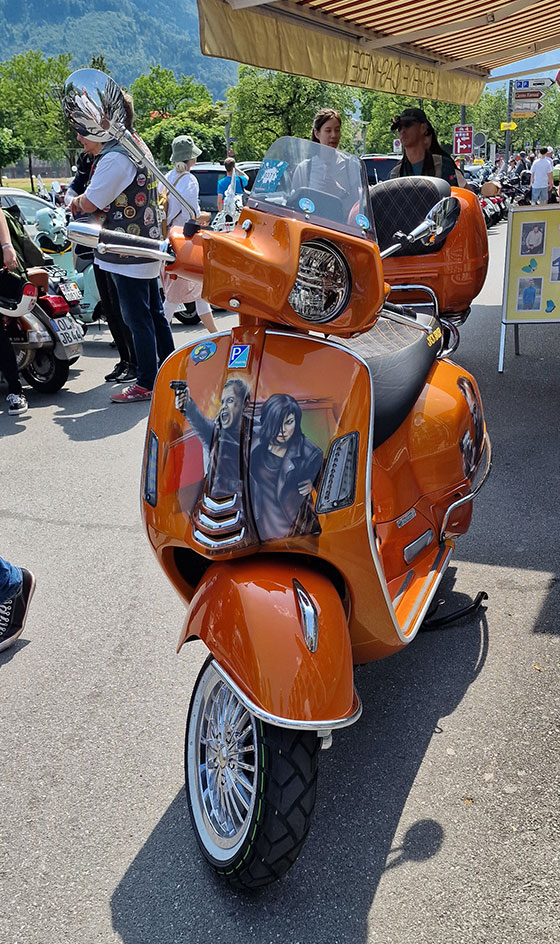
To put our feet on the ground is itself a statement! A reaffirmation of our identity: Scooter boys & girls, Mods, Racers and travelers know that their ideologies and beliefs land on accessories, which will become symbols of their most intrinsic qualities.
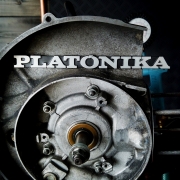
This is how Platónika takes this great step forward, after spending months in the air, preparing as the ideal Vespa, she descends, to finally touch the floor of the garage that equipped her with symbols of safety, style and fun. Being the first to integrate the last bgm releases:
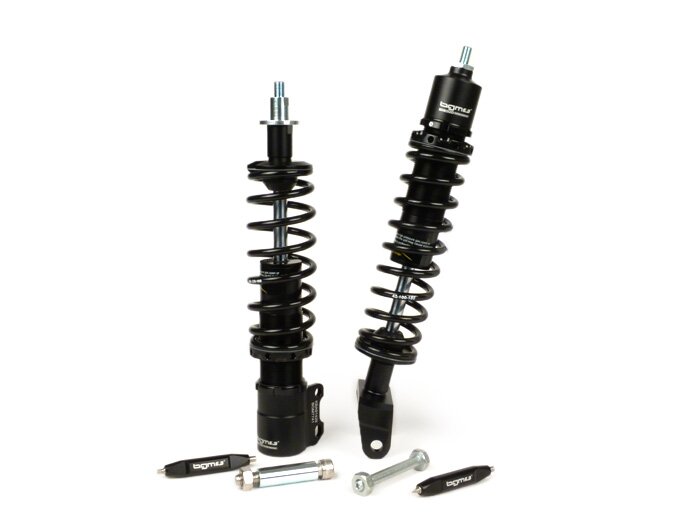
The Shock absorber set bgm PRO SPORT bgm7741BKTS
Which in spite of their high load capacity are very light, thanks to the high material quality and the length can be adjusted, this is beneficial to driving stability, top speed and last but not least to the appearance.
The set wheel and rims Sport tubeless black matt bgm – bgm35010SLKB
Tyres design with V shape for steering much better into the bend and offers more contact area when leaning and rims which its weight saving improved noticeably the response behaviour of the Chassis.
Brake caliper and bracket bgm Touring
Bgm2506BK
With 4 pistons improve greatly the hydraulic transmission ratio and the braking force (with the same lever force) is increased.

bgm2507LBL
and the Premiere, the brake caliper bracket for bgm, Platónika is the one that will put to the test, but soon you can be the pioneer of this German Technology.
These are undoubtedly highlights that, do not end the adventure of the building, but start an experience on the roads of the world.
Music:
Artist: Sunsearcher
Title: Flamenco Rhythm
Album: Sunsearcher Spirit
License: CC-BY-SA
With us you can now also get ARROW exhaust systemsagain. Maybe you have already noticed with our Vespa GTS – Custom-Special that most custom scooters from CafeRacer 69 have an Arrow exhaust system installed. This is certainly not without reason, the Berlin Vespa Customizer Team knows what it does! Scooteria has made a nice comparison video here and compares the original Piaggio Vespa GTS exhaust with the ARROW exhaust:
Giorgio Giannelli founded ARROW SPECIAL PARTS in 1985 and very successfully built racing exhaust systems for professional competition. In the 4-stroke and 2-stroke sector, drivers in various classes won world championship titles with the Arrow exhaust systems. In the meantime Gianelli and Arrow have brought their know-how gained from racing to the road and offer exhaust systems for the Vespa GTS, for example. The sound, the workmanship and the performance make it for many the best exhaust for the Vespa GTS. Of course available with E-marking and approval!

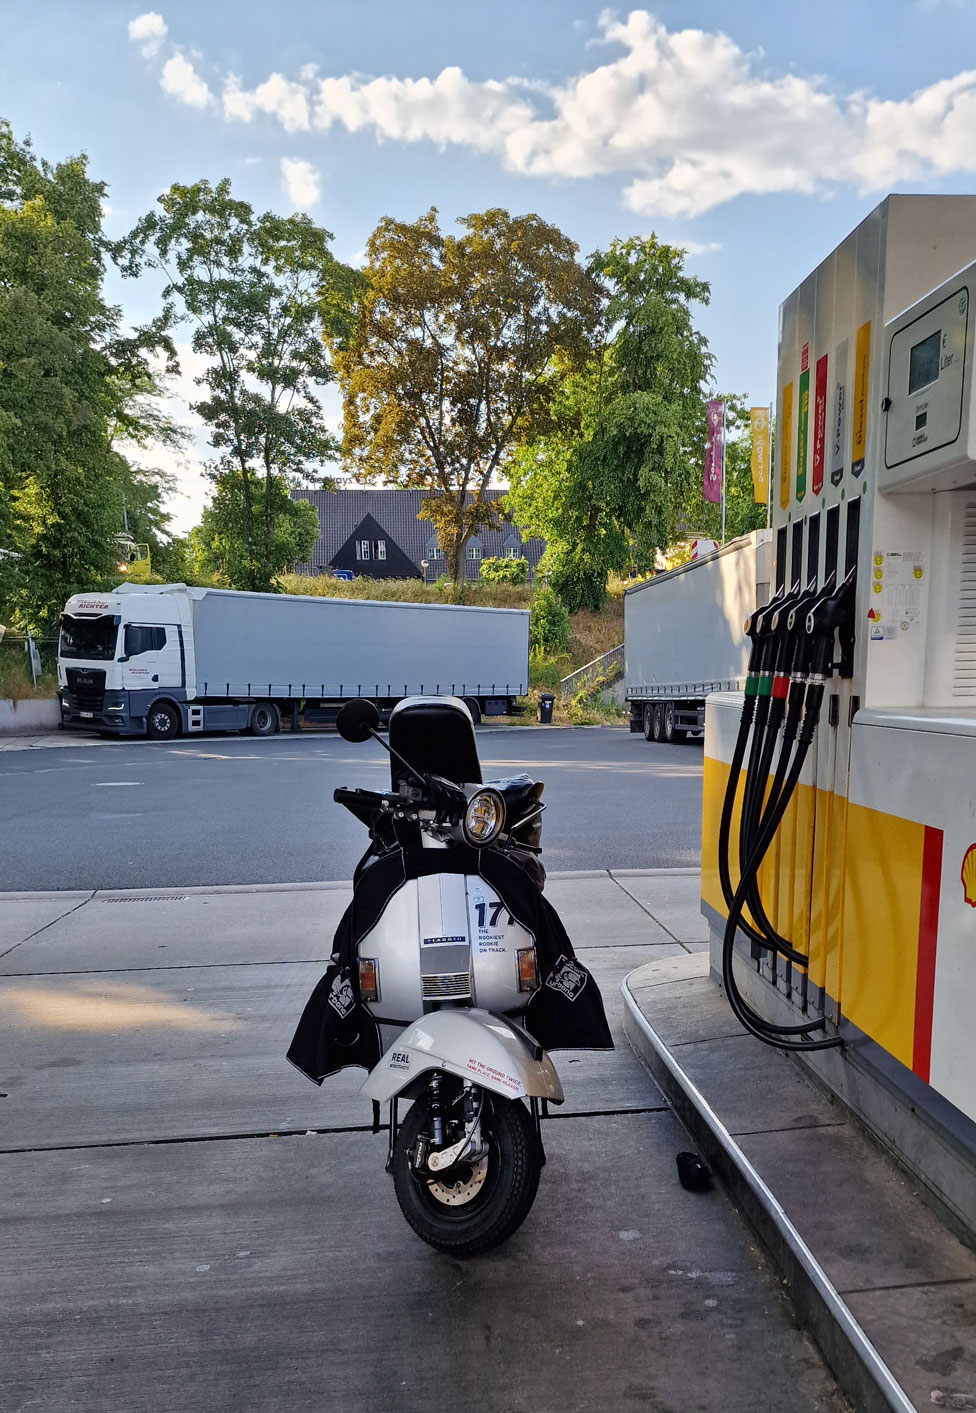
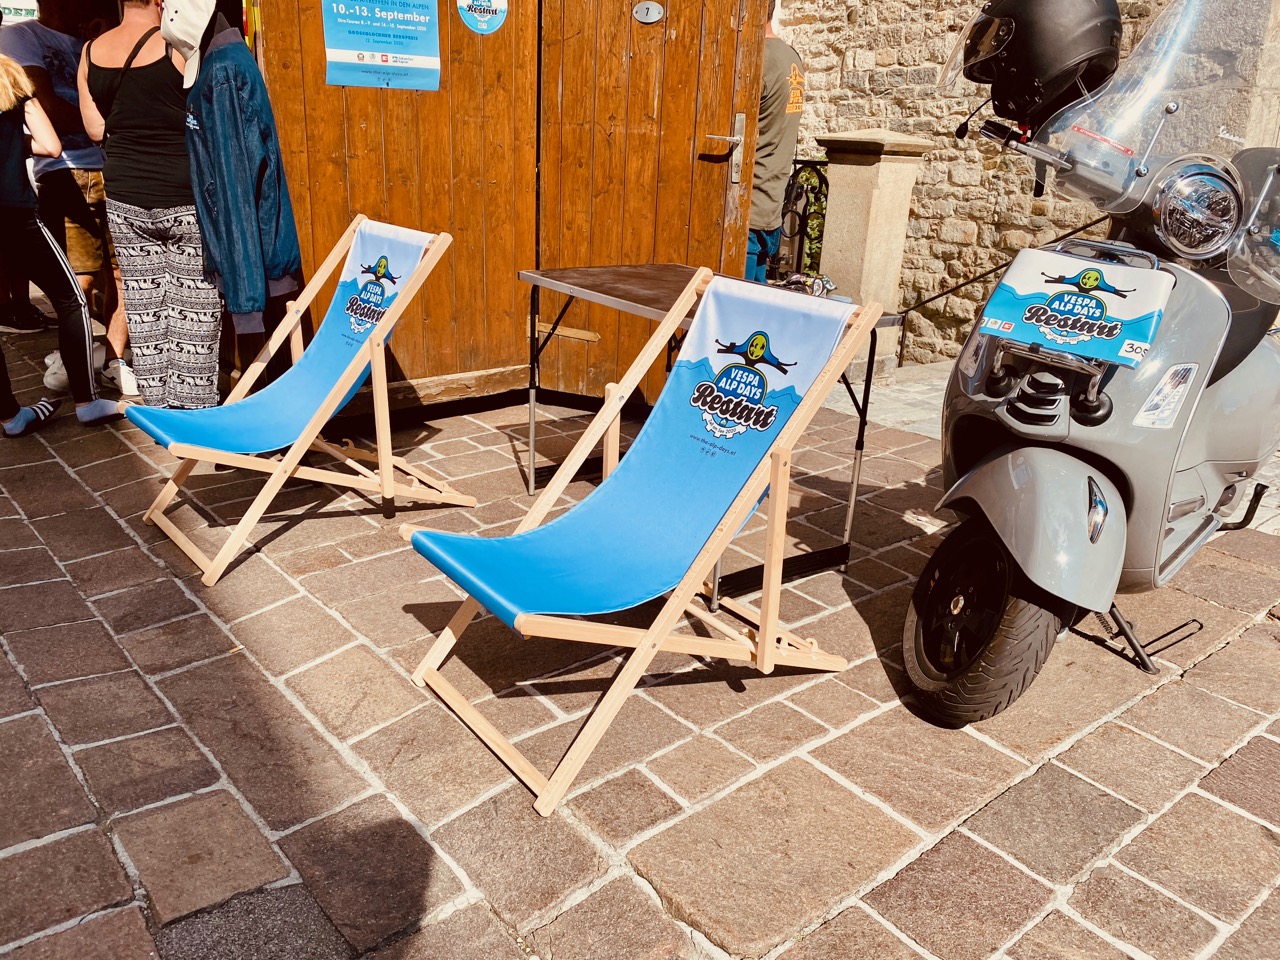
One thing in advance: we are already looking forward to next year’s Vespa Alp Days 2021 in Zell am See(June 01-08, 2021) and are confident that we will be able to celebrate “normal” Alp Days with you again. Registration and information you will find soon here: https://www.the-alp-days.at/
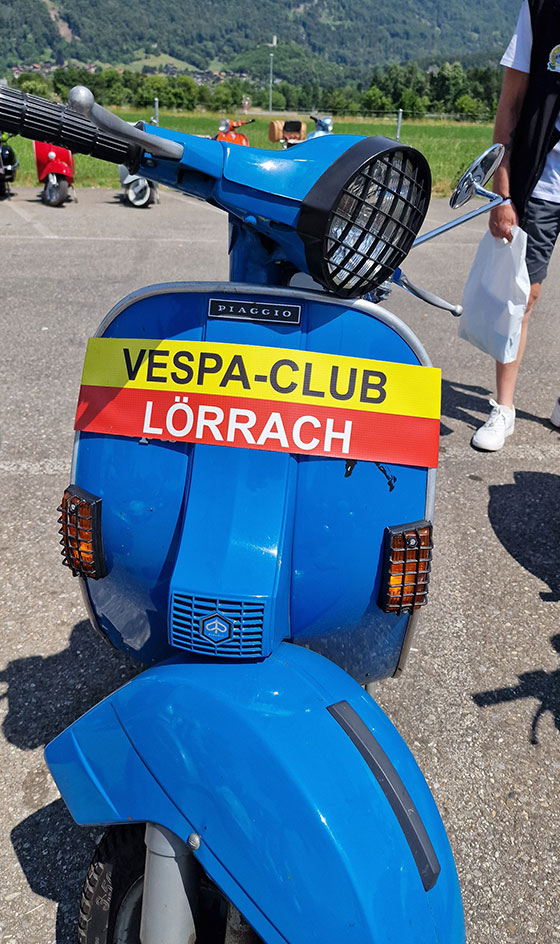
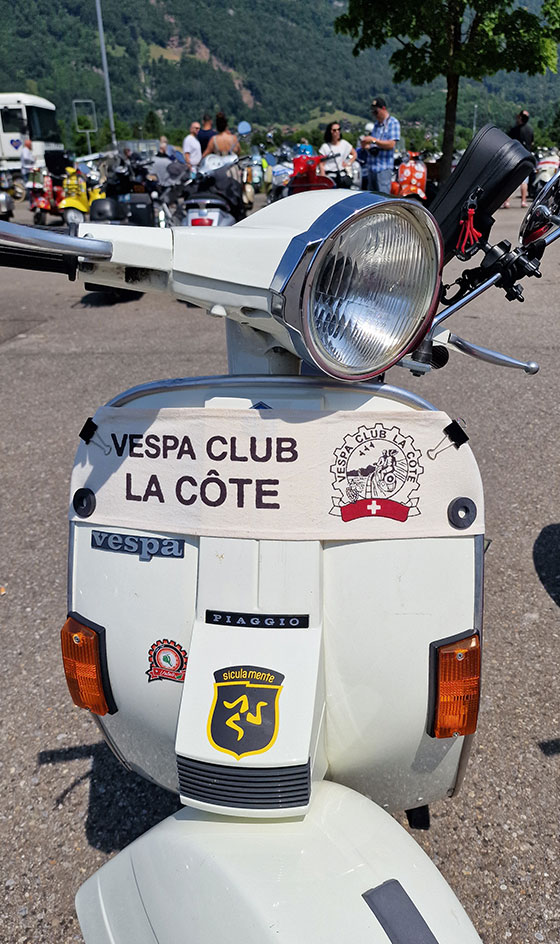
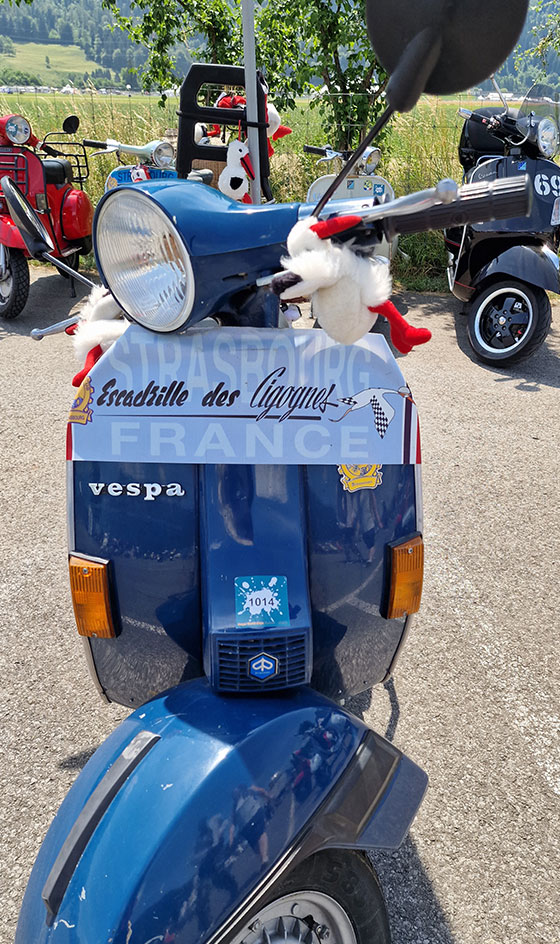
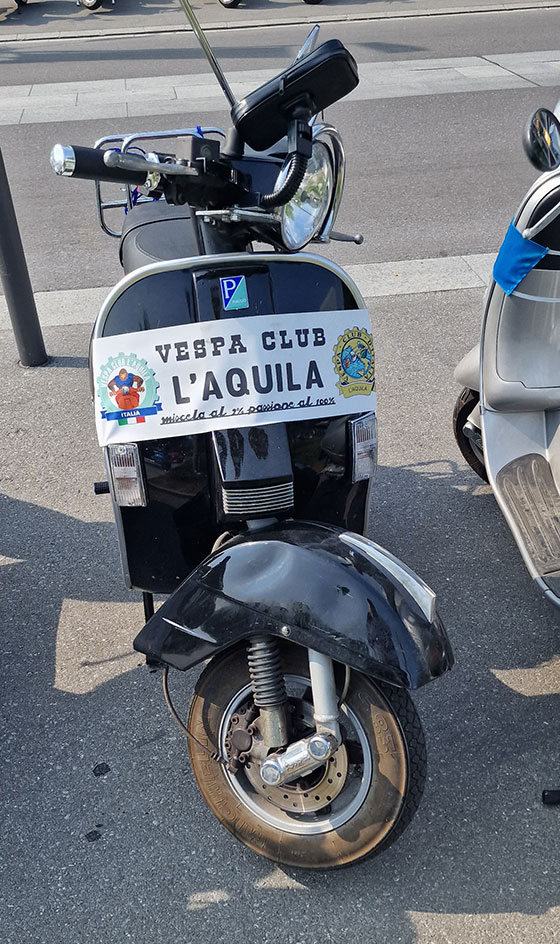
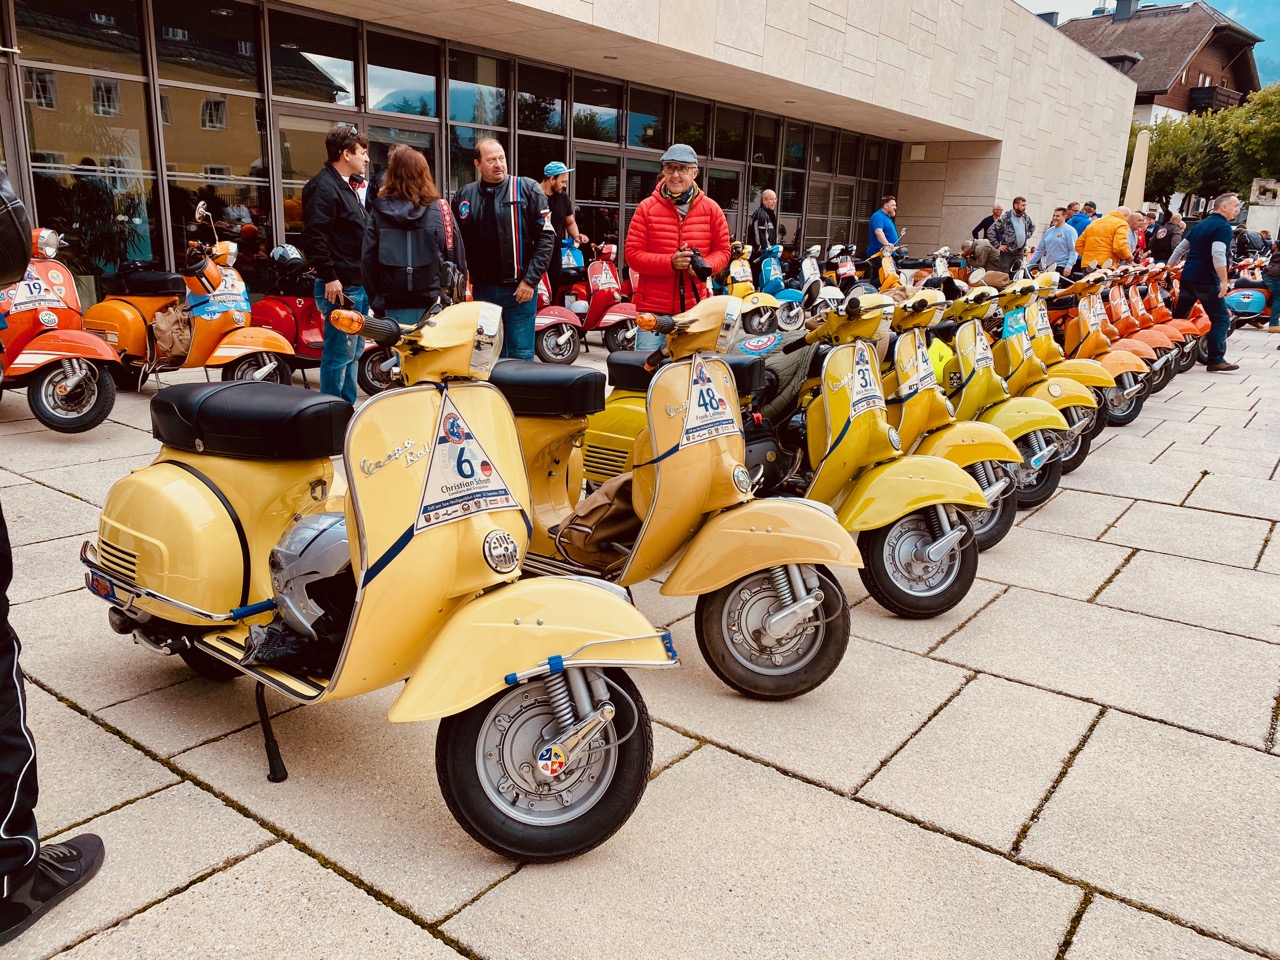
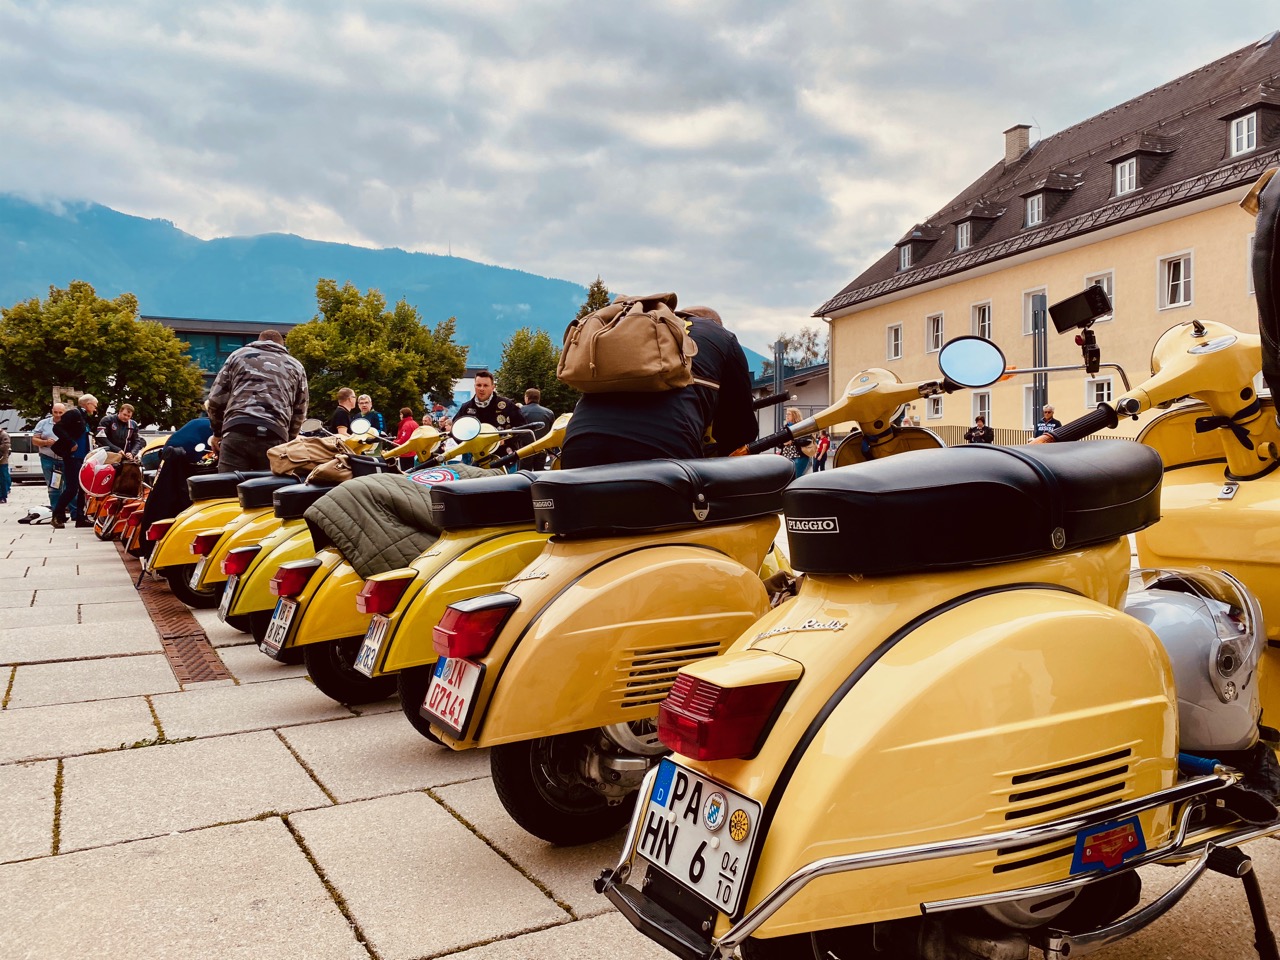
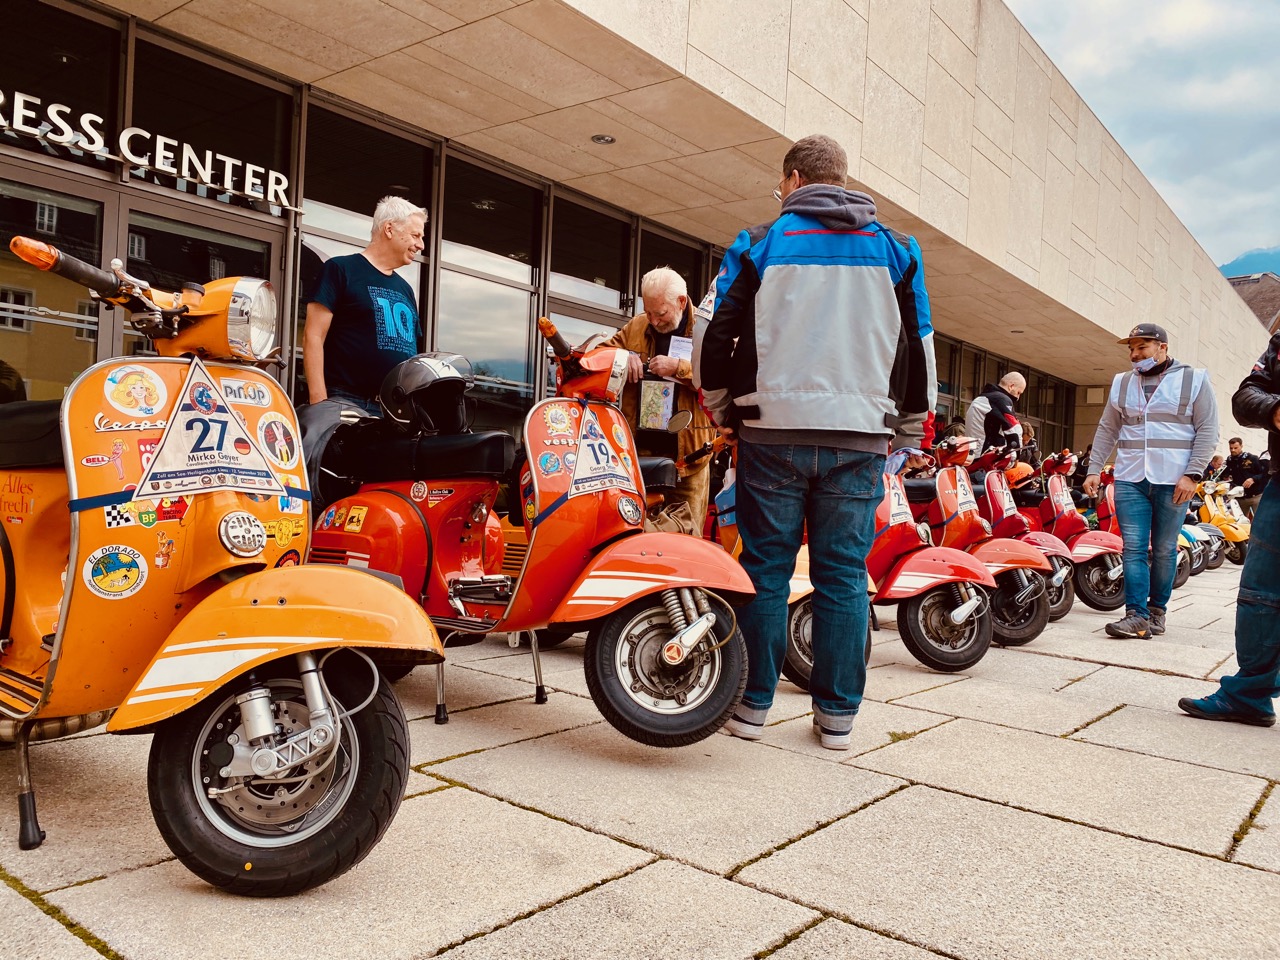
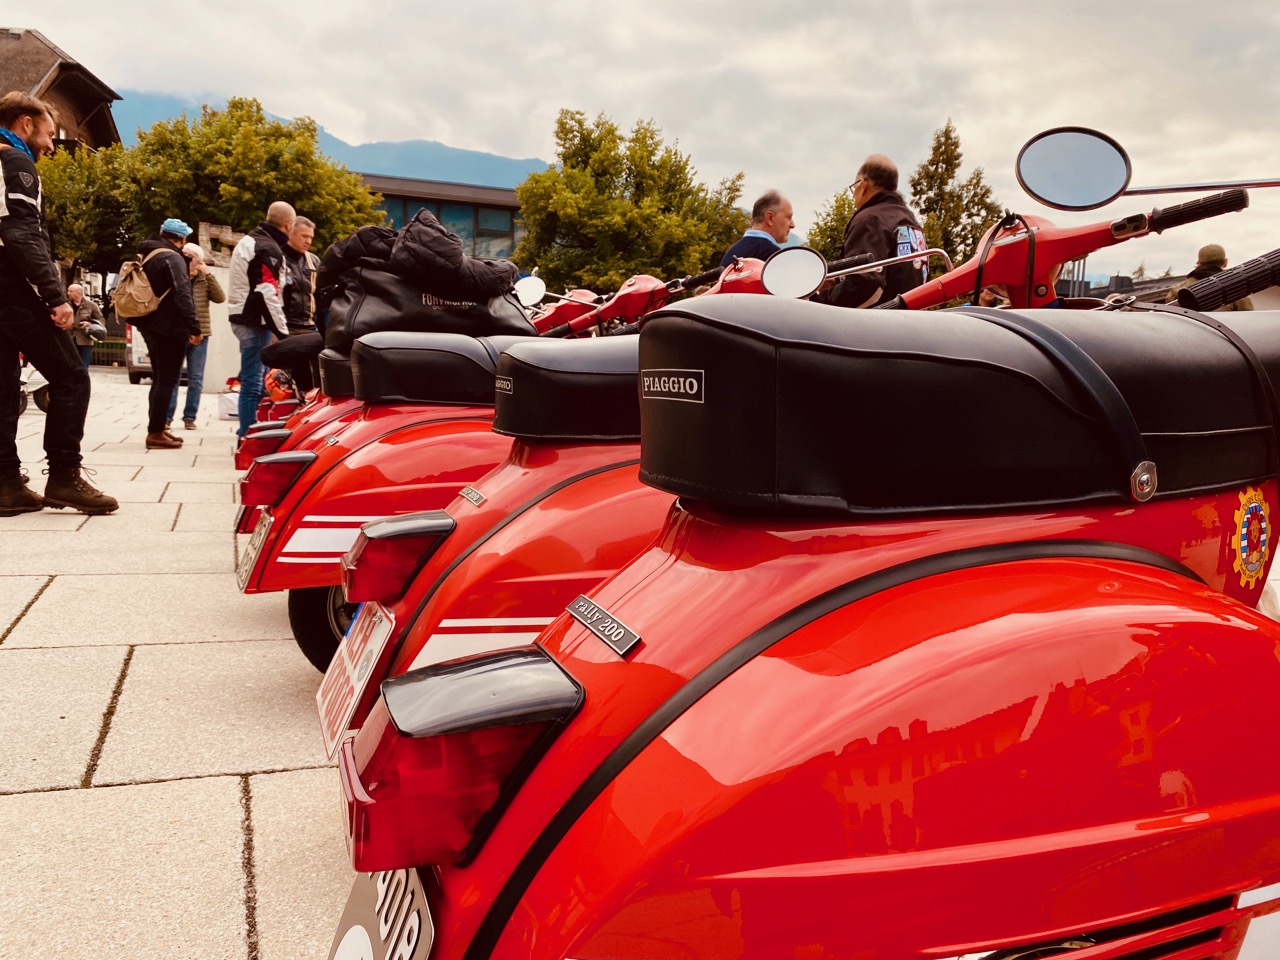
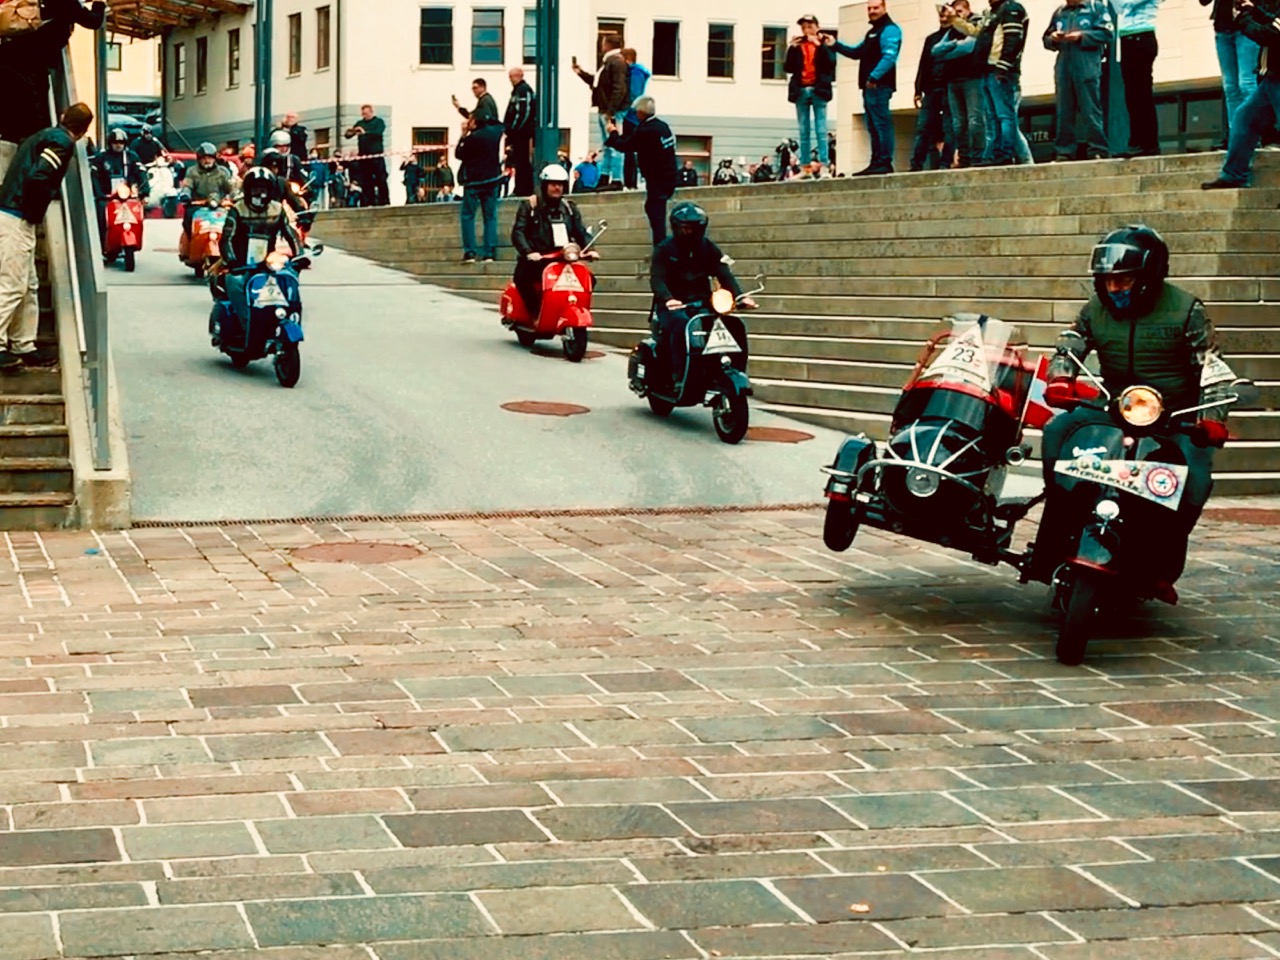
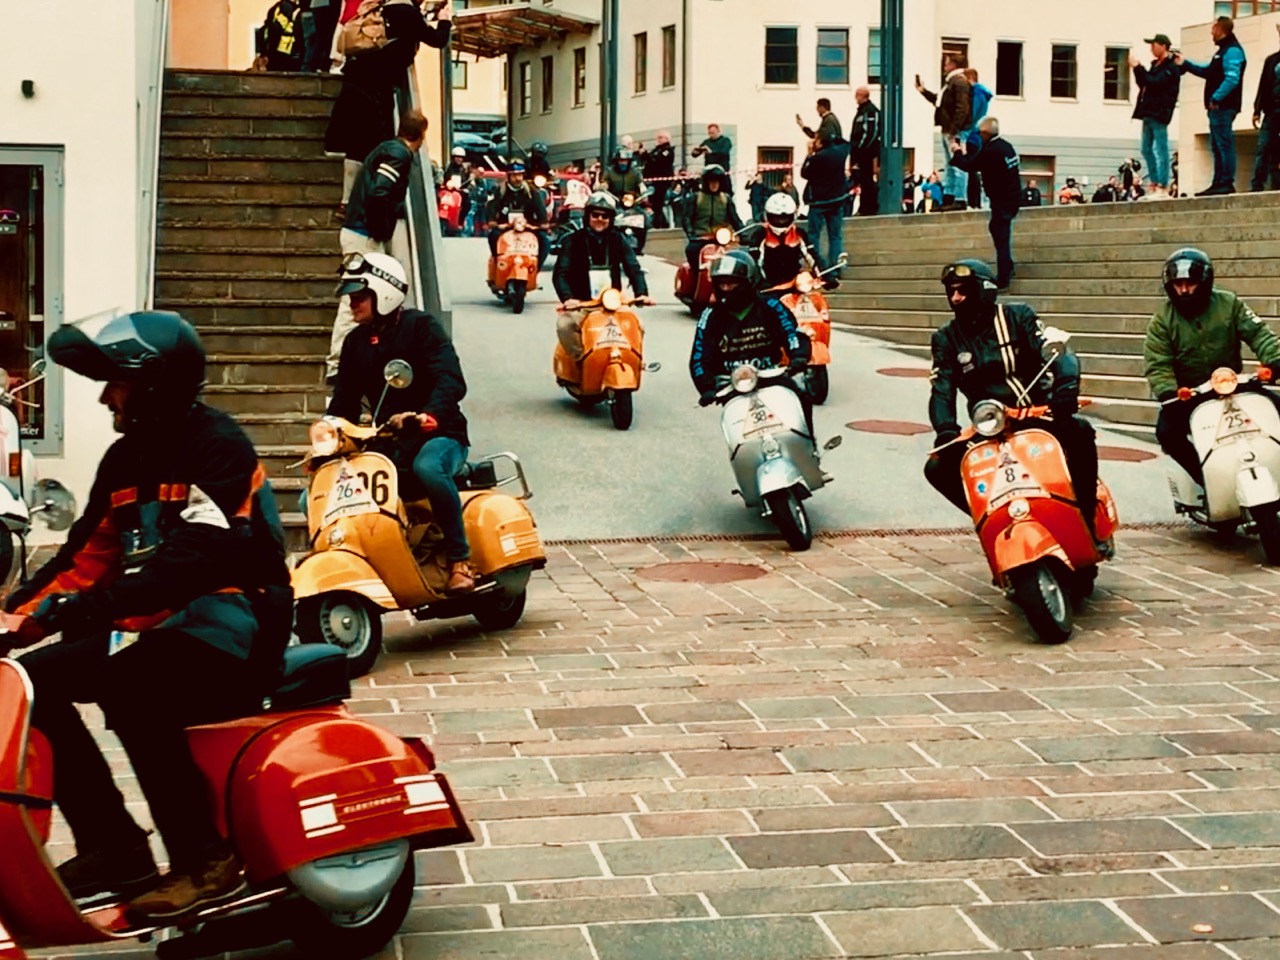
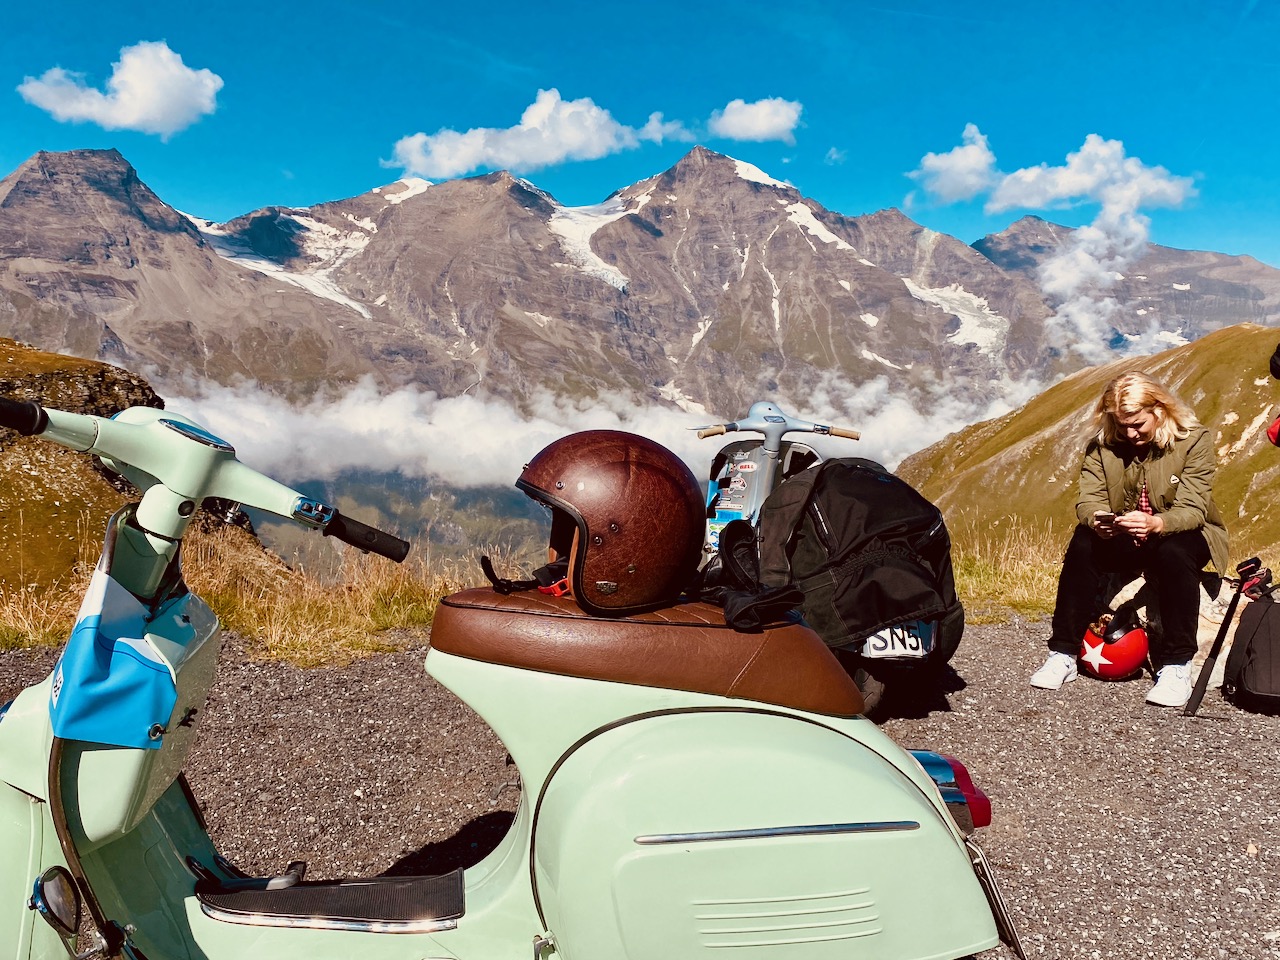
Everything is different this year. Corona makes it possible. The date in June was cancelled, like many other events. Most of the scooter meetings fell victim to the epidemic. But then the Vespa Alp Days, under these difficult conditions, fortunately took place in the Alp Days Reloaded Edition.
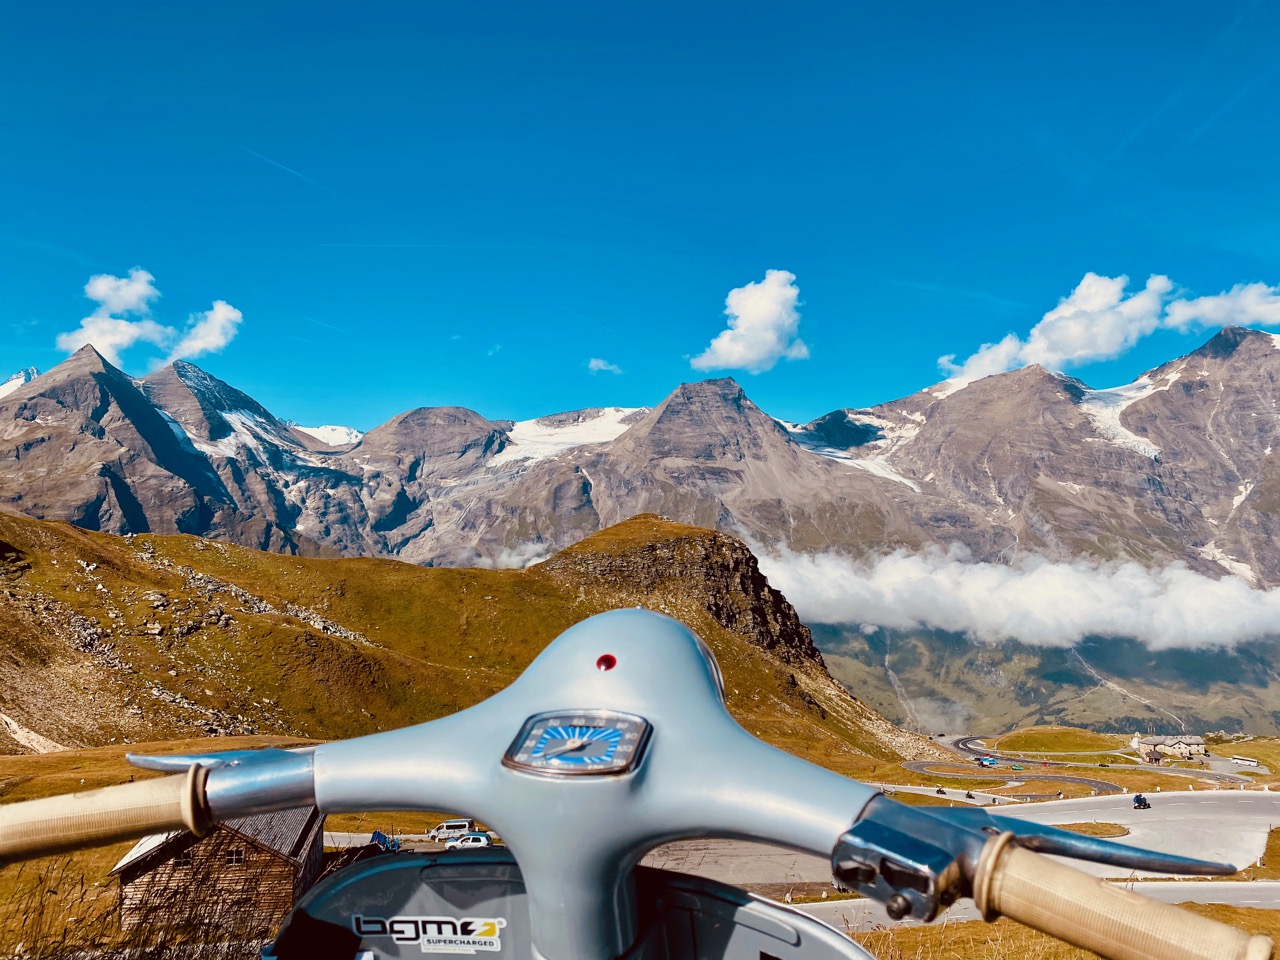
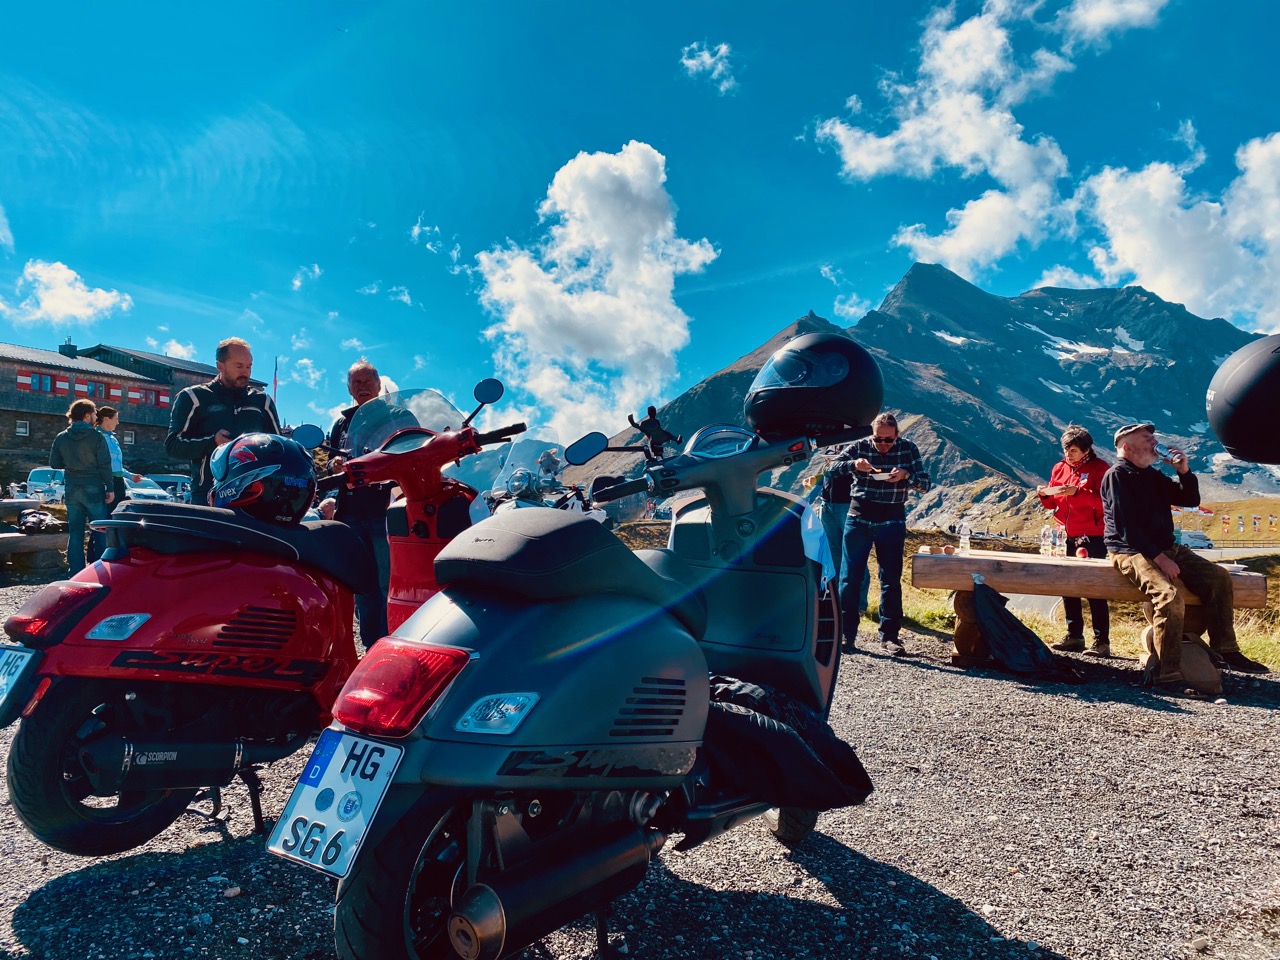
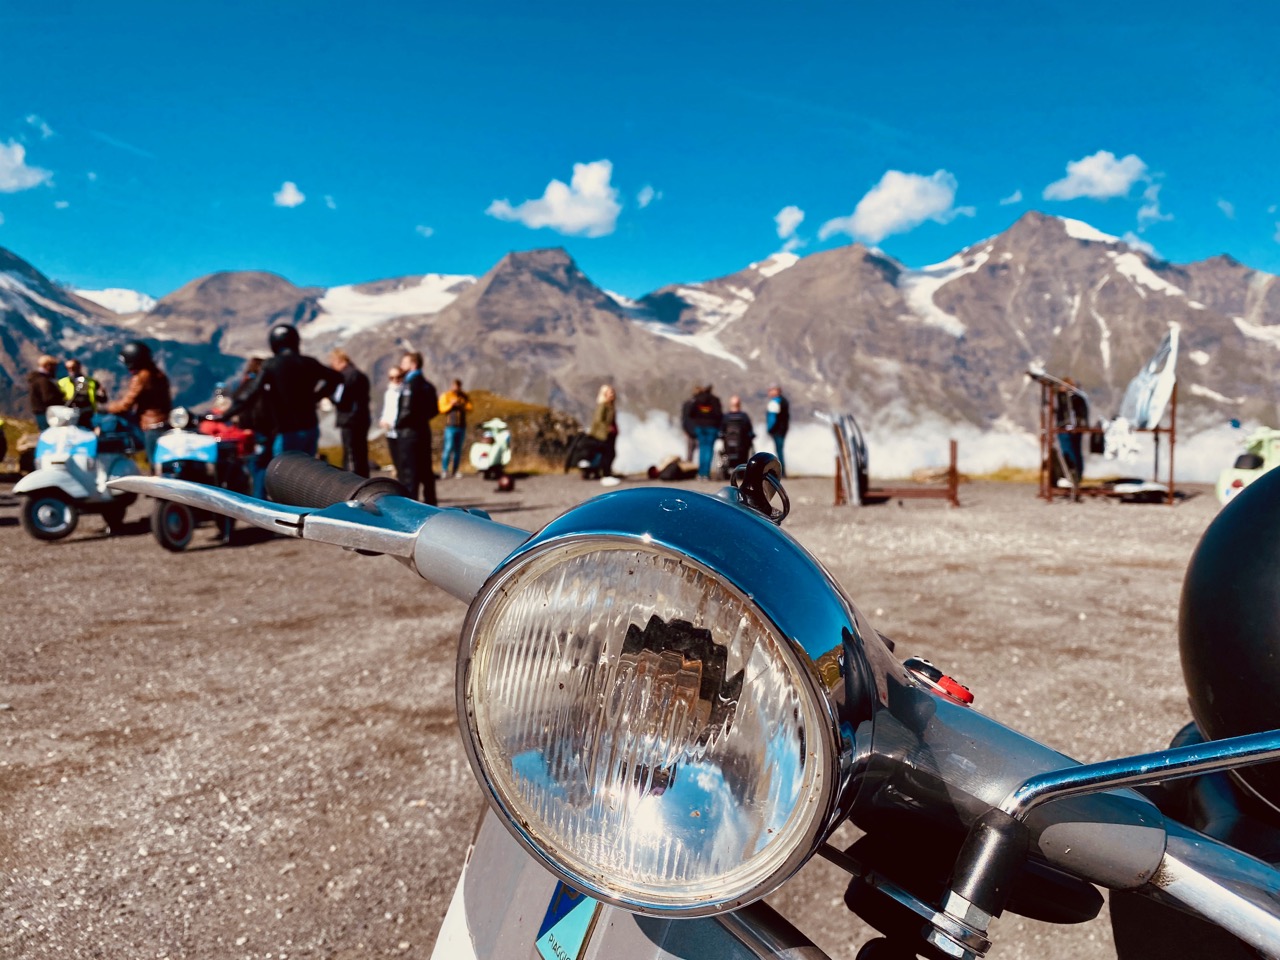
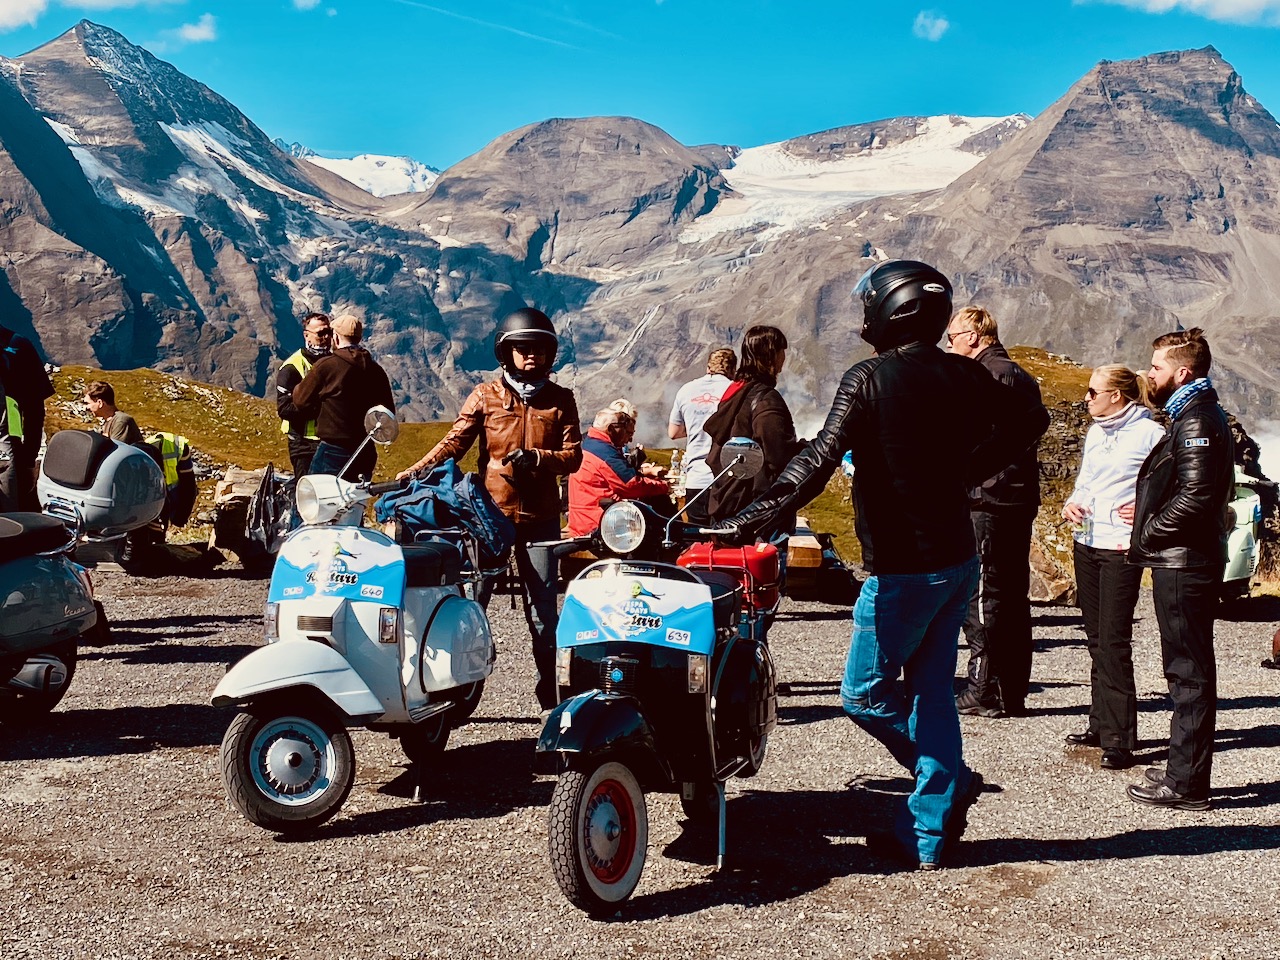
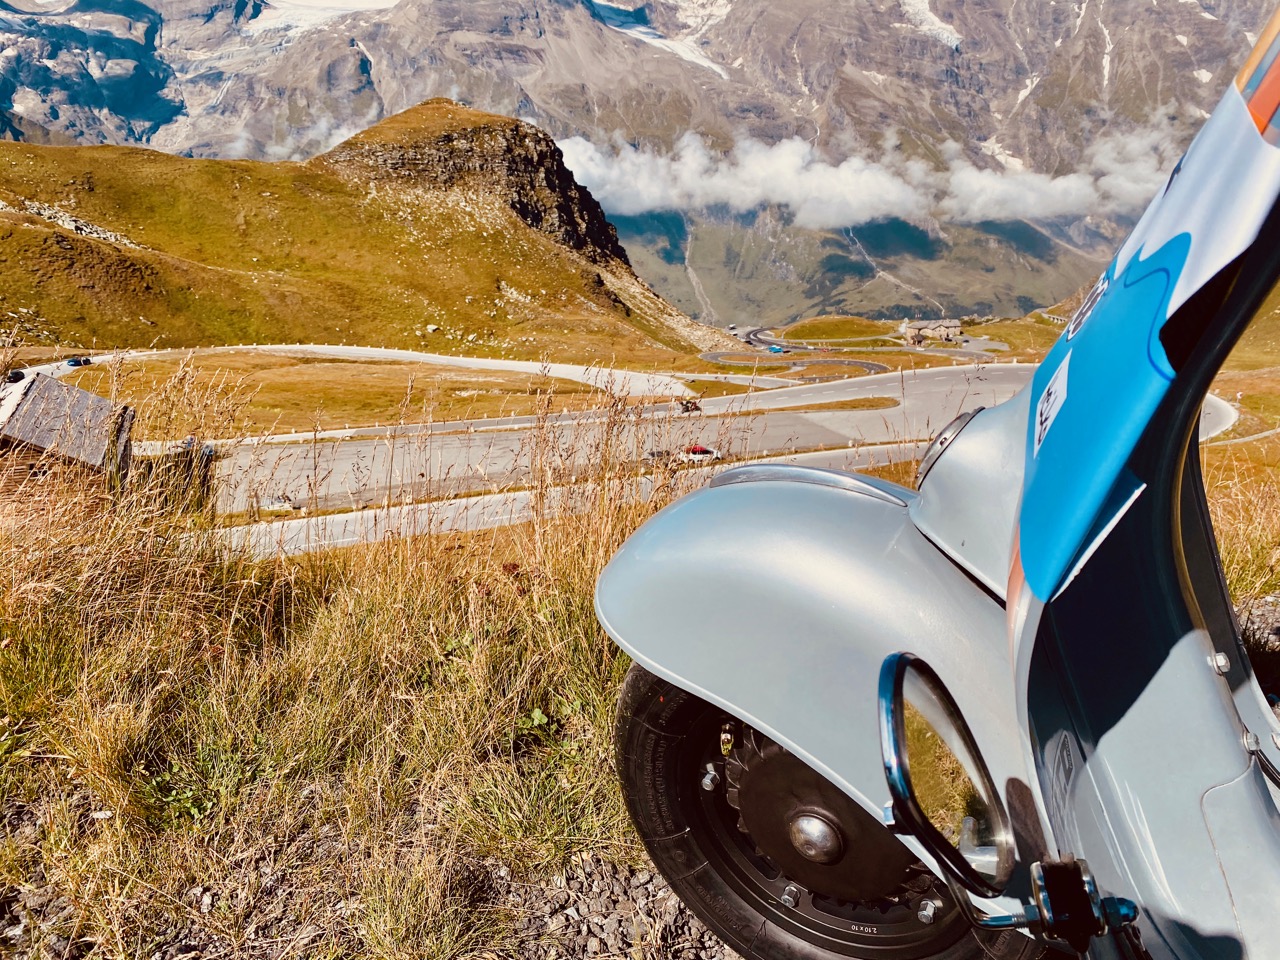
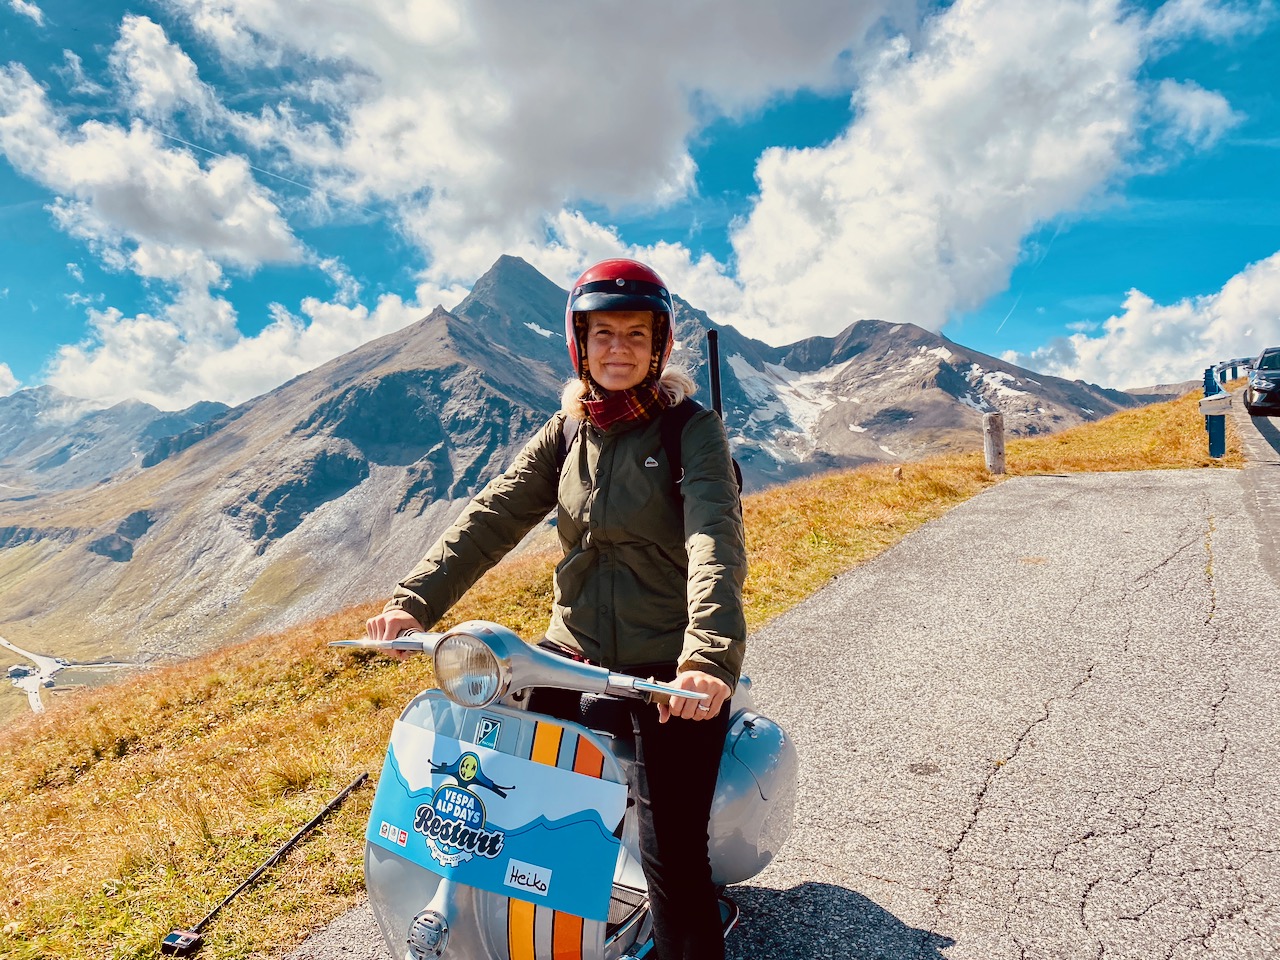
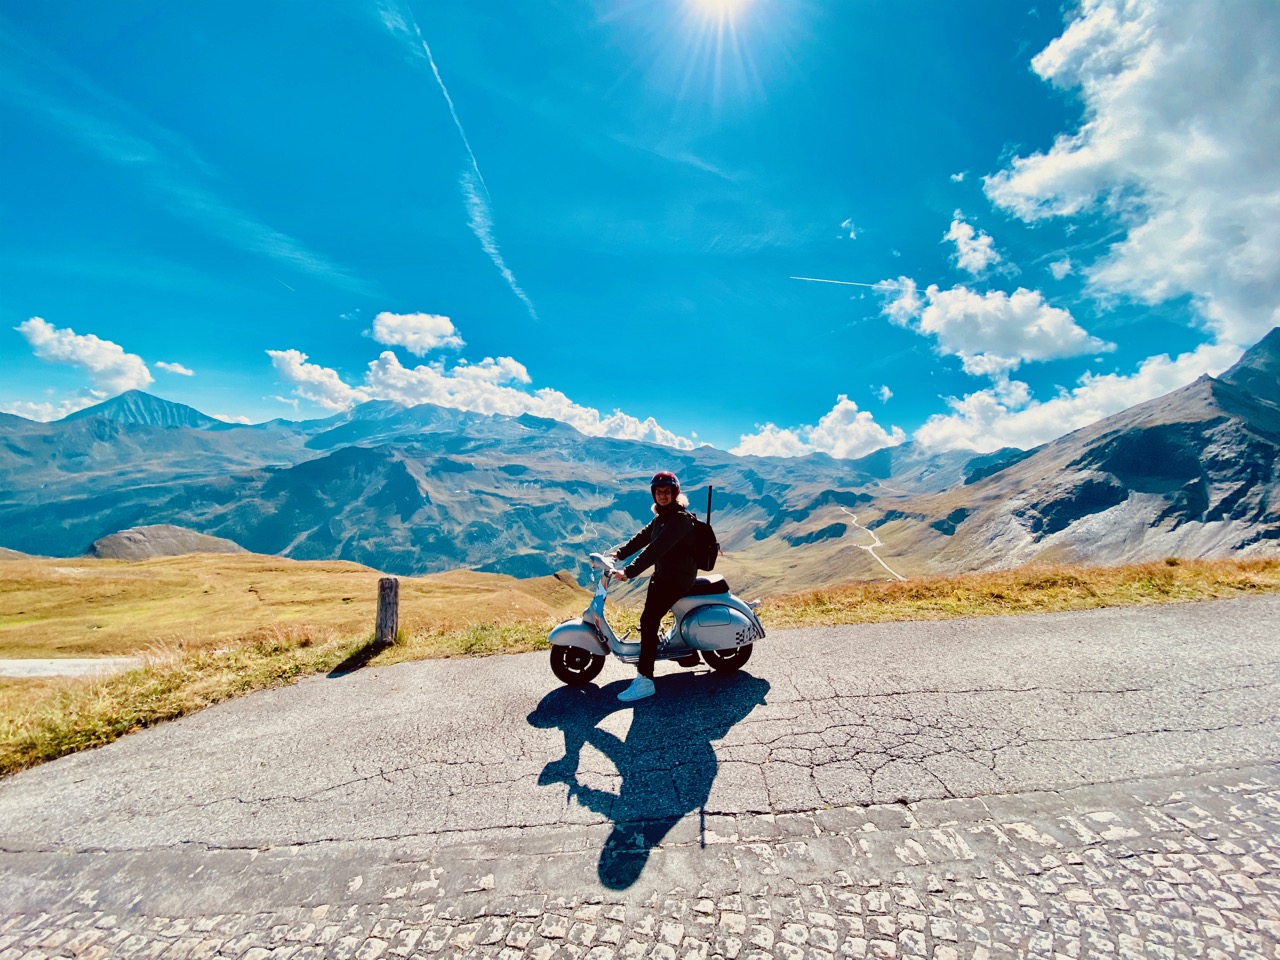
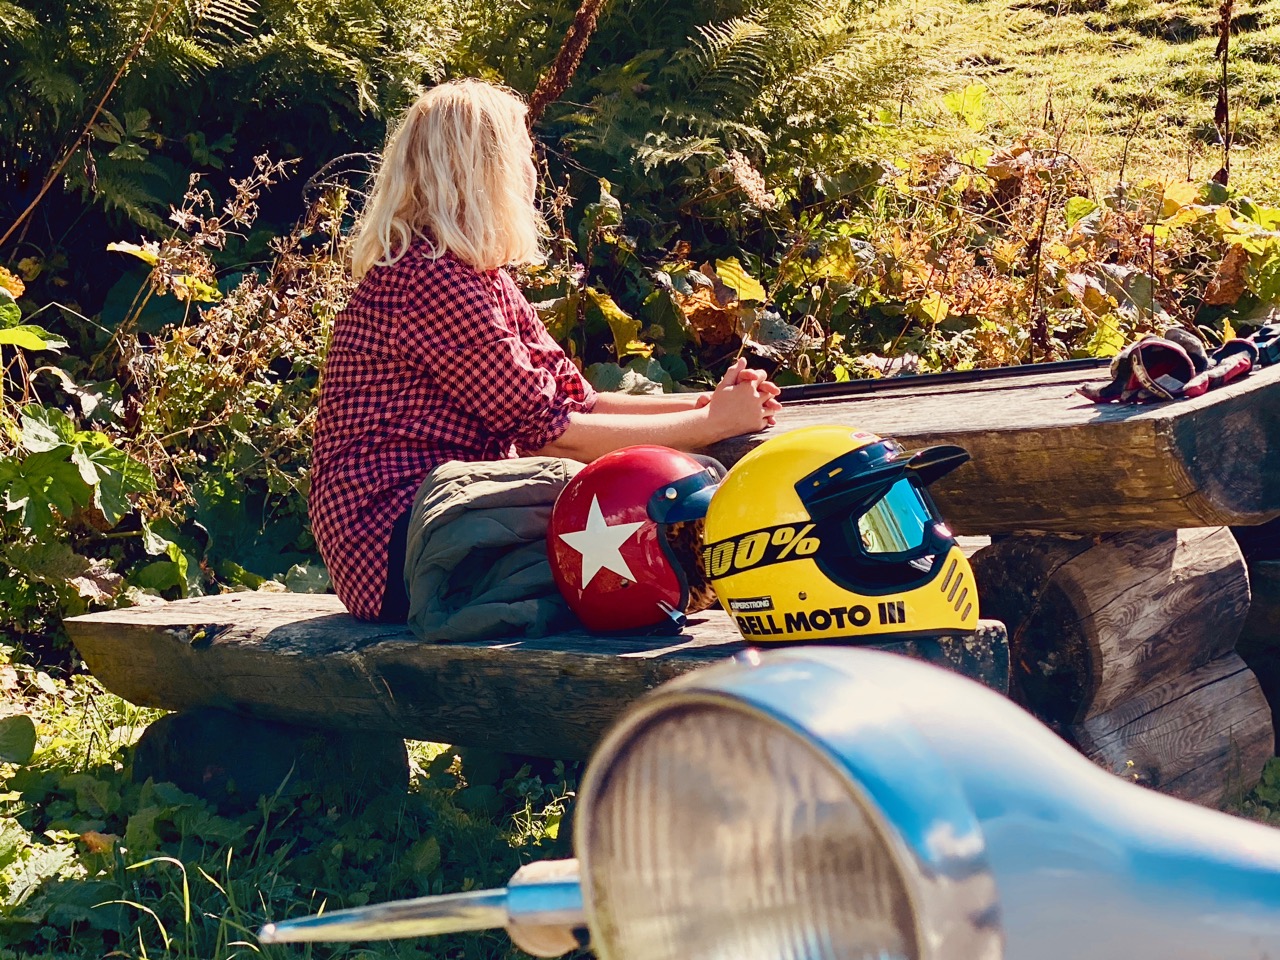
We from the Scooter Center have been following this super Vespa meeting in Zell am See since the World Vespa Days 2009, when we were already the main sponsor and represented with a large stand and team. This huge international Vespa meeting was the birth of the following AlpDays event, which should take place for the 11th time this year. The Scooter Center is again the main sponsor and once again we were on site, albeit in this special situation with a mini team. What the two of us were able to experience in this short time was simply amazing: We started at 9:00 am in the morning with the Großglockner Bergpreis, I have never seen so many Vespa Rally 180 / 200 in one place before. Have a look here:
The result is 2 videos.
Tip: for the Großglockner exit Full Movie
you should take 30 minutes. It’s worth it! The course of the road in connection with the breathtaking mountain scenery at 2,500 meters above sea level make the scenery and the video simply epic.
I don’t know how Nicole and Franz always do it with the weather, but see for yourself!
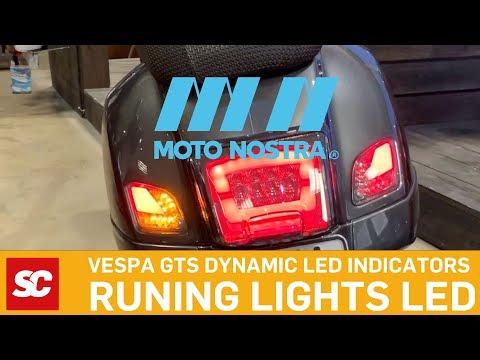
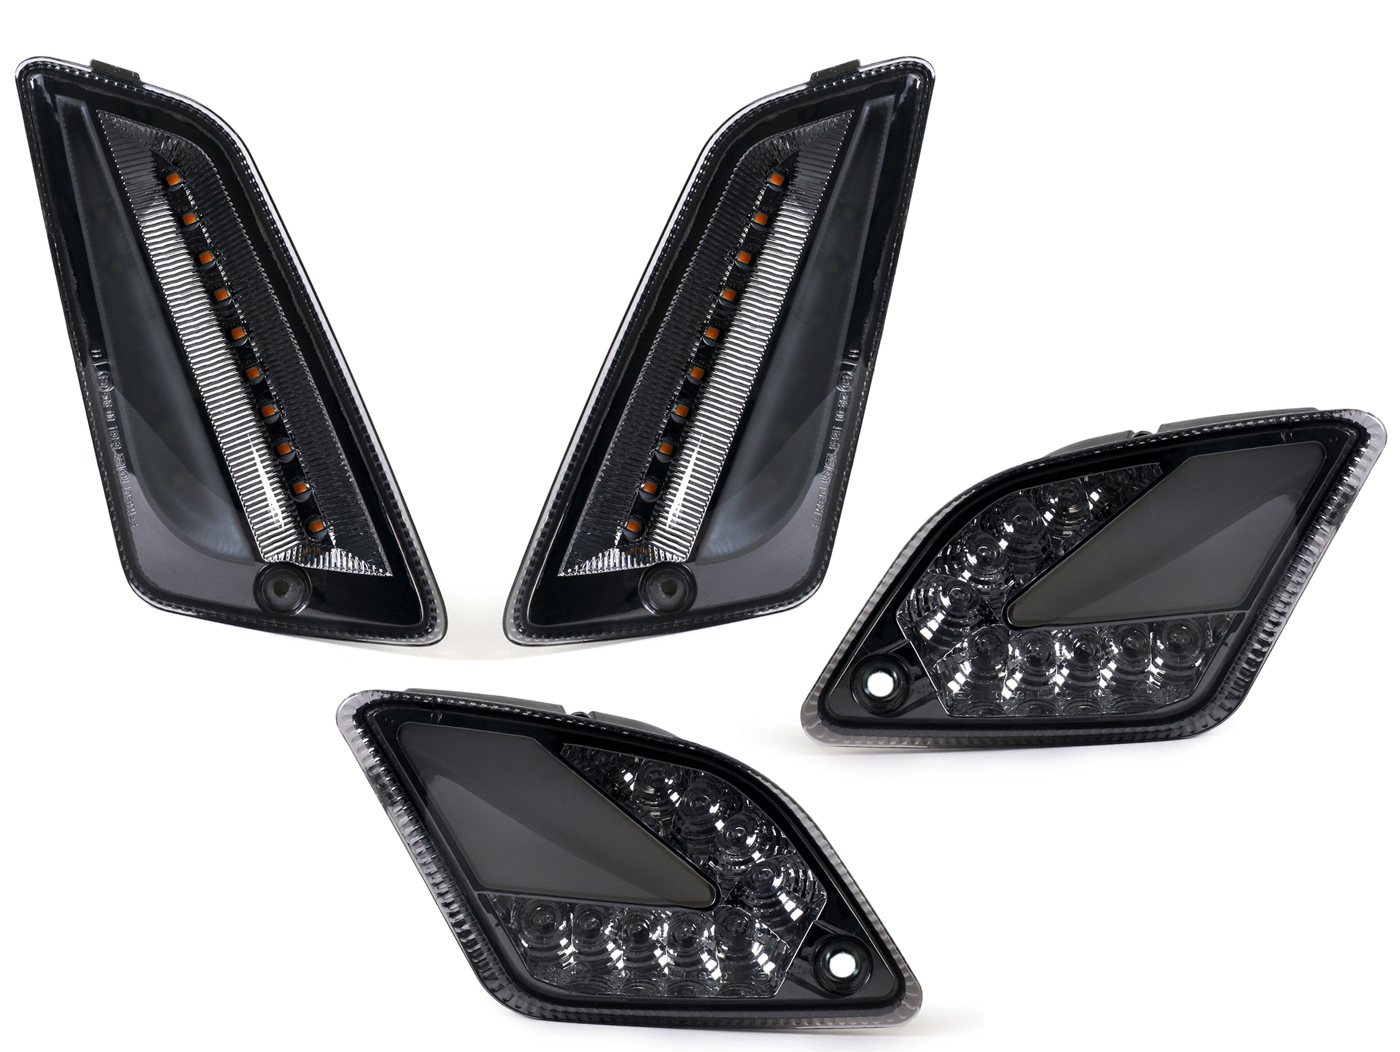
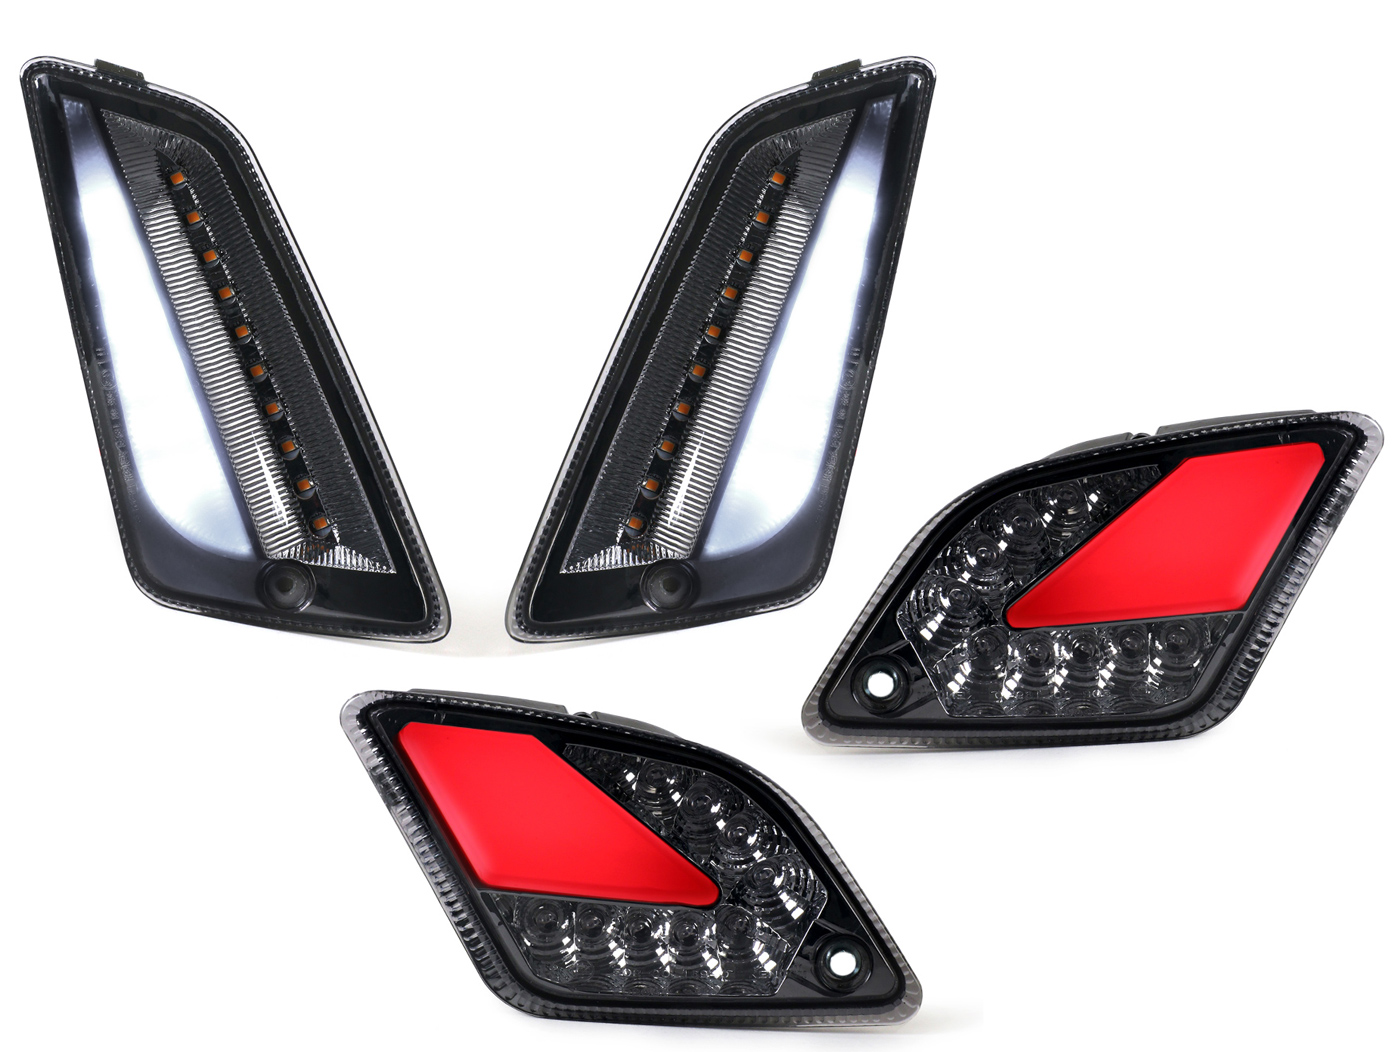
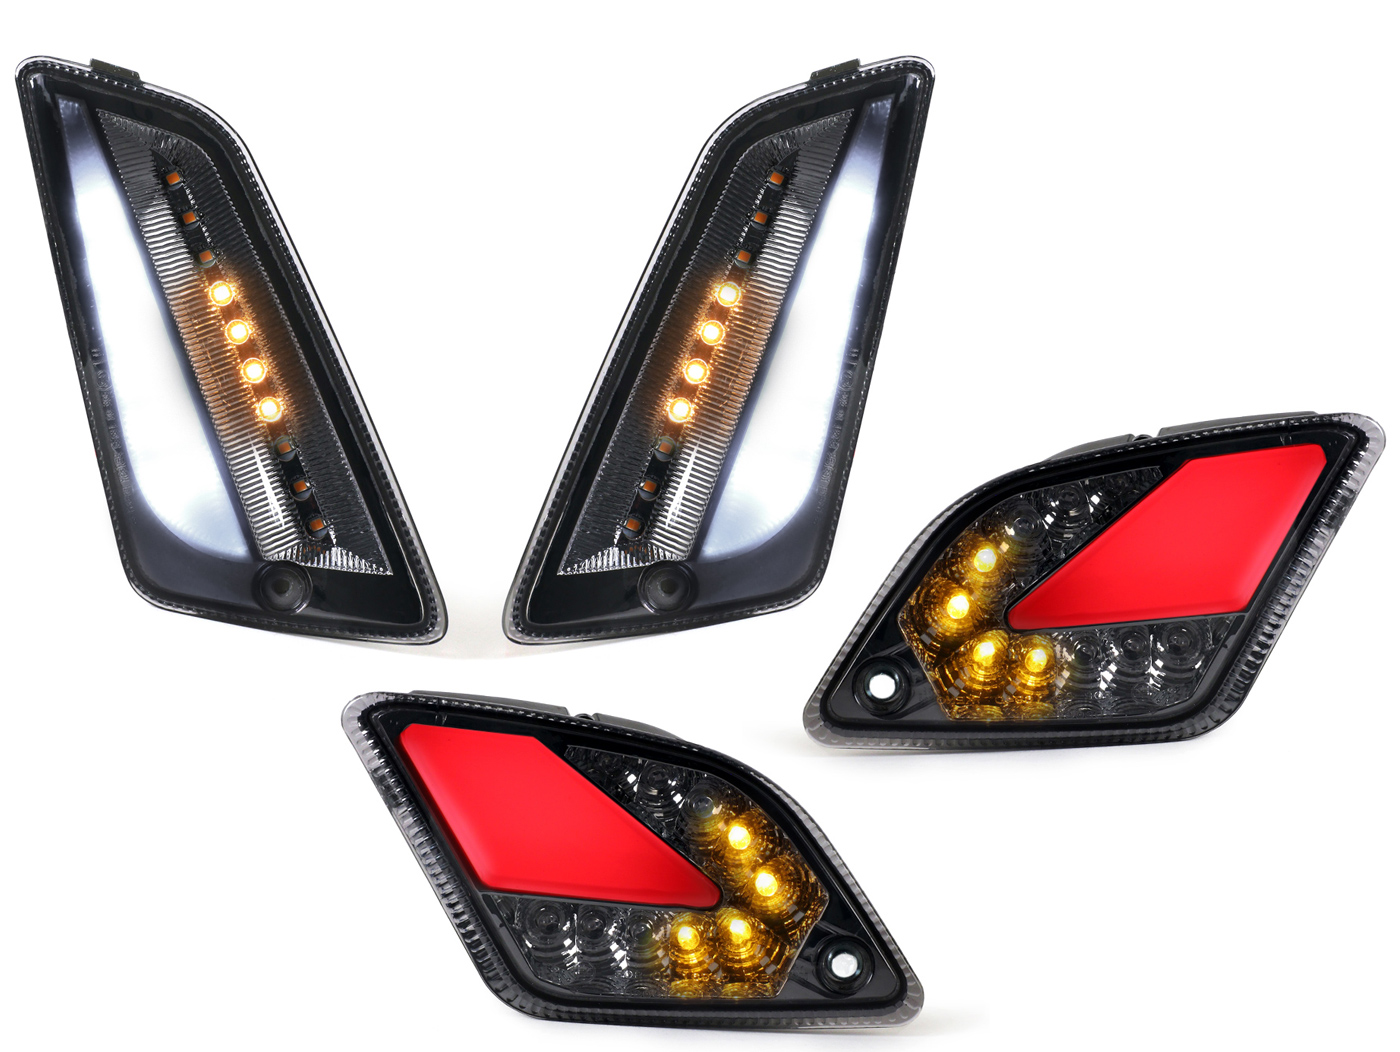
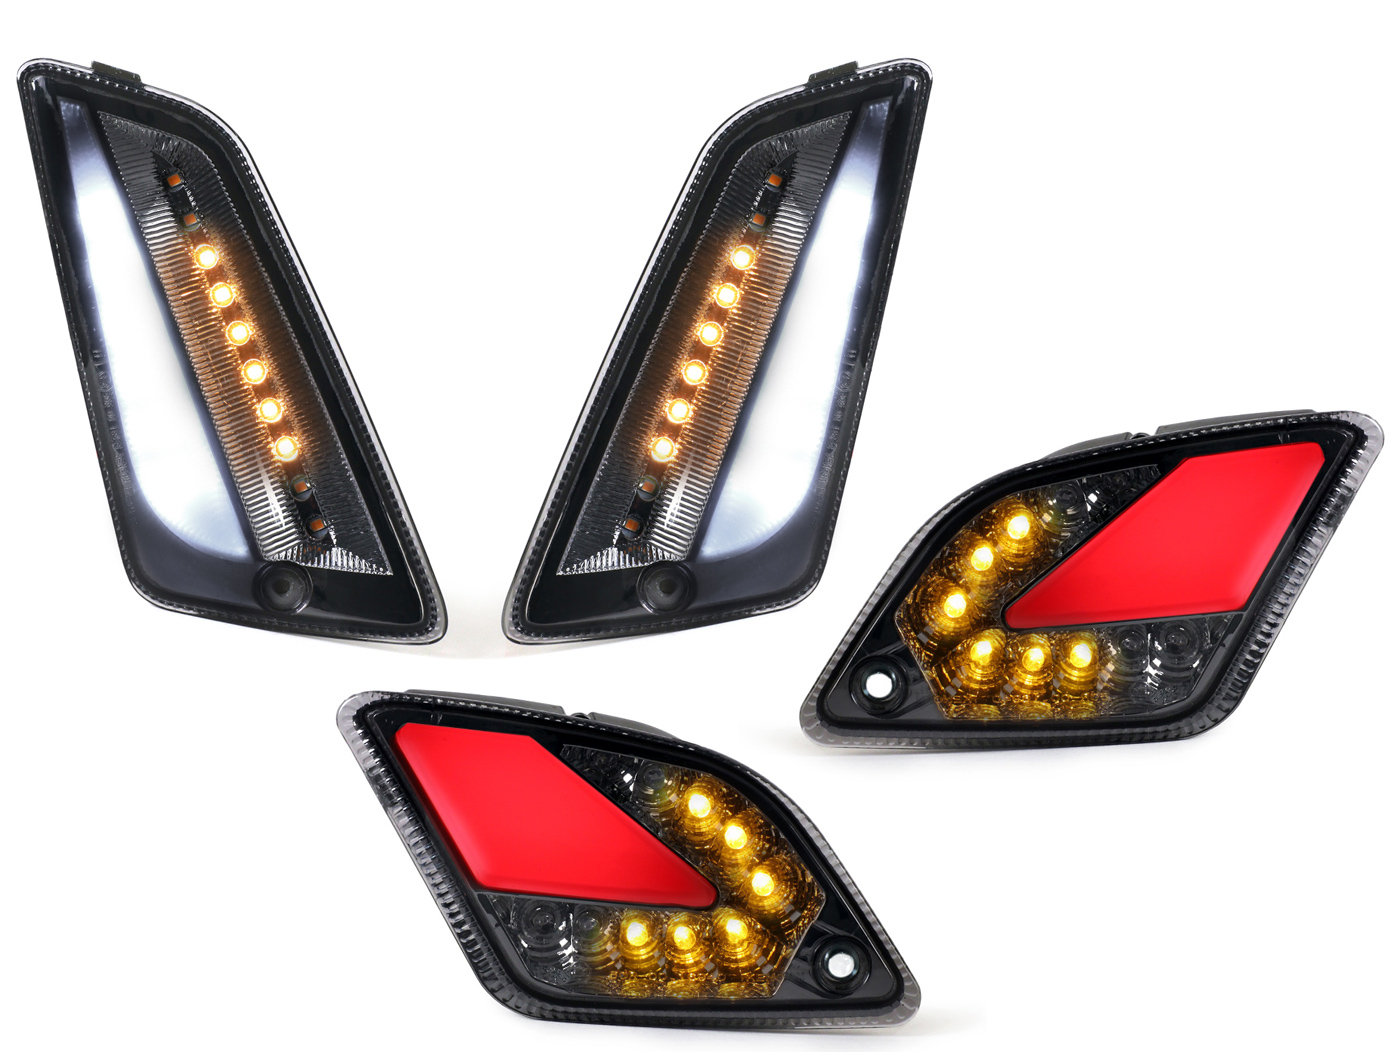
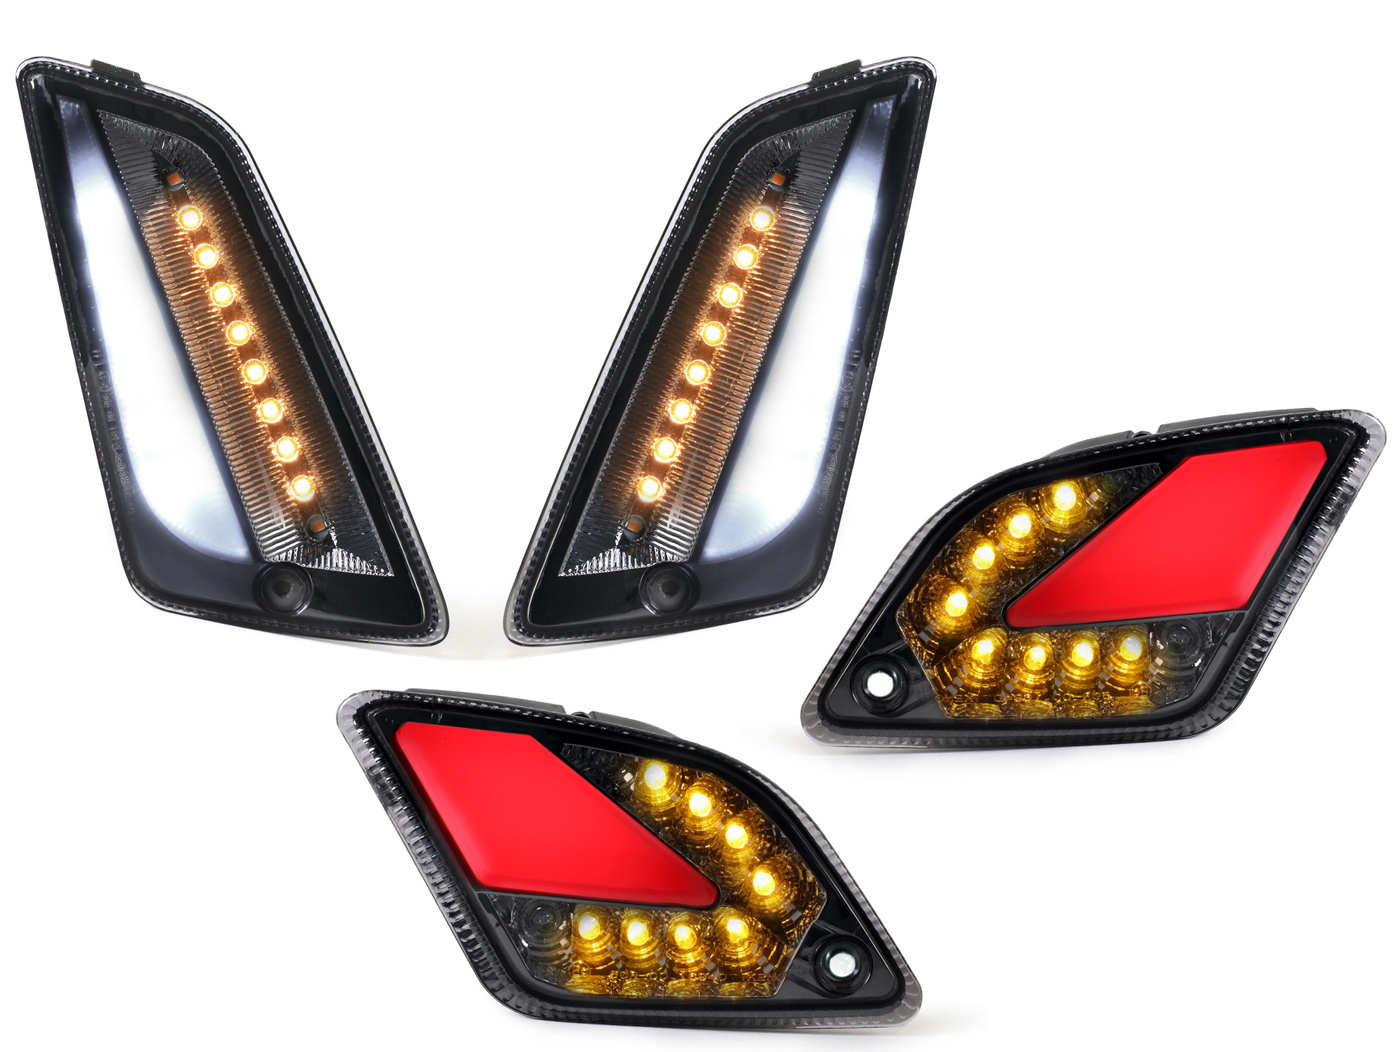
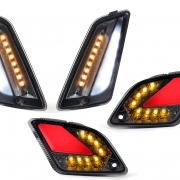
We have already presented the popular LED indicators with dynamic running light from MOTO NOSTRA. Our partner Cafe Racer 69 also likes to use the indicators in their Vespa GTS conversions. Not without reason, because the tinted turn signals offer an exclusive and noble optics. In action the GTS running light indicators are spectacular, furthermore they fit perfectly into the design and the lines of the Vespa GTS bodywork: see also here in the video!
Now there is a video on Youtube, which shows the easy installation of the LED indicators very nicely:
The Vespa GTS LED turn signals with running lights are available in clear glass or black tinted, individually for front or rear and in an affordable set:
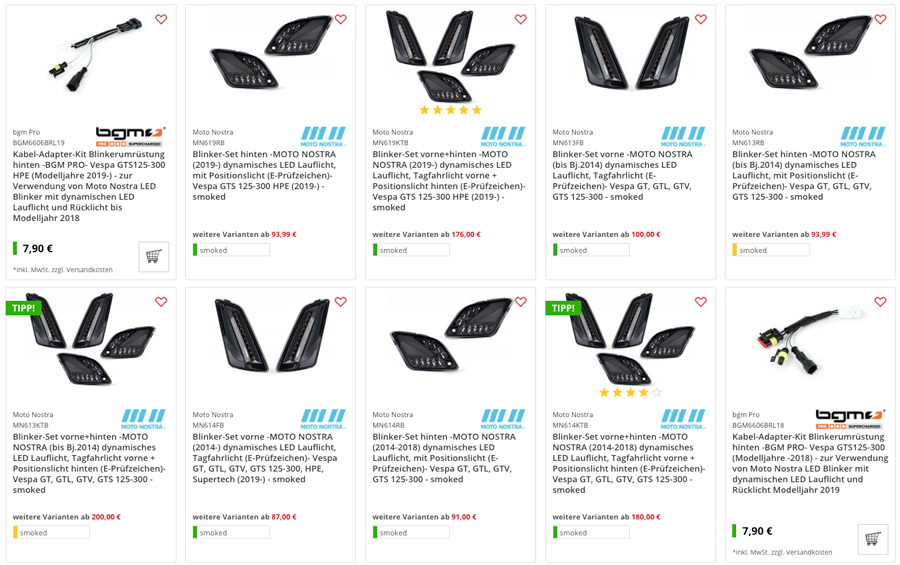
The MOTO NOSTRA turn signals have individually controlled LEDs and thus produce a fully dynamic running light, just as one knows it from vehicles in the luxury class (e.g. Audi A7). The generated light effect is very pleasing and offers a pleasant change to conventional turn signals. As an additional feature, the front turn signals have a bright white daytime running light strip in plasma look. At the rear the same technology is used as position light.
Besides this wonderful visual enhancement of the scooter and the possibility to individualize its GTS and thus stand out from the crowd, there is another important point that speaks for these great LED indicators:
This new technology increases the optical width of the rear end in the dark and significantly improves perception in road traffic. The bright LEDs of the turn signals are already clearly visible from a long distance. The running light is also optically better detected than with a conventional turn signal.
A special concern for us was the quality and fit. Both are on a very high level with the MOTO NOSTRA turn signals and therefore a high-quality alternative to the Power 1 turn signals.
In addition, the Moto Nostra indicators are always supplied with connection adapters. Therefore, there is no need to make any changes to the wiring harness!
Of course the indicators have a test mark and are approved for public road traffic (no TÜV approval required).

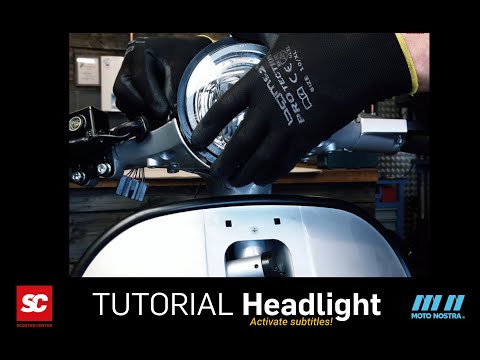
In this Vespa tutorial video we show you how to install our Vespa PX LED headlight for the Vespa PX. The MOTO NOSTRA HighPower LED headlight itself can also be installed in other cars (Lambretta, Vespa GTS, Sprint, Rally). With the included car specific frame, the installation of the Vespa PX LED headlight as e.g. Vespa PX LED headlight is very easy
CONTENT
DOWNLOAD PDF Assembly instructions for printing as PDF
The limit with conventional Bilux bulbs is on most scooters a headlight bulb with 45/45 W. The 80 W to max. 120 W ignition does not give more. The luminosity measured in lumens is less than 400 and the LED headlight has a luminosity three times as high (1300 lumens). The power consumption is only 20 W. This corresponds to the luminous efficiency of a conventional 100 Watt spotlight. This means that with a given alternator/power supply a considerably better illumination can be achieved. In addition, more capacity remains for other consumers
Parts used in this video
LED headlamp with E9 marking (road approval) and high-intensity main/dipped beam. Additional feature is a separately switchable position light. With a diameter of 143mm it also fits perfectly in the steering head of the PX and Cosa models as well as in the lamp bezel of e.g. Vespa Sprint, GTR and Rally.
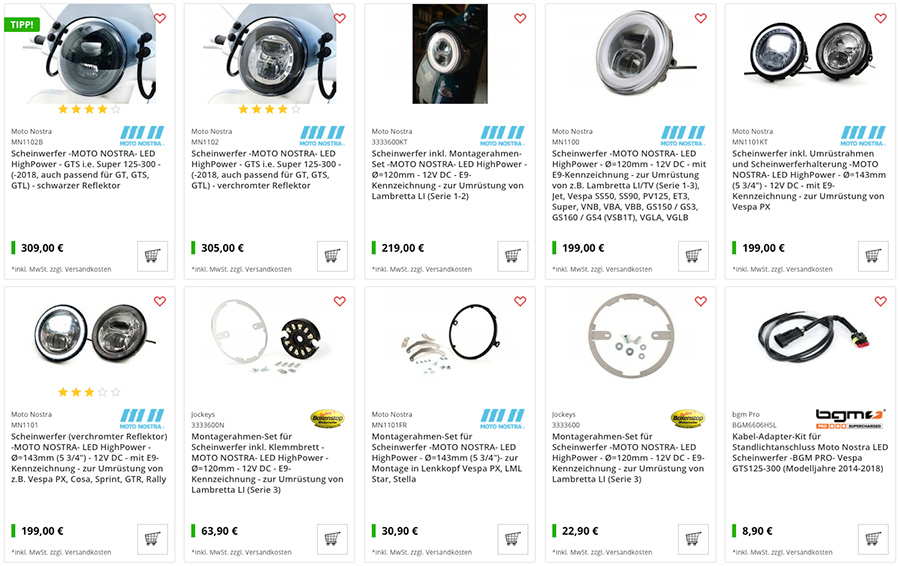
Luminosity 1300 lumen Voltage: 12 Volt DC (direct current) Power consumption: 1.8A/1.3A Power consumption: 21.5W/15W/1.9W Diameter: Ø143mm Overall depth body: 54mm (measured from headlight ring without glass bulge) Overall depth overall: 79mm (measured from headlight ring without glass bulge with cable entry)
The LED headlight works exclusively with direct current, therefore it needs a battery or another equivalent power source with 12V DC. Operation with an AC power source will result in immediate failure

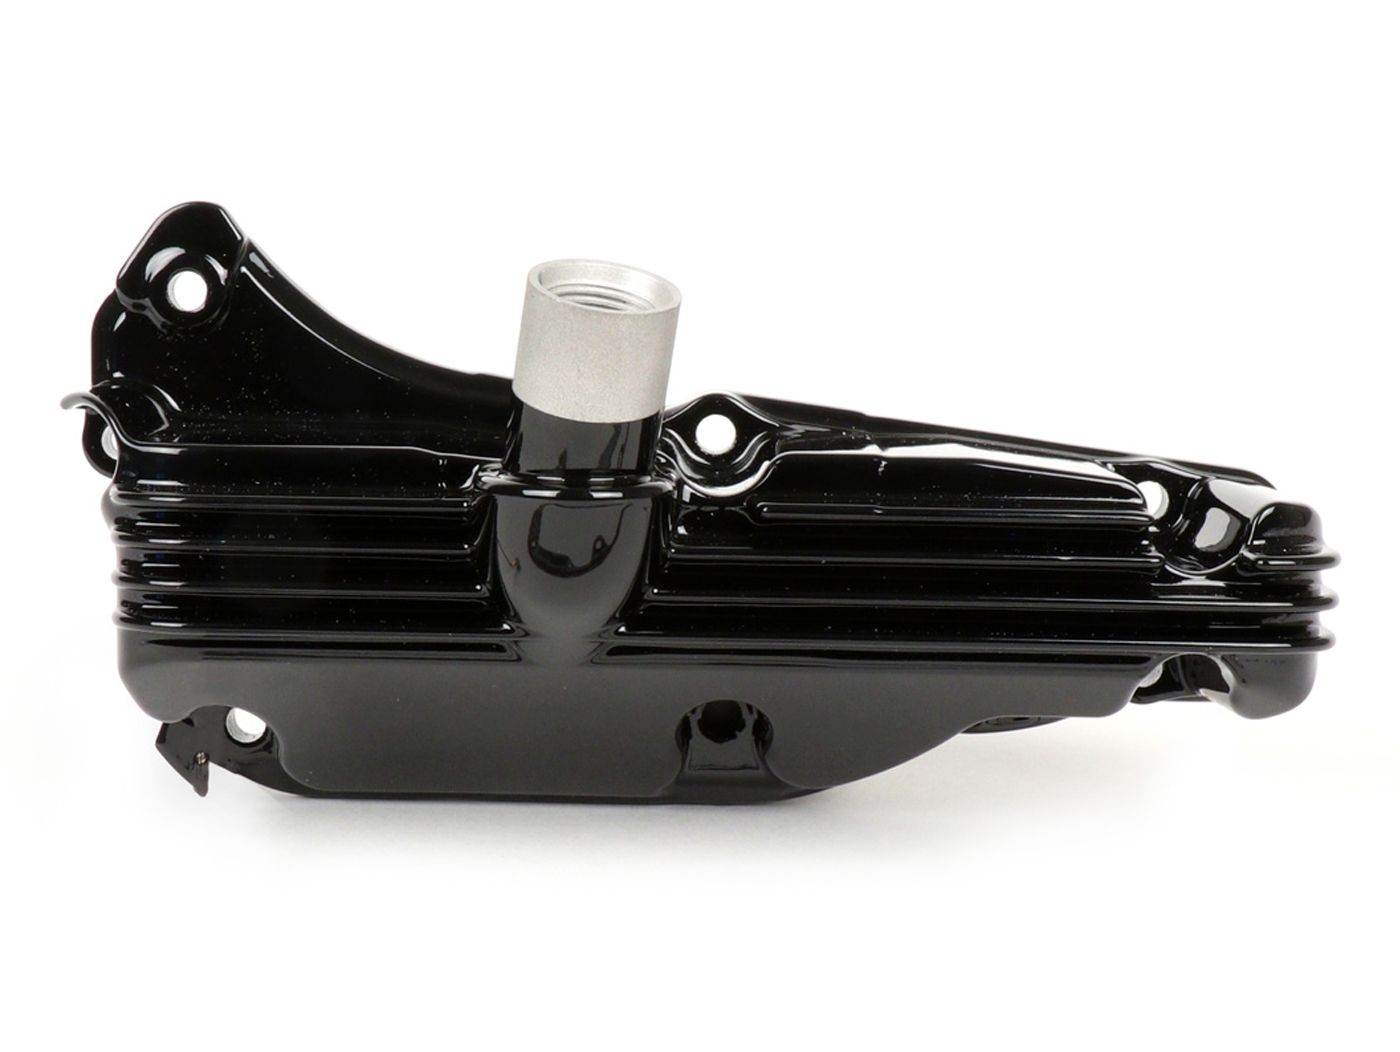
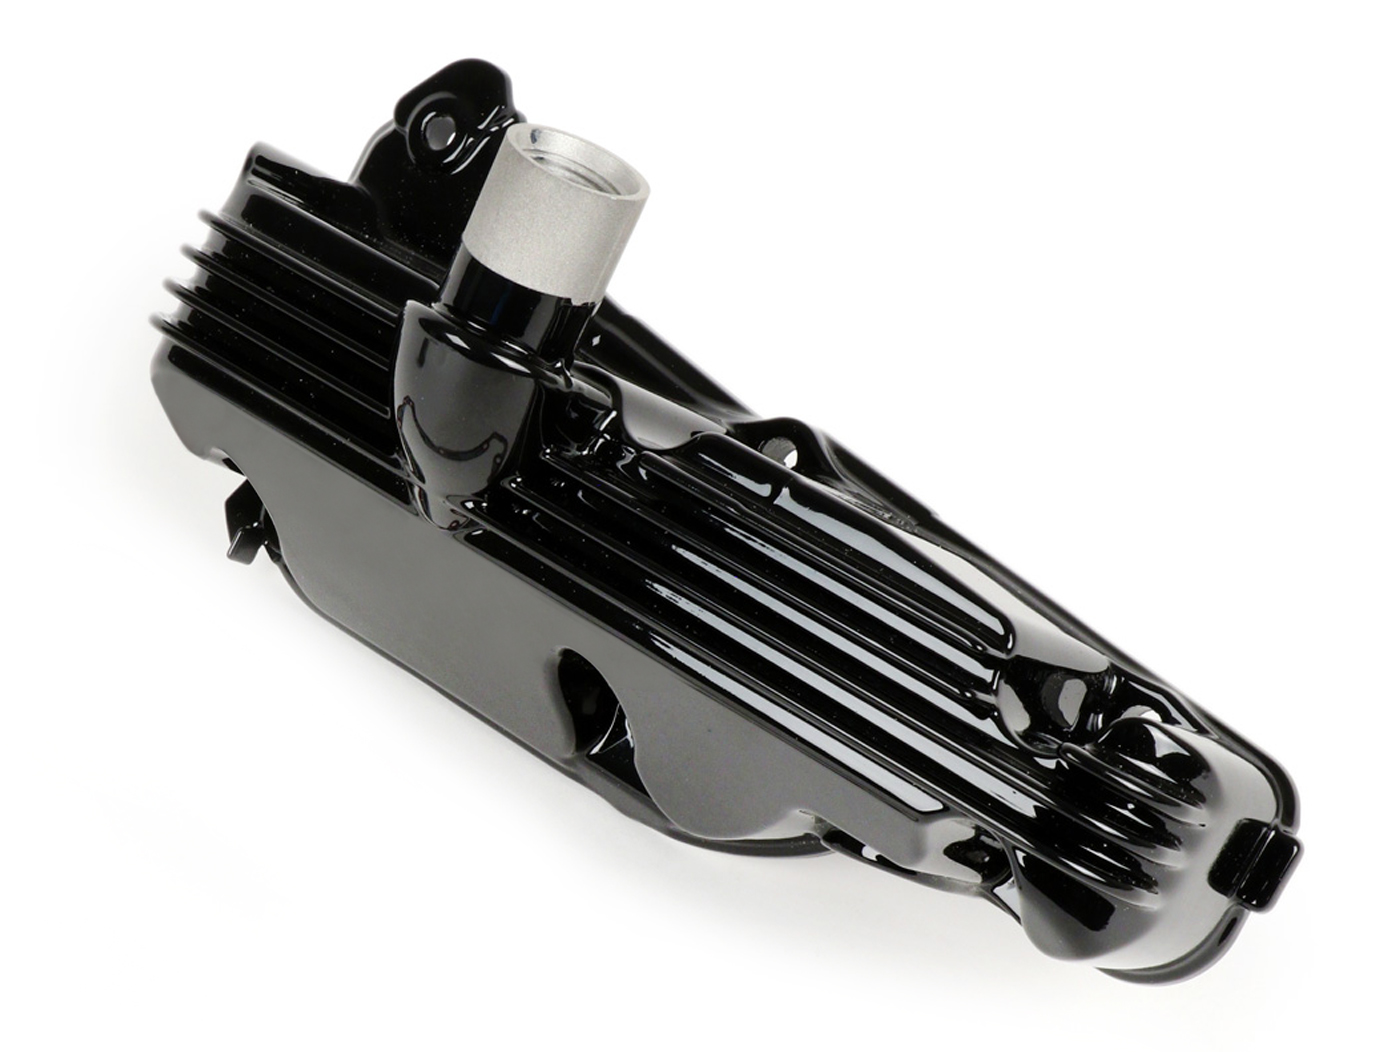
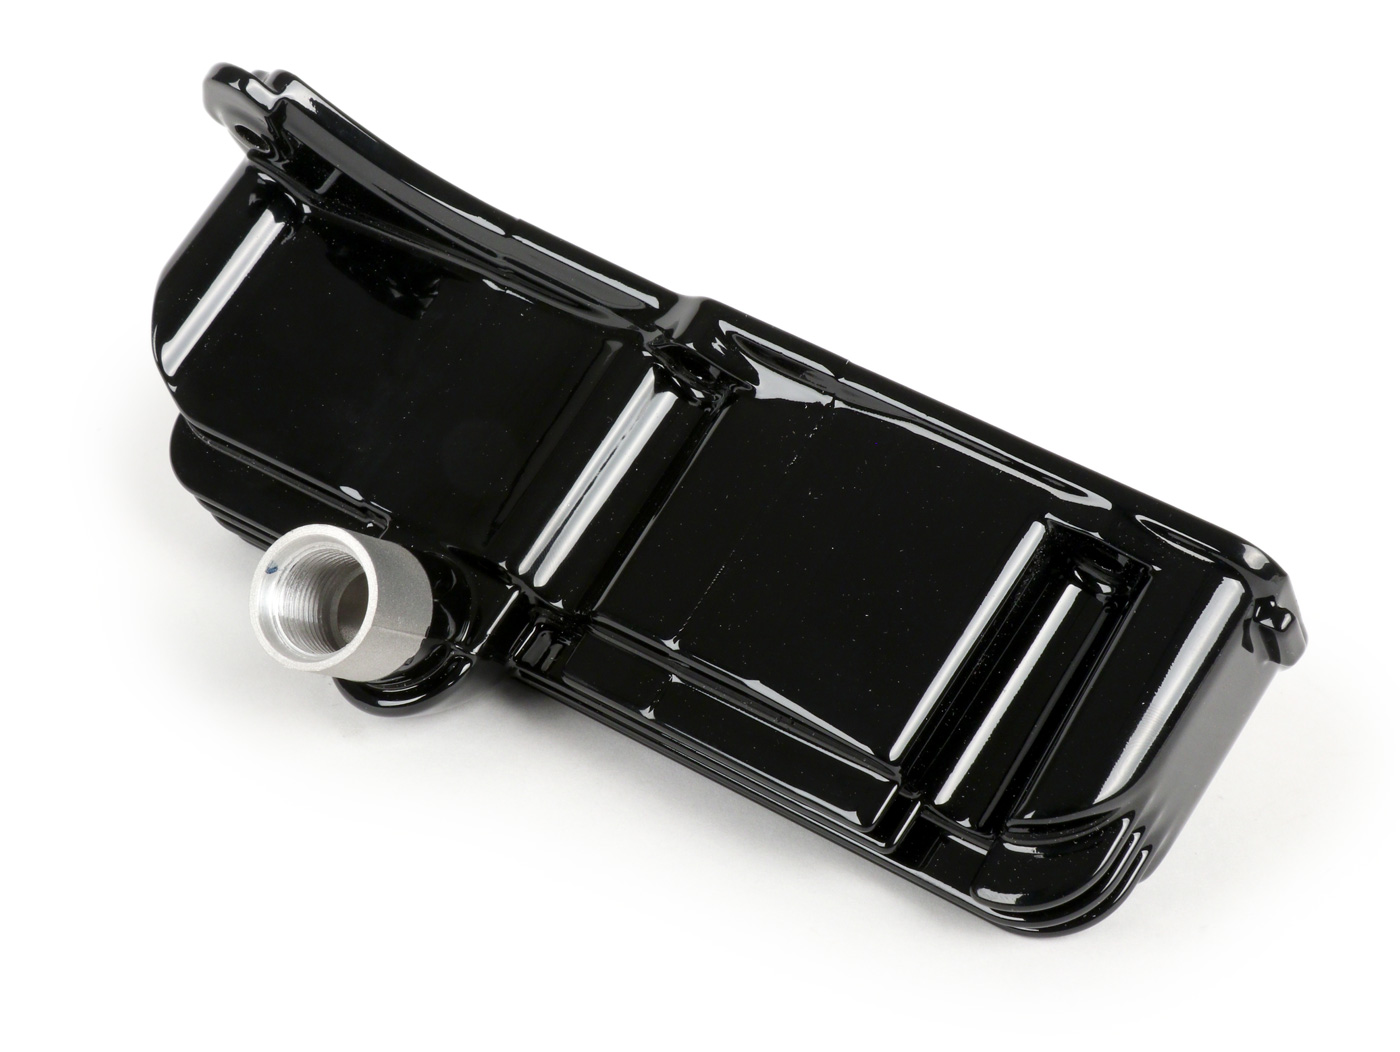
Why convert a Vespa GTS oil pan?
In this article about Vespa GTS conversion we have shown you some great examples of custom and tuning a Vespa GTS.
It is often the details that make for a successful conversion with a coherent overall concept.
A nice detail of the modern Vespa scooters is for example a black oil pan. We offer you with our MOTO NOSTRA oil pan a brand new original Piaggio – oil pan, which we have provided with a high-quality high-gloss powder coating. The video below shows how the conversion is very easy to do.
This GTS oil pan is first prepared for the refinement in a complex way and then professionally processed. The result is an extremely hard-wearing surface with a super look. The sump is of course delivered ready for installation, you have the choice:
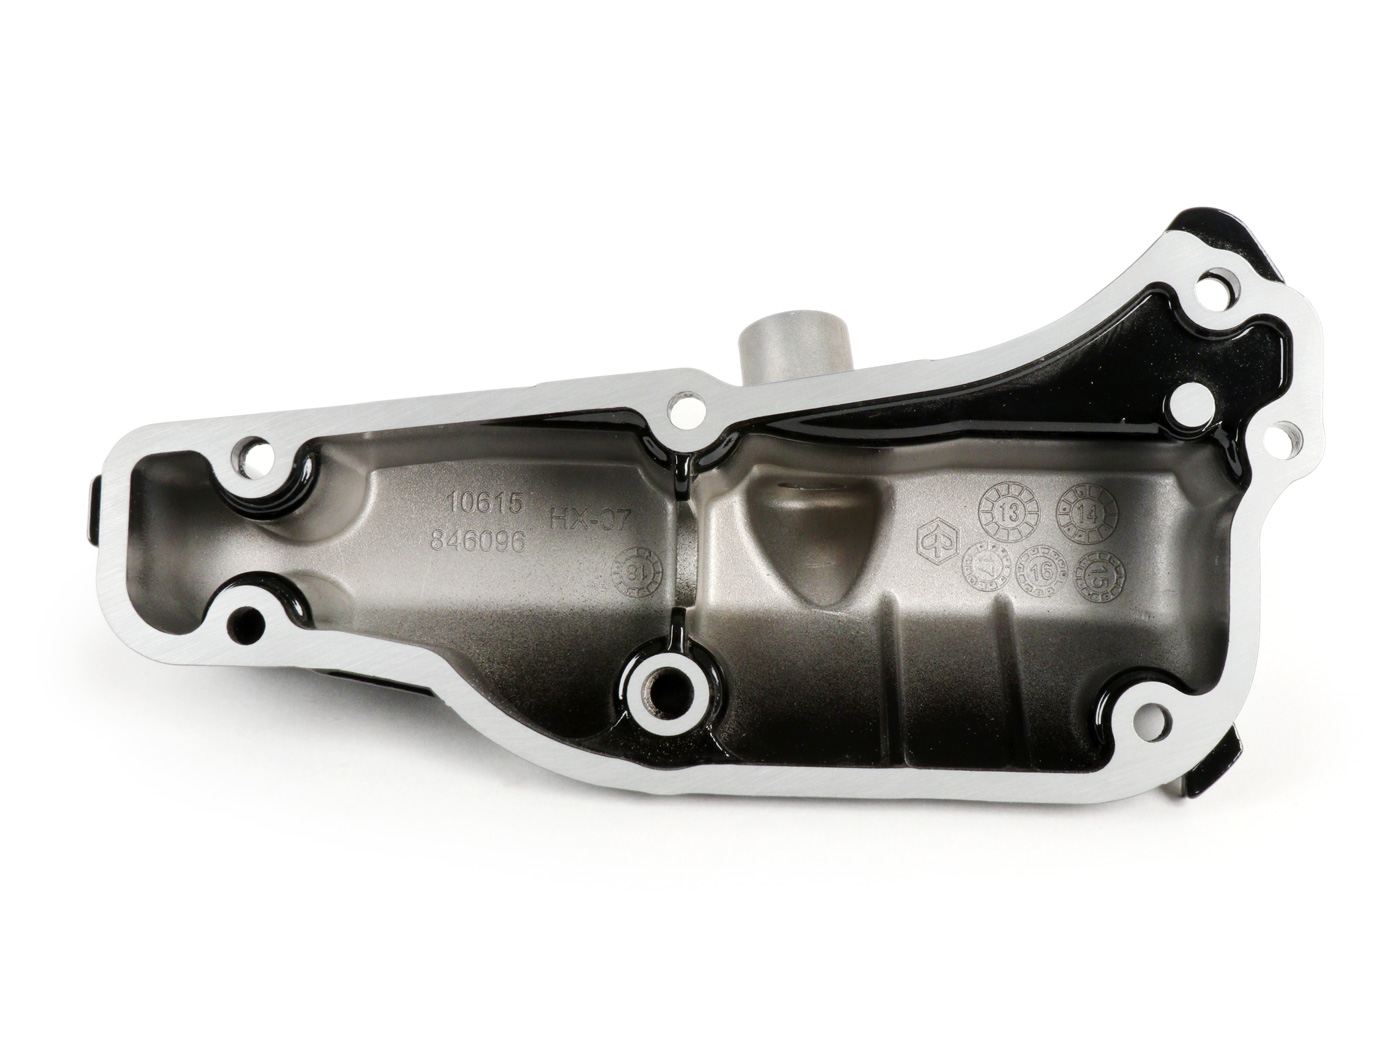
Note: Please do not forget to install a new gasket -> oil pan gasketA
great opportunity to use new engine oil and oil filter:
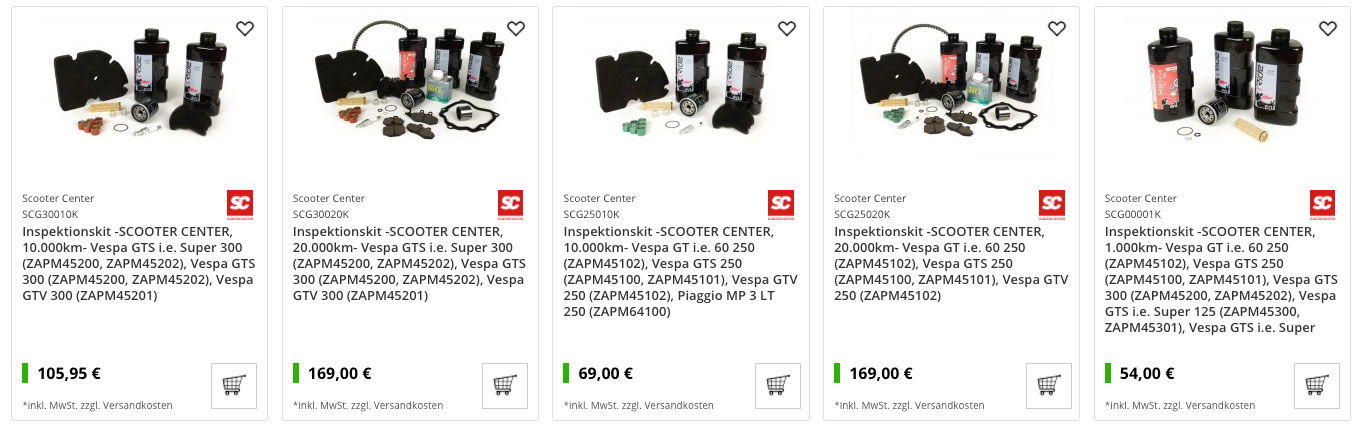
Tip: We offer you cheap and practical sets! The inspection kits are equipped with all parts needed for an inspection, depending on the mileage and recommended revision work:
The installation is very simple, but there are a few things to consider.
Here you can find a great video of Scooteria, who also change the MOTO NOSTRA oil pan in the course of their GTS 300 conversion. Helpful tips from the custom professionals of Cafe Racer 69 with tricks for installing the Vespa GTS oil pan:
Note:
See video above. Use correct screws, replace spring, observe tightening torque: M6 screws oil pan: 10-14Nm.
MOTO NOSTRA oil pan purchaseThe MOTO NOSTRA tub is available in :
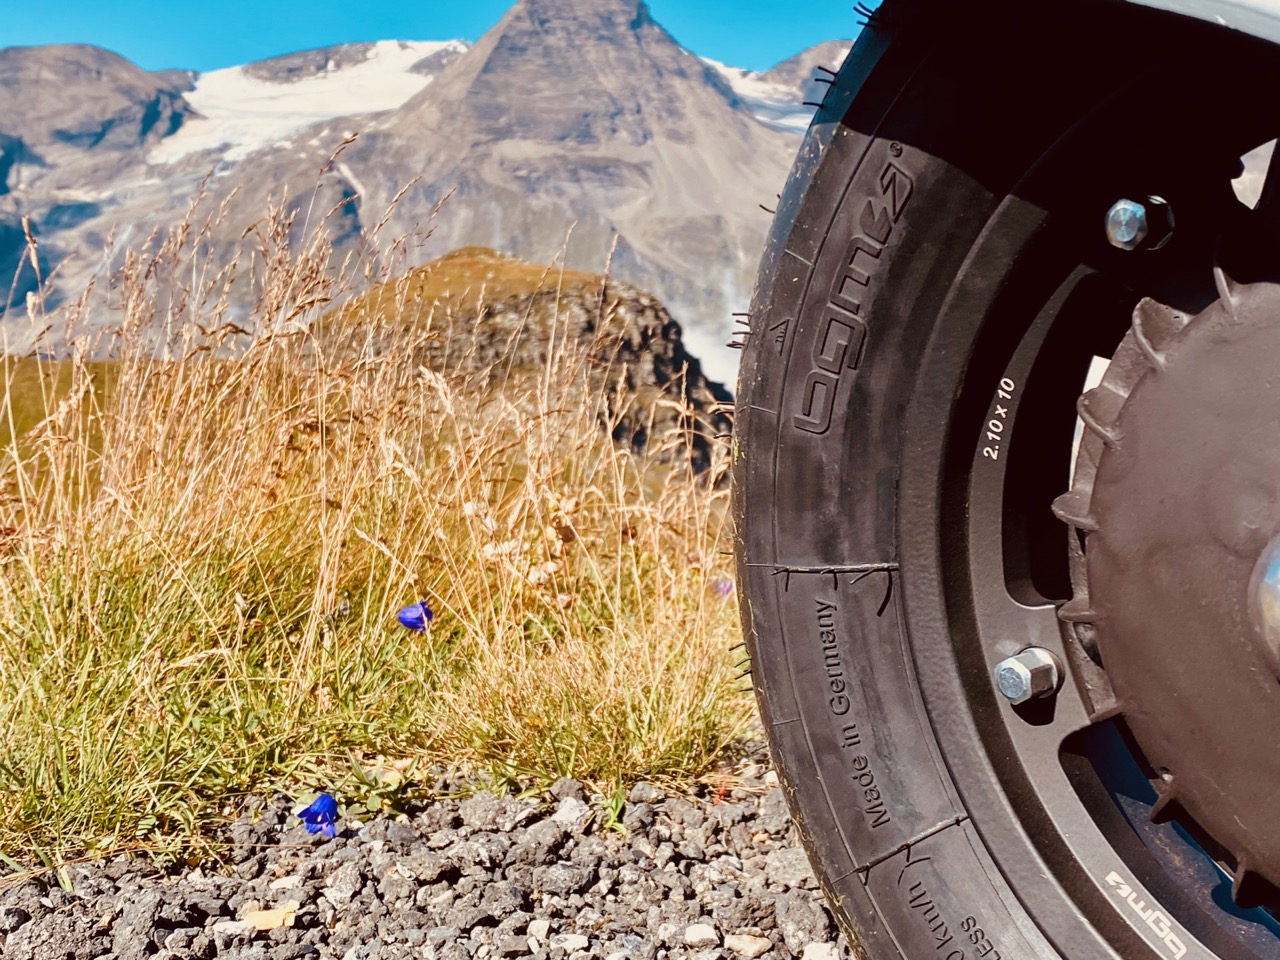
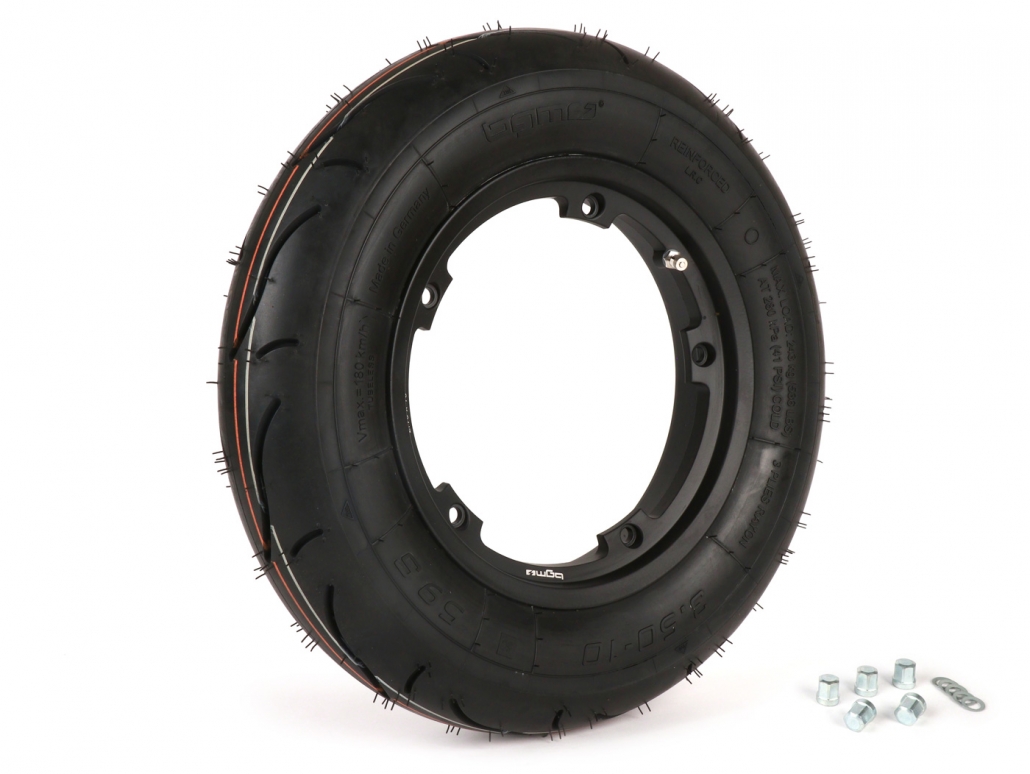
In this video Alex introduces you to the bgm CLASSIC tire, a modern tire with a classic tread pattern for scooters. So don’t be irritated by the tread: at first sight the tread is not to be distinguished from the Vespa & Lambretta original equipment tyres of the 60s, but the tyre is not only something to “drive in front of the ice-cream parlour with the oldtimer”.
Thanks to modern tire development Made in Germany and high quality components, the bgm CLASSIC is a very performant tire for all life situations in lean angles, which is clearly visible in its speed release of up to 150km/h and the Reinforced marking.
Tips for tyre mounting on a divisible rim, as they can be found on a classic Vespa or Lambretta for example, we have here for you: Vespa tyre mounting
The new scooter tires from bgm!

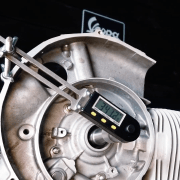
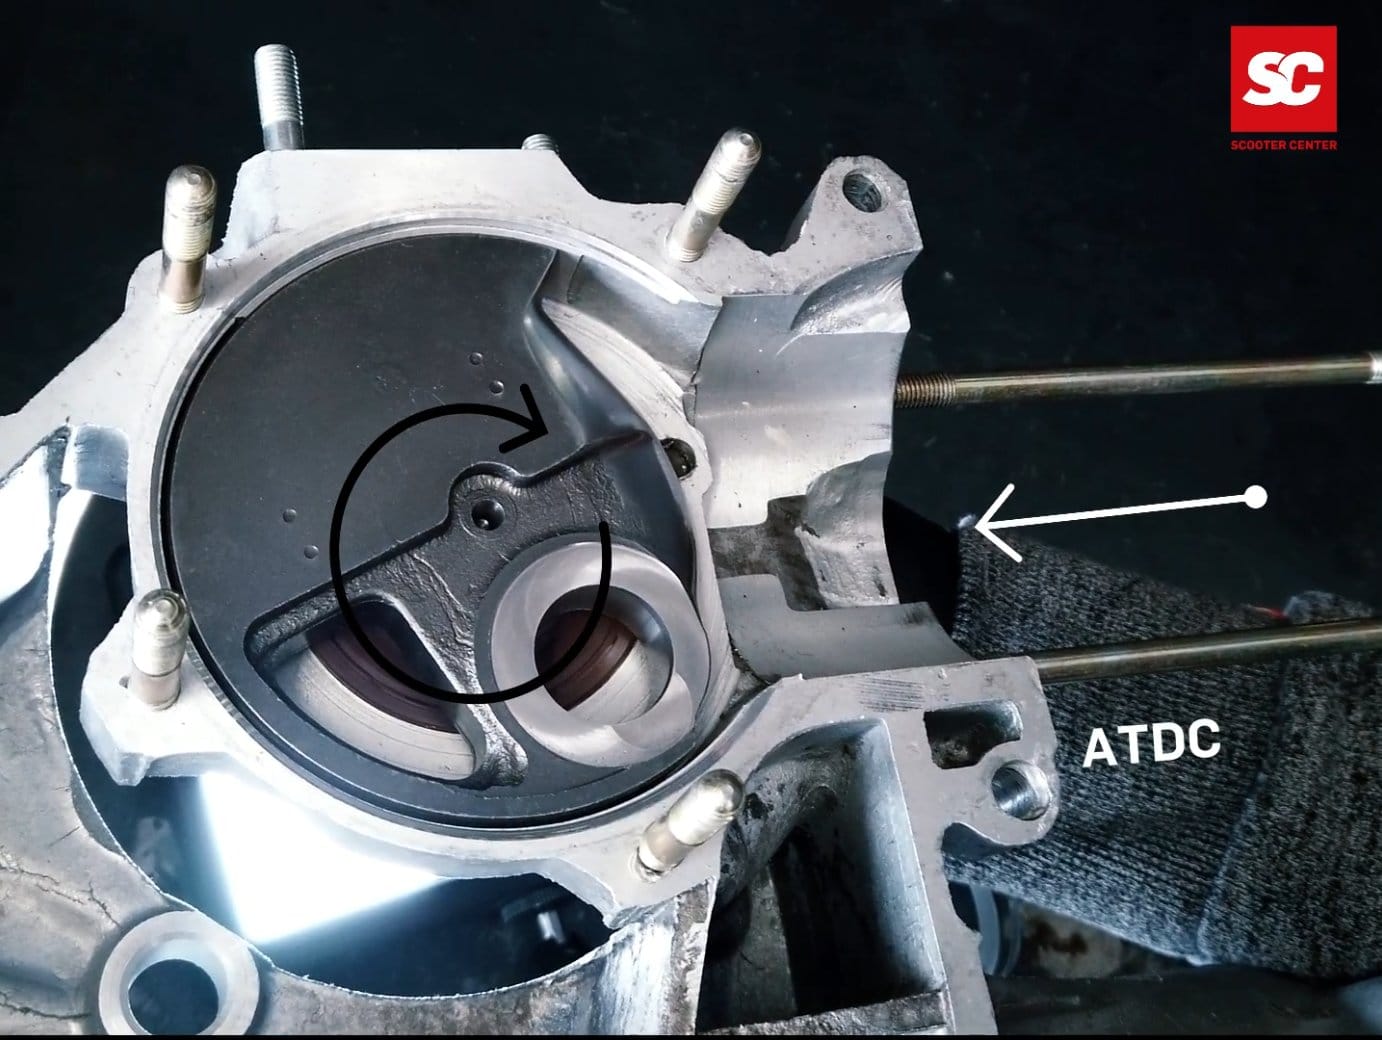
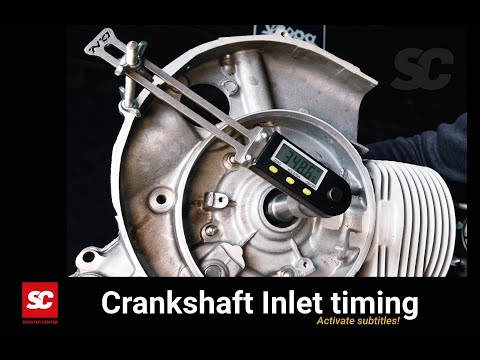
In today’s video and blog it is about measuring the intake angle, also called intake timing.
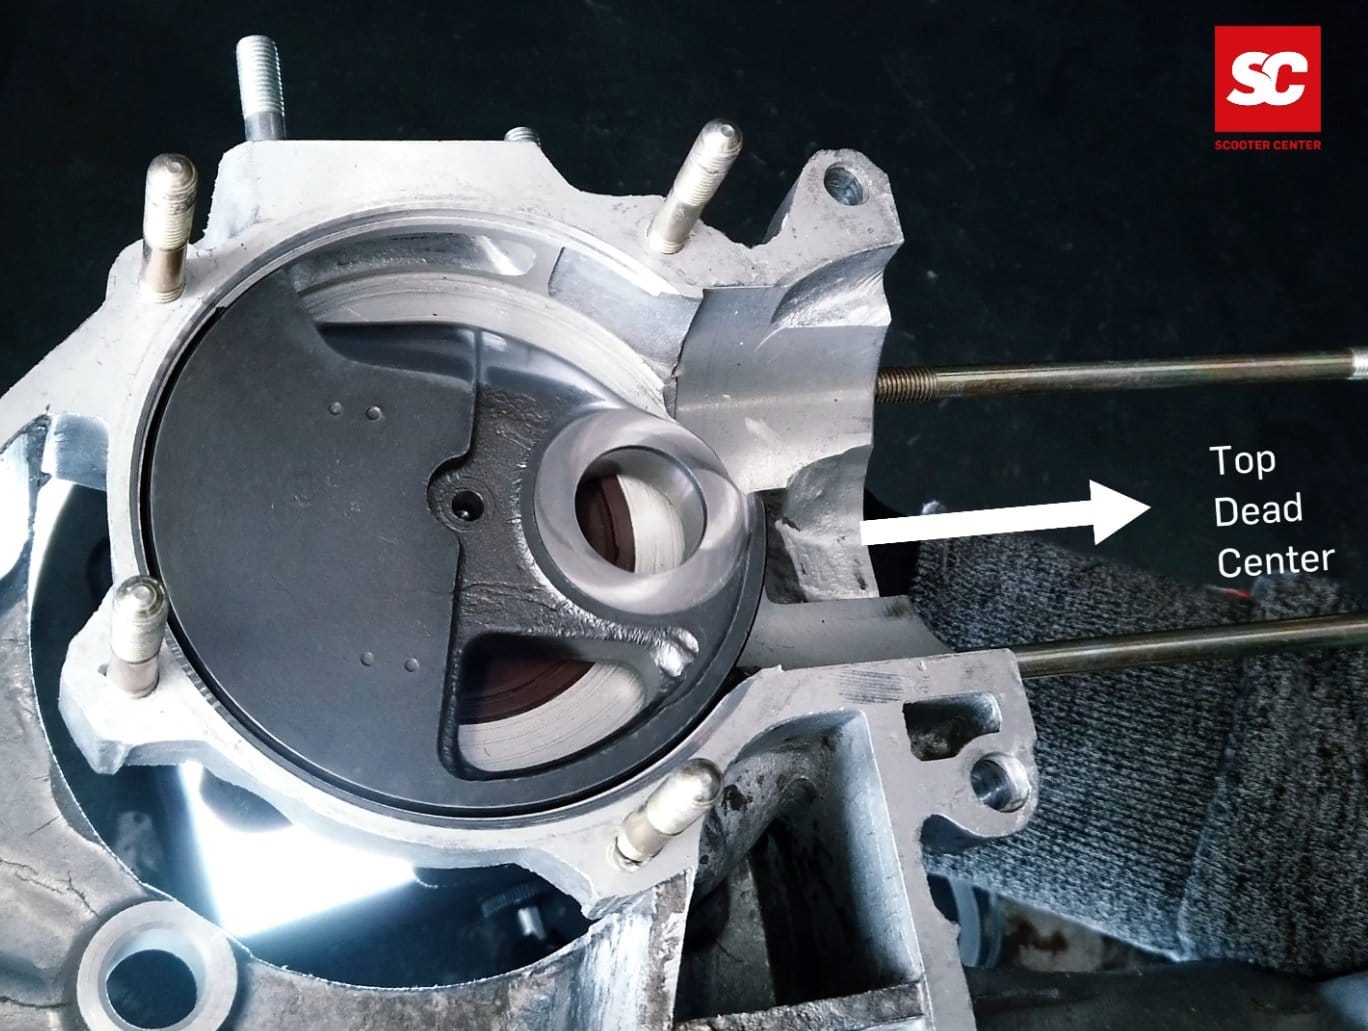
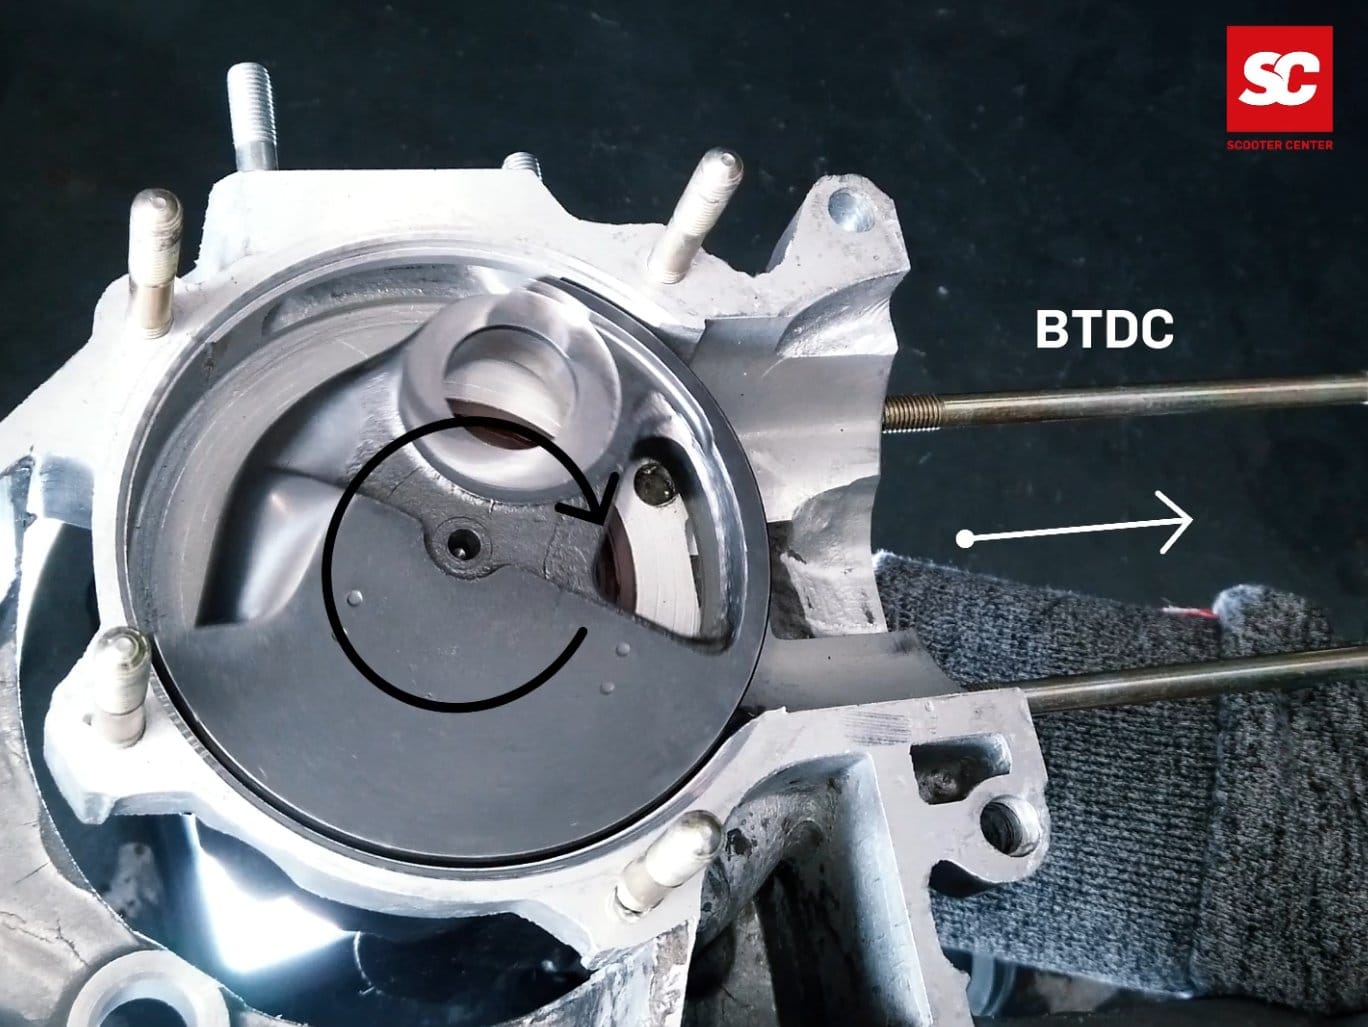
The intake angles should be within a certain range which is indicated in degrees crankshaft. The measurements always start as a fixed point from the top dead center, called OT for short.
The intake range is therefore divided into the values “before TDC” and “after TDC”, because the intake is opened before the top dead center and closed after passing the top dead center.
For a Vespa engine with rotary vane control, the values of approx. 100° F.T.S. and 65° N.T.S. have been found to be good for a good touring concept.
For very performance-oriented concepts which sometimes have to operate a higher engine speed, the values can also be significantly higher. 120° f.o.d. and up to 75° n.o.d. can be found here. The inlet angles should always be selected to match the desired concept. Here the principle is to make the intake area as large as necessary and as small as possible in order to reach the desired values.
The two-stroke heart of Platonika should be a powerful unit and therefore the inlet should be in the range of 100° F.T.O. to 65° N.T.O.
In order to determine the exact angle of one side, some tools and material are necessary.
– engine case-
crankshaft-
cylinder and piston-
bearing dummies
BGM PRO- 613912 (25x62x12mm) BGM PRO- NBI 253815 (25x38x15mm)
– Degree disc or similar measuring device
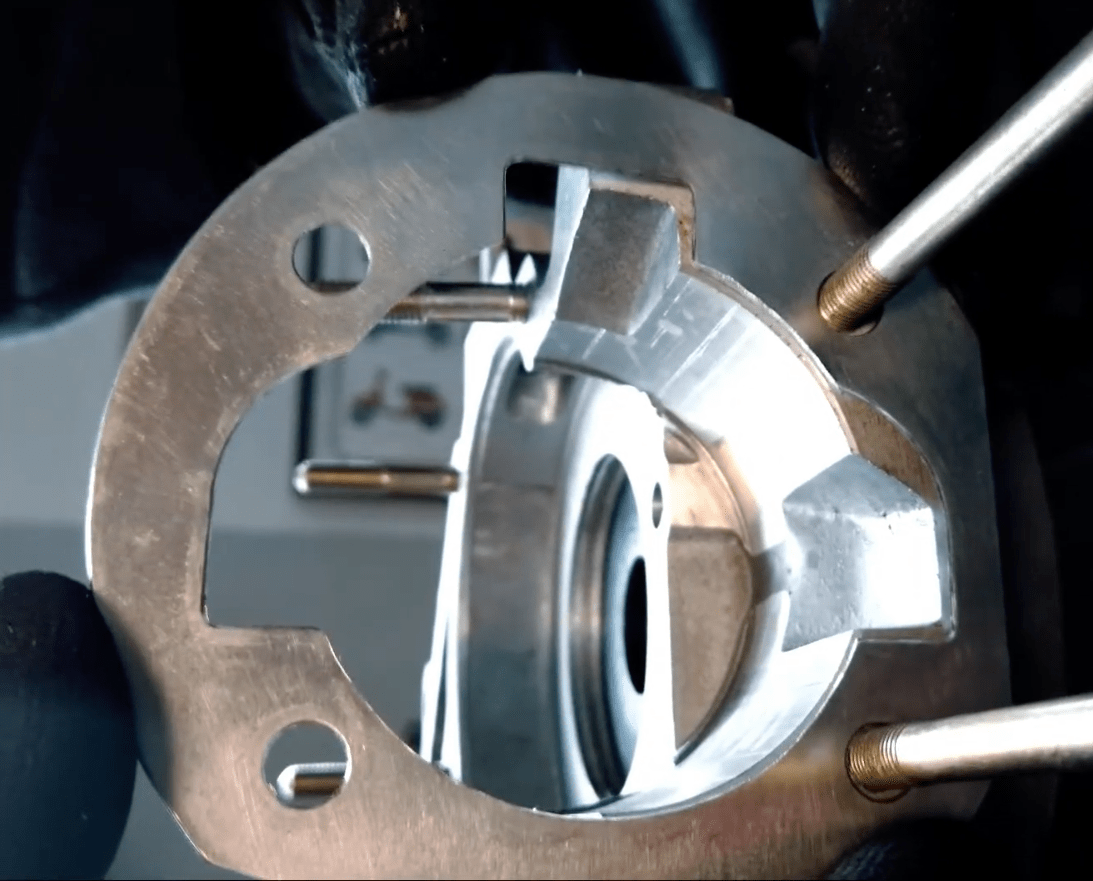
As it is very likely that the inlet area in the motor housing has to be machined to achieve the desired angles, the use of so-called bearing dummies is recommended.
With these dummies, the crankshaft can be removed from the engine case for machining as often as desired without stressing the bearing seats of the crankshaft or engine case each time and without wear and tear even before the engine is put into operation.
The bearing dummies are available for every size of the commonly used bearings in the Vespa and Lambretta range.
The first step is to insert the bearing dummies into the engine housing. Then the crankshaft is simply inserted into the bearing dummies and the engine housing is screwed into the stator housing via the stud bolts.
To determine the TDC, the cylinder and the piston are required. To ensure that the work is carried out smoothly, the piston is pushed into the cylinder without rings. The dial gauge is screwed onto the cylinder with the holder and thus the TDC of the crankshaft can be determined.
The alternator side of the crankshaft is fitted with a degree disc or a digital protractor. There are many different possibilities available. The easiest to handle are digital measuring tools such as the Buzz Wangle Grade Meter which does not need a reference point to the engine case.
If the crankshaft is in TDC, the degree disc, whether digital or analogue, is set to “0” and then the crankshaft is rotated to start and end of intake. The value, read on the dial, then shows when the intake is open or closed.
In order to bring the inlet to the desired dimension, the crankshaft is moved to the desired value and the position of the crank web is marked on the engine casing.
Once this has been done for the value before and after TDC, the engine housing can be opened again and the crankshaft can be easily removed again thanks to the position dummies.
Caution is required when machining in the intake area. The surfaces sealing the rotary valve must not be less than 1 mm overlap with the crankshaft at the sides.
Once the inlet has been machined to the proper size and the crankcase has been cleaned of machining debris, the crankshaft is re-inserted for inspection.
The indicator is then used to check once again whether the desired control angles have been achieved or whether reworking is necessary.
The Vespa engine – the heart of Platónika – has received the desired control angles of the crankshaft in the last article
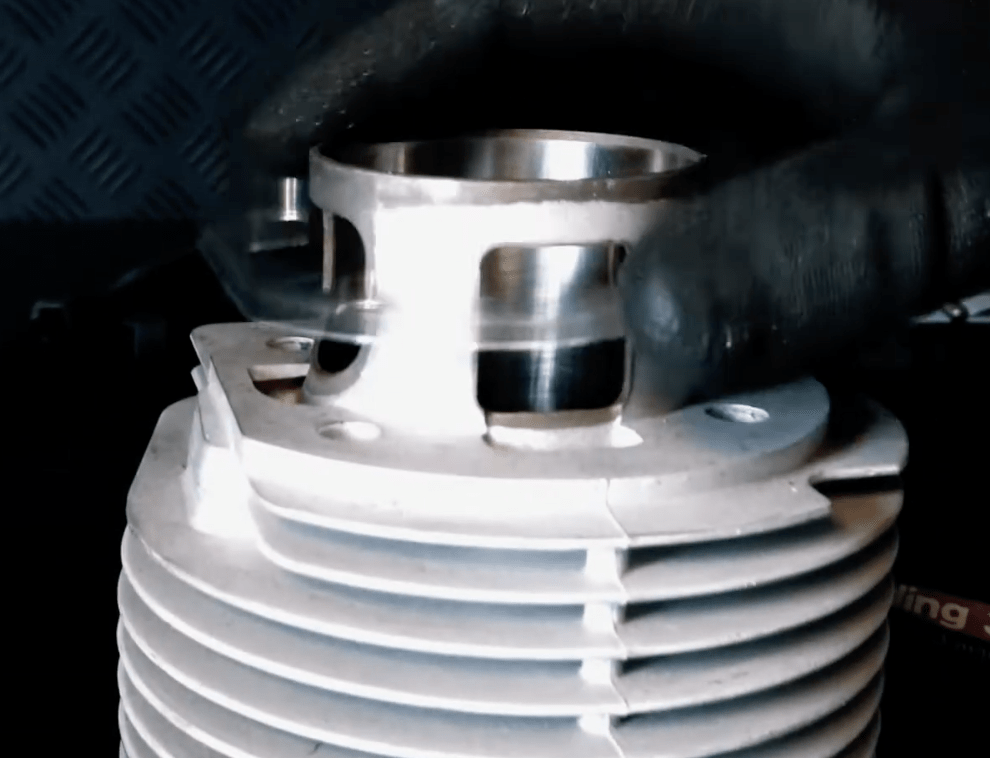
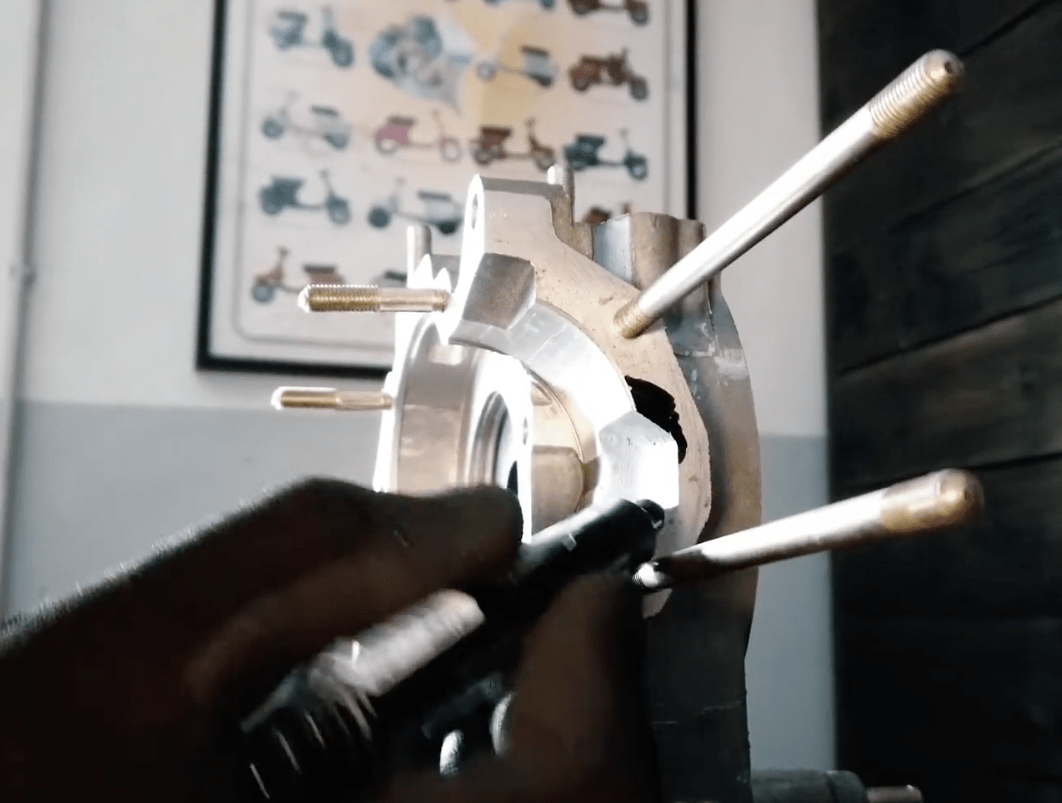
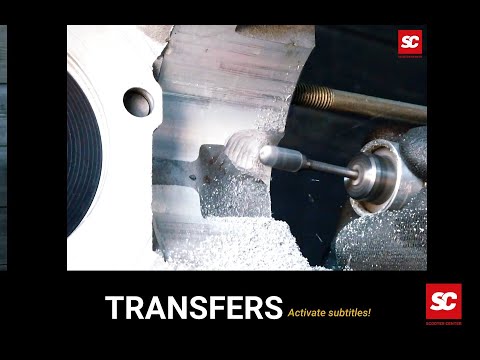
Before the complete assembly of the motor can be done, all work that generates chips must be done. Only then can the housing be cleaned.
In the next step, this includes the ports of the cylinder in the engine.
The BGM177 is designed in such a way that the cylinder functions perfectly even on the original ports.
However, in our project we took the opportunity to directly adapt the case. A better filling of the cylinder always means a higher possible torque.
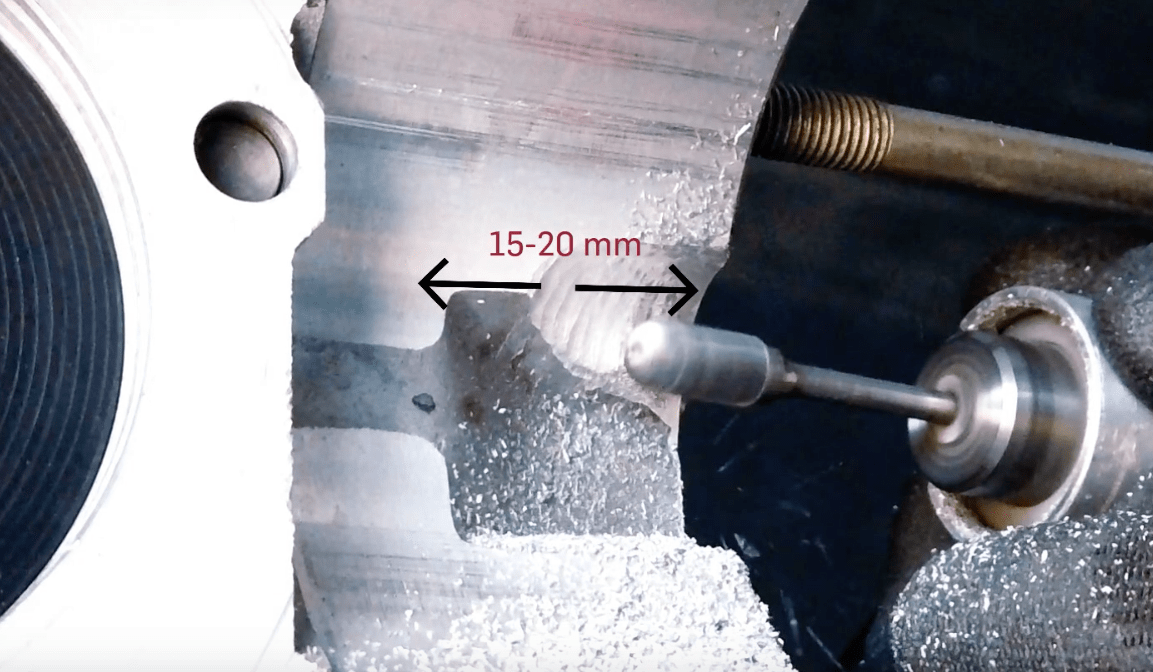
In order to transfer the contour of the overcurrent channels to the motor housing, the easiest way is to place the matching cylinder base gasket on the housing and thus transfer the contour to the housing.
The sealing surface is best marked with a foil pen. Then the contour of the overflow channels is marked with the aid of the cylinder base gasket.
A milling cutter is then used to adapt the contour in the motor housing. It is not necessary to mill the channel exactly as deep as in the original motor housing.
The BGM 177 cylinder is designed from the basic construction so that the piston offers a sufficient cross section.
The generated surface of the adapted channel may be milled rough. Further polishing is not necessary. As long as there are no more rough corners and edges, a slightly roughened surface is perfect.
After the channels have been milled and the housing has been cleaned again, the assembly process continues

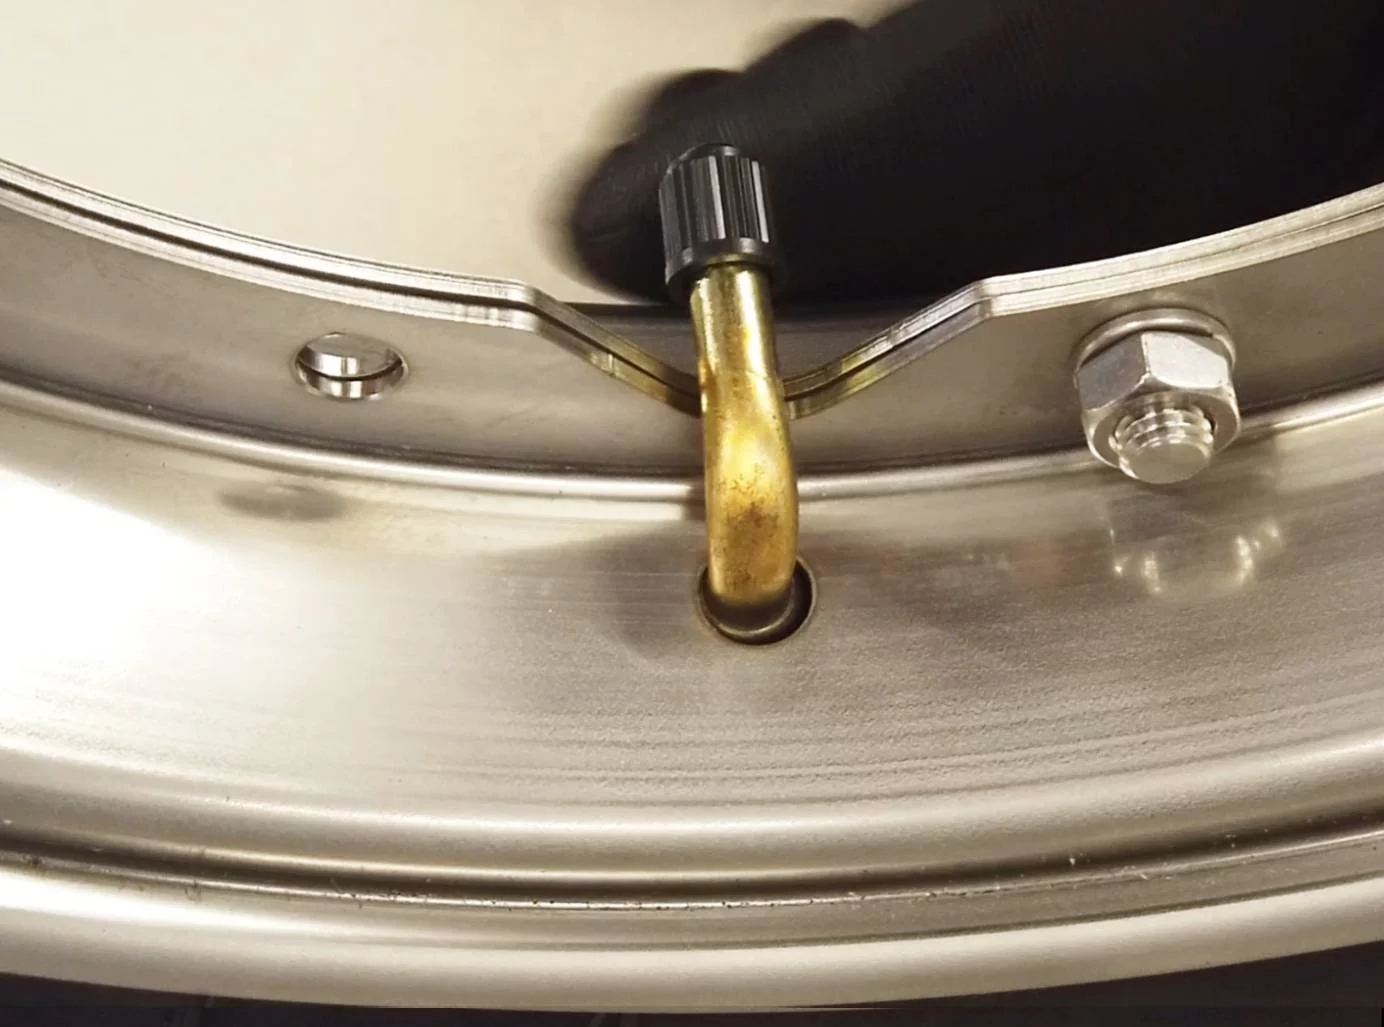
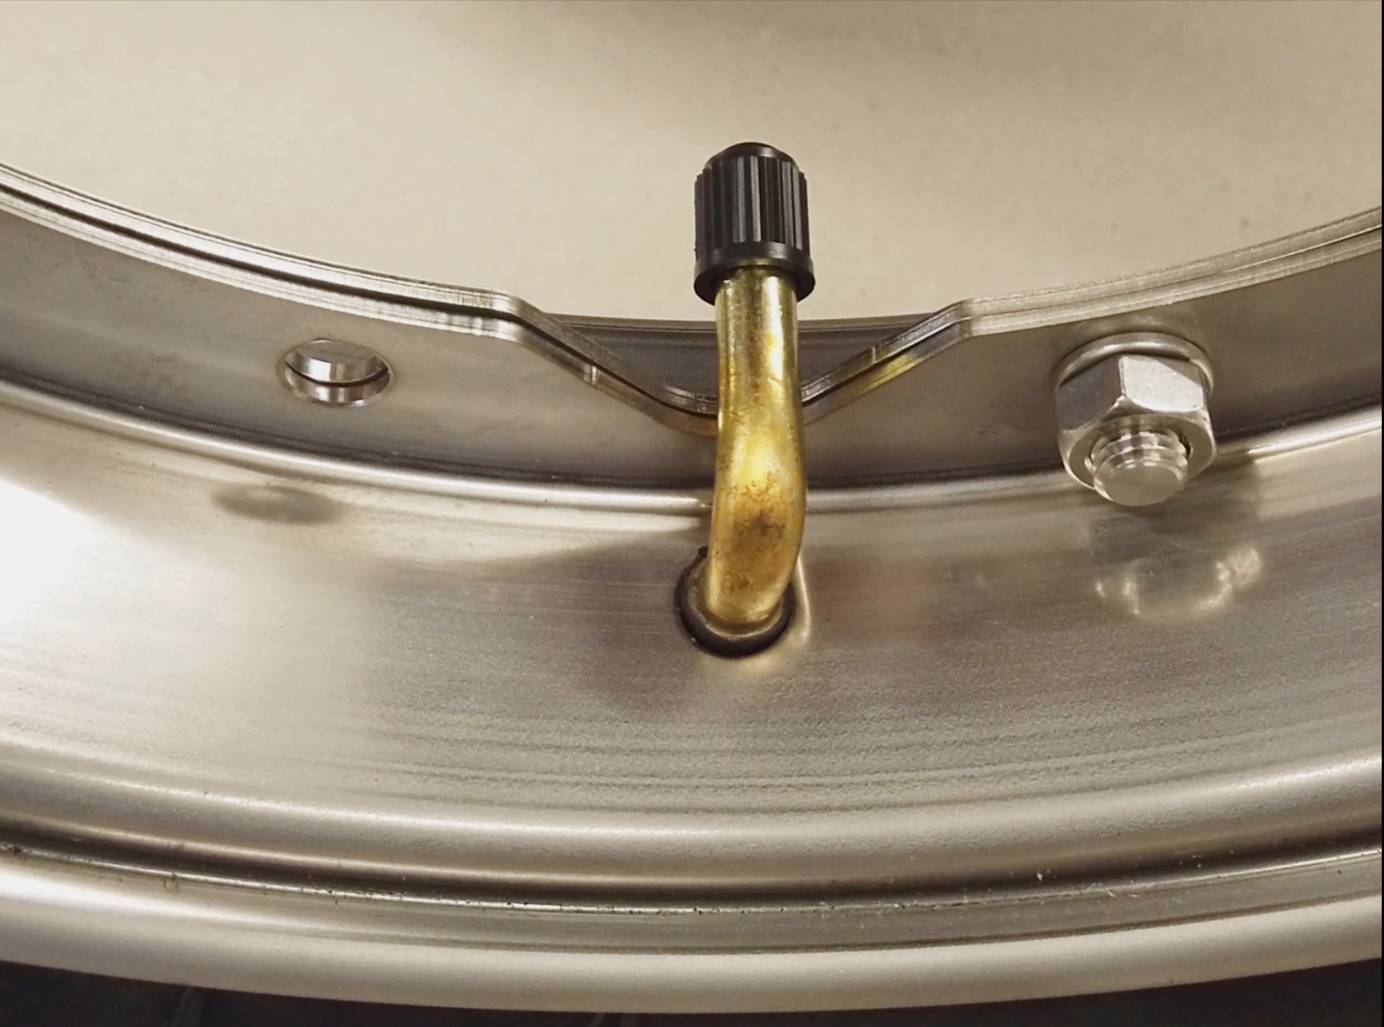
Using our bgm Classic tires as an example, we show the correct mounting of the tire (split rim).
The tube inside is subject to flexing when the tire is unrolled and therefore it is useful to reduce the friction inside by talcum.
The white powder reduces the friction between the tube and the tyre and thus the wear of the tube.
A small amount of talcum powder is spread inside the tire and the tube is filled with air just enough to prevent it from expanding and also sprinkle some talcum powder on it.
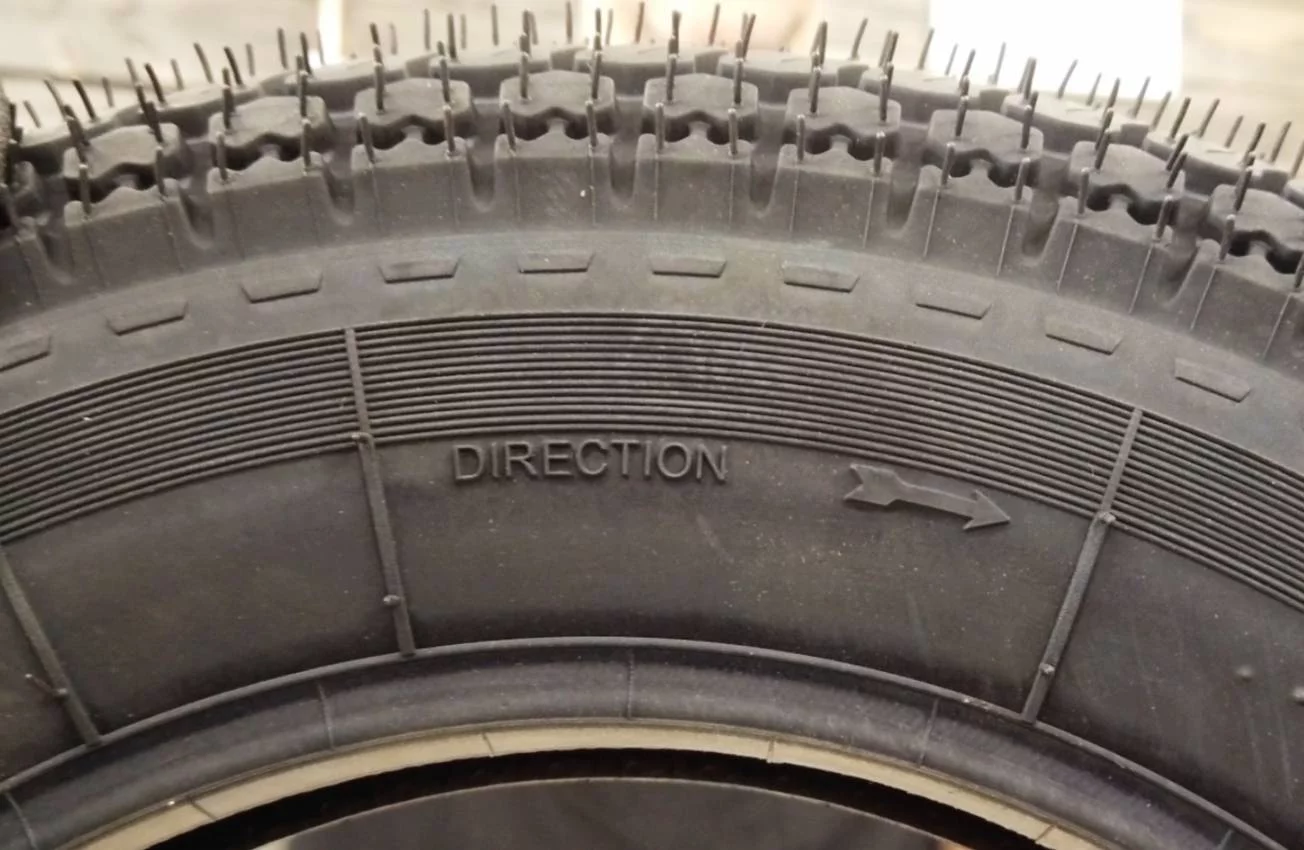
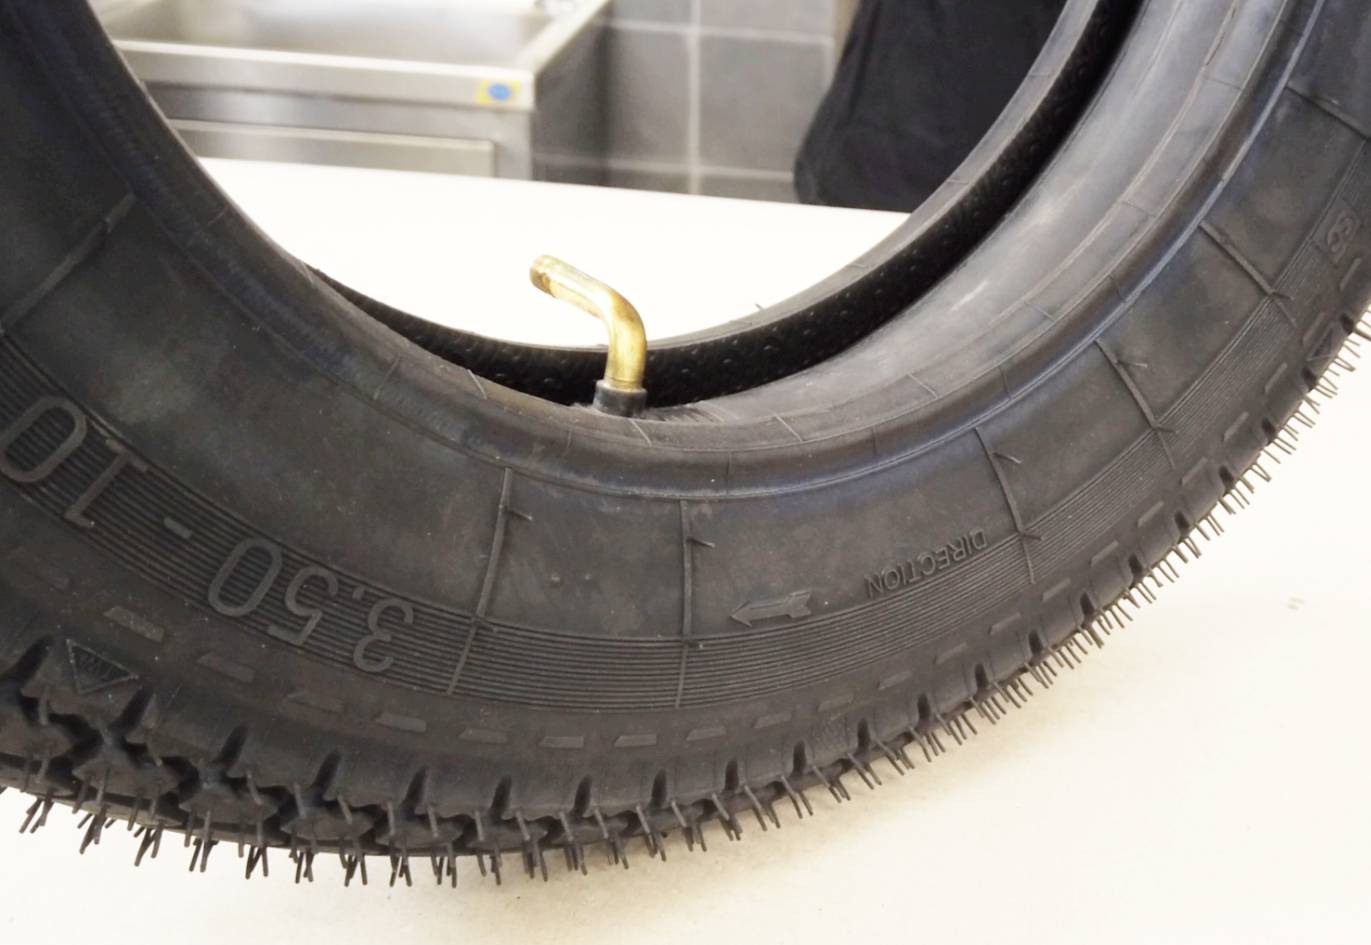
Before fitting the tube, first check that the tyre has a direction of rotation specified by the manufacturer.
This indication can be found on our bgm Classic tire in the form of an arrow on a tire sidewall and points to the direction of rotation of the tire when driving.
The tube is then inserted to match the direction of rotation of the tyre, so that the valve points to the left side in driving direction, typical for Vespa.
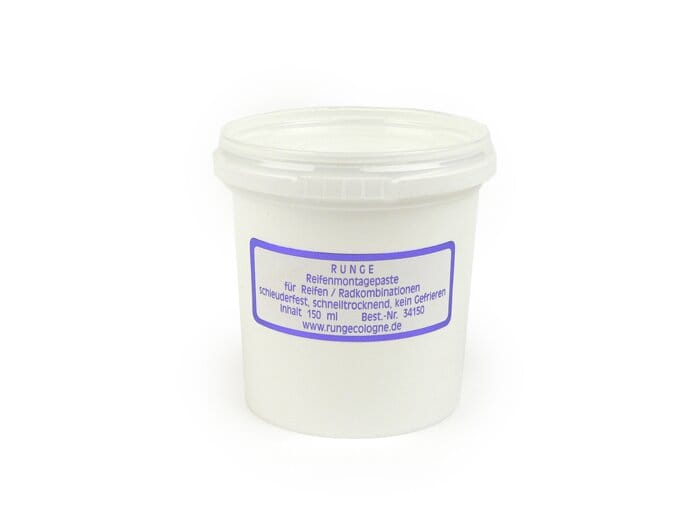
For mounting the tyre on the rim, the so-called mounting paste is a real help. With it the tyre can be pushed very far onto the rim. This makes it much easier to screw the two-piece rim together.
First the valve is put through the wide half of the rim and then the rim is pushed into the tyre.
The narrow half of the rim also has an opening through which the valve is accessible. When inserting the valve into the tire, make sure that the valve hole is aligned with the hole in the wide rim half.
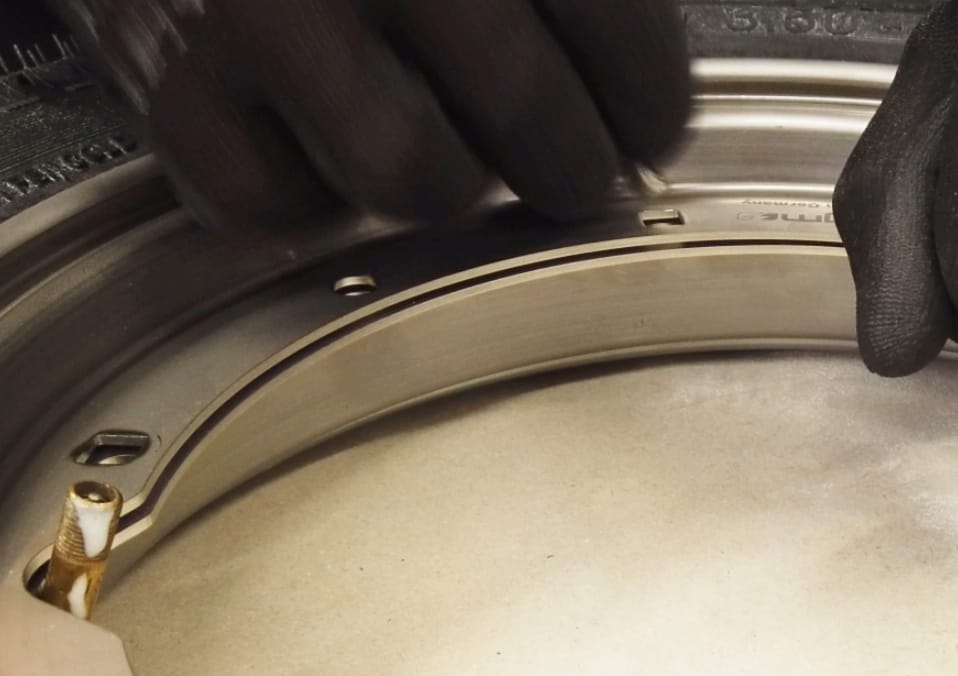
Our bgm stainless steel rims have exchangeable bolts. Please make sure that the head of the bolt is inserted into the square to prevent rotation.
The five nuts of the rim halves are fixed crosswise with 16 – 18Nm. When fastening, make sure that the tube is not clamped between the rim halves.
Then inflate the tyre with 2 bar and check that the tyre and valve are correctly seated in the rim.
Ready
Music: Rene Winkler from SC / NXT Level Title: First one dub 4

Next week we will start with our Vespa Tutorial Videos, a series from the Vespa Platónika bgm177 project of the Scooter Center.
Platónika is the name of the scooter. A Vespa PX, which we completely rebuild with new parts from the Scooter Center stock. Of course we use our best BGM parts. Benefit from our know-how, get lots of tips and take a look behind the scenes.
Follow the project here on the Scooter Center blog:
https://blog.scooter-center.com/category/sc-shop-demonstrator/platonika/
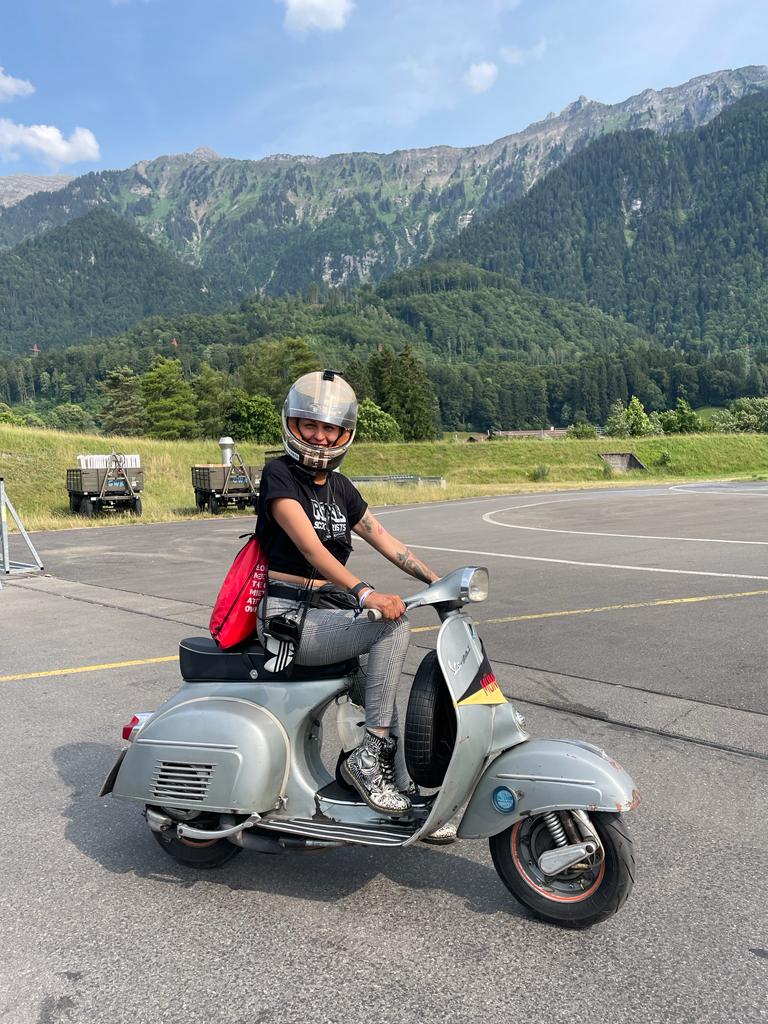
Hello I’m Maryzabel and I do part of the Scooter Center team. In the SC Newsblog I will show you my adventures here and give you a look behind the scenes.
To build a complete scooter from single components is not an easy task and you need a source, or a shop in this case, with a strong search function and good data base.
Luckily there is a list with the components to complete the Frame LML Star listed on product page of the shop: https://blog.scooter-center.com/vespa-lml-rahmen-teileliste/, this helped us to create ours, with the specialties of BGM and Motonostra.
You can see the Platónika’s wishlist here, with its hundreds of parts
Platónika WishlistThe wishlist in the shop is also the perfect Trojan horse to share your wishes for Christmas, as it can be simply send out by mail.
For the engine treatment I asked the SC technicians for their advice for the perfect touring engine that is reliable, powerful, a pleasure to ride and also not too thirsty.
And they helped me to add the other parts to my list that already contained the Cylinder -BGM PRO 177/187 cc, the Seat -BGM PRO SportTouring and the Schock Absorber -BGM PRO SC F1 SPORT.
Hello I’m Maryzabel and I do part of the Scooter Center team. In the SC Newsblog I will show you my adventures here and give you a look behind the Scenes.
My final trainee step brought me to the technical department. So I had to put away the notebook and put on the work gloves. Additionally to the technical work, I will also do some video footage on the work that we do.
One idea of me was to restore a Vespa Smallframe so that I get back on a Vespa gain instead of using the public transport. With everyone very passionate about scooters, they instantly liked the idea. After some head scratching about the state of my Smallframe, the technicians came up with another idea. Why not build a scooter from scratch. ALL YOU NEED for that is here and the plan was to use one of the LML frame sets and combine it with an engine with the full bgm treatment. The imagination started and everybody was hooked by the idea.
So we are now not only going to build the Vespa of my dreams, we will also do un-boxing videos, reviews and tutorials.
And for sure we will show you the build of the Vespa step by step. She will be a platonic love.
Here we have the teaser of the things to come.
The trend comes from the automotive industry and the LED technology allowed us to develop these indicators. With its own brand “Moto Nostra” Scooter Center is the first manufacturer that produces and sells indicators with dynamic LED sequential light for Vespa scooters. What’s new:
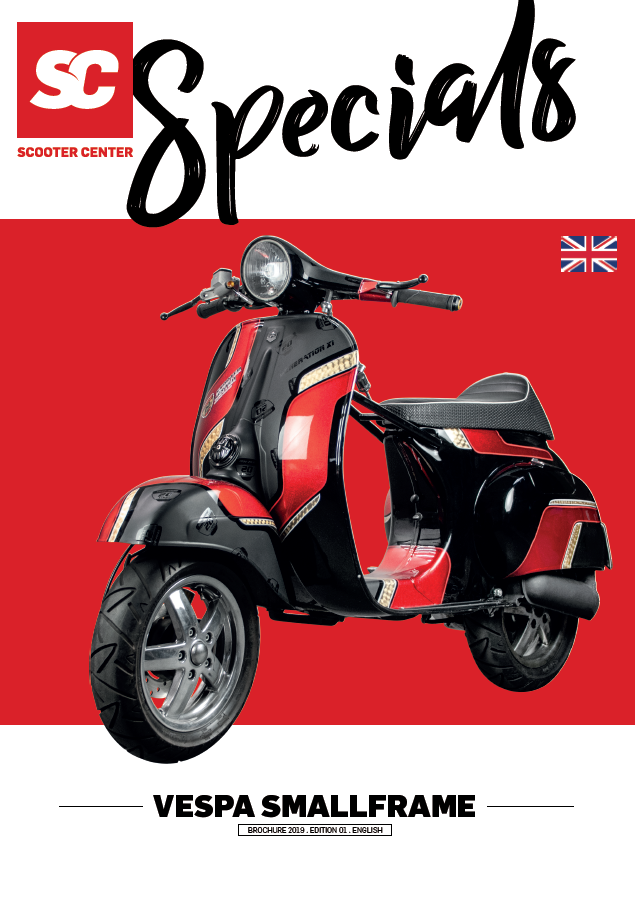
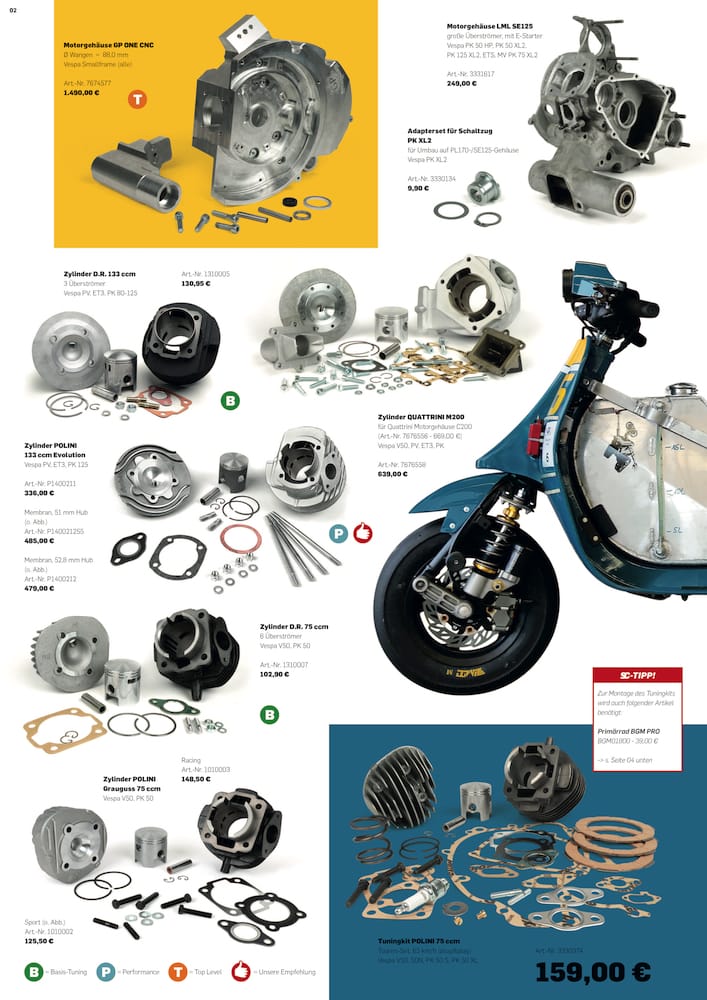
Good news for the new year! For all classic Vespa lovers we have just published the new Scooter Center Specials brochure for the Vespa Smallframe, also in English!
Available soon! You can add the printed version for free to your order: https://www.scooter-center.com/en/search?sSearch=sc+specials
Can’t wait to read the new brochure? click on the button below to download the brochure in PDF format. By clicking on the part numbers you’ll be redirected to the product page in our online shop!
Download here the new brochure!
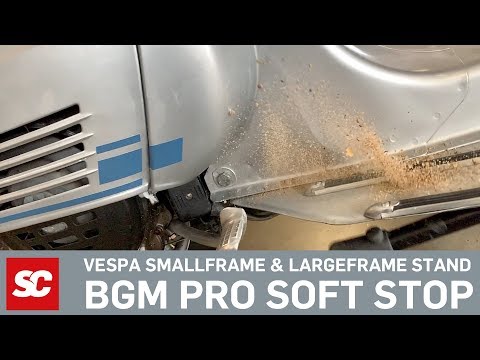
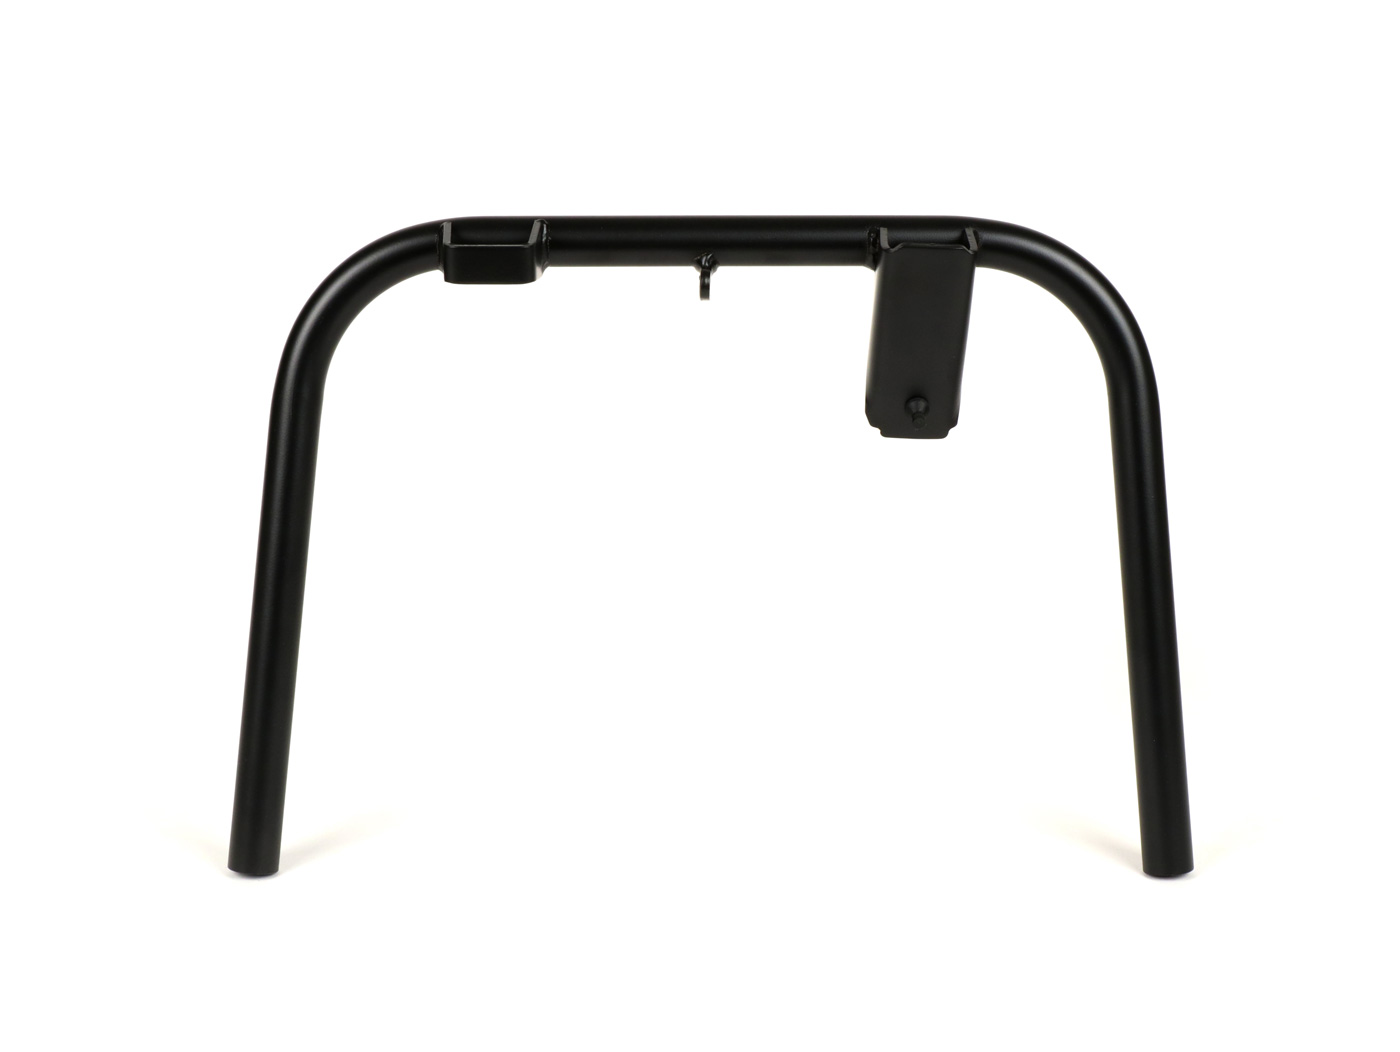
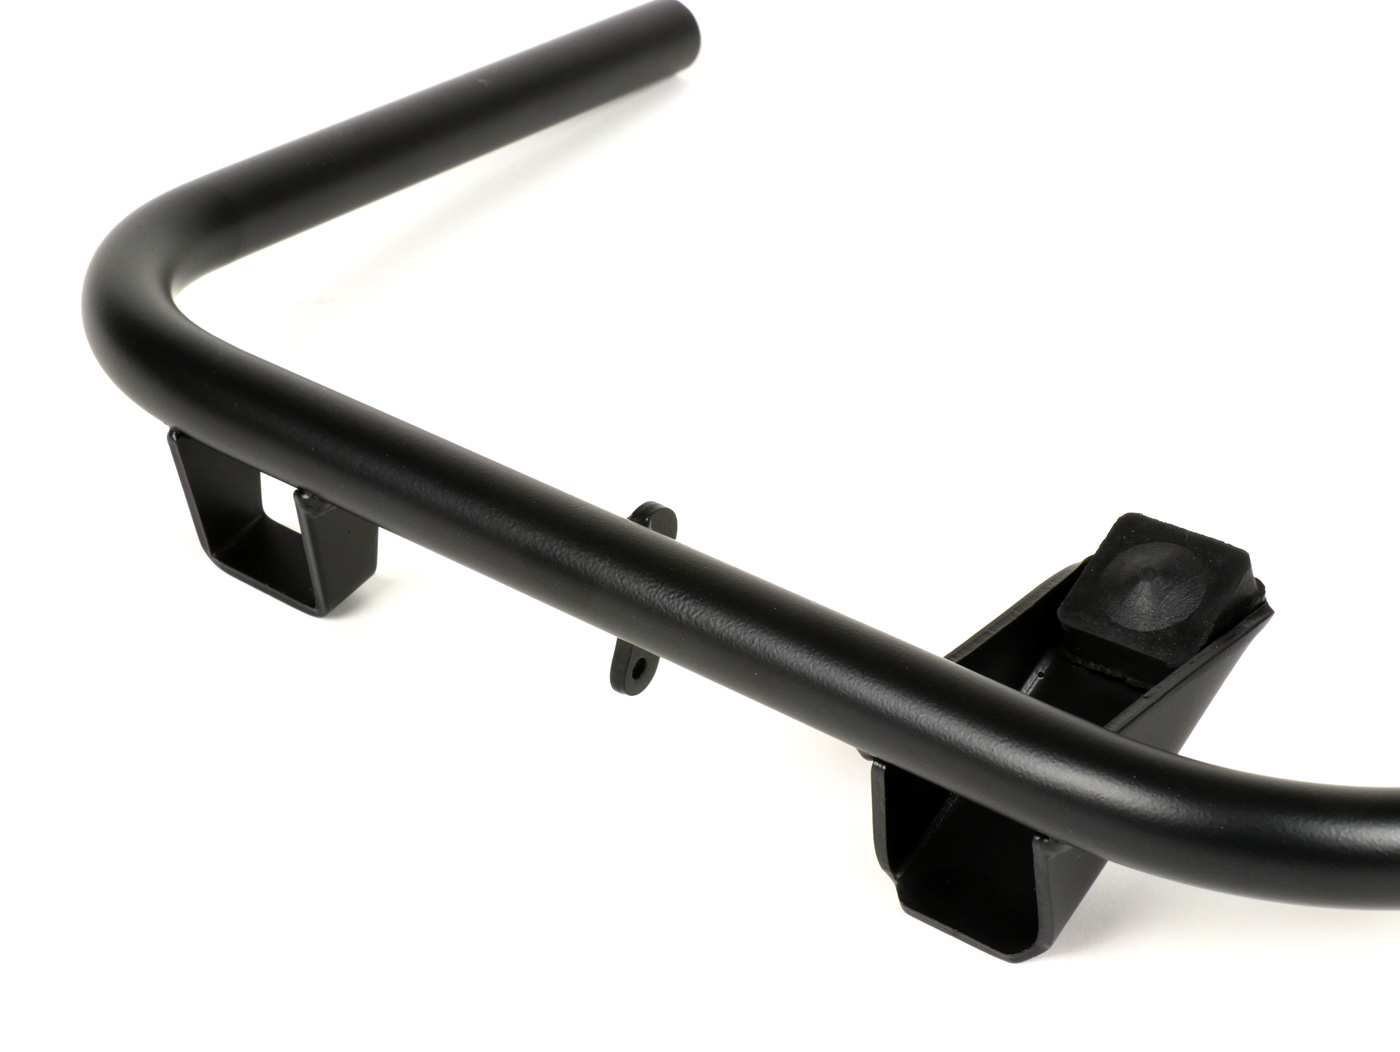
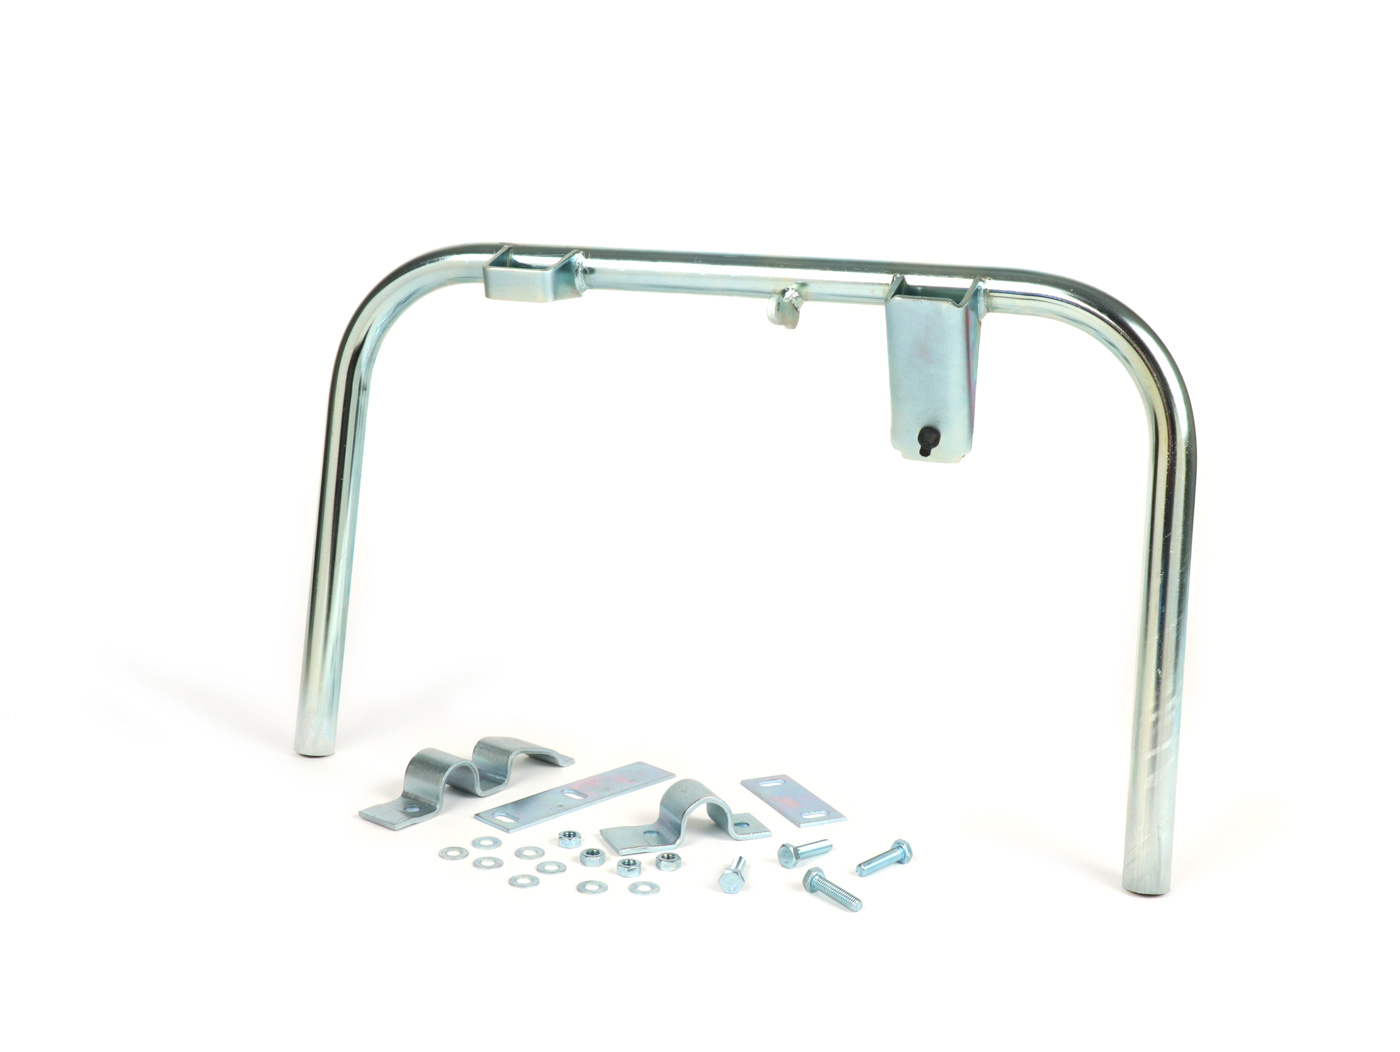
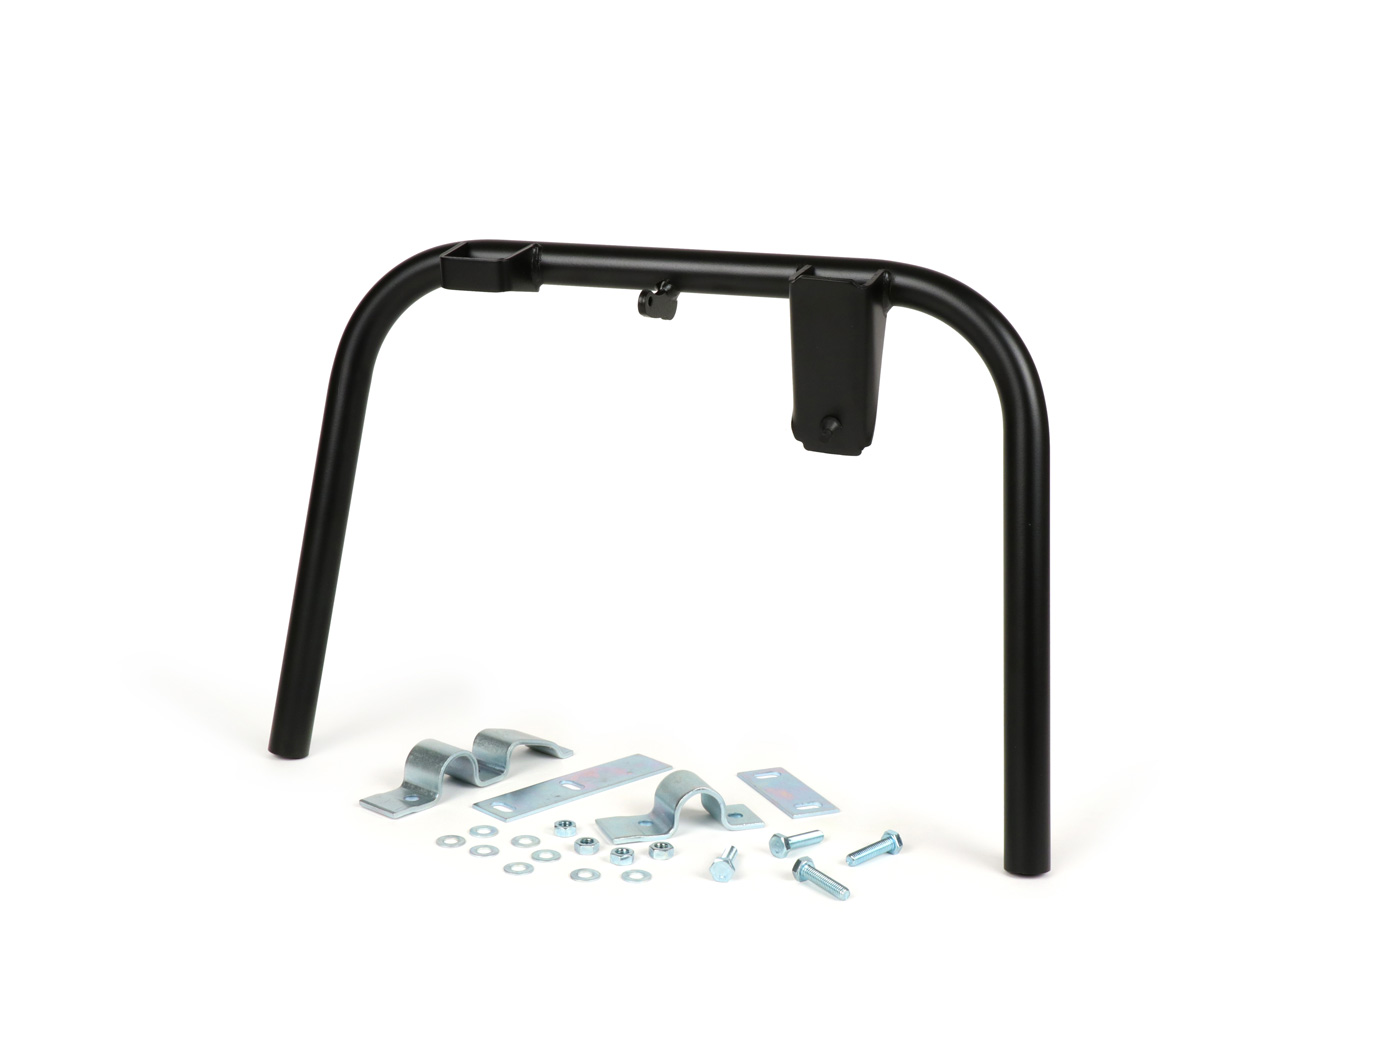
We have developed a new centre stand for Vespa. The new bgm PRO Soft Stop centre stand for Vespa will finally no longer hit hard against the footboard.
The stand is available in galvanised, chrome and black version and fits the vintage Vespa Smallframe and Largeframe models:
It’s just a small detail, but simply brilliant. Thanks to the soft stop system the feet of the bgm PRO centre stand will no longer hit hard against the footboard. Like for the PX models, the centre stand stop is now placed on the stable mounting brackets on the central frame tunnel.
The centre stand will stop at an ideal position and this will prevent the footboard from vibrating.
Thanks to the soft stop system, the centre stand will be not only less noisy when retracting but it will also protect the footboard from the cracks which are usually caused by the genuine stand.
The soft stop centre stand includes mounting brackets that are also provided with additional plates on which the stand is fitted. This prevents the direct contact between the tube of the stand and the frame of the Vespa. Unlike the genuine stand, the new bgm PRO stand will no more rub against the painted footboard.
To mount the stand you’ll need longer screws which are also included in the item. Of course you can use the genuine spring and feet of your stand, alternatively you can order them in our online shop: centre stand feet.
Get here your new centre stand for Vespa!New bgm PRO centre stand: the technical innovation which makes the difference!