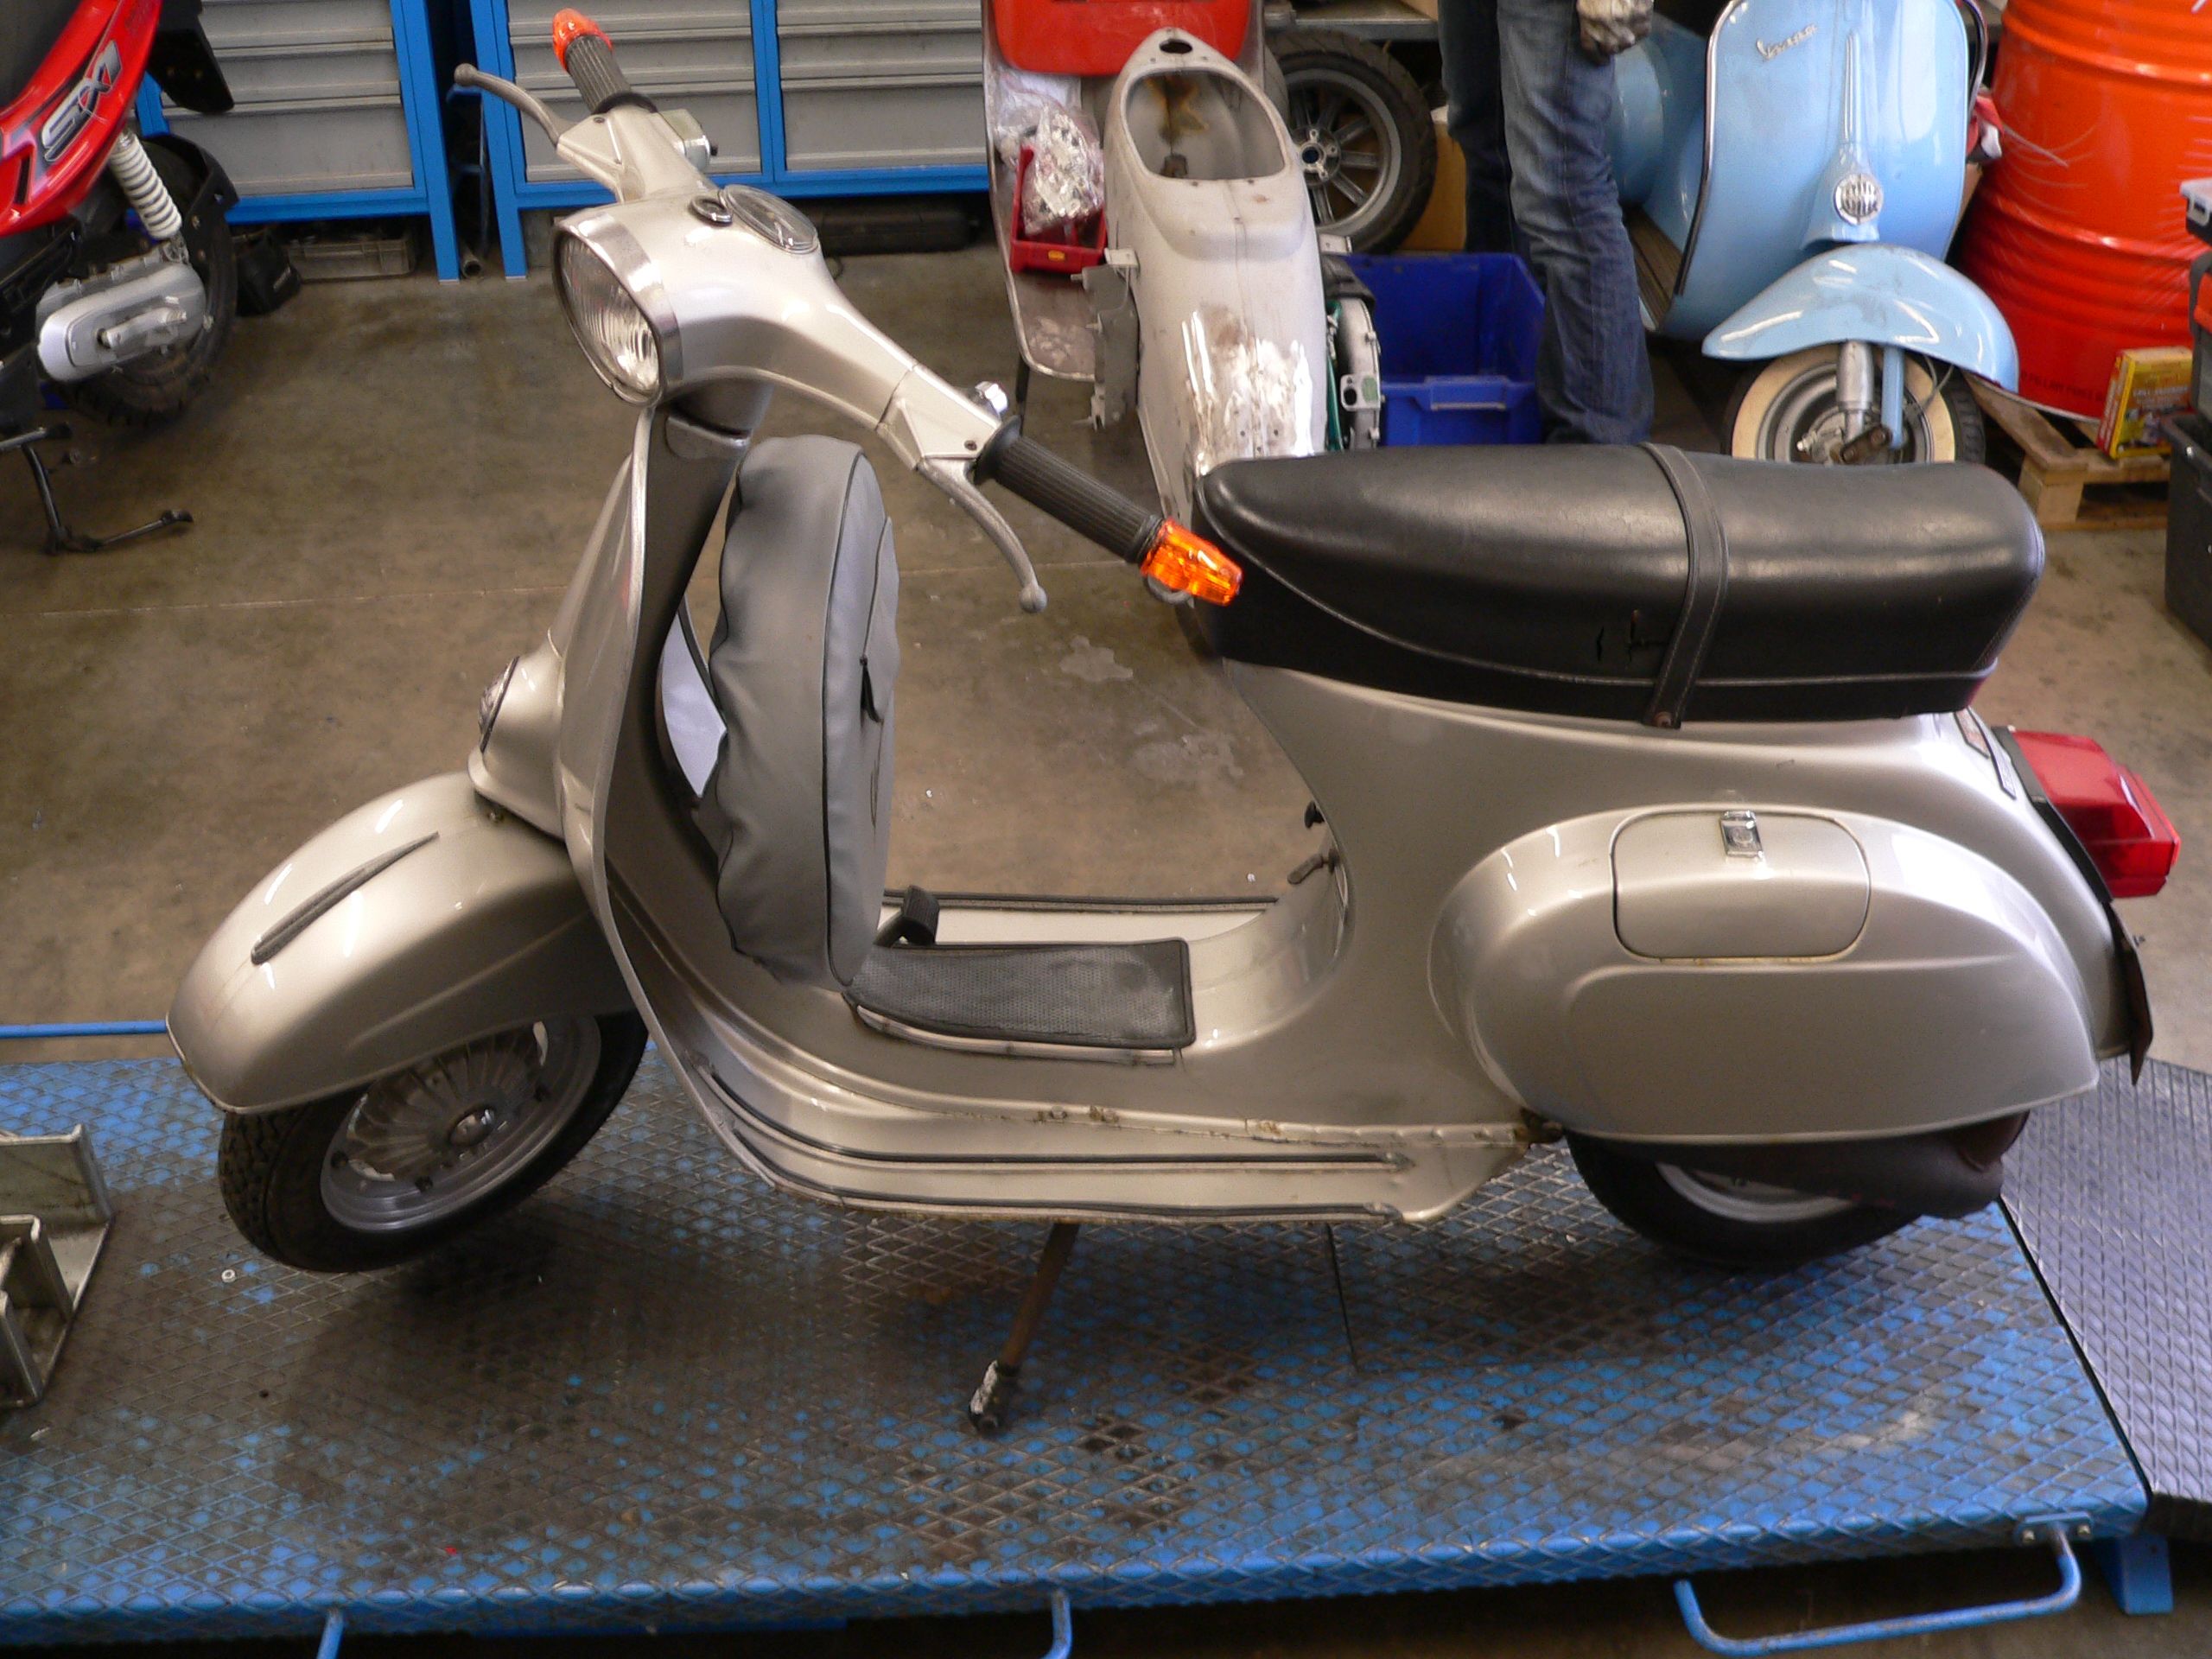
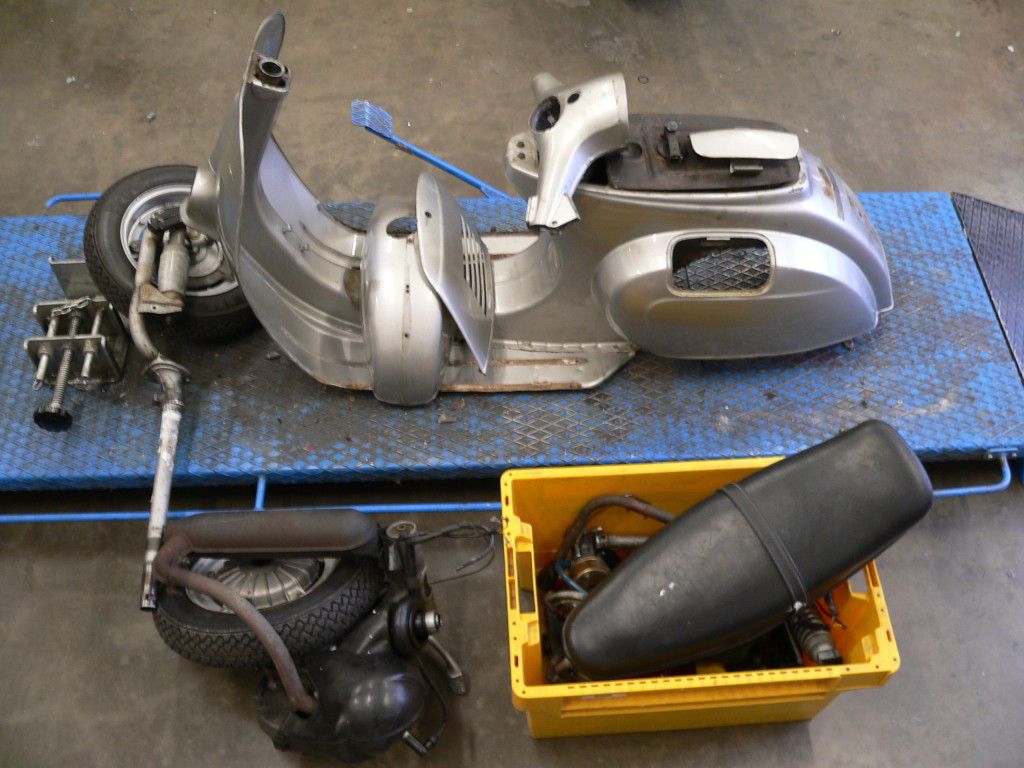
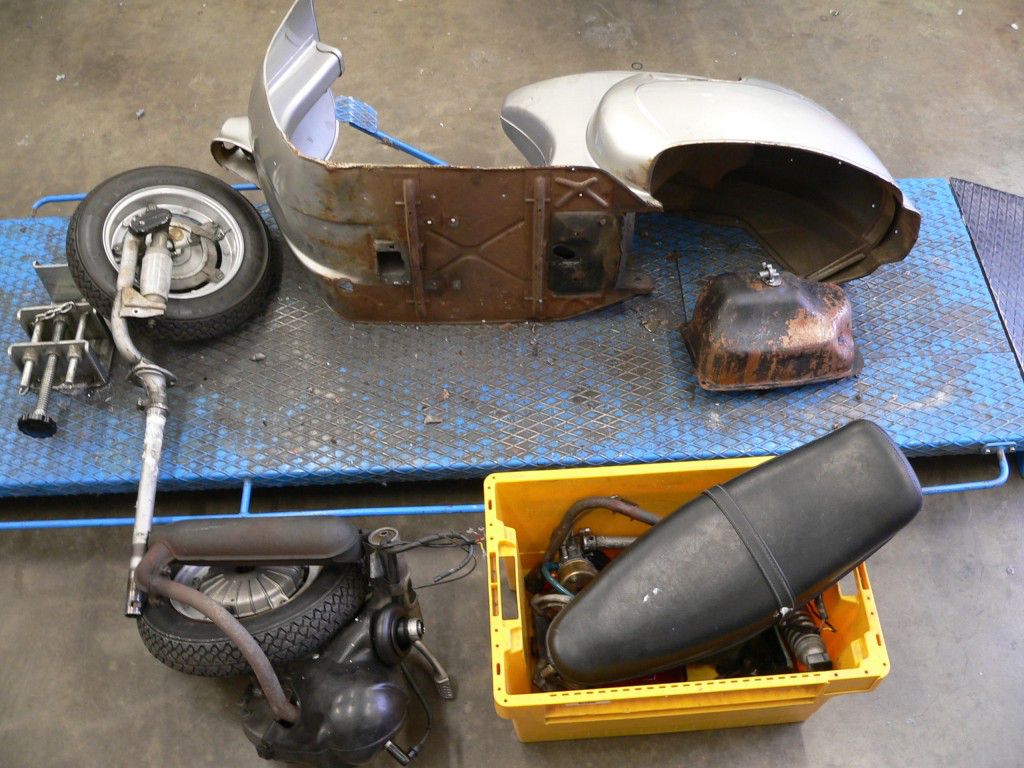
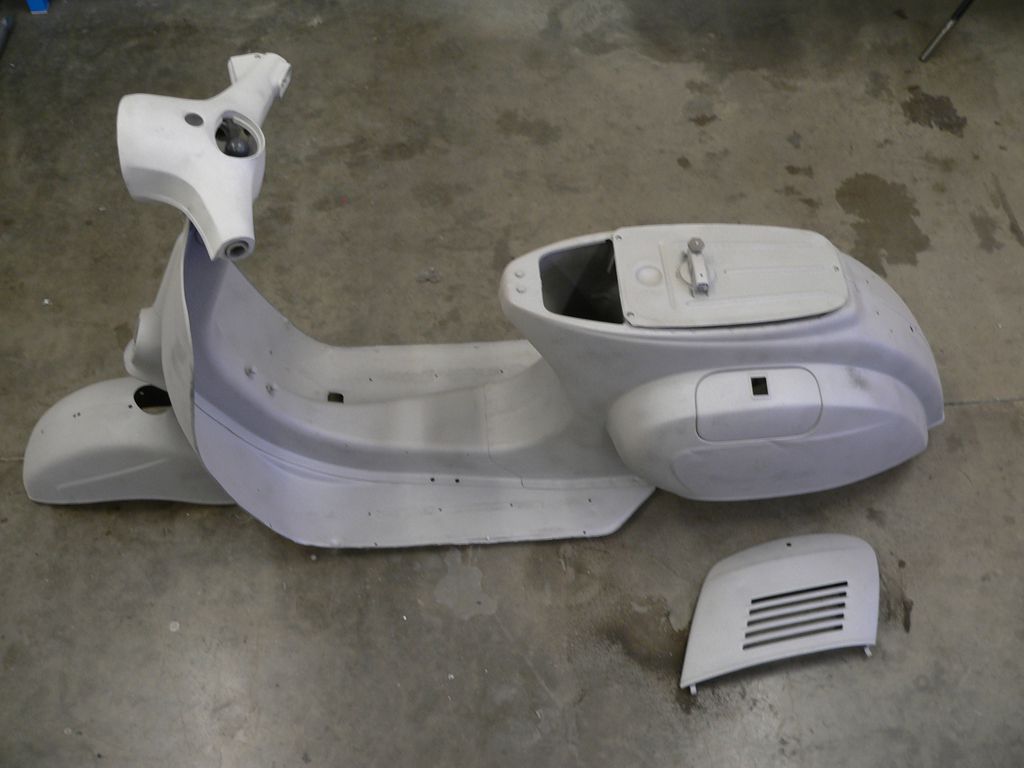
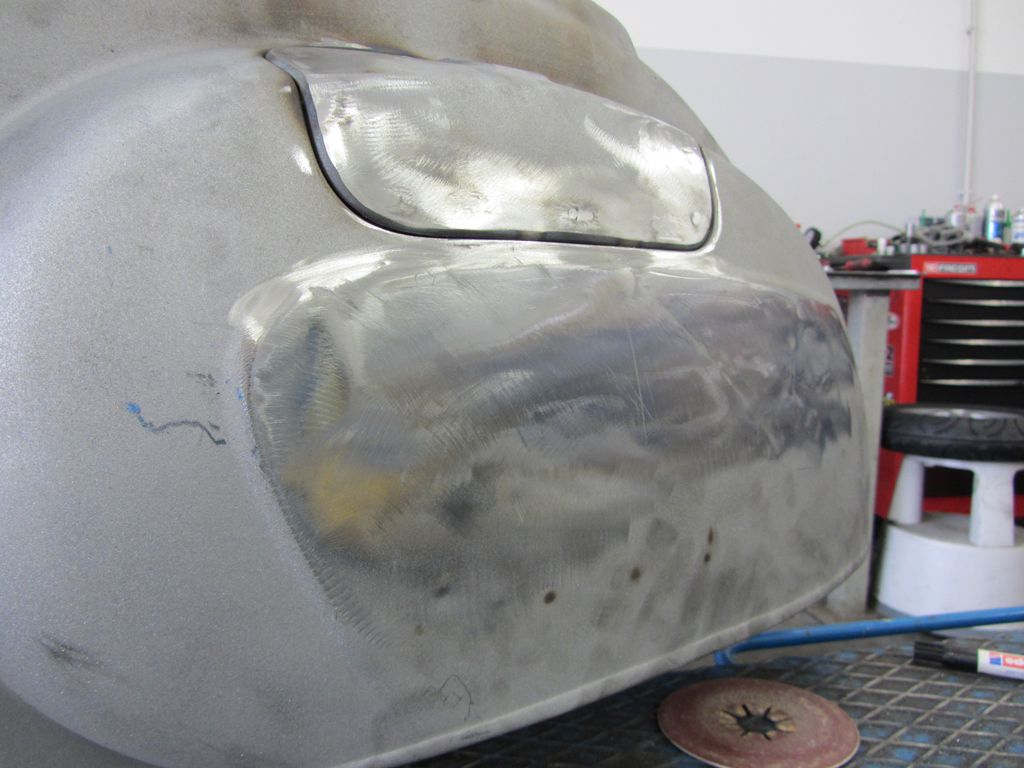
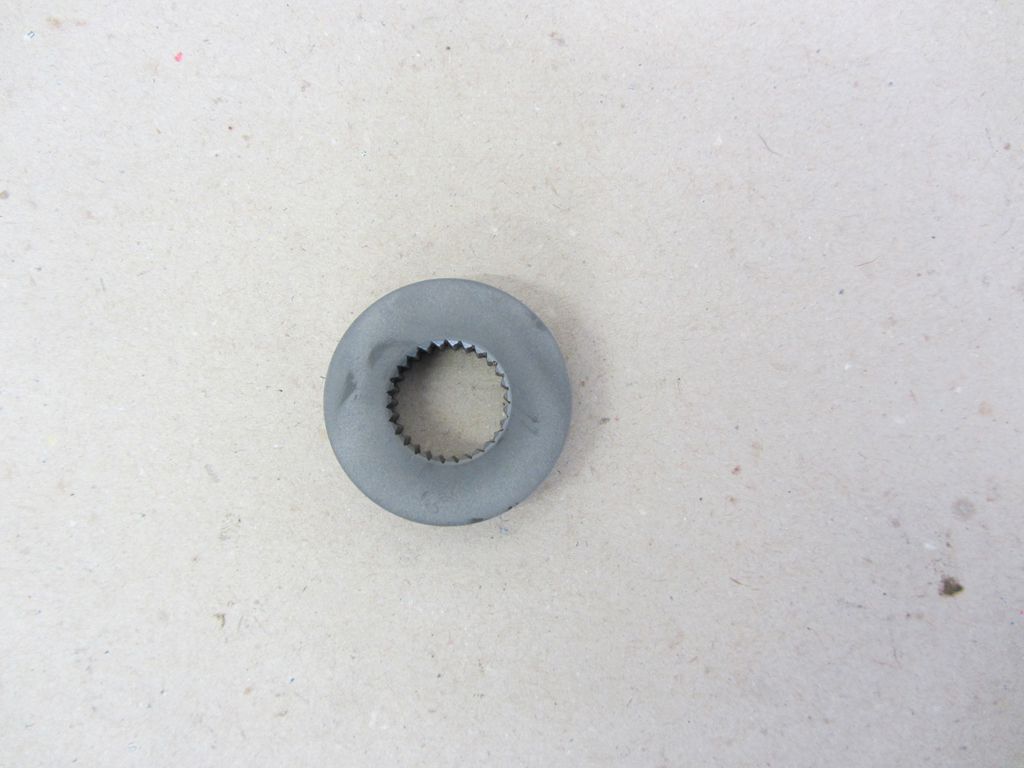
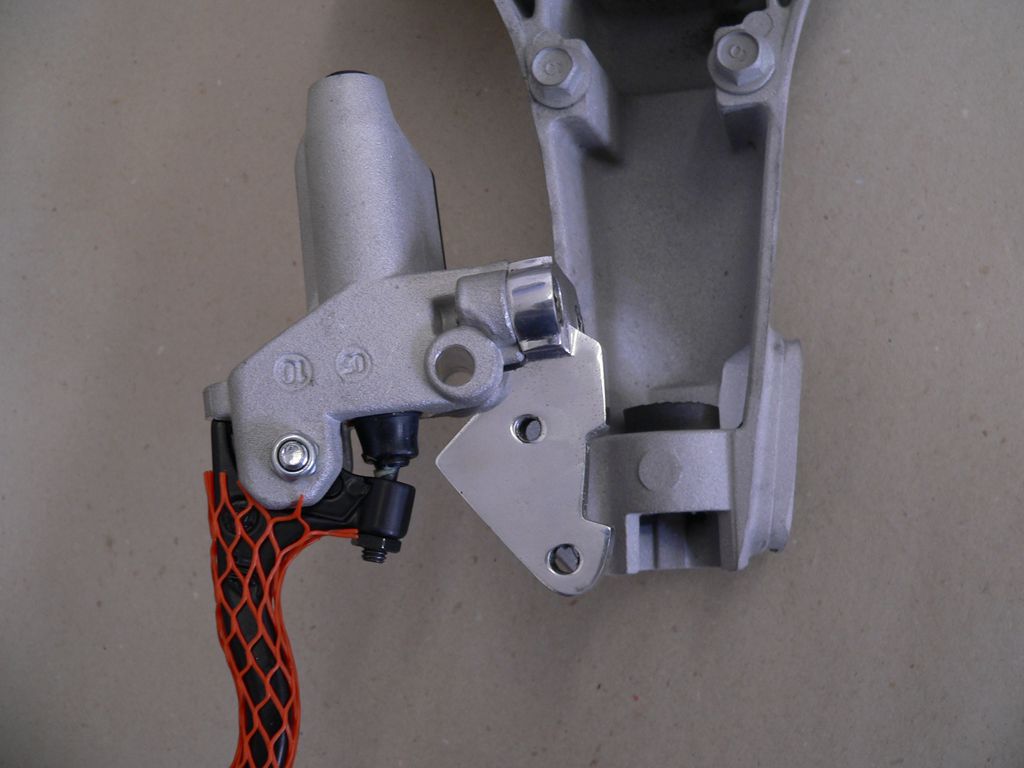
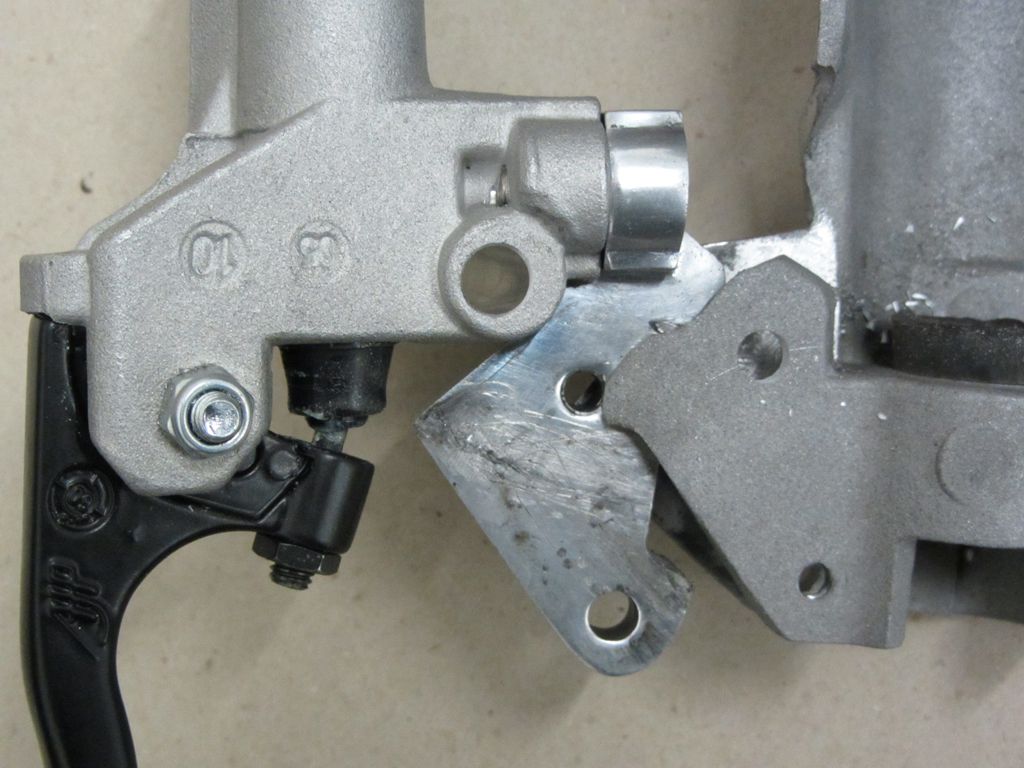
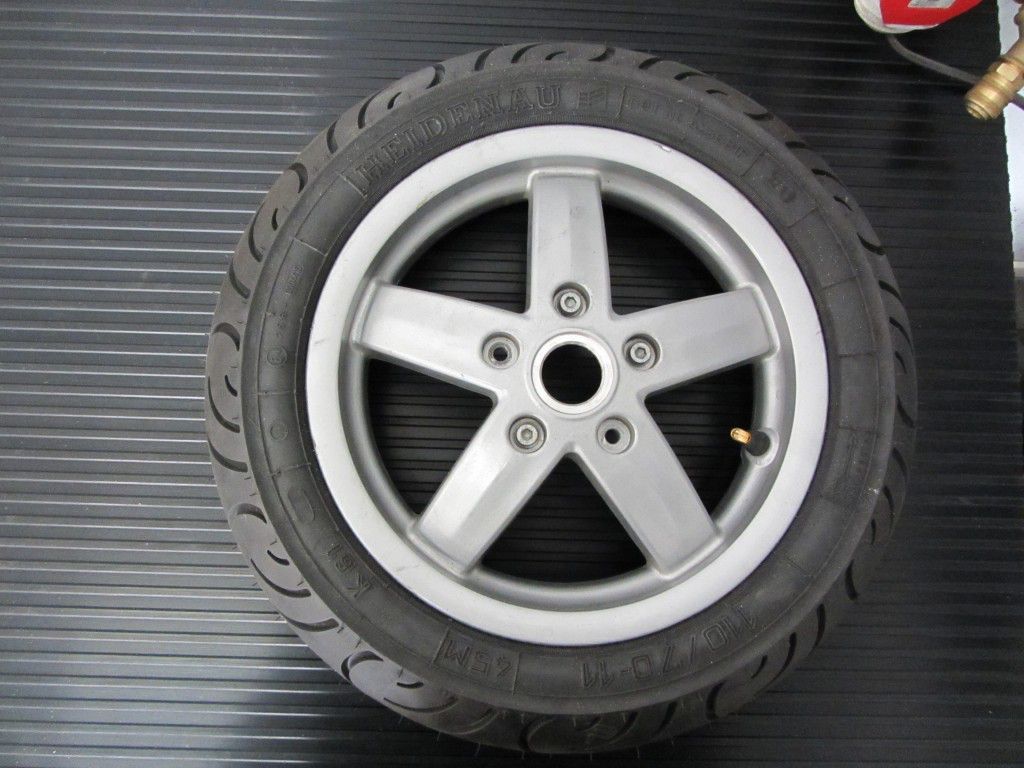
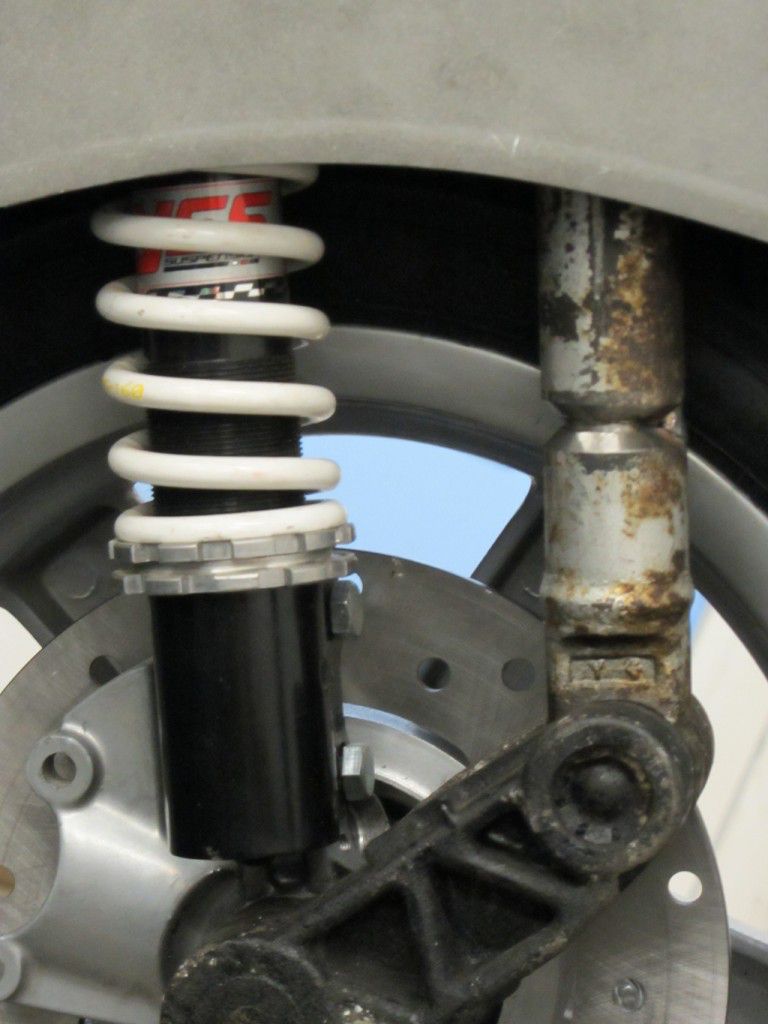
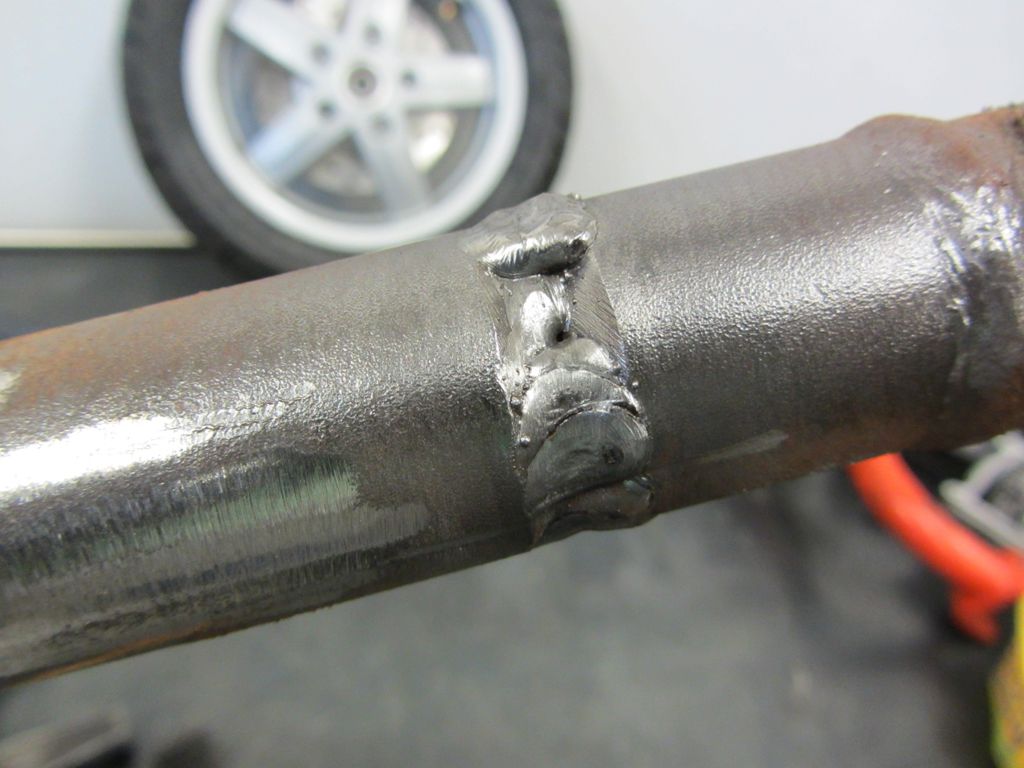
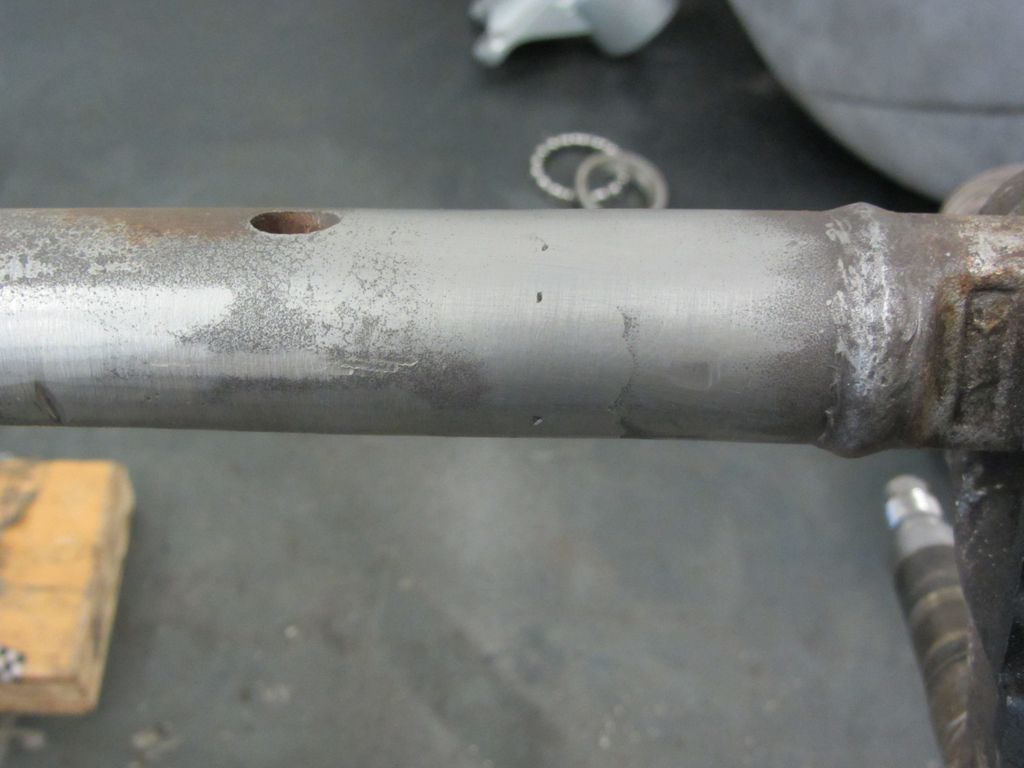
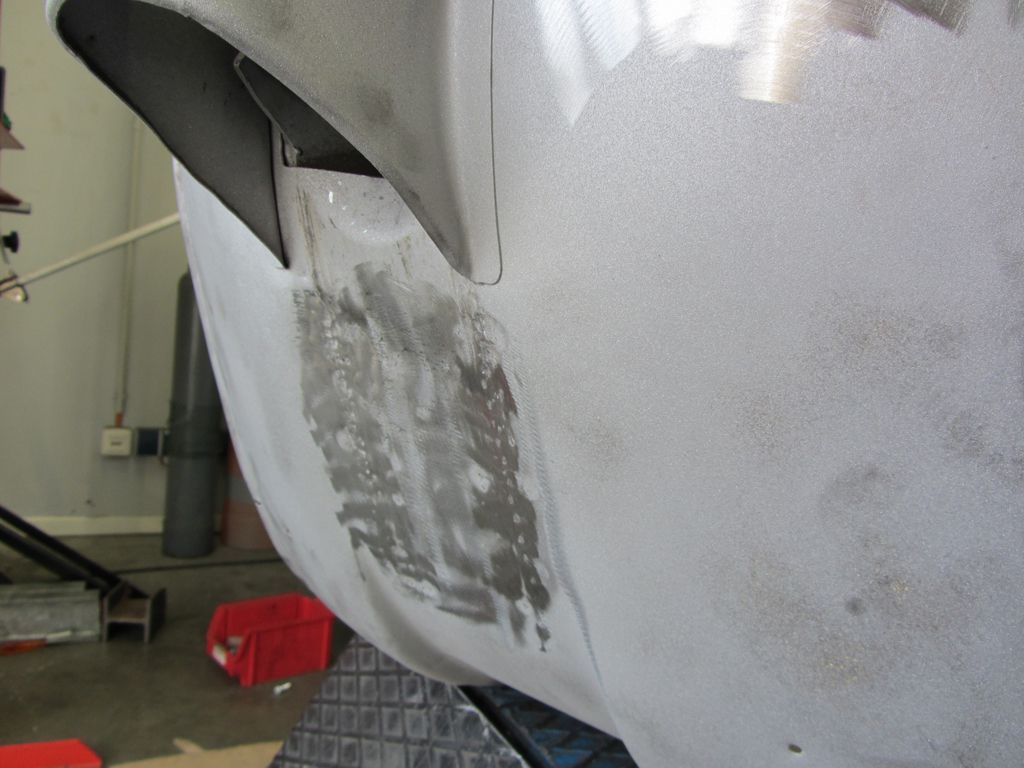
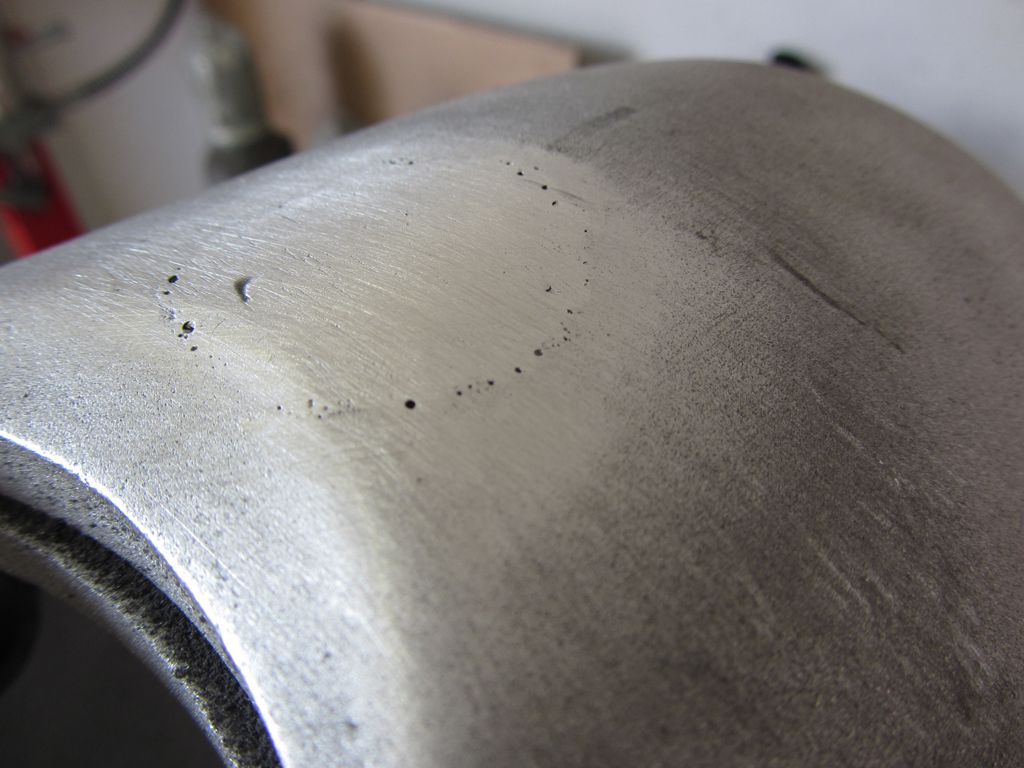
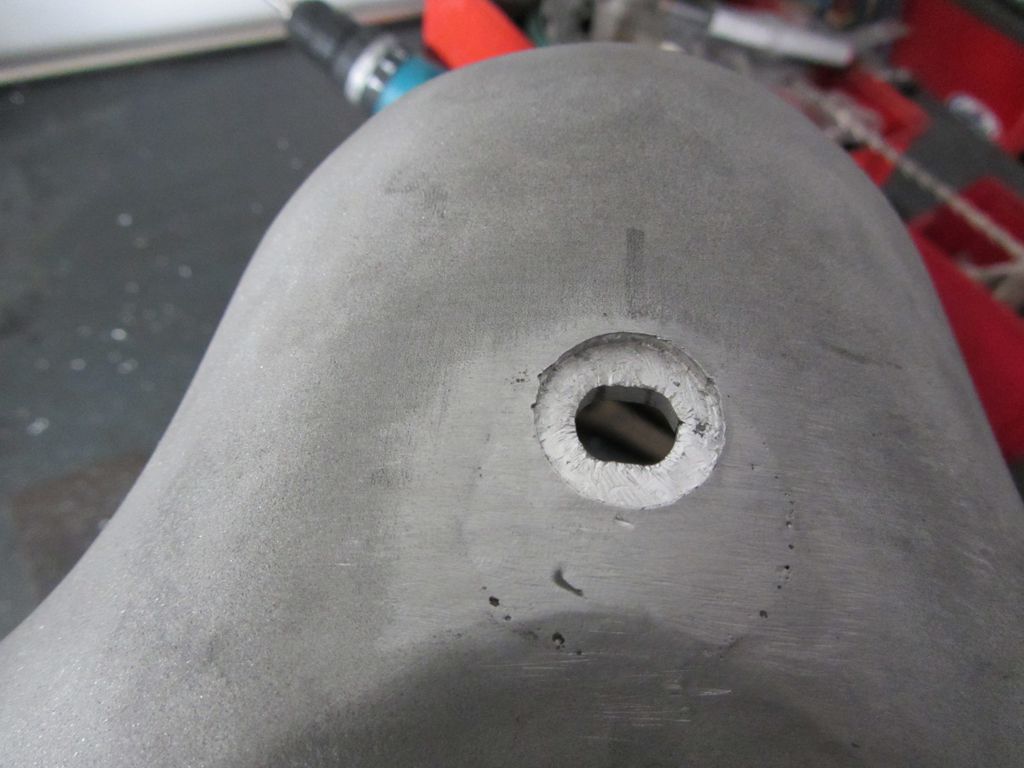
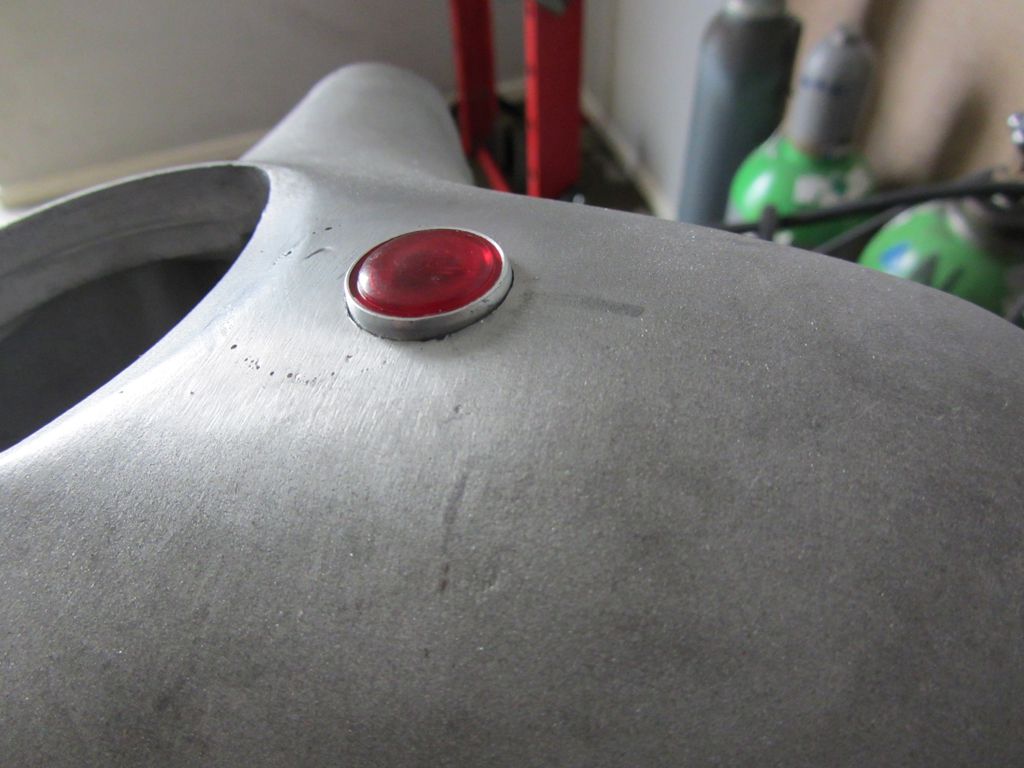
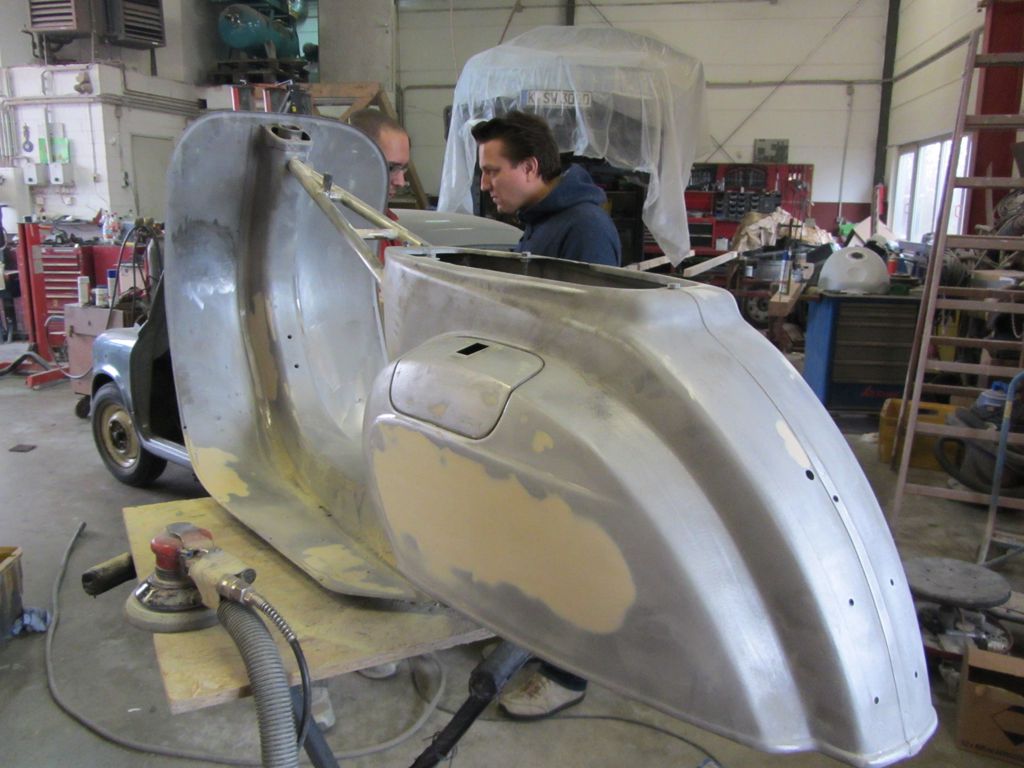
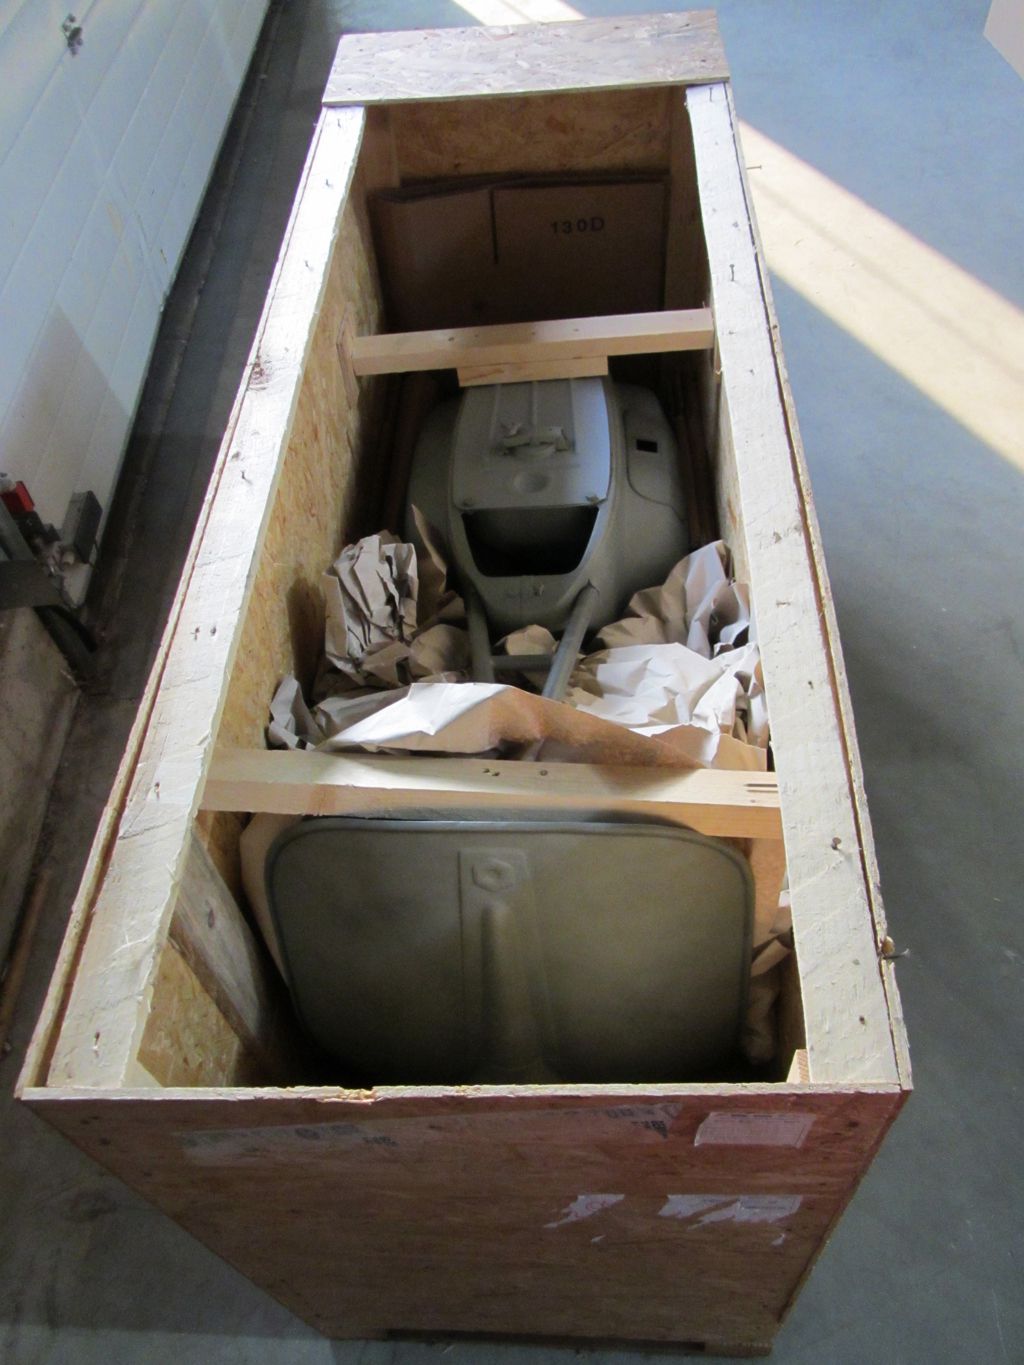
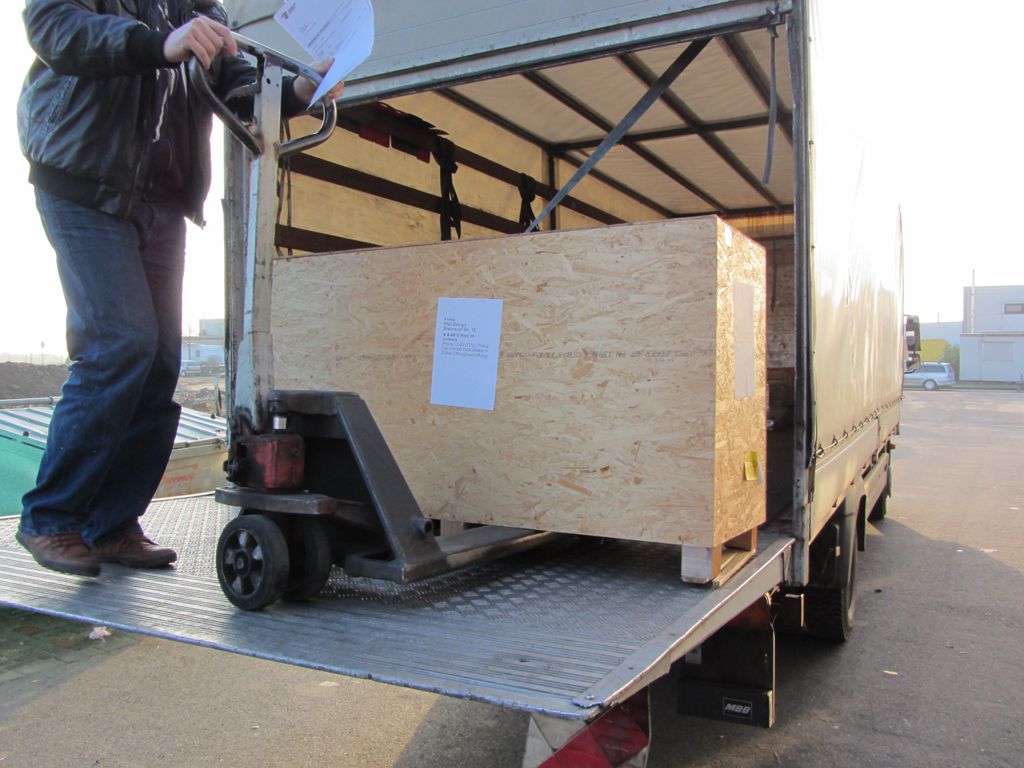
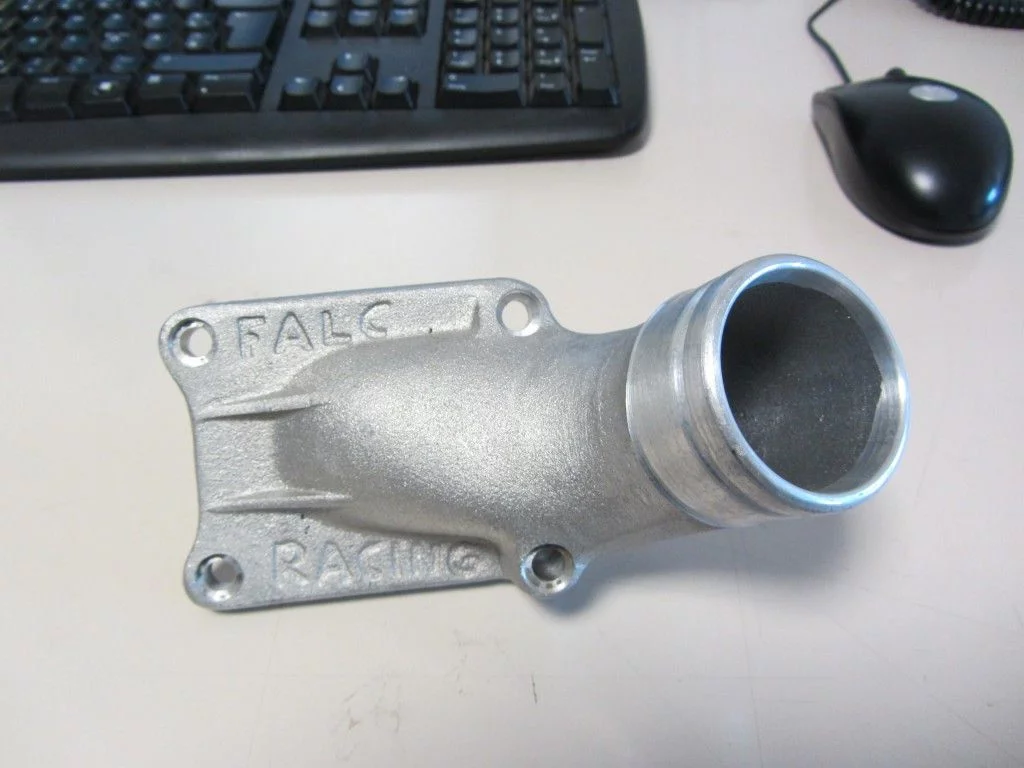
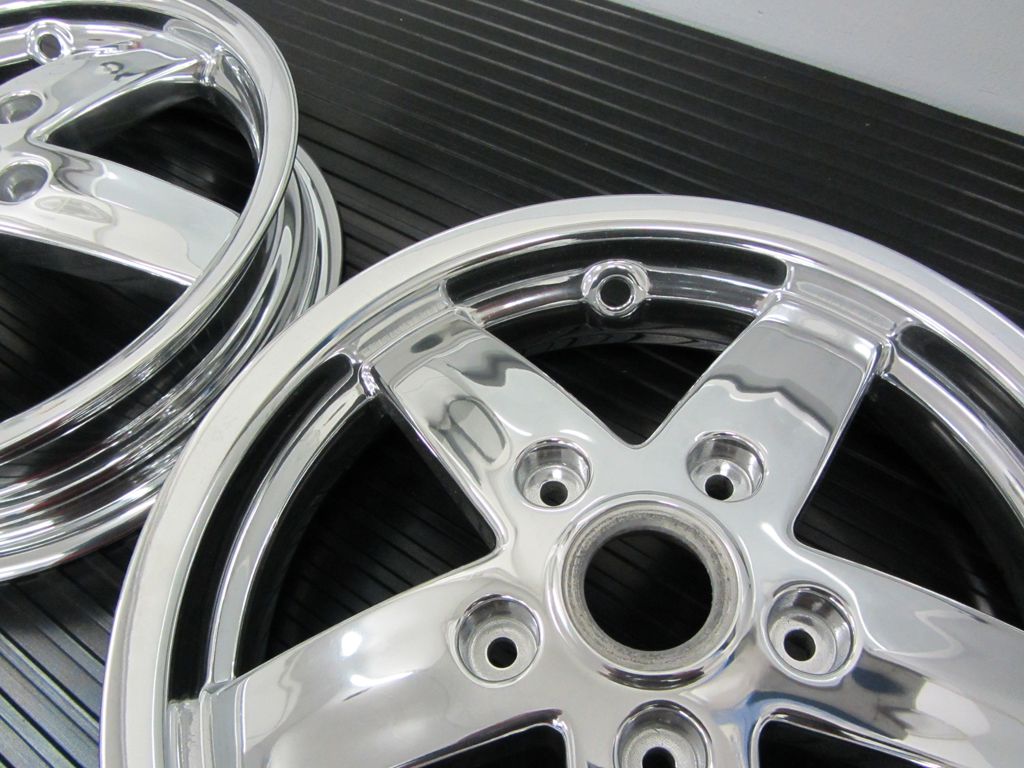
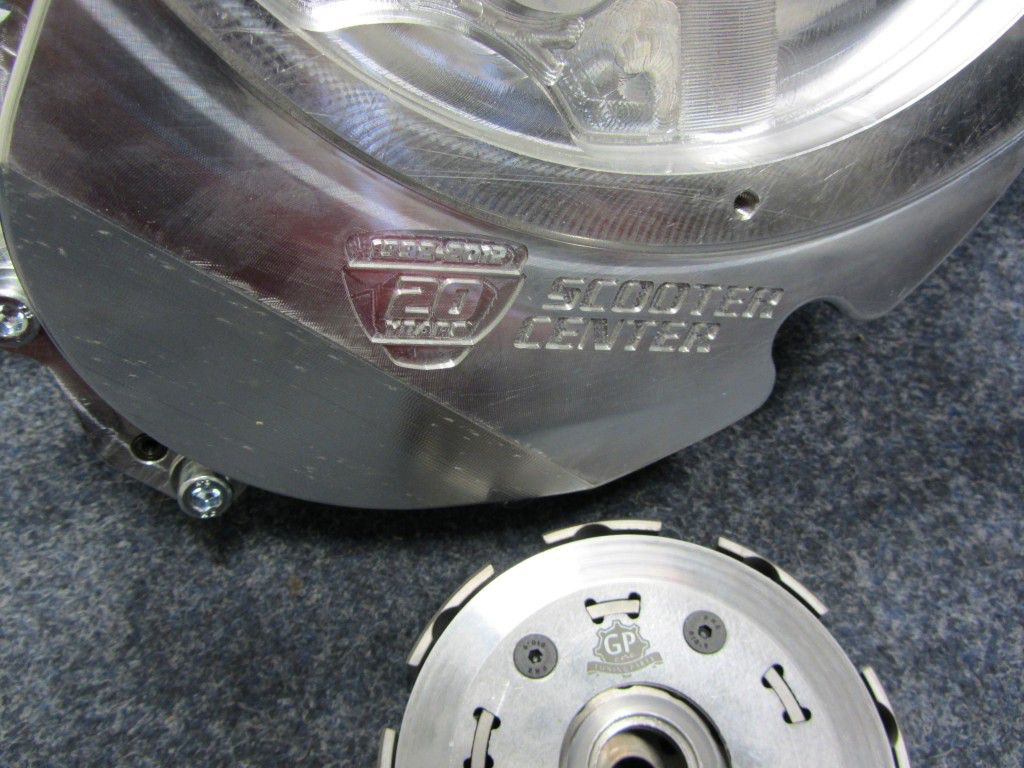
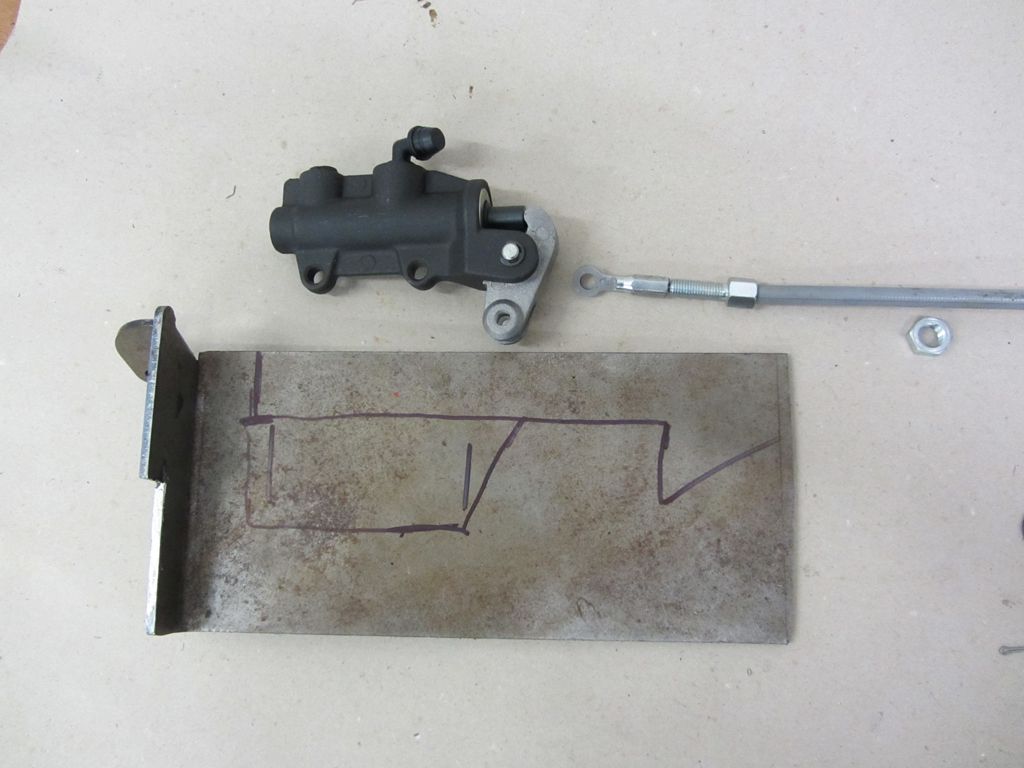
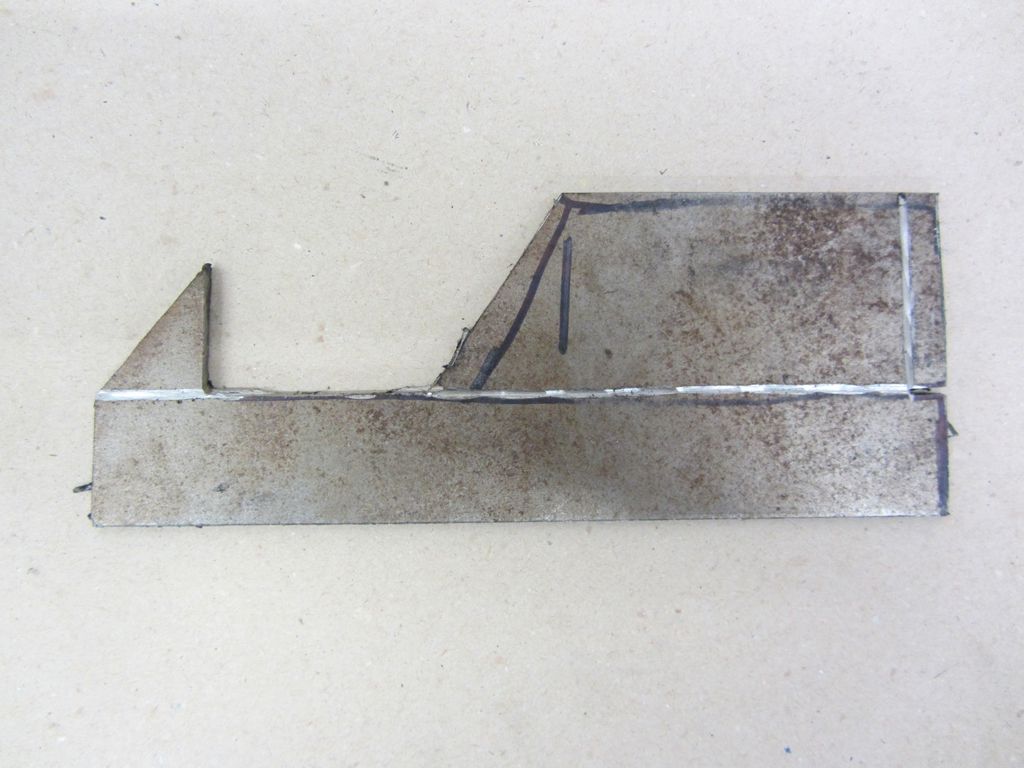
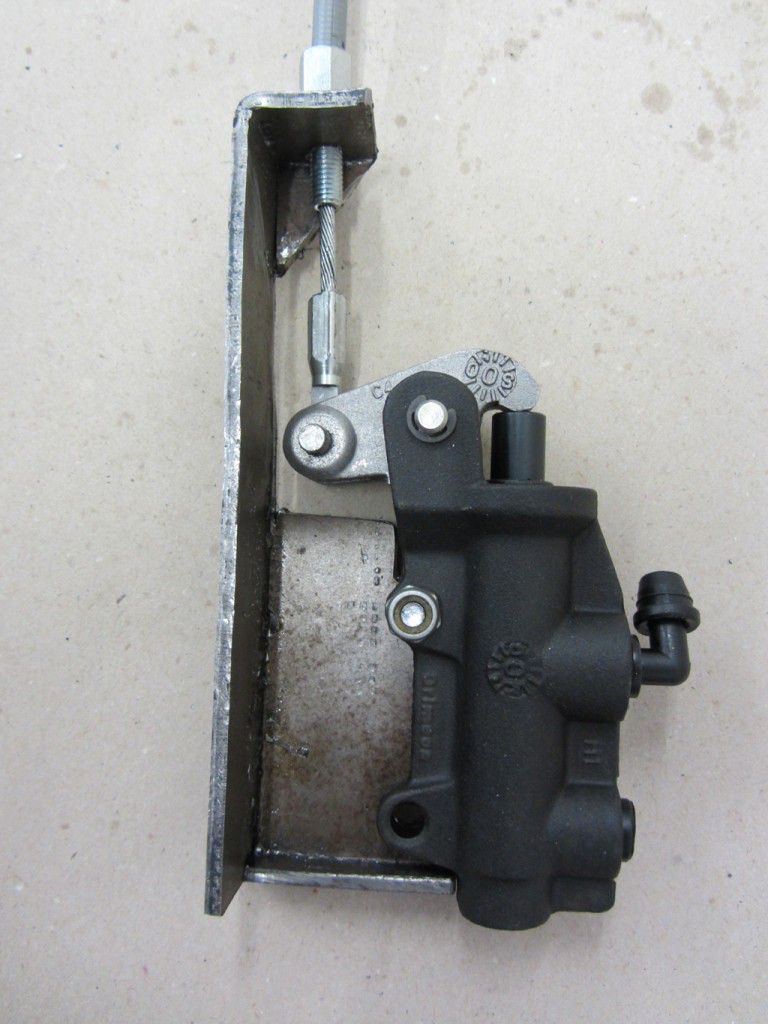
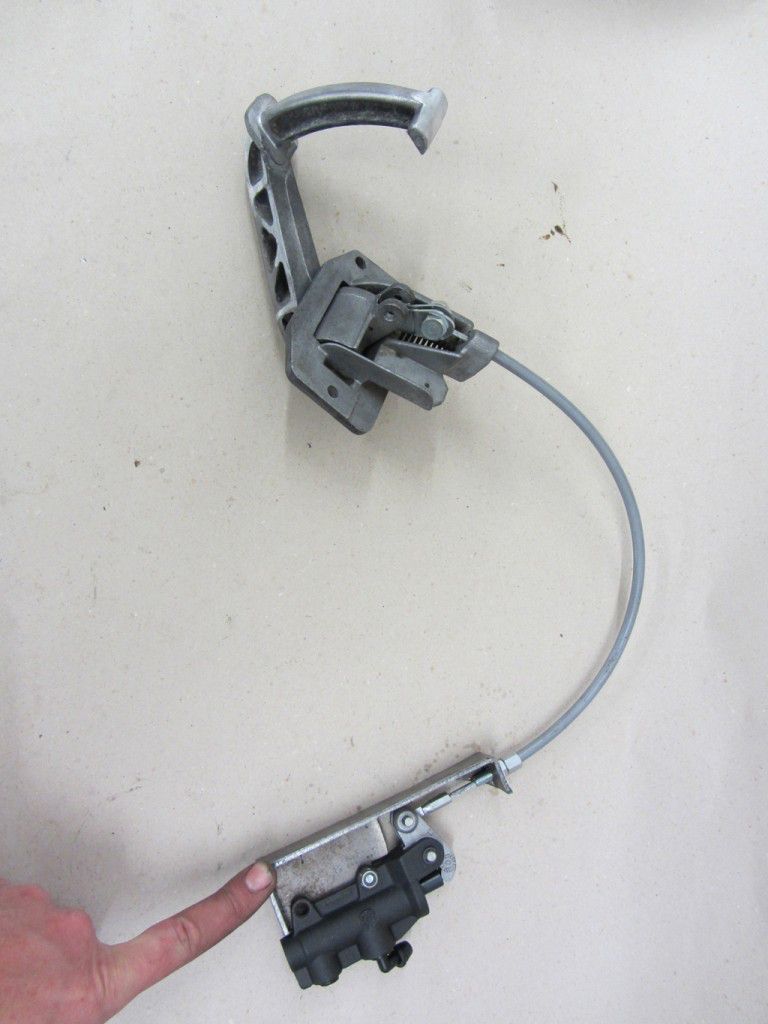
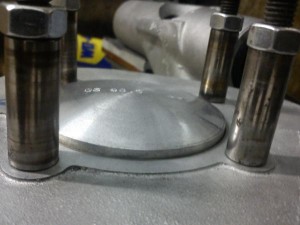
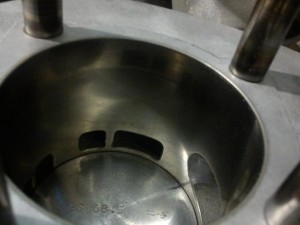
Zu unserem 20 jährigen wollten wir ein besonderes Projekt auf die Beine stellen. Bis Anfang Januar gab es nur die Idee als solche und keine konkreten Vorstellungen was genau es für ein Roller werden soll. Klar ist nur, bis zur Custom Show in Ried/Österreich am 25.02.2012 soll der Roller fertig sein. Also eine durchaus sportliche Zeitvorgabe um einen kompletten Custom Roller von NULL an aufzubauen. Startschuß war der Montag 09.01.2012 Wir haben uns für eine fahrtaugliche ET3 als Basis entschieden. Die Schöne wurde komplett zerlegt…. …. und nach erfolgreicher Schlachtung geht der Rahmen und alle Blechanbauteile zum Sandstrahlen. Das Trittblech und der Rahmentunnel geben Anlass zur Sorge, denn erst nach dem Sandstrahlen kann man erkennen wieviel Blech noch übrig bleibt. Solange der Rahmen beim Sandstrahlen ist, kann man sich Gedanken um den „Rest“ machen. Hoffentlich bleibt genug vom Rahmen über :-). Da die Fahrtrichtung in diesem Projekt „Racer“ ist, ist eine Scheibenbremse unumgänglich. Vielleicht sogar vorne und hinten? Um eine Scheibenbremse vorne verbauen zu können, benötigen wir eine PK-XL Gabel . Die orginale ET3 Gabel lässt einen solchen Umbau nicht zu. Abgesehen davon haben wir beim Thema PK-Stoßdämpfer auch noch etwas in Vorbereitung. Beim Motor entscheiden wir uns für ein komplettes CNC-Gehäuse von Gernot Penn, der mit seinem Lable GP-One schöne CNC Teile für den Vespa Fahrer anbietet. Das Motorgehäuse soll für einen Polini Evo Zylinder und Polini Evo Kurbelwelle passend gefertigt werden. Freitag 13.01.2012 Eigentlich kein gutes Datum um einen Rahmen vom Sandstrahlen abzuholen. Aber erfreulicherweise und allen Befürchtungen zum Trotz, ist nach dem Sandstrahlen viel wertvolles Vespa-Blech übrig geblieben. Natürlich offenbart uns die betagte italienische Dame die eine oder andere Delle nach dem der über 30 Jahre alte Lack entfernt ist. Alles in allem aber nichts gravierendes. Um die Blecharbeiten kümmert sich Dirk, Meister an Absetzzange und Karosserie-Feile. Montag 16.01.2012 Heute nehmen wir mal die Bremsanlage in Angriff… Damit die PK-Gabel nachher vernünftig in unserem Rahmen steht, muß die Gabel bearbeitet werden. Ohne eine entsprechende Bearbeitung würde man ein „Chopper Fahrwerk“ erhalten, weil die PK-Gabel im unteren Bereich, also das Maß von der unteren Lagerschale bis zur Radmitte, länger ist als bei den V50 / ET3 Gabeln. Dazu schicken wir die Gabel nach Würselen, zur Fa. Gelb. Dort wird an unserer Gabel der untere Lagersitz um 10mm abgedreht und das Lenkrohr um 25mm gekürzt. Armin hat Erfahrung mit umbauten dieser Art und wird diese Arbeit für uns übernehmen. Die Angelegenheit unterliegt natürlich einem gewissen Termindruck, da die Teile ja alle noch zum Lackierer müssen. Für die geplante, hintere Scheibenbremse, muß eine eigene Radnabe gefertigt werden. Dazu lassen wir erst einmal ein Muster für die Hauptwellen Verzahnung anfertigen – hört sich jetzt erst mal einfacher an als es ist… :-) Das Muster wird von Rennfahrer-Team-Kollege Dennis per Drahterosion gefertigt. An Dieser Stelle möchten wir „dem Denni“ ganz großen Dank aussprechen, weil er immer derjenige ist, der, wenn’s mal schnell gehen muß und Teile „bis gestern“ fertig sein müssen, sich absolut gewissenhaft, zuverlässig und sehr zügig um die Abwicklung solcher „Kleinigkeiten“ kümmert. …. und passen tut’s auch. Die vordere Scheibenbremse soll Vollhydraulisch betrieben werden. Dazu ist es notwendig eine Bremspumpe am Lenker zu befestigen. In unserem Fall entscheiden wir uns für eine AJP Bremspumpe mit einem 11mm Kolben. Hierfür werden passende Bremspumpen-Adapter angeboten, die allerdings das umarbeiten des Lenkers unumgänglich machen. Zusammen mit einer Grimeca Bremszange mit einem 30mm Kolben sollte sich eine gute Bremsleistung bei angenehm soften Druckpunkt realisieren lassen. Hier seht ihr den Adapter einfach nur von unten auf den Lenker gelegt, zum Einbau muß die originale Bremszugaufnahme entfernt werden: Damit der Adapter wir hier zu sehen, so in die Aufnahme passt, muß man schon einige Minuten investieren. Umso schöner wenn nachher alles gut zusammen passt. Dienstag 17.01.2012 Zwischenzeitlich erreicht uns aus Österreich die Meldung, daß die Motorgehäuse in der Fertigung sind. Rahmenstrebe Damit unsere Racer bei schnellen Lastwechseln und starken Bremsmanövern immer schön in der Spur bleibt, bekommt er eine Rahmenstrebe an der auch später der Lenkungsdämpfer montiert wird. Die Doppelrohrstrebe wird direkt am Steuerrohr angeschlagen. Eine Abstützung auf dem dünnen Blech vom Rahmentunnel hält erfahrungsgemäß nicht lange und kann bei heftigen Bremsmanövern abreißen. Die Streben werden seitlich unterhalb der Sitzbanknase in den Rahmen geführt und innen im Rahmen mit einer Querstrebe abgefangen. Für den Lenkungsdämpfer heften wir eine Distanzmutter an die linke Strebe. Noch kurz alles verschweißen und dann sitzt die Strebe. Mittwoch 18.01.2012 Heute gehen die Felgen zum Hochglanzverdichten. Im Moment sind Sie noch in Piaggio-grau gewandet. Donnerstag 19.01.2012 Endlich ist die Gabel wieder da. Um die 11″ Felgen unterzubringen und den dadurch entstehenden Spurversatz von 8mm auszugleichen, müssen wir die Gabel vor dem zusammen schweißen leicht verdrehen. Alle Teile werden erstmal trocken zusammen gesteckt um auszumessen wie weit die Gabel/Schwinge verdreht werden muß. Durch das leichte verdrehen der Gabel wandert die Stoßdämpferaufnahme soweit nach außen, das natürlich der Kotflügel nicht mehr passt. Dazu aber später, erst wird noch die Gabel fertig verschweißt. Zusammen mit der eingesetzten Hülse, die die Trennstelle wieder verstärken soll, wird die Gabel in Lagen verschweißt. Nach dem verschweißen wird die Naht noch geglättet und verputzt. Jetzt zum Kotflügel, damit der PK Stoßdämpfer mit seiner Aufnahme noch unter den Kotflügel passt, muß dieser verbreitert werden. Zuerst wird der Kotflügel aufgetrennt. Anschließend wird er mit Blech um ca. 10mm verbreitert. Das ganze wird dann noch hübsch gemacht und auf die Gabel angepasst. Wie man hier in der Seitenansicht schön sieht, kommt der Kotflügel jetzt leider doch an den Rahmen. Mit etwas sanften zureden passt dasganze am Ende aber doch… Freitag 20.01.2012 Durch das abdrehen der Gabel fällt der untere Lenkanschlag weg. Der muß natürlich wieder ersetzt werden. Die richtige Position im Rahmen an zu zeichnen gestaltet sich ein bisschen schwierig. Anschließend wird der Lenkanschlag angeschweißt. Die ET3 besitzt original eine Zündschloß, da wir im Endeffekt allerdings nur einen Killschalter verwenden stört das Loch im Lenkkopf. Da wir einen Fastflow Benzinhahn mit Reserveanzeige einbauen möchten, bietet sich der frei gewordene Platz für die Kontrollleuchte der Reserveanzeige an. Nach dem zu schweißen der Schloßöffnung muß der Lenker wieder geglättet und eine passende Ausfräsung für die Kontrollleuchte gemacht werden. Nach dem jetzt erstmal alle Arbeiten an den zu lackierenden Teilen erledigt sind, geht es an die Vorbereitung zur lackierung. Der Roller soll bei Pfeil Design in Österreich sein Farbkleid bekommen. Doch bevor der Rahmen und die Anbauteile zu Lackieren in das Nachbarland geschickt werden, wird der Rahmen hier vor Ort gefüllert und grundiert. Montag 23.01.2012 Der Rahmen und die Anbauteile sind fertig grundiert und gefüllert. Die ganze Herrlichkeit wird in eine Holzkiste gepackt und für den Versand nach Österreich vorbereitet. Bon voyage! Gernot hat eben geschrieben das die Motorgehäuse auf dem Weg sind… Schon angekommen ist der Falc-Ansauger den wir für den Polini Evo verwenden wollen. Dienstag 24.01.2012 Die Felgen sind vom Hochglanzverdichten wieder da :-) Auch das Motorgehäuse ist angekommen :-) Is‘ schon echt heftiges Zeug.. Damit am Hinterrad auch hydraulisch gebremst werden kann, muß ich noch kurz eine Teilhydraulik basteln. Zutaten sind das originale Bremspedal und der Bremszylinder einer TPH 125.
We were glad to support our friend Taka in 2011 for the SKRO! scooter Rally. Taka has put his heart and soul into scootering. His Newsblog is the reference for the latest Lambretta News. If you want to stay in touch with the latest developments for your Lambretta, checkt it out at: http://lambretta-magazine-japan.net/.
Last year’s SKOOTER RIDE OUT was the place where the donation to the Vespa Ring was held. This donation was mainly funded at our Open Day 2011. It was one part of the Scooterist 4Japanese Scooterist help for bringing a little joy to the kids of the polluted area after the nuclear desaster.
The donated amount was raised at the Open Day 2011 mainly by a fee for using our dyno. Lots of fuel addicts took the chance to measure the power output of their engine and generously donated at least the 5 € fee. Often more. We still collect money by selling these Stickers. The amount is completeley donated to the Vespa Ring.
Here are the words from our friend Taka about the SKOOTER RIDE OUT @Ise-Shima. We really wished we could have been there and one time this hopefully happens. But now enjoy taka’s report:
————————————————————————————————————
SKOOTER RIDEOUT!2011@ISE-SHIMA NATIONAL PARK
19th.NOV.-20th.NOV.
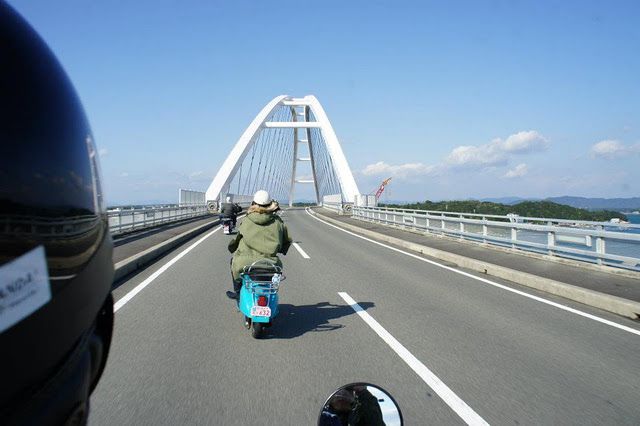
The first day was a very cold rainy day. However, Lot of SCOOTERISTS from various areas in Japan gathered in the Ise Shima international park.
Sadly, the touring-Run of the first day was stopped because of bad weather. But, we enjoyed the party with much alcohol and a delicious dish! ISE-SHIMA is a specialty place of a fresh seafood. We greatly enjoyed it with many many alcohol!
At the party, the ceremony of the donation which charitable project „SCOOTERISTS 4 JAPANESE SCOOTERISTS“ of the SCK contributed to VESPA CLUB MIYAGI was also held. And -of course- the donation was presented also from all entrants of SKRO!.
And the entrants scrambled for the fantastic premiums(Parts, clothing, decal, accessories etc..) which entrants and many SHOPS in the world supported happily in the game!
After the party drank alcohol, and night advanced and it went in the room of each hotel by SCOOTER TALK……
The 2nd day was fine weather from the morning. Temperature is not cold, either. We collected the candidate and went out for the early morning run. The wind of early morning Ise Shima was comfortable, and the exhaust sound of 2stroke sounded pleasantly.
After the Japanese breakfast, we wentout for a short touring run by all the entrants. So we enjoyed the good road and seaside view in Ise Shima National Park!
I feel that Japanese Scooter Scene is changing in several years. The Scooter friends in the world joined hands by evolution of communication of the Internet.
Thank you for the always big Supports. SCK!!!
————————————————————————————————————
Cheers,My Friend!
TAKA
[nggallery id=7]
We just received the SCK Ancillotti for the Vespa P-range from Italy!
From tomorrow on you can order this beauty at www.scooter-center.com or by phone or by email!
Defintley the No. 1 on every PX rider’s wishlist.
Available for Vintage Vespa scooters as well. All Made In Italy and not just that all are hand crafted!
Pictures with fitted seat klick: HERE!
Sitzbank -SCK Ancillotti- Vespa V50, PV 125, ET
Sitzbank -SCK Ancillotti- Vespa Sprint, TS, GT, GTR, GL, Super, VNA, VNB, VBA, VBB
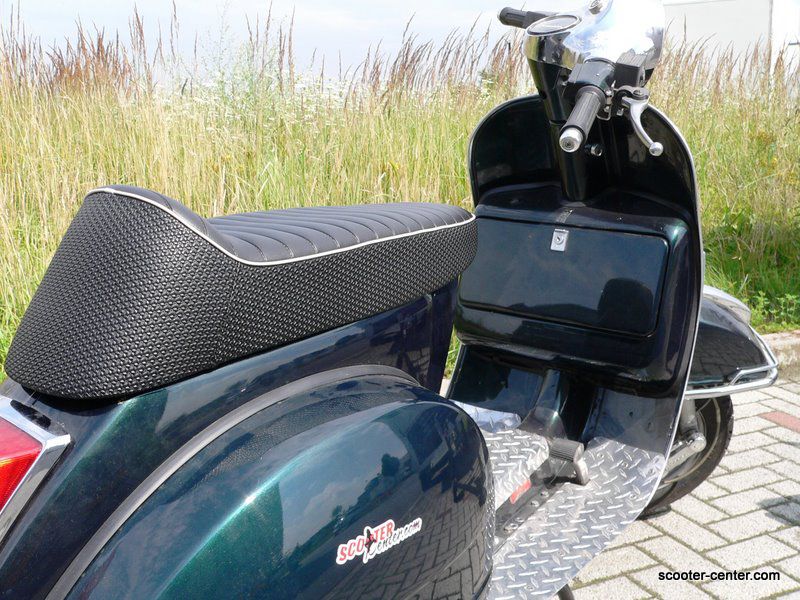
Once aghain we have shortly before Xmas the pleasure to announce the next Vespa seat! And once again it is something very special, the SCK Ancillotti seat for the Vepa P-range. Here are the shots of the first sample, the delivery is expected to arrive shortly:
The seat will have the same perfect finisdh as our already available SCK Ancillotti seats:
Sitzbank -SCK Ancillotti- Vespa V50, PV 125, ET3
Sitzbank -SCK Ancillotti- Vespa Sprint, TS, GT, GTR, GL, Super, VNA, VNB, VBA, VBB
Die Sprint Version passt natürlich auch auf alle Vespa Rally, GS 160 (GS4) und SS 180 Kisten. Da musst Du lediglich den hohen Tank gegen die flache Version der PX austauschen.
Hier sind die Bilder von unserem ersten Muster der SCK Ancillotti für die PX. Die Form passt dank der Hilfe von Dirk E. mal wieder perfekt zum Rahmen. Mit mehr Liebe kann man das unserer bescheidenen Meinung nach einfach nicht anpassen. Die Umsetzung erfolgt in einem kleinen italienischen Betrieb, in dem jede Sitzbank von Hand hergestellt wird.
The winter time is the right time to upgrade your scoot for next years season! So it is the time for us to pimp our ecommerce shop. The masterplan is t overwork the exploded views we do have for Lambretta and Vespa scooters. There you come into the game!
As mentioned earlierPolini is going to release the alloy barrelfor the 200cc casings for long stroked engines later next year. The Polini 210cc alloy kit can be used with a 60mm stroke crankshaft, but you are limited in doing so because of different reasons. The kit contains a oiston with the top ring in L-shape. This type of piston rings runs to the top of the piston.
If you are going to use a longer stroked crankshaft e.g. 60mm instead of 57mm the 3mm longer stroke needs to be equaled in one way or another…
With the piston running 1.5mm in each direction (top and bottom dead centre) the barrel needs to be 1.5mm longer. Normally this is equaled by a base or head gasket.
With a two stroke engines power determined by the port timings, this can cause headaches or been seen as the perfect way to get the tune on barrels sorted to one’s needs. With the port timings as a trigonometric function the transfer timings are altered above average. The timings of the transfers and exhaust should always be in a certain level to work properly.
With the Polini as it comes you can use a base gasket only to equal the stroke. With a head gasket the L-type piston ring could cause trouble by running at least partially out of the bore. Is a base gasket used the port timings are raised about average and the blow down timing is affected heavily. Limiting the power up the rev range.
To achieve the good and torquey power output that the new Polini kit has out of the box, a head gasket is recommended to for te right timings. But there is the L-ring prob…
Facts…
Out of the box the new Polini has port timings of 123° transfers to 171°exhaust timing with the 57mm crankshaft. One of the best kits out of the box for touring and good power low down.
If you are going to fit the kit with a 60mm crankshaft and simply use a 1.5mm base gasket the port timings are changed to around 135°/179°.
If you are looking at the bow down timing only it is changed from 24° to 22° only. If you look at the 22° this would be still okay for a broad power curve. But if you have a look at the changes of te port timings the 135° transfer timings is far away for a road going engine. This crap design can be used with an exhaust based on the original design to make it work. So a Sito Plus or SIP Road would be the ones to go for.
230cc???
One of our customers (Thomas aka schoeni230) had a full go on the Polini alloy barrel subject. He is using it with a custom made 62.5mm crankshaft.
With a special piston instead of the standard Polini L-ring item the problem with the L-ring running out of the bore is cured.
This piston makes it possible to have the piston running out of the bore to a cretain degree:
This way a 0.4mm base gasket was sufficient to get everything right. Even with the longer stroke of 5.5mm the port timings were nearly in a reasonable area.
With ~133°/179° and a special cylinder head to cover the longer stroke the engines runs pretty well with a exhaust based on the PEP Big Bore design. The high torque and a really broad power band makes it a really good Rally going engine with hight top speed under every circumstance. And the top power output is -with the design of the exhaust in mind- stunning as well.
The carb used is a 35mm Keihin PWK with a Scooter & Service Reed Manifold (with V-Force Reeds). The ignition is one of the Vespatronic ones.
The barrel is nearly untouched. The exhaust port was altered only. The width and height were slightly enlarged.
UPSHOT:
Even with the port timings on the strange side, the engine should be best of all worlds and really catches one’s demands for a strong road going engine. With more than 20hp beyond the 9k rev mark.
One weak point for sure is the piston running out of the bore. Giving alignment issues of head to bore and the thermal thing at the sides of the piston are an issue as well.
The upcoming Polini for the 60mm crankshaft should be a massive step to built one of these dream engines without the need to cut so much corners.
If you are fancy this NOW, contact us. We are happy to give you advice how to built a similar engine with the 60mm crankshaft.
Your ein(e) angebete(r) fährt Roller, but you do not have an idea for a present?
Check you one stop scooter shop for really nice presents, we might be able to help even there. Not for scooter riders only are our clothing, accessories and merchandise items. Another idea is one of our shopping vouchers, always a more than welcome present!
How about a nice key ring perfectly suited for the Vespa keys as well for bringing good memories to every car with the sytlish Vespa key ring.
Or one of the fantastic officially licensed bag in different designs that pay the due to the Vespa heritage!
The combination of lighter and pocket knife comes in quite handy.And the nice box adds to the lovingly overall experience. And maybe it can safe your a***, in case of a braekdown of your scoot.
If everything is over and the scoot won’t do it anymore, one of our smart Iphone cover is the solution to call for help in style.
The Espresso cup sets are perfect to bring back some of the nice and beloved Italian atmosphere with a nice little Cafè after the dinner. So these nice little beauties bring back those feelings even in winter!
You have to give a present to one of those who are always late or even better forget dates completeley. Time for a wrist watch and an alarm clock that looks so nice that the attention should be given!
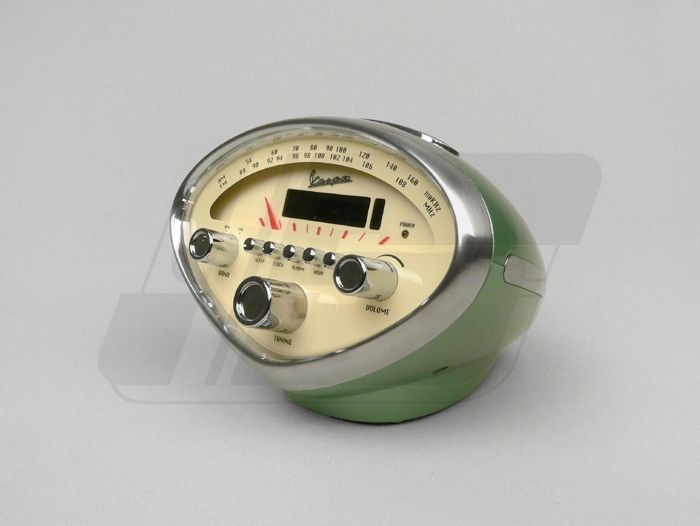
A real stunner is the Retro alarm clock looking like the Vespa speedo. This gives the ultimate start in a new day. Especially with the chance to connect your MP3 player via USB to it.
If you fancy something nice at work that reminds you to the classic shape of the Vespa, you should check out the very loveley made table lamps.
The 21st century Jetsetter travels in style while doing business. The Vespa Trolley is a companion nearly as good as a dog…
That was only a small selection the complete range of nice ideas for Xmas you can find here Onlineshop!
From now on we have top notch Vespa S 50 / SS 90 Super Sprint seats available. These are the real thing and Handmade in Italy for us.
They are spot on and there is no difference to the original item. Compared detail to detail the shape is exactly like on the original ones. So is the length and all the attention to detail.
Instead of the clipping of the cover it is properly glued.
The lever is riveted like on the original seats instead of screwed like on the other remade seats out there. The dimension of the piping has the diameter as been found on the original SS seats.
The delivery does contain the passenger strap as well as the cover for the toolbox.
Jetzt in deinem one-stop-scooter-shop hier verfügbar!
For all who didn’t know Tony O’Brien, we have attached the nice video. This shows him flying over the Nürburgring. The performance of his Charlie Edmonds tuned Falc engine is amazing.
Last week Tony tested the bgm PRO SC rear shock for the first time on Mallory park race circuit. This is a national race circuit seeing the riders topping 150 km/h (95 mph) plus easily.
This is the feedback Tony has given bgm and us from his first races. Sadly Tony crashed during the race, but on the 24/25th of September the last race for the BSSO series will be held at Cadwell Park.
“The meeting didn’t quite go to plan due to me deciding to test the hardness of the tarmac! (…) Practise was very wet… (…) The damper was set to 3mm pre-sag.. -5max compression and -5max rebound damping. My first impression is that this damper actually works and works very well.
The bike soaks up the bumps pretty well but I feel maybe I could have set the rebound a little harder to help stop the back end bounce on one particular corner. The motor runs a little hot with a little detonation and so I increase carburation to solve this.
By the time of the first race the track is dry. I am on last place on the grid (grid positions are based on previous meeting’s results and I couldnt attend). By then end of the lap I am up to 5th from 19 starters, but there is a problem with the bike. (…)
The shock I have set to -3max on rebound and -4max compression.. its working fine and the bike feels transformed. By lap 1.5 I am into 4th behind the 250cc grp6 bikes of Topper, Turner and the 210 grp4 bike of Charely Edmonds. The corner which I had the issue on is now improved and the bike feels much safer and I actually manage to stay on the seat.. the corner is a 70mph left.
On the next lap however the motor cuts and then fires up again whilst banked over on a second gear corner.. This spits me off and into the dirt.
(…) The shock however even in two laps I feel is a massive improvement over the rs24. I feel yes for the track it could do with more damping as I think over the 10 lap race the oil will heat and it may lose damping. It would be nice to have the settings at mid-adjustment on compression and rebound. The spring does touch my tyre (3.50 sava) but I can’t move the shock over any more at present as the exhaust is in the way. I hope to move this over a little in the winter to solve this problem. the spring rate I would say is correct for me as it is.
During the day lots of racers were interested in the new shock.”
THANKS TONY!!!!
High Quality made in Itlay!
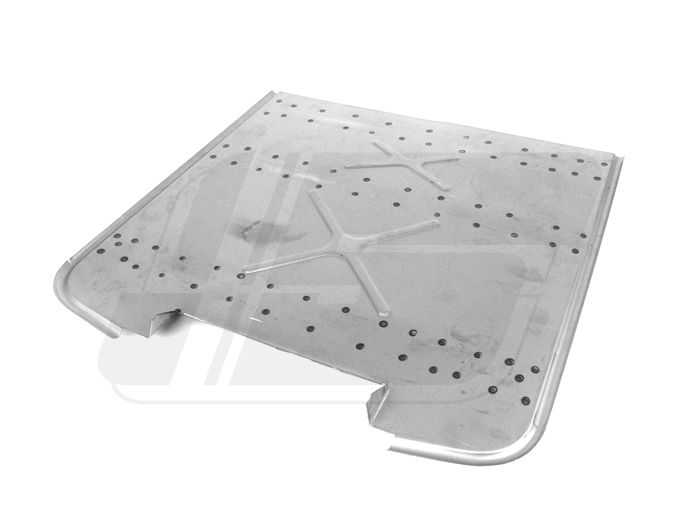
The Vespa with its ingenious frame concept stands for sturdiness and longevity. But even the strongest concept can suffer after years in the wind and rain, or from little mishaps and accidents. Especially the floor boards start to root, if not cared for regularly.
For a long time, there was only one spare floorboard available for the Pre P-range, so called wideframe Vespa. It was O.K. to use those, and easier and better than building one from scratch.
We just found in Italy these wonderful spare floorboards which are specifically build for the different Vespa models.
No more time or money consuming, extensive reworking is necessary with these floorboards.
The height and form of the beading are like the original, as is the hole for the cable routing and other details, which support a perfect restoration result.
No filler is used, which could hide dents or imperfections. Real quality products for a perfect restoration job. So if you already plan to bring a Vespa back to live this autumn or winter have a look!
Floor board -VESPA- Vespa VNB4T (ab Nr. 0110644), VNB4T bis VNB6T, VBB2T
Floor board -VESPA- Vespa VNA1T bis VNA2T, VNB1T bis VNB3T, VNB4T (bis Nr. 0110643), VBA1T, VBB1T
Floor Board -VESPA- Vespa Super, GT, GTR, GL, Sprint, TS, SS 180, Rally
We sourced some nice bits and pieces to mod-up your Vespa LX, LXV, S, GT, GTL or GTS.
Headlight visors are one of the essential items to customize your Vespa. An instant classic for decades.
But it is not just because of the nice vintage optics, they are a nice upgrade for night riding. Especially in the dark on the countr road the headlight dazzles in the direction of the rider. The visor covers this part and makes night riding much more relaxing. The emotional people here are see it as the eyelash of their Vespa.
We have these on offer in the classic chromed look as well as the more sportive black finish. An extensive fitting instructions is included to every visor. They are available for GT, GTS, GTL and LX and LXV Vespas.
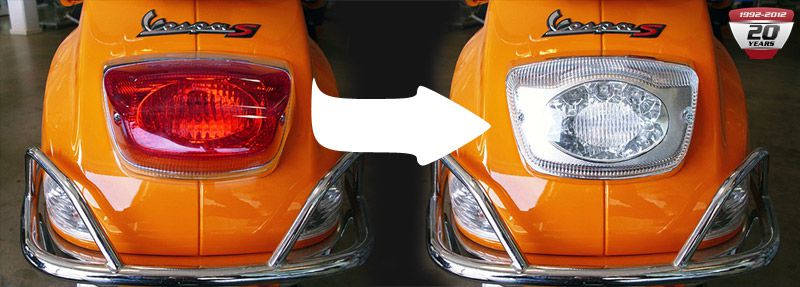
Finally arrived are the first LED rear light units for your LX, LXV and S Vespa. With the clear glas these give a much more up to date look than the red bog standard item. The dimensions are exactly like on the original one. For sure it has an e-mark.
The LEDs are placed in honeycomb shaped holes. These are highly chromed. Each LED gives very bright light and their duration of life is much better compared to the old style bulbs.
Fitting is easy for this item as well.
bgm LED rear light Vespa LX, LXV und S
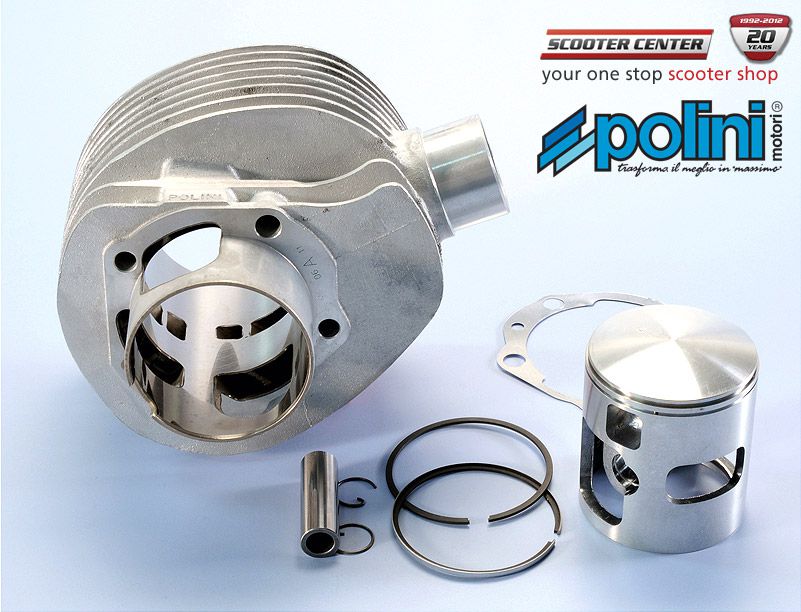
Polini presents the new 201cc Alloy cylinder for all Vespa Piaggio P 200 and Rally 200
The ever lasting religious war Malossi 211 or Polini 207 or Pinasco 213 in the maximum cc-range of Vespa scooters has received a new argument.
The torque-orientated layout of the Polini 207 with power through the whole rev-range was loved by many.
However it is with all things love, there are days when everything in a partnership is not going the way it should.
Wrong carb setup, ignition faults or general wrong set up of the engine brought the old, cast cylinder to its thermic capabilities, and above in the worst case.
This led to the bad reputation of the eternal heat-seizure, which could only be cured by accurate setting up of all components.
Now Polini have sorted this problem for us and made our live easier, and those of their competitors harder.
The proven design of the Polini 207cc is now crafted in high quality alloy. With a 68.5mm bore and good two ring piston for excellent heat-dissipation and piston-guidance the new cylinder has the perfect thermic basis for race or touring tuning.
Simple with a Sito+ and 26mm SI carburator , or with monster-membran and race exhaust , we are keen on what people will do with this cylinder.
Visit your one stop scooter shop and select the components for your individual engine!
After the successful bgm Lambretta stator plates, which proved powerful and reliable, and stators for both p-ranges, bgm has directed their attention to the smallframe Vespas.
The newest weapon is the Ignition kit bgm PRO to convert the V50, Primavera, ET3 and early PK models to maintenance free 12 volt electronic ignition.
This gives the most reliable and powerful solution for daily commuting, Rally going or fast road use. Basis for this conversion is the bgm PRO stator HP V2.0 for the Vespa PK XL series w/o battery, which incorporates the proven and powerful Cosa design. In combination with a 1650gr Ducati flywheel it gives reliable tick over and instant acceleration.
The ultra slim BGM AC/DC voltage regulator compliments this kit.
The neat bgm voltage regulator can be used on all Vespa and Lambretta electronic ignitions. It delivers a very steady AC and DC output, and can supply sat navs, mobiles or other electric gimmicks directly. The kit can be easily fitted with standard tools, and all parts can be sourced separately.
The choice of high quality components makes it a more reliable piece than some of other competitors.
So you get an easy to fit kit, of high quality components for a very reasonable price.
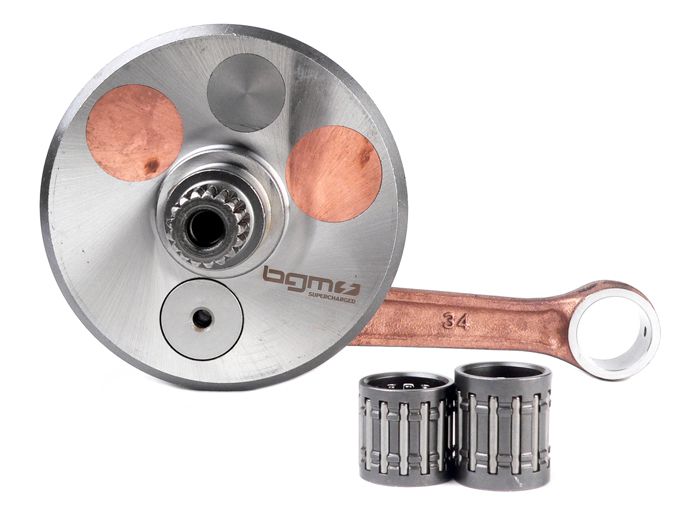
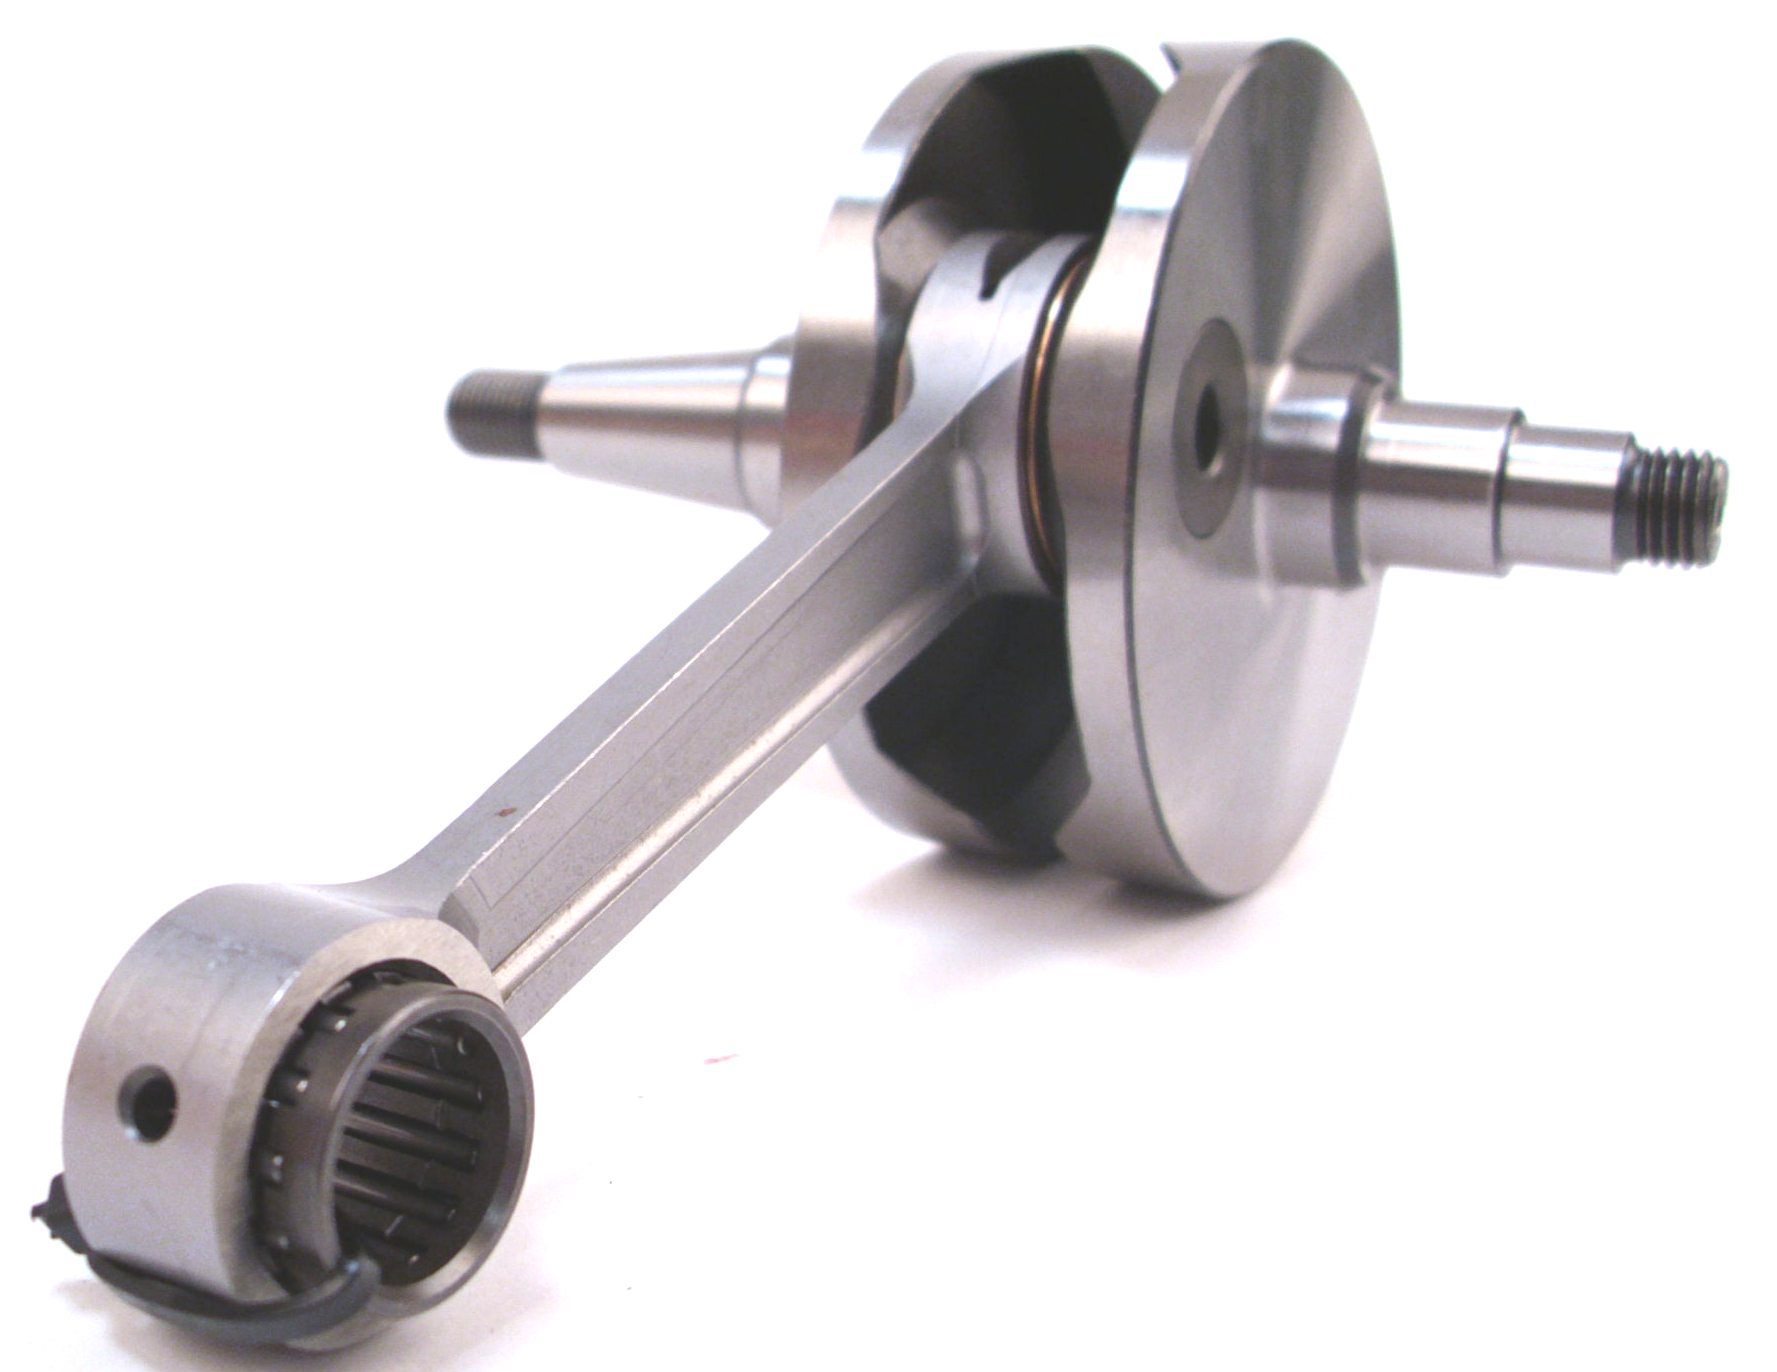
We were busy during winter constructing new crankshafts, and here they are
Crankshaft -BGM Pro Racing full circle 51mm stroke, 105mm conrod- Vespa PK125 XL2, ETS125
Crankshaft -BGM Pro Racing full circle 54mm stroke, 105mm conrod- Vespa PK125 XL2, ETS125
The power of the newest generation of smallframe cylinders is amazing, and kills most parts of the rest of the engines. The developers at BGM constructed bigger crank webs which are not prone to twisting and cracking, because of a larger overlap and superior material..
In order to fit the larger diameter crank webs (87 mm on the flywheel side and 86 mm on the drive side) you have to machine the casings to 88 mm.
The next innovative feature is the piston rod length which has been increased to 105 mm (8 mm longer than on standard 125 cc Smallframe cranks). The crank is a perfect fit to some of the latest Smallframe tuning kits that are designed to be run with this sort of piston rod
An easy way to use it with every other barrel available, is to fit the 8 mm bgm spacer (BGM0223) and longer cylinder stuts (BGM 0290). Also available as complete kit (7673185).Upshot: a better angle, which is perfect for the life of the big end bearing and reduced friction of the piston in the bore hole.
This results in better power and reduced primary compression, which work well with the modern day exhausts, such as the ones made by manufacturer Ludwig and Scherer, as the port transfers at the casing can be improved and the flow optimized.
Main features are the very strong CNC-maschined Rod, which is superior to most rivals, and the durable ETS spigot on the ignition side, which can be fitted to all V50/90/Primavera engine cases as well, using our special seals and bearings. A perfect solution to cracking tapers and blown ignitions.
And here is another part we were looking for, for a long time.
Crankshaft -BGM Original- Vespa PK125 XL2, ETS125
The label BGM is known for high quality scooter products. Crank shafts of BGM work in many tuned road and race engines. With this nice build crank shaft BGM closes the gap for rotary driven smallframe cranks. It is technically orientated on the original Vespa ETS crank shafts, but is supplied with high quality elements, like the overlap against twisting, a well build piston rod with good lubricating holes and strong crank webs. The The PK XL2, ETS 125 has the most solid taper of the Vespa Smallframes. Therefore it is capable to sustain much higher forces. An additional feature is that it can be used with the ultra light flywheels for much improved acceleration and power output.
Crankshaft -RACING- Vespa PX 80
And here we have a special solution for the german Vespa PX 80. Italian manufacturers have build a special racing crank to go with the tuning cylinders like the Malossi 139, DR 135 and the likes. Nice quality and functionality.

