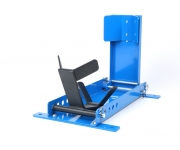
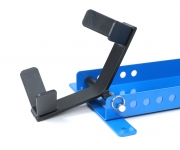
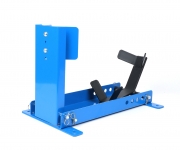
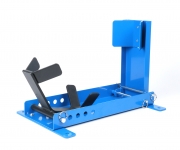
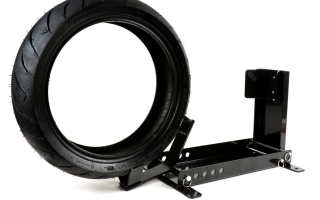
Vespa Transportsicherung für Motorroller BLUE limited Edition

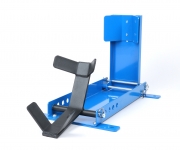
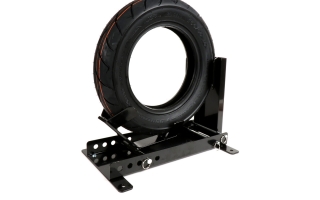
Vespa wheel chock – limited edition in blue

Our wheel chock allows you to park your scooter quickly, easily and safely on a trailer, in a van or bus, garage, carport, shed, workshop or on a morotcycle lift.

This wheel chok is ideal to transport your scooter on the loading space of a van or trailer.
Tip: if you need to service your scooter, the stable wheel chock can also be fixed on the morotcycle lift.

Ideal for an easy parking and secure transport

This chock provides an easy and secure upright storage for your scooter:

  1. push or ride your scooter into the cradle of the chock
  2. the cradle folds forward with front wheel
  3. cradle clamps onto the tyre holding the motorcycle upright. If necessary, you can also use lashing straps.
Get here the wheel chock in limited edition BLUE
BGM7400 Scooter Center bgm Motorroller Transport Sicherung Vespa

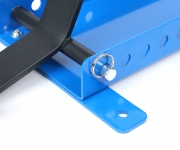
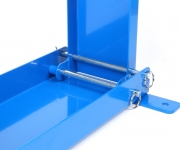
In order to be safely bolted down on the ground, the chock is provided with four holes.
Accommodates front tyres from 8 up to 13 inch and 90 up to 130mm wide tyres.

  • Weight: approx 7 kg
  • Dimensions (WxHxD): approx. 29x48x31cm
  • Material: steel
  • Holes for bolting the chock down on the ground: 4xØ10mm

Tip!

Lashing straps for transport are not included in the item, but are available in our online shop.

Your new wheel chock – limited edition BLUE

A Vespa Sei Giorni?

The Vespa Sei Giorni is among the most sought-after collectors items. A Vespa Sei Giorni, but what’s it all about?

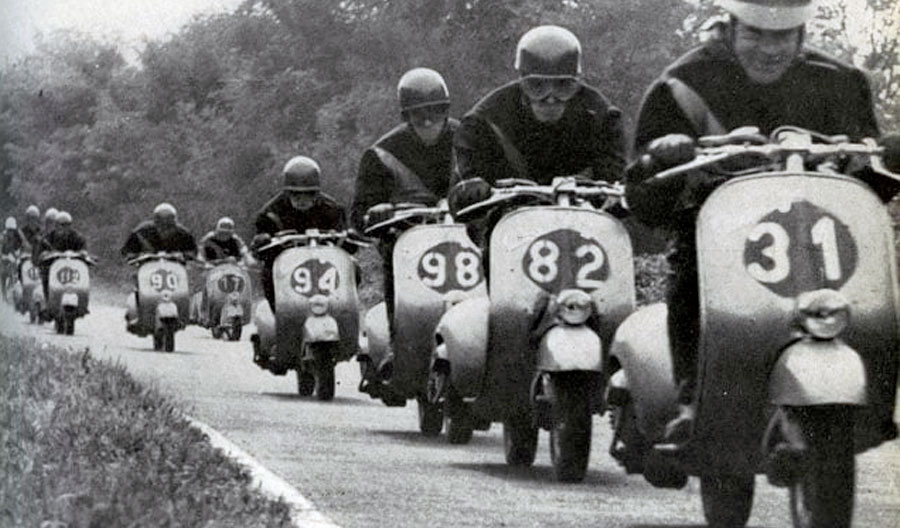
In 1951 the Vespa company’s racing team “Piaggio Squadra Corse” gained massive attention during a race. The “Sei Giorni Internationale” took place from the 18th to the 23rd Septemper 1951 in Varese, in the hinterland of Lake Maggiore in Italy. It was one of the hardest and most important competitions of that time: 220 participants riding over several kilometres in an off-road environment.

Rennen 6 giorni (6 Tage)

Sei Giorni = six days

Still today this six days reliability trial is known as “International Six Days Enduro”. The first race took place in England in 1913, a test of the limits of both daring racers and machines. And in 1951 the Vespa was just 5 years old!

For this race Piaggio modified a small part of three hundred 125cc Vespa models. The racing team “Piaggio Squadra Corse” participated with these ten scooters. But how could the small Vespas, built specially for this race, compete against motocross motorbikes?

Surprisingly the Piaggio company’s racing team (racers: Biasci, Cau, Crabs, Mazzoncini, Merlo, Nesti, Opesso, Riva, Romano, Vivaldi) won the competition with their Vespas, outdoing the offroad motorbikes: 9 out of 10 racers got a gold medal. In 1951, for this top performance the Vespa 125 “Sei Giorni” also won the prize of the Italian motorcycling federation and with their Italian Vespa models the three racers Giuseppe Cau, Miro Riva and Bruno Romano stole the limelight from all other racers.

Near-series racing scooters

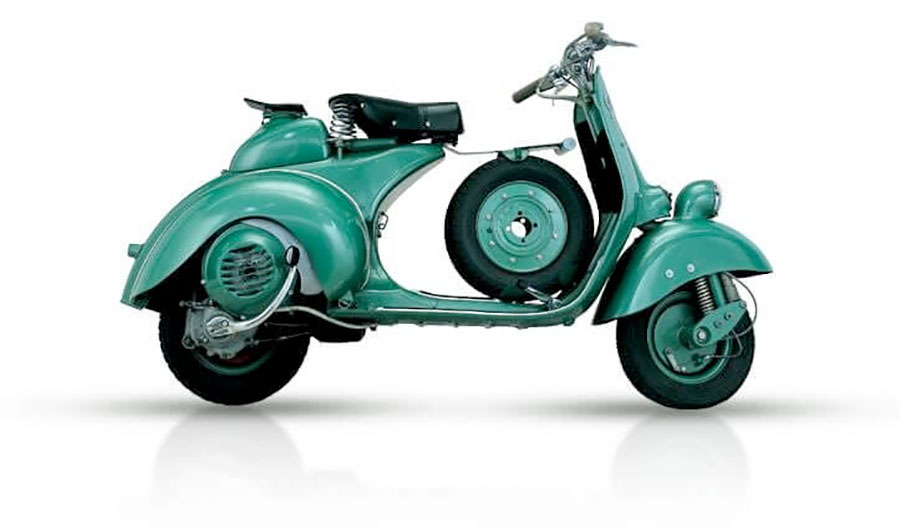
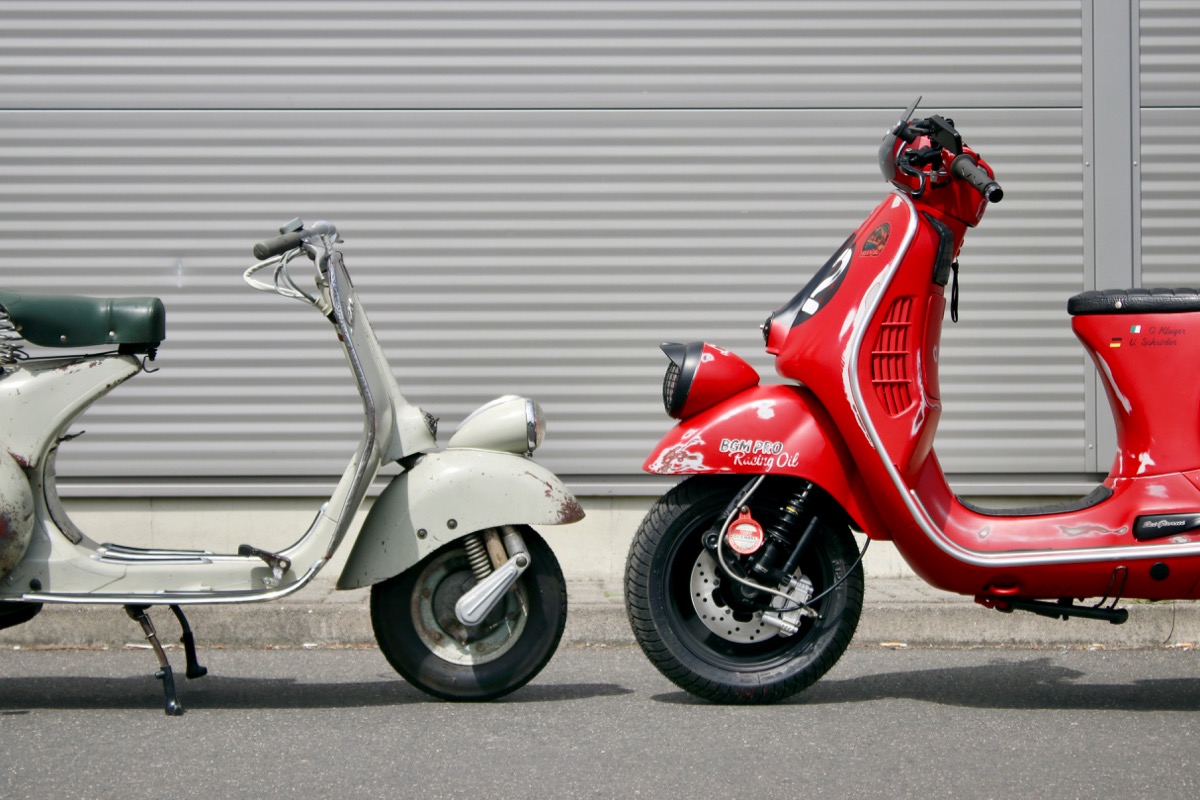
The Vespa “Sei Giorni” was optically very similar to the series model. The main differences which were visible were for instance more tank volume, improved aerodynamics of the leg shield and a bigger engine cover.

Vespa Sei Giorni Rennroller Vespa 125 von 1951

Vespa Sei Giorni 2017

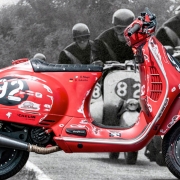
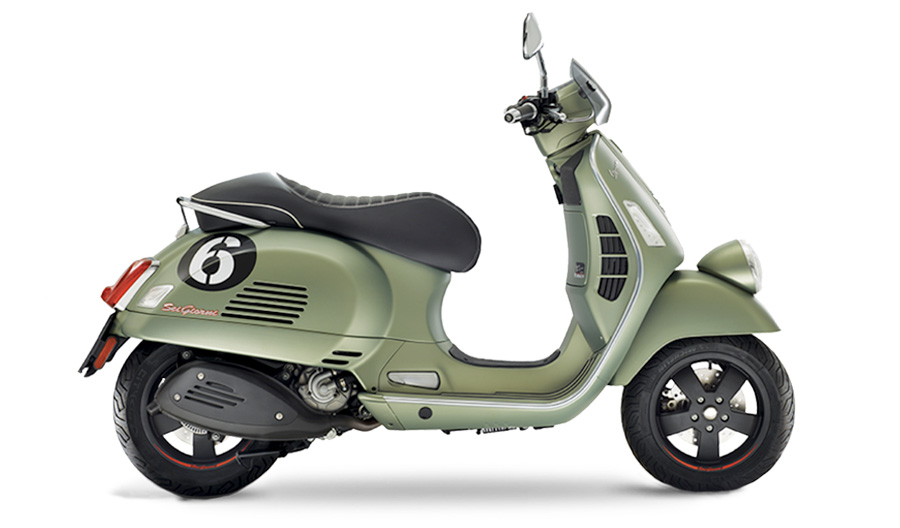
As we reported from the motorcycle show Eicma in 2016, in memory of this legendary success, Piaggio released a special edition: the Vespa Sei Giorni 300.

Vespa 300 Sei Giorni 2017

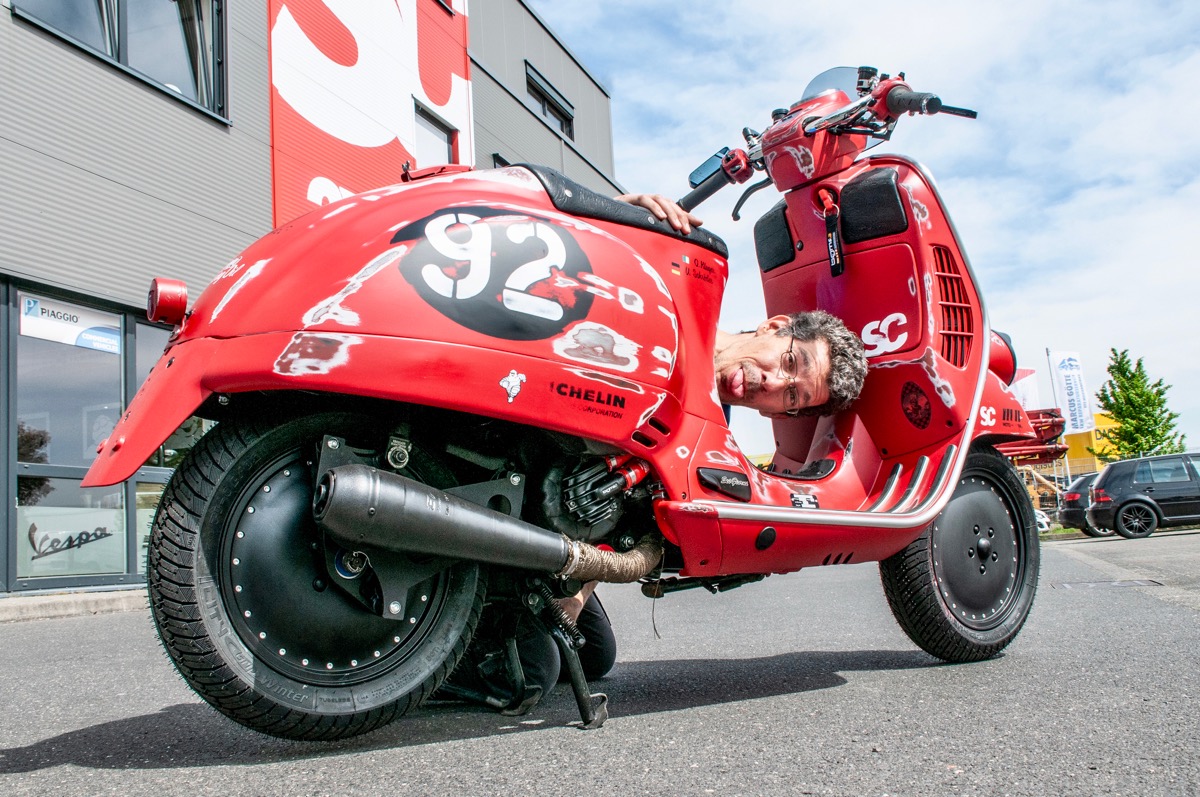
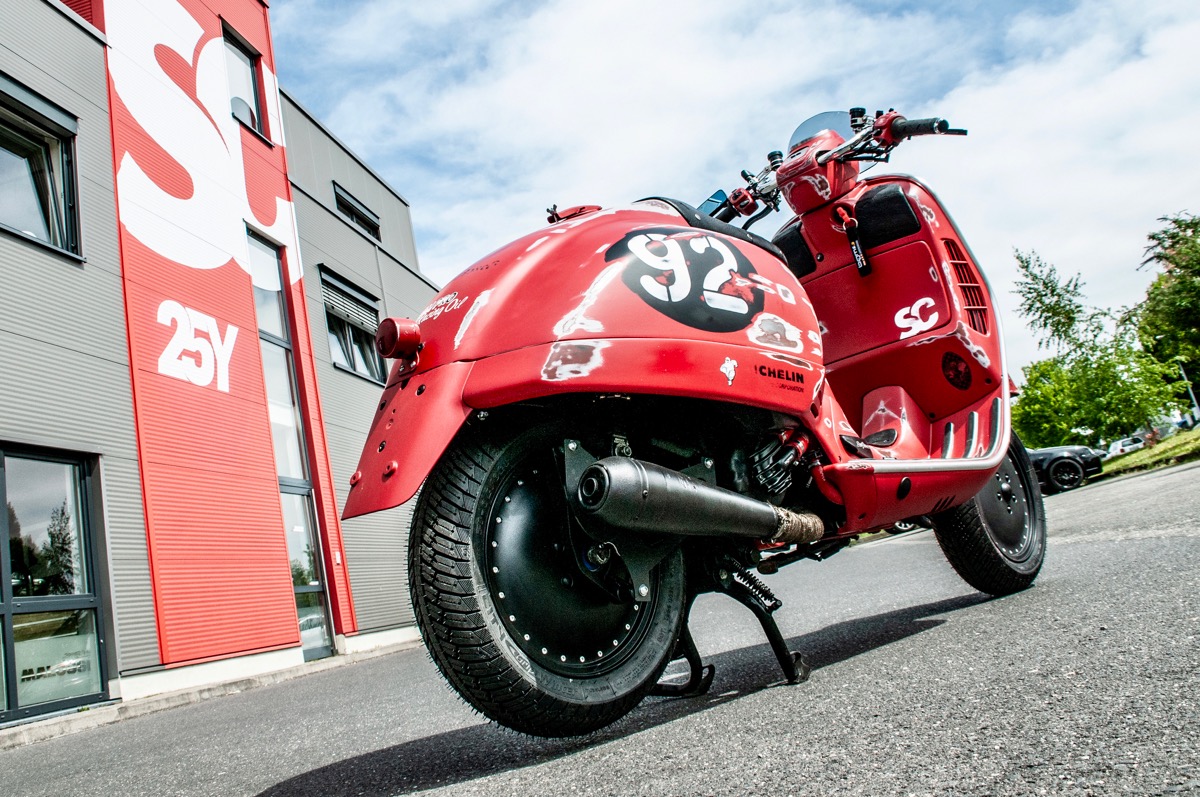
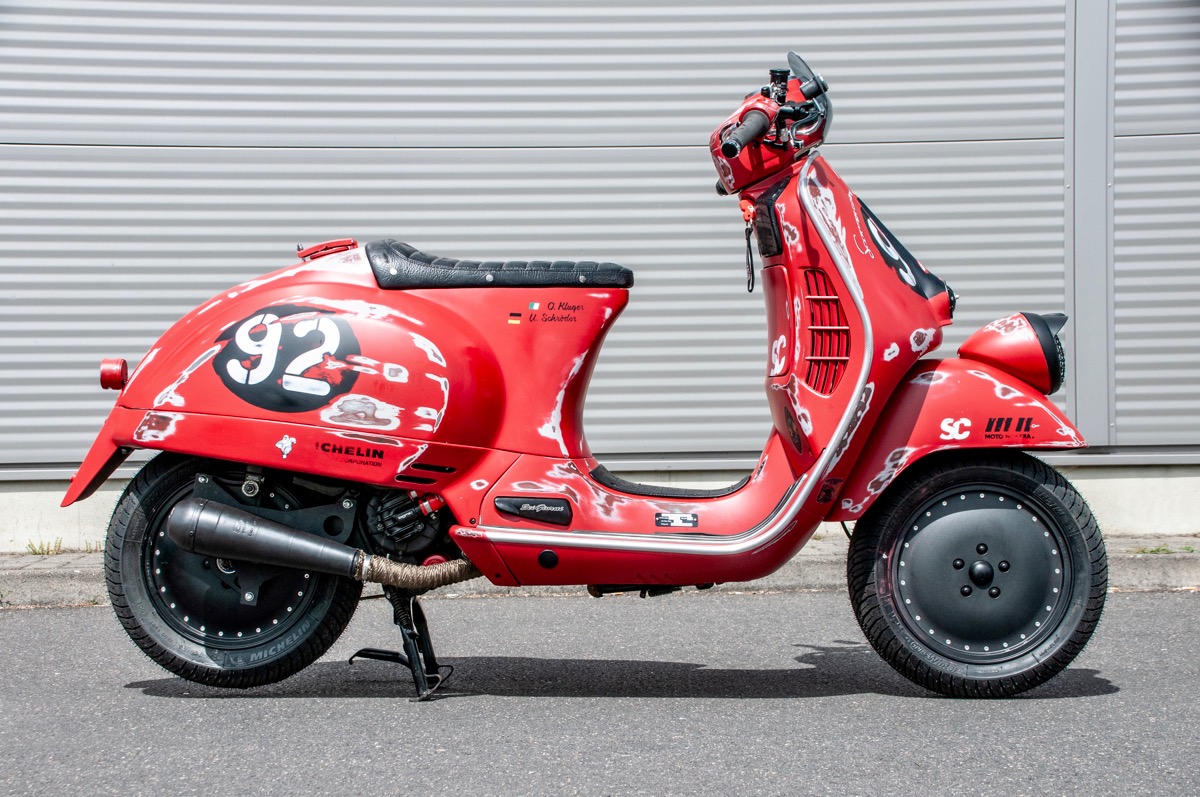
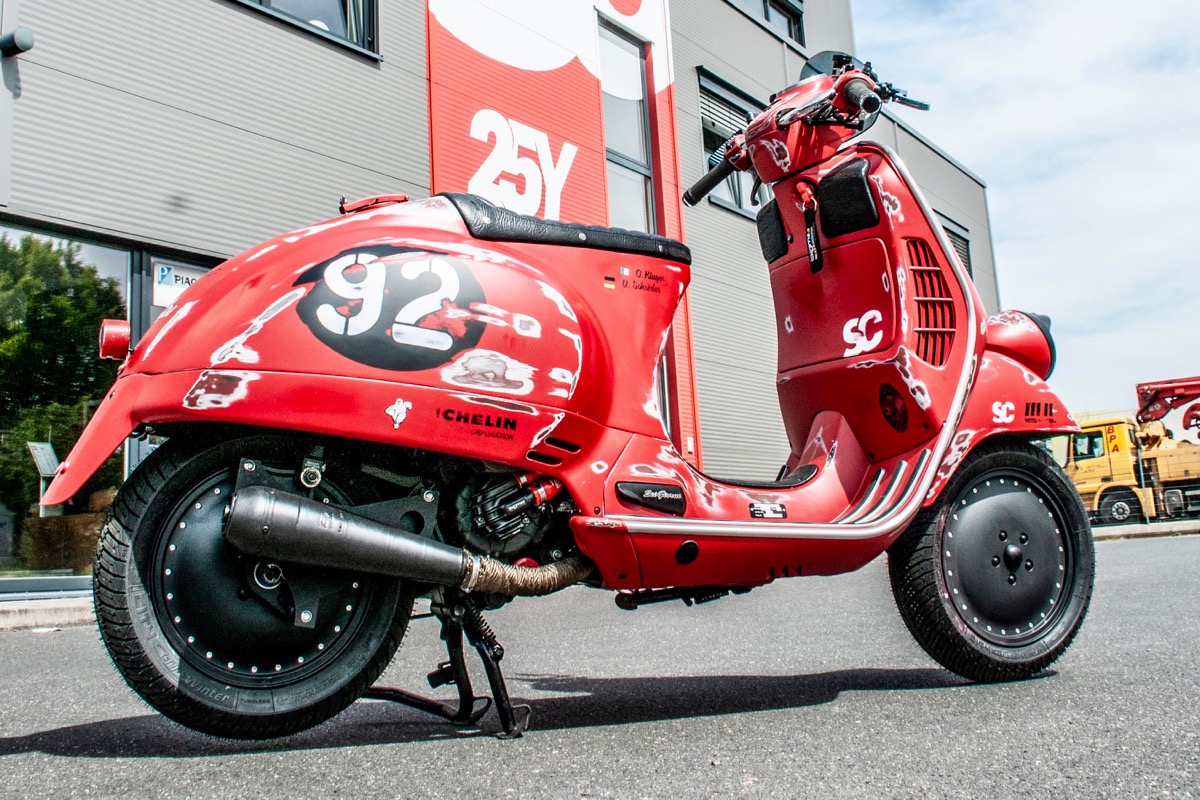
Scooter Center’s Vespa Sei Giorni

After the Eicma morotcycle show 2016, we got the idea of creating a new Scooter Center demonstrator which represents a fusion of the automatic Vespa and the classic Vespa. Just like our Vespa shop where you can just find everything you need for your modern or vintage Vespa.

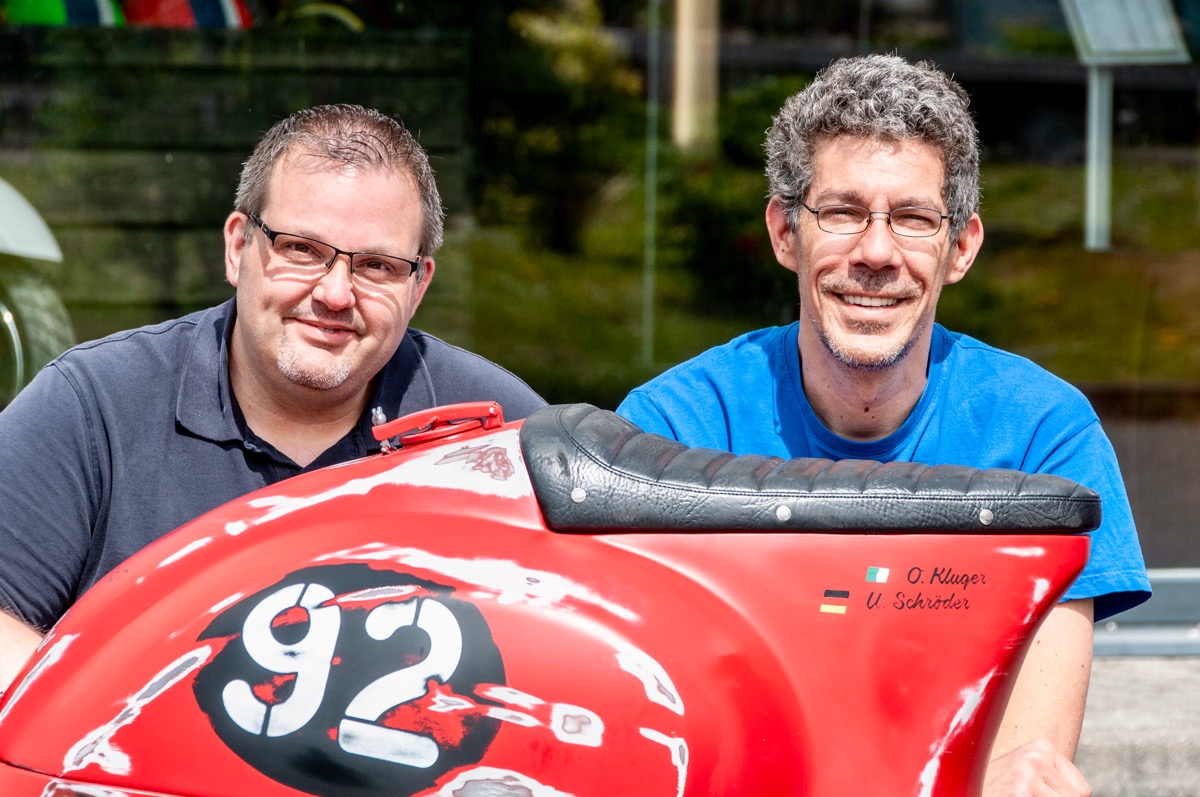
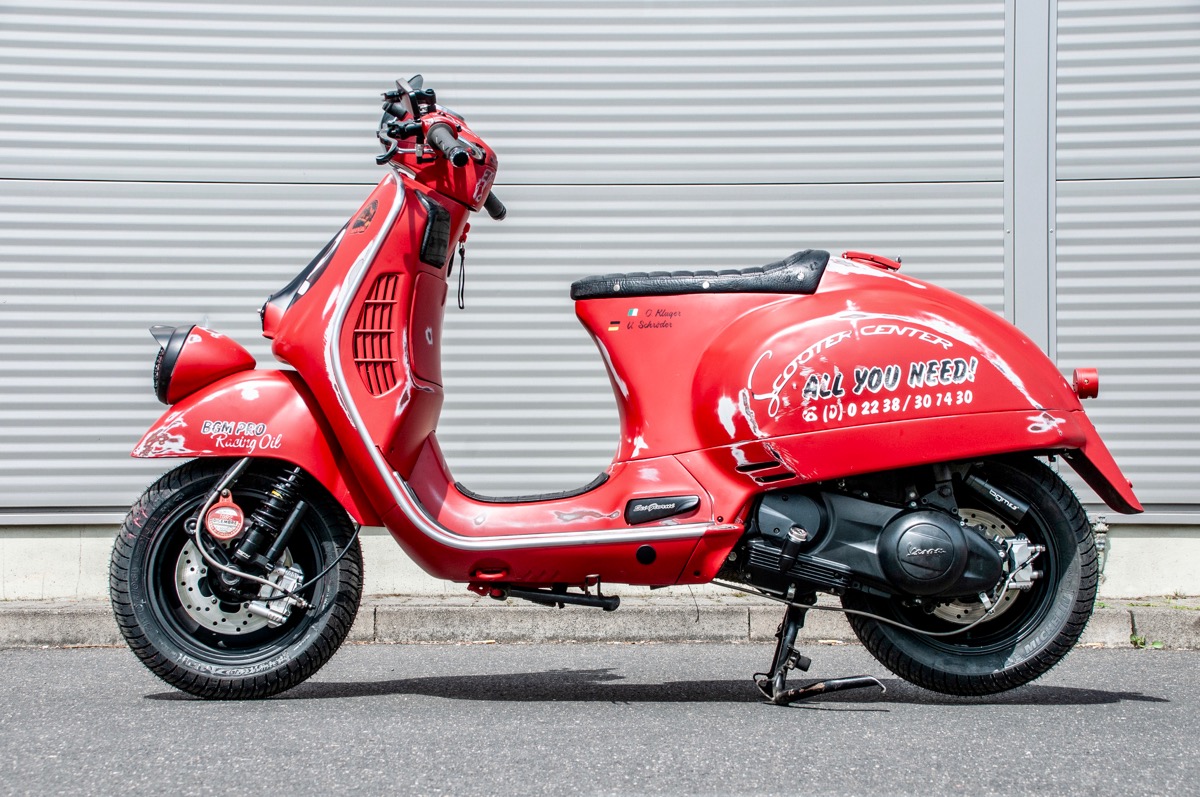
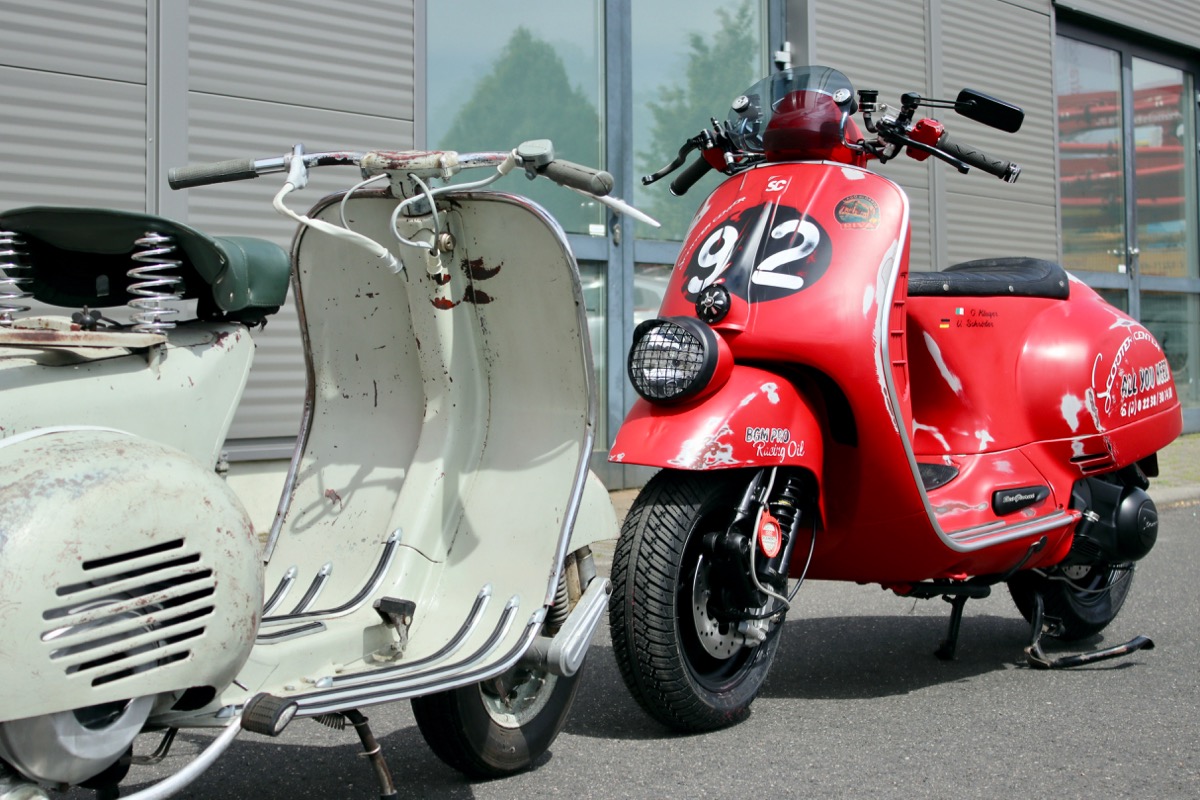
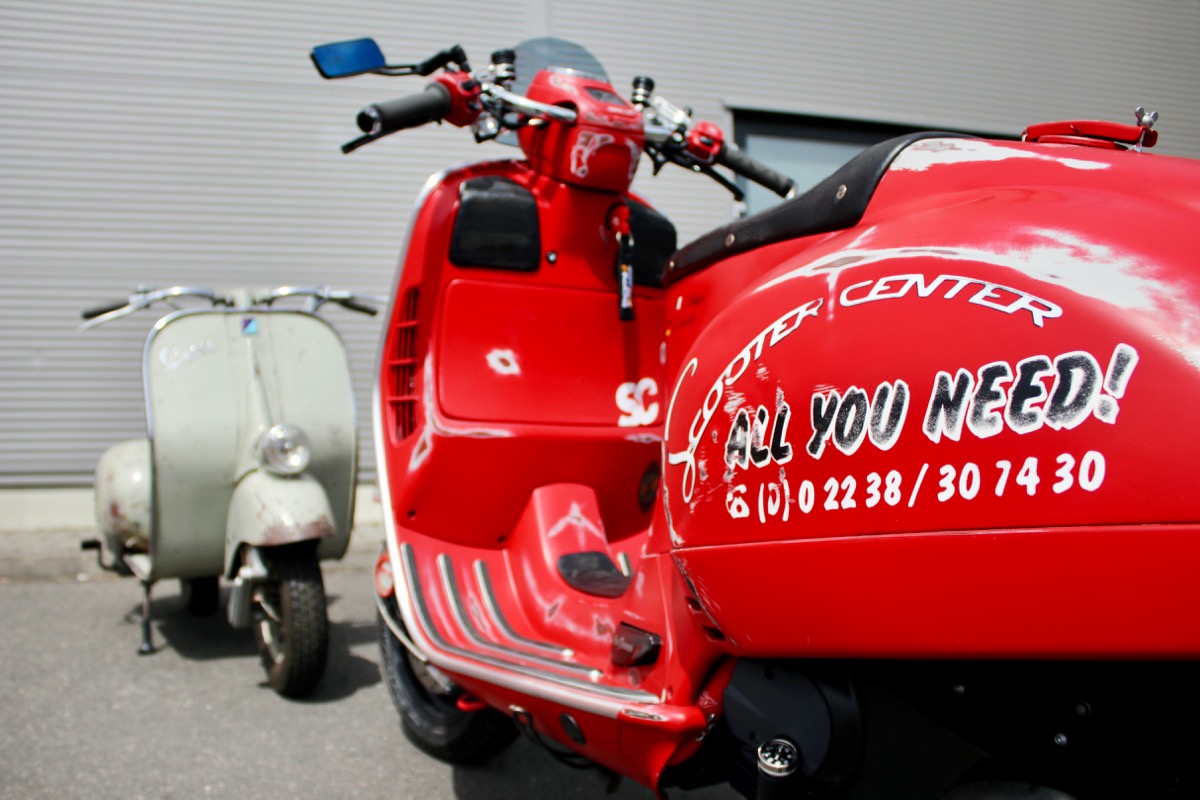
We were inspired by this new model and wanted to release our own “modern” Vespa Sei Giorni. Alex Stroh (right) und Frank Winkel (left) worked on the project of our new Scooter Center Vespa Sei Giorni.


The genesis of the SC Sei Giorni          

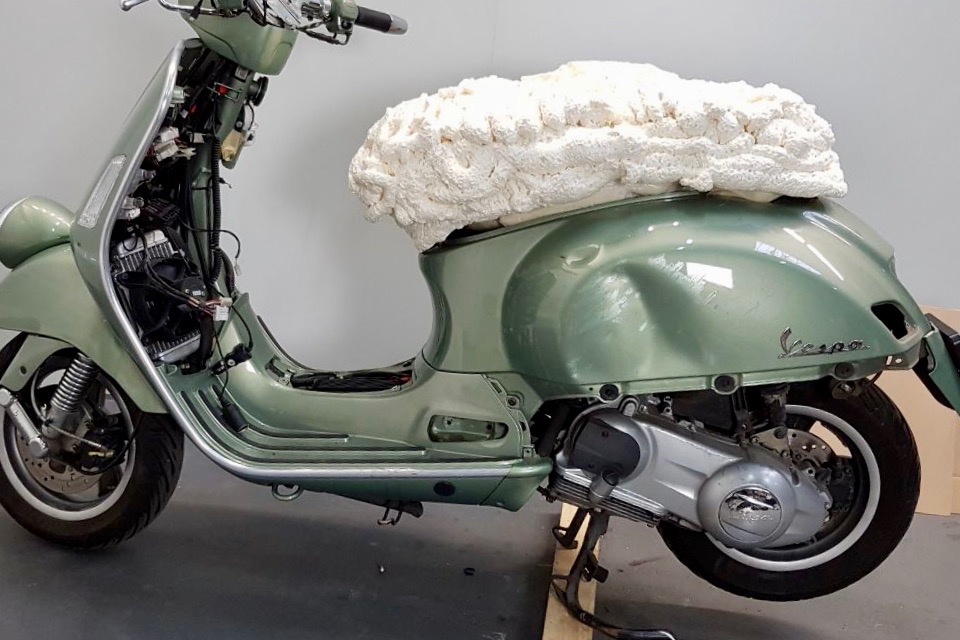
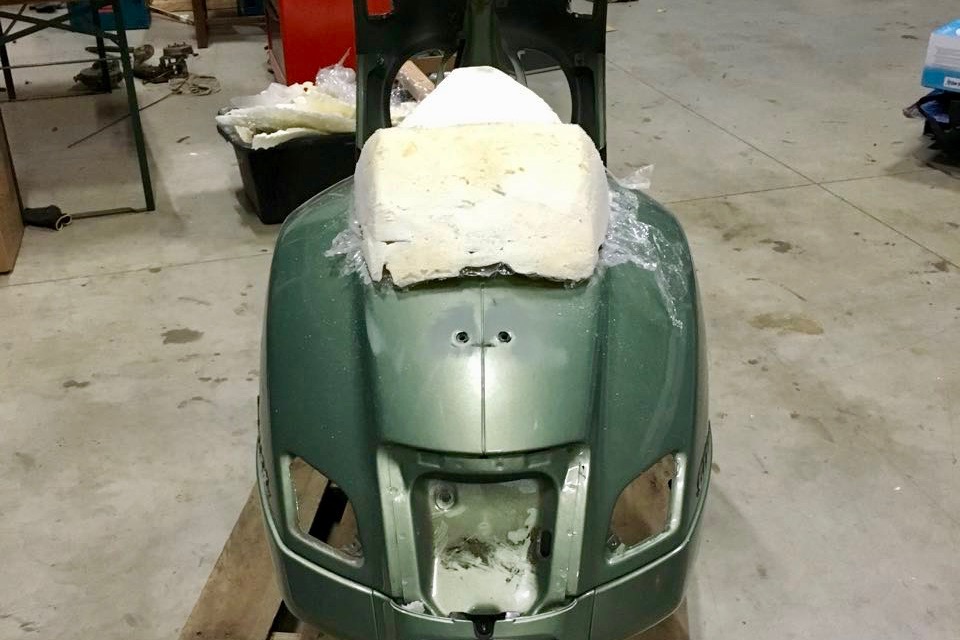
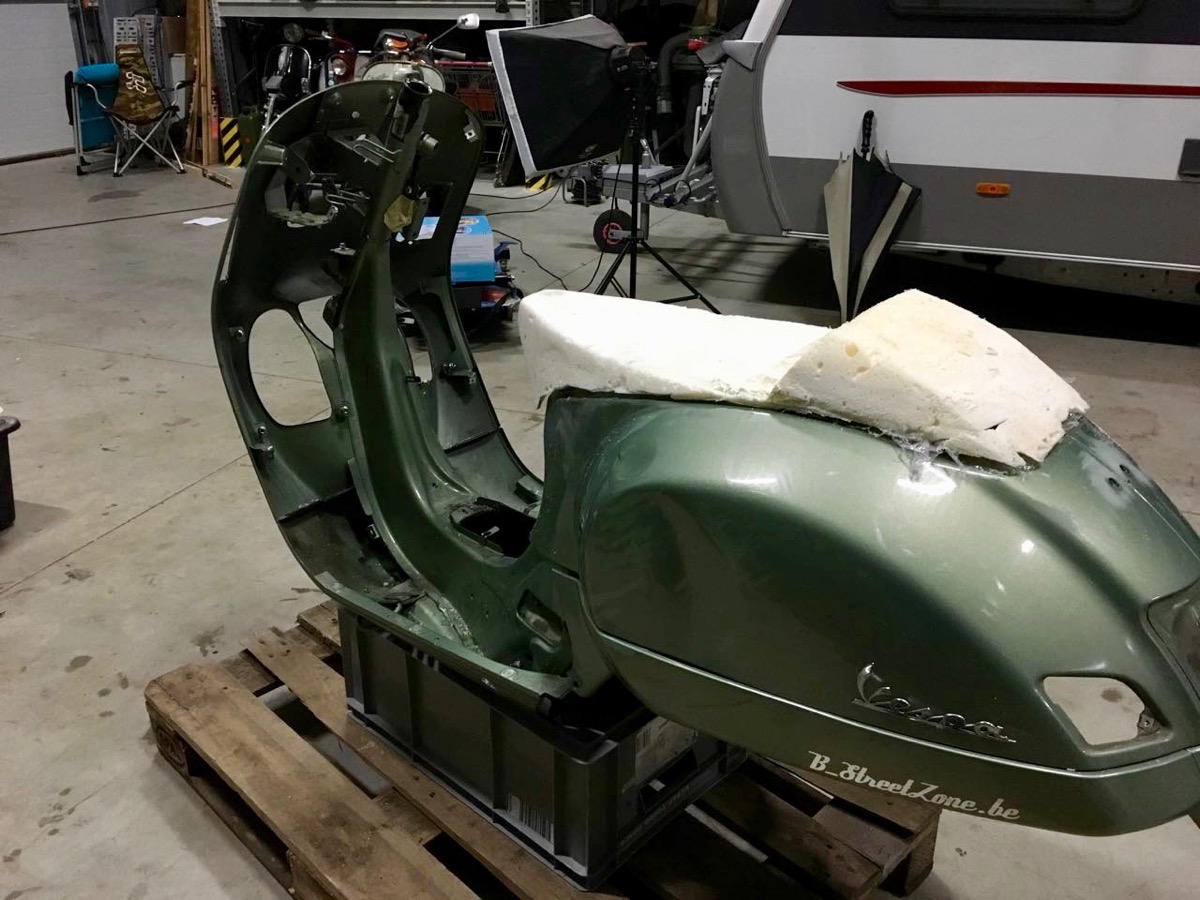
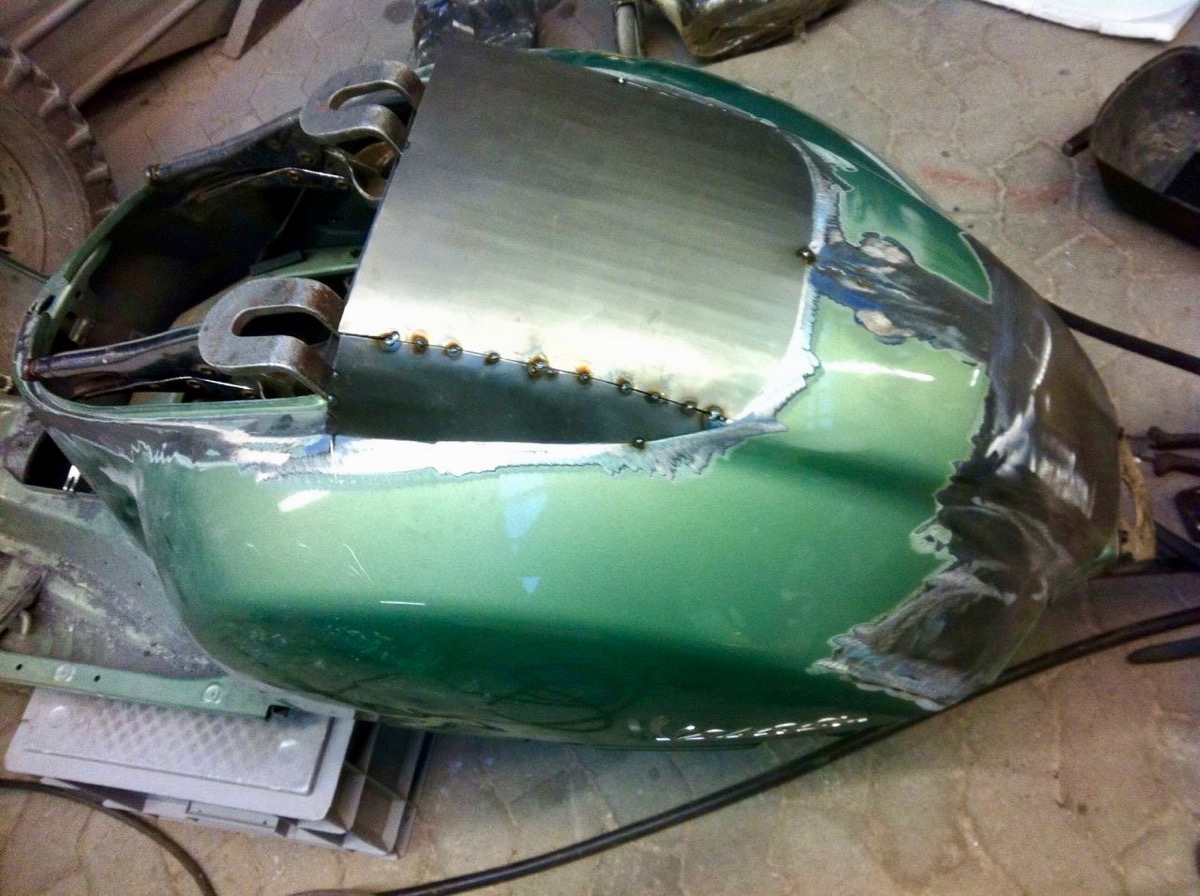
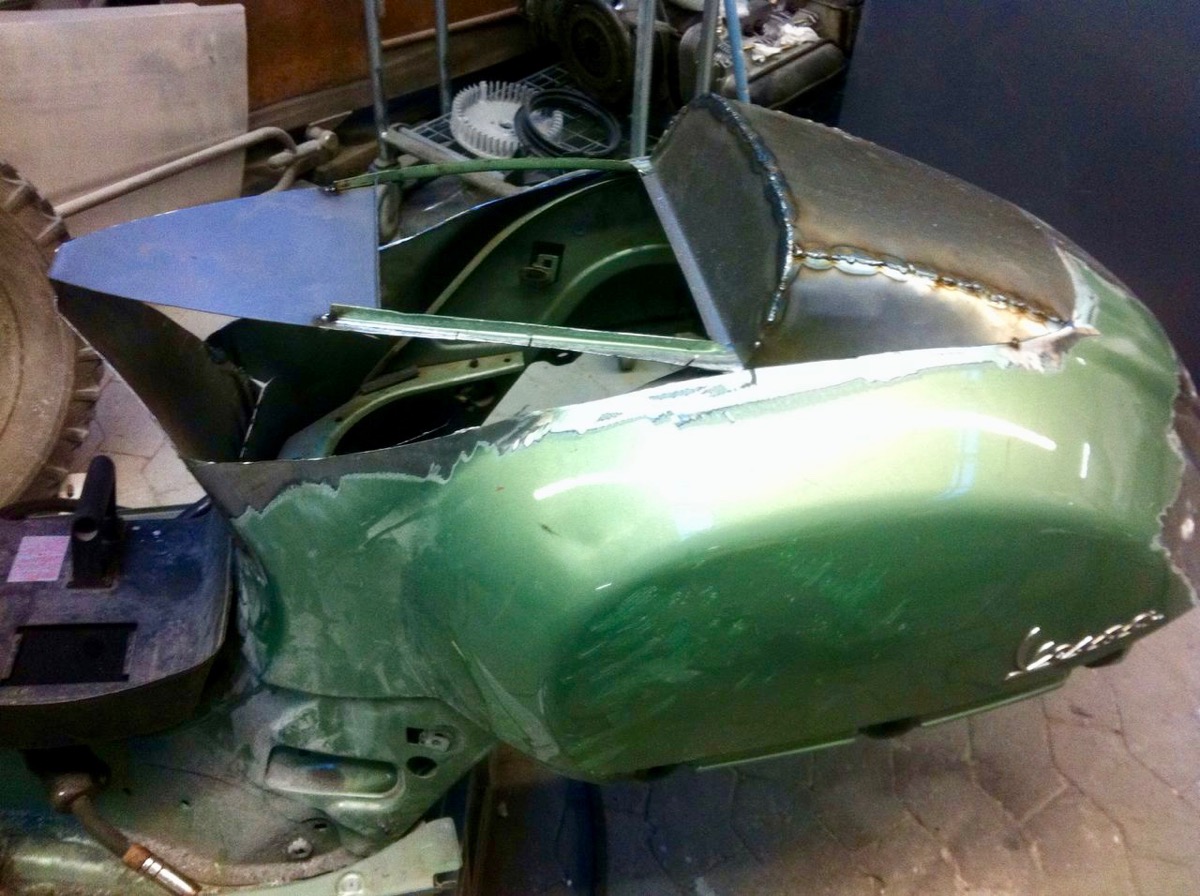
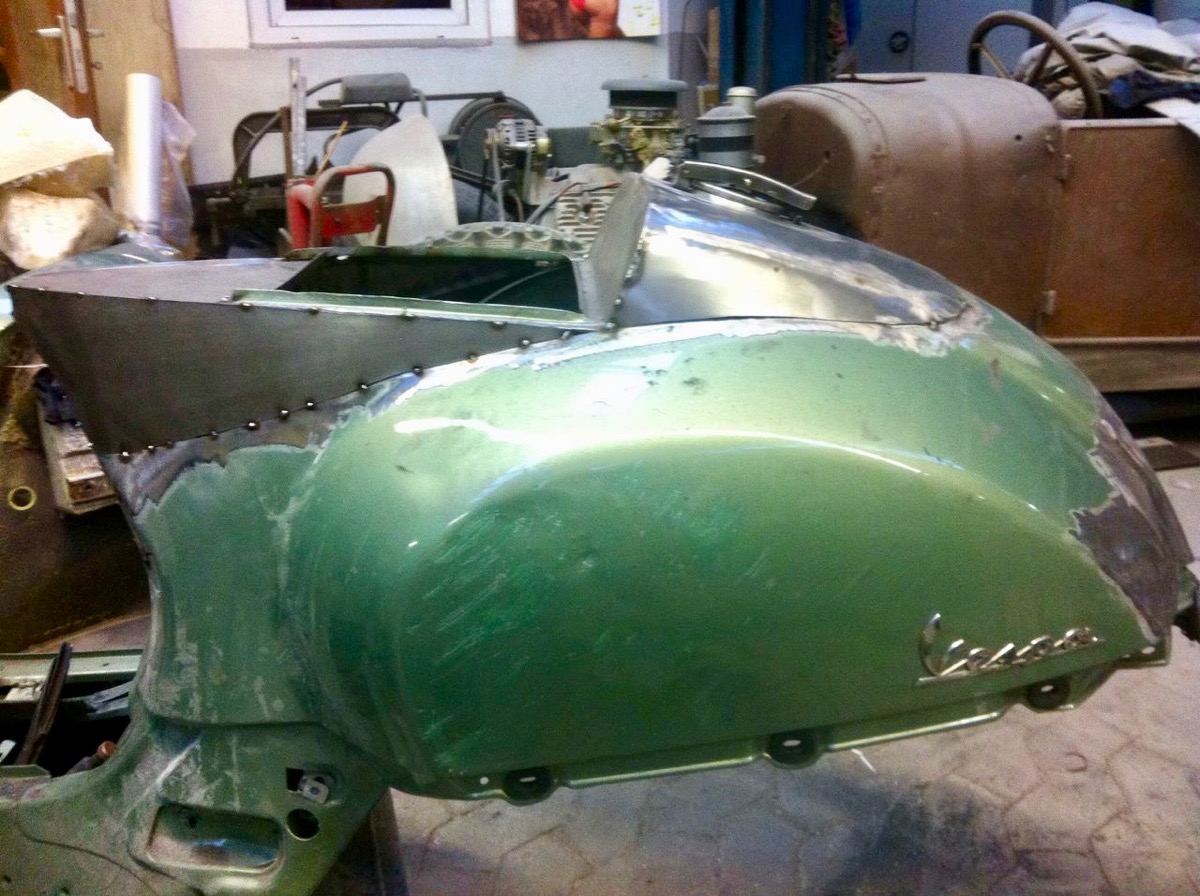
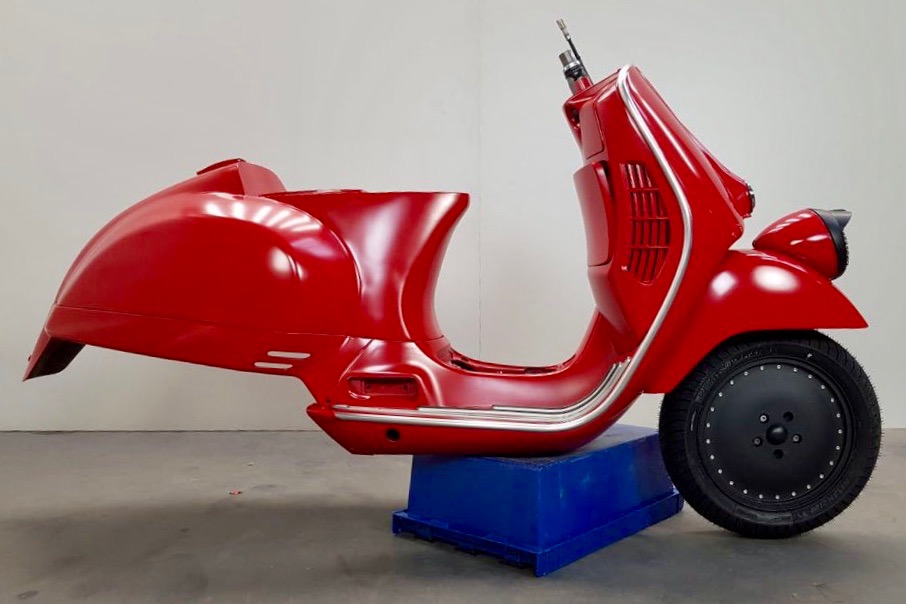
Our new Vespa demonstrator was a normal, slightly accident-damaged Vespa GTV…

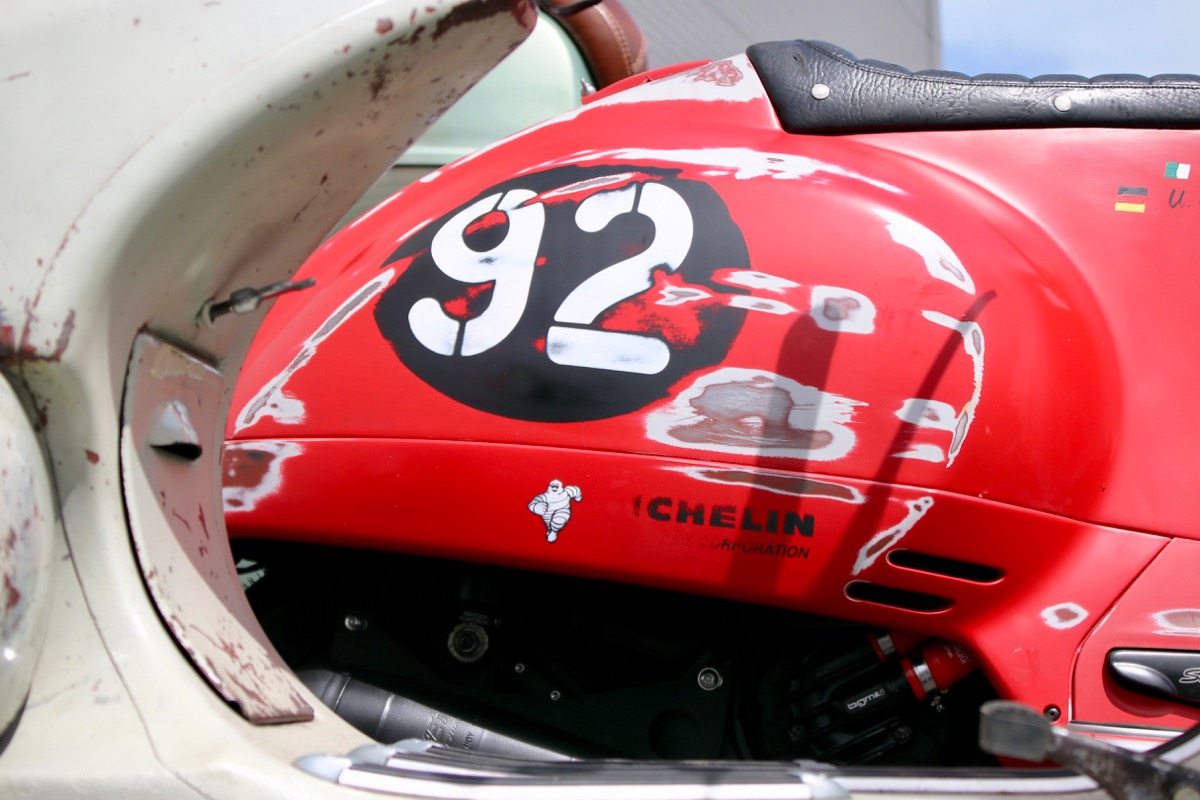
 Scooter Center Vespa SC Sei GiorniVespa Modellierung mit Bauschaum

Filled building foam?

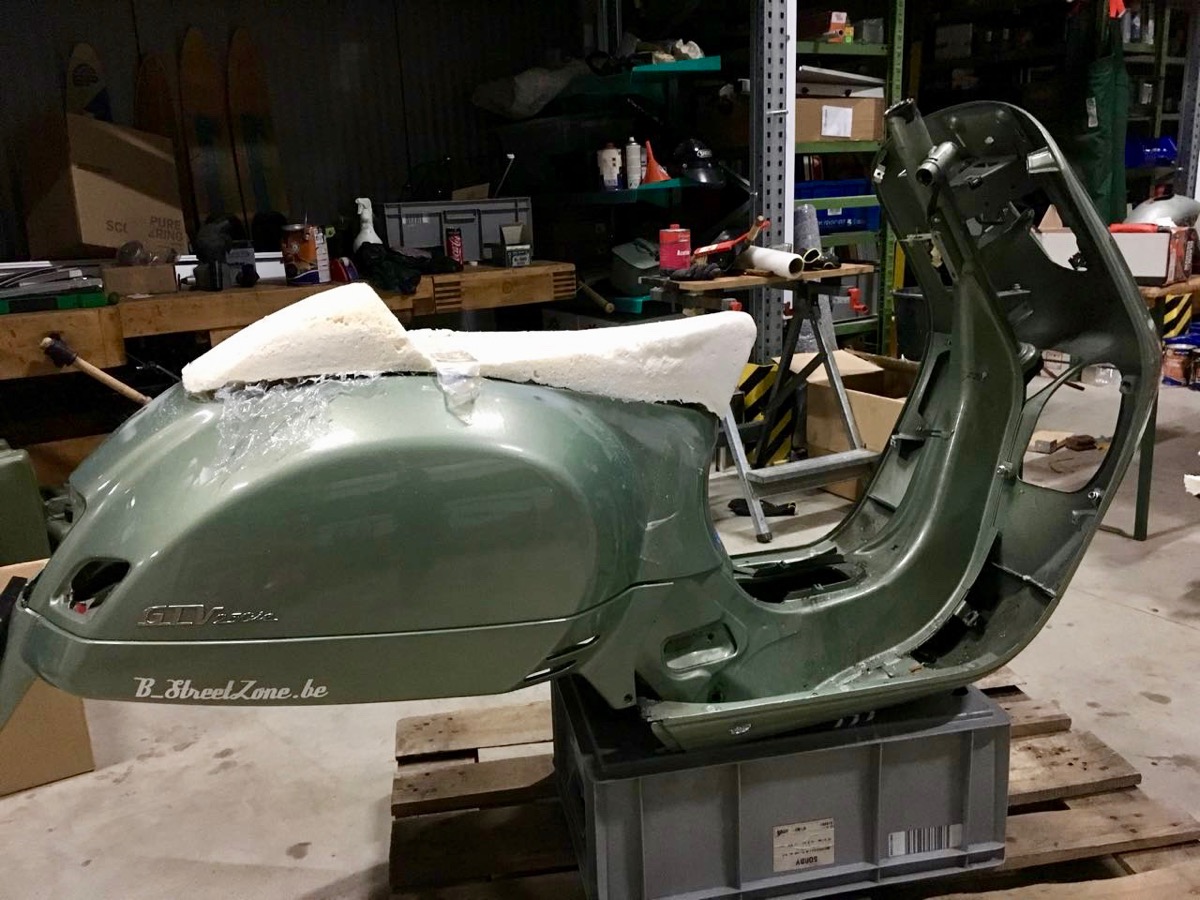
The filled building foam was just a model for Mathias Laubsch from Blechwerk in Neuss, http://www.blechwerk.com/, who brilliantly transformed it into metal sheet.


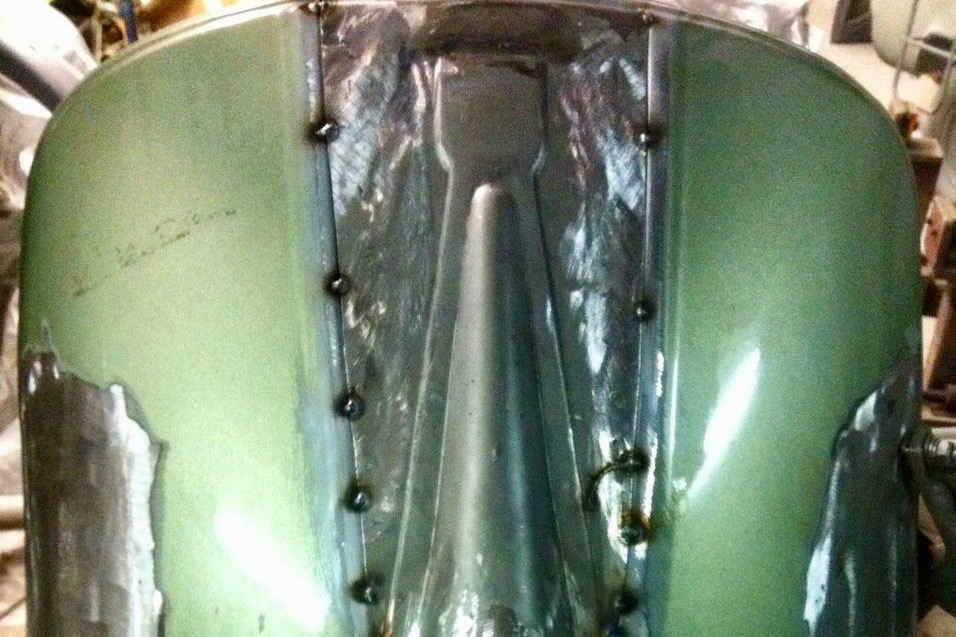
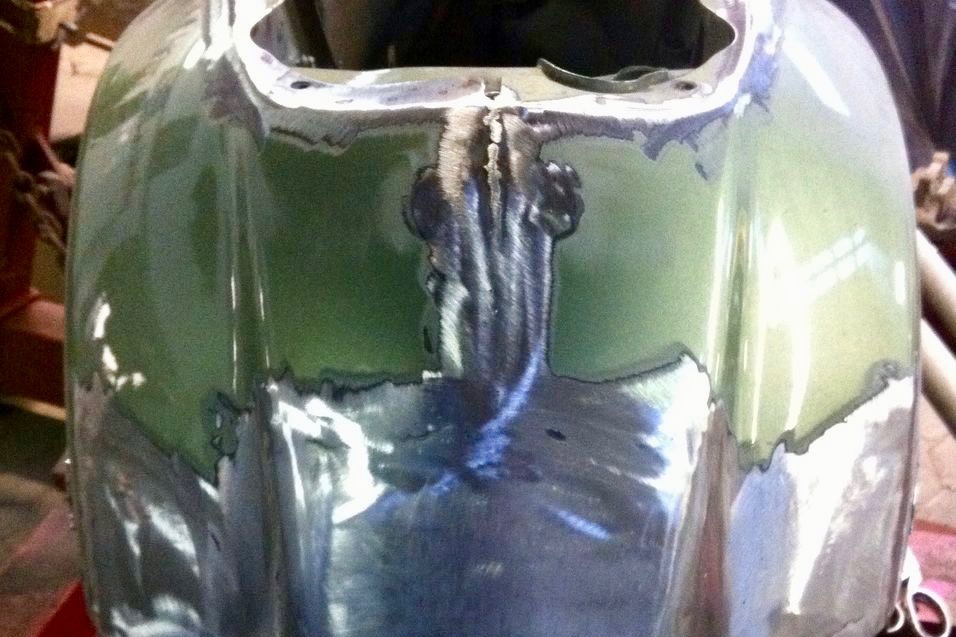
Huge sheet metal and painting work!

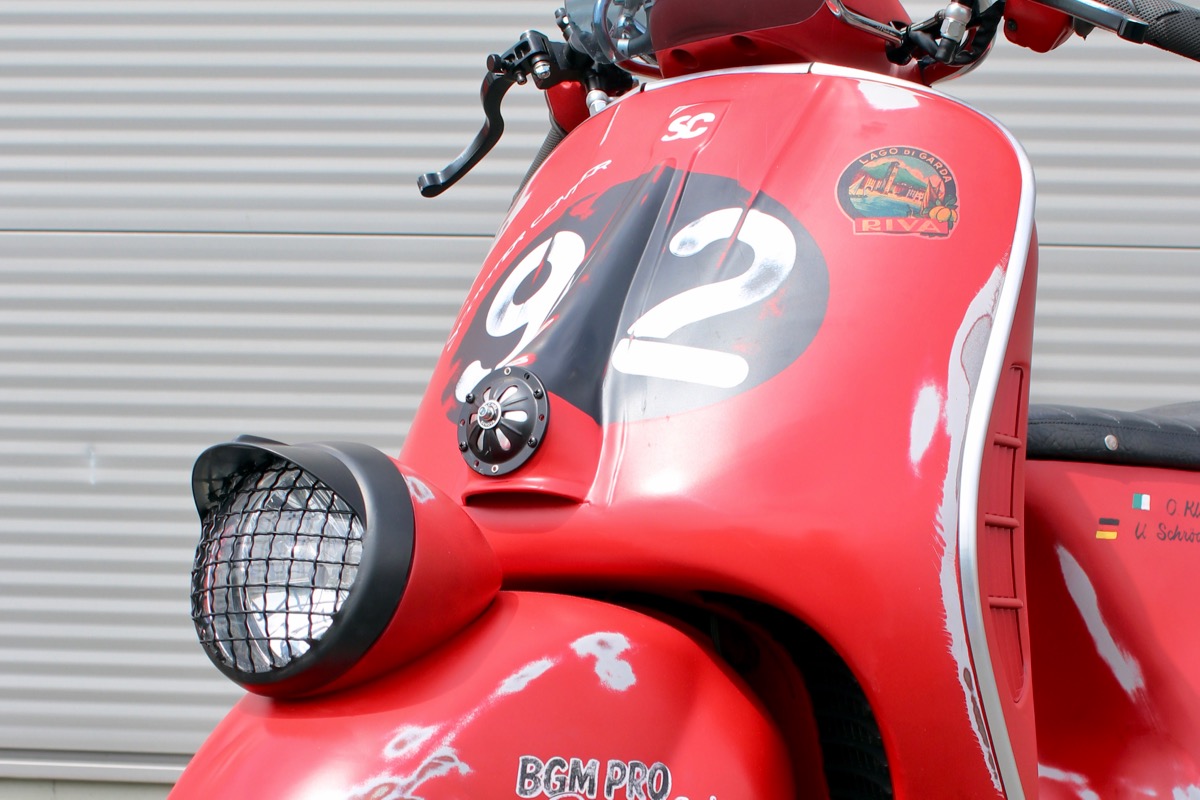
For the typical “nose” we mounted a horn cover which is normally used on a Vespa VNA-VNB. We “just” welded the indicators and the hole under the tail light and Vespa Sei Giorni was brought to the painter…

All plastic parts got a silver coating so that patinatig could be made on “metal sheet” and not on bare plastic.

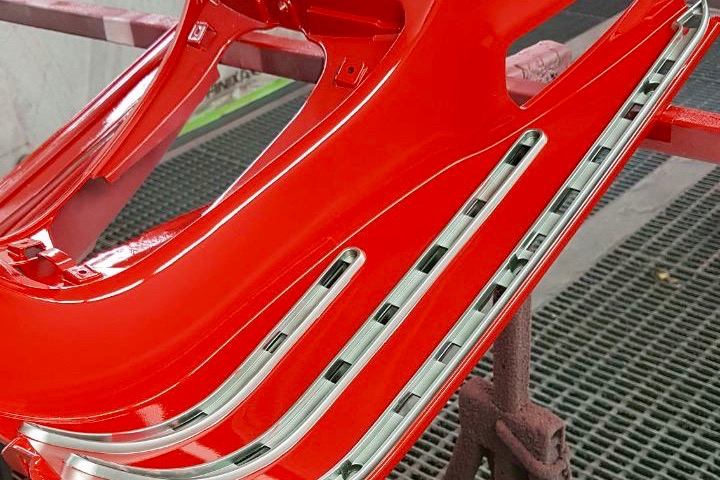
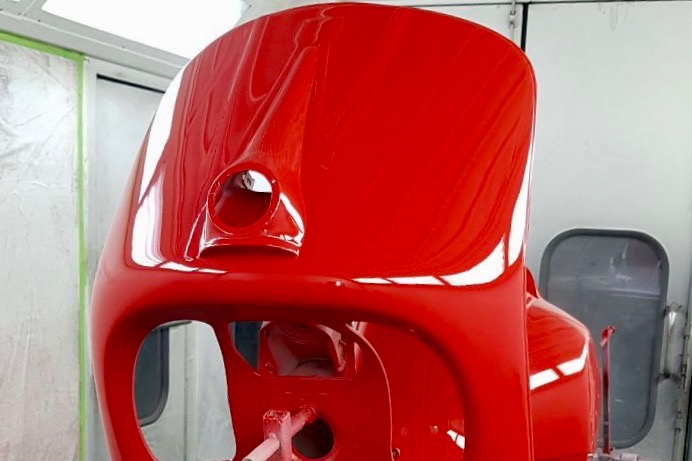
Then, all metal and plastic parts were painted with a deep red coating which was used in the 50s and then again with a second coating in grey before being painted eventually with the red varnish which recalls the typical coating of the first Piaggio race models.

Custom-made Vespa seat

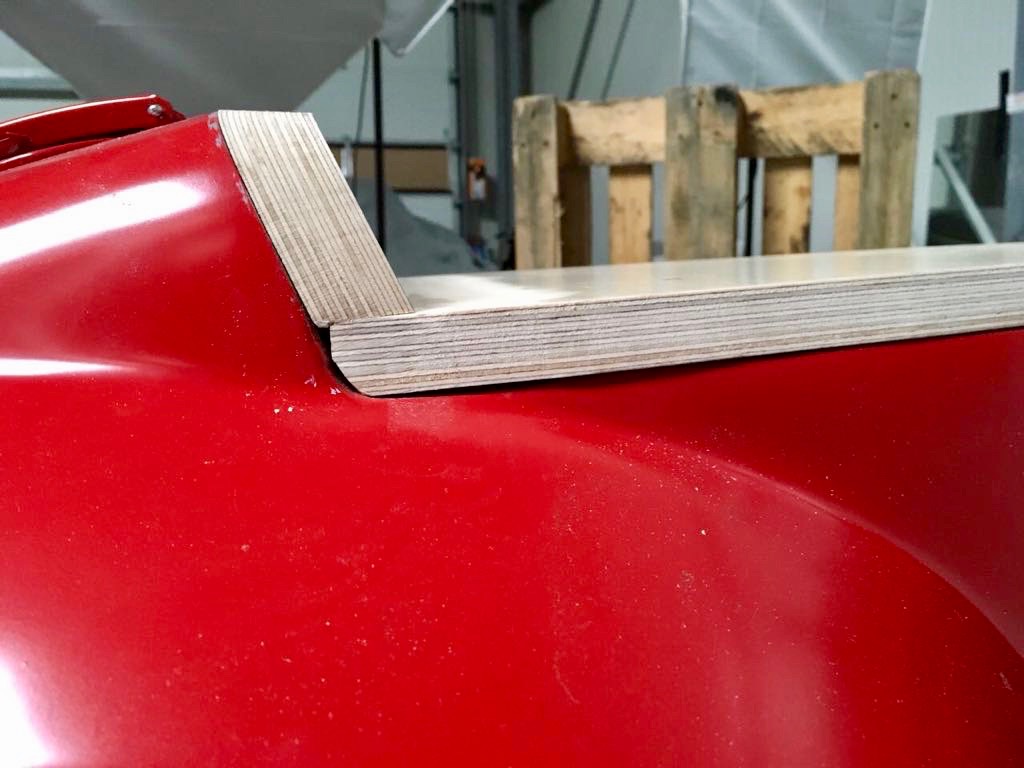
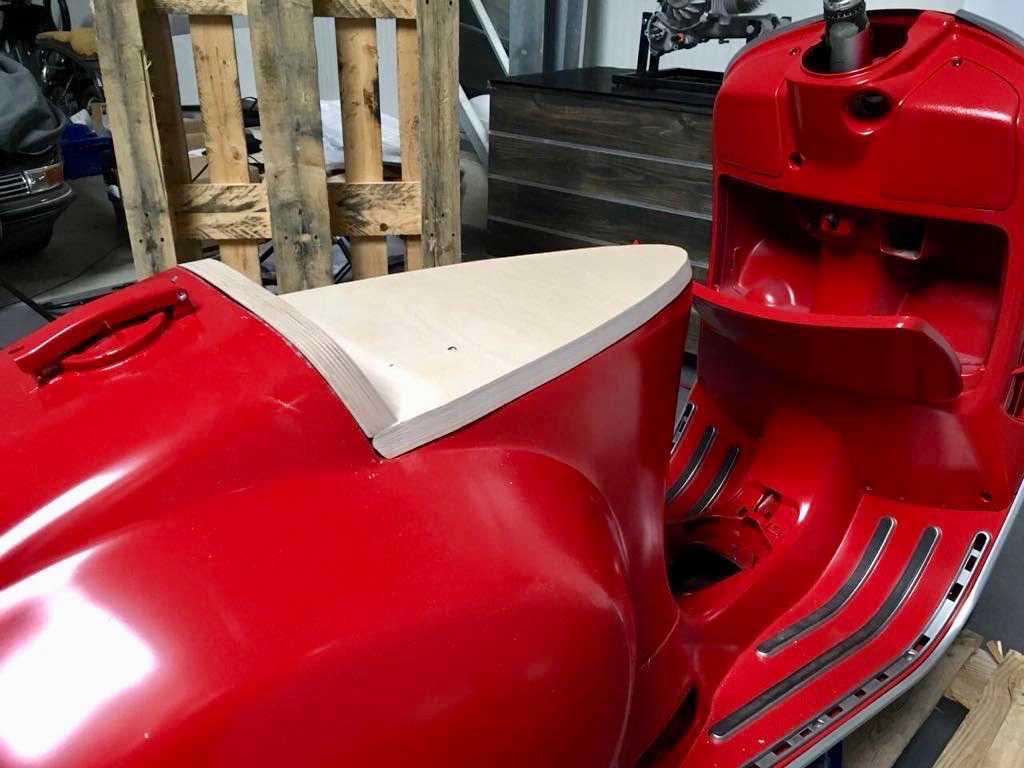
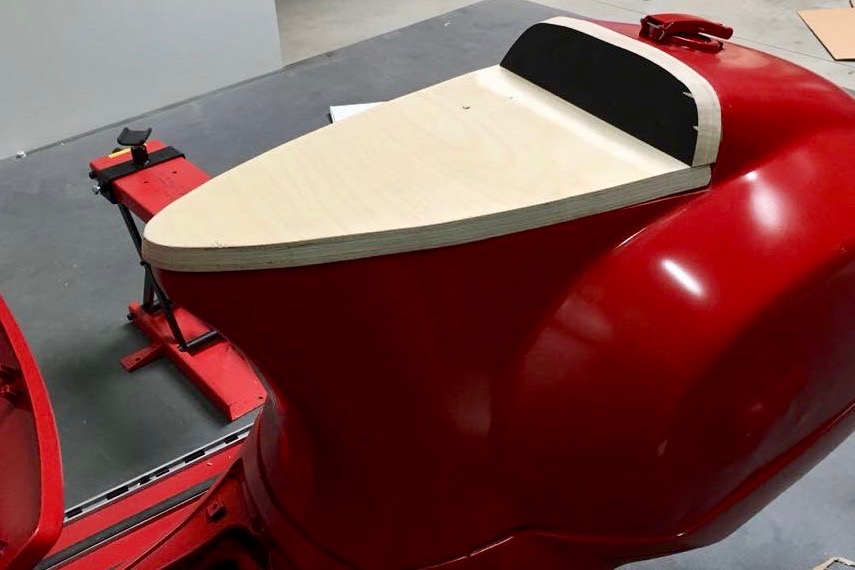
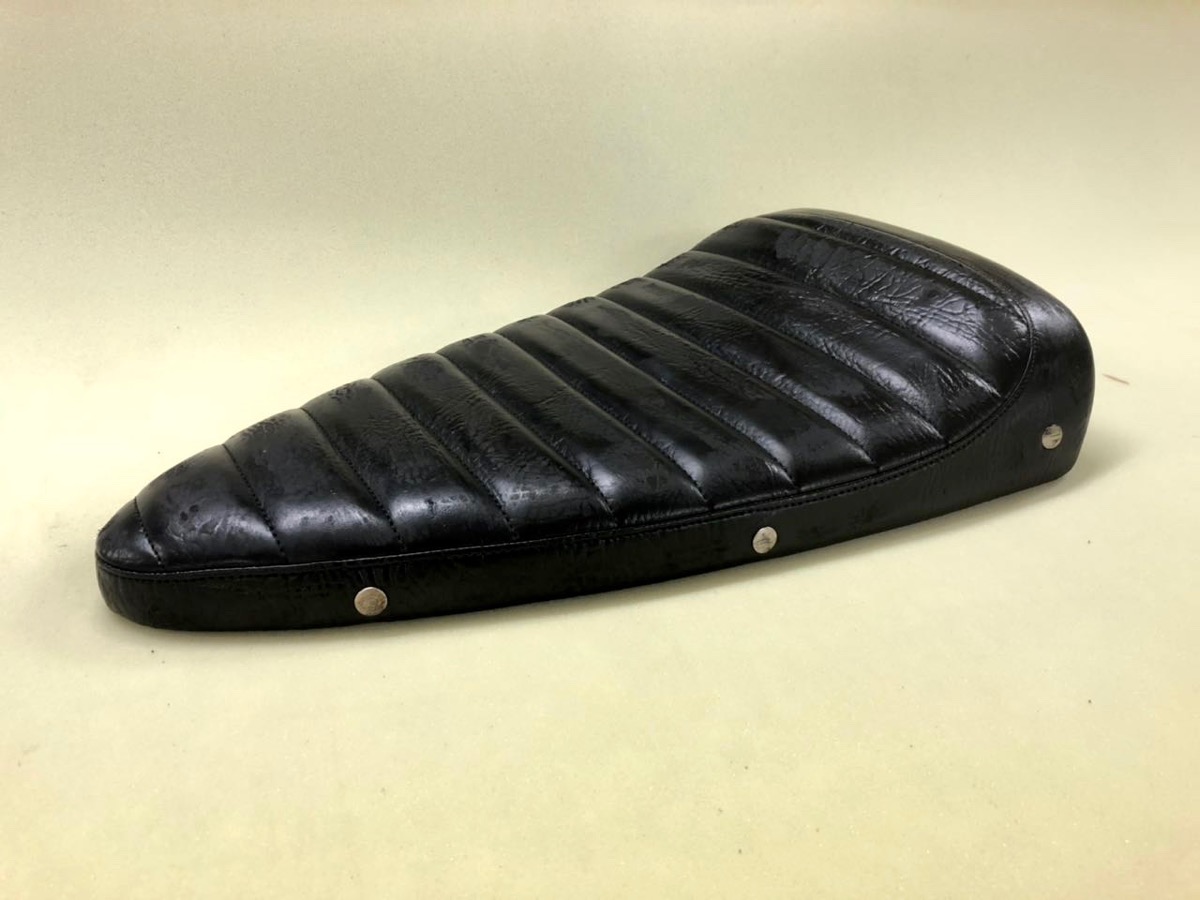
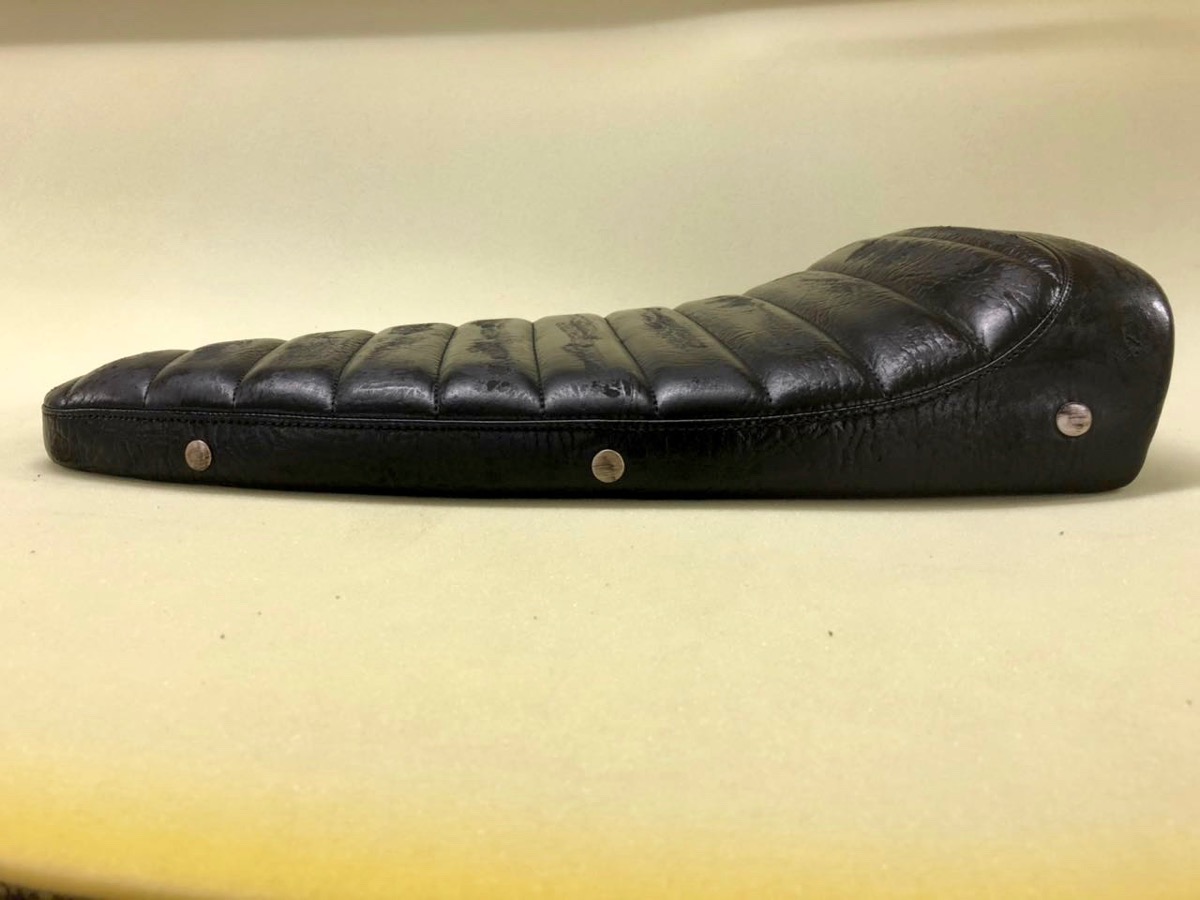
The seat frame was made in our workshop and given to the seat specialist Holger http://www.sitzbankdoktor.de/ who sacrificed his old leather jacket and made the perfect seat for the Sei Giorni.

Racing handlebar!

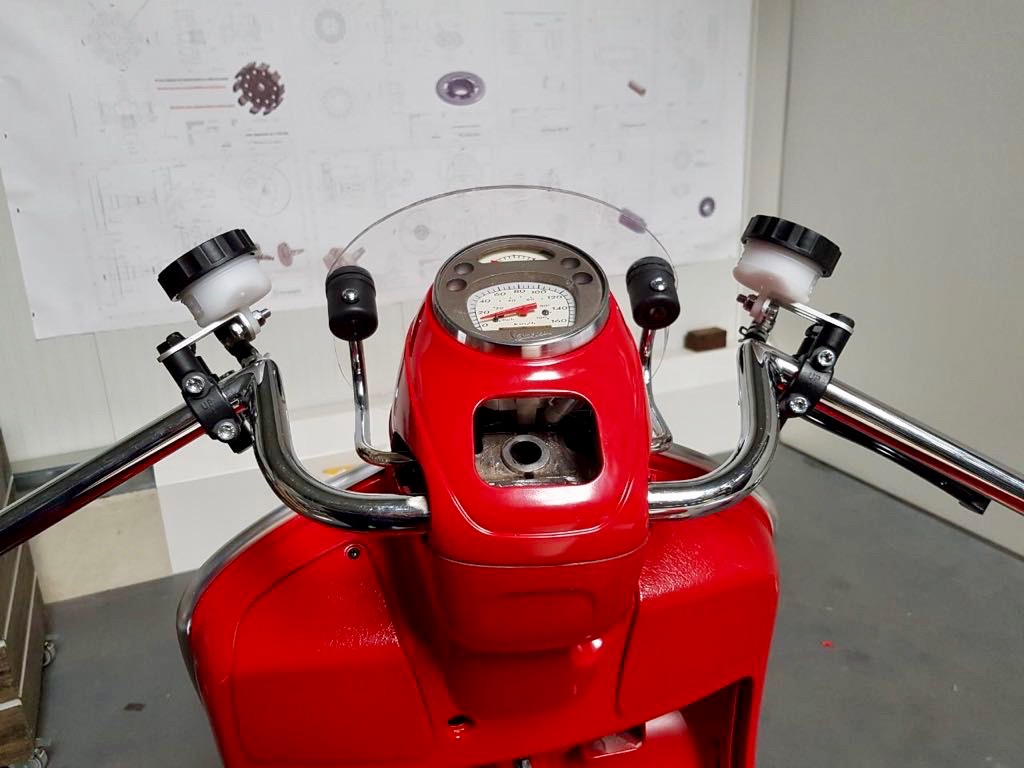
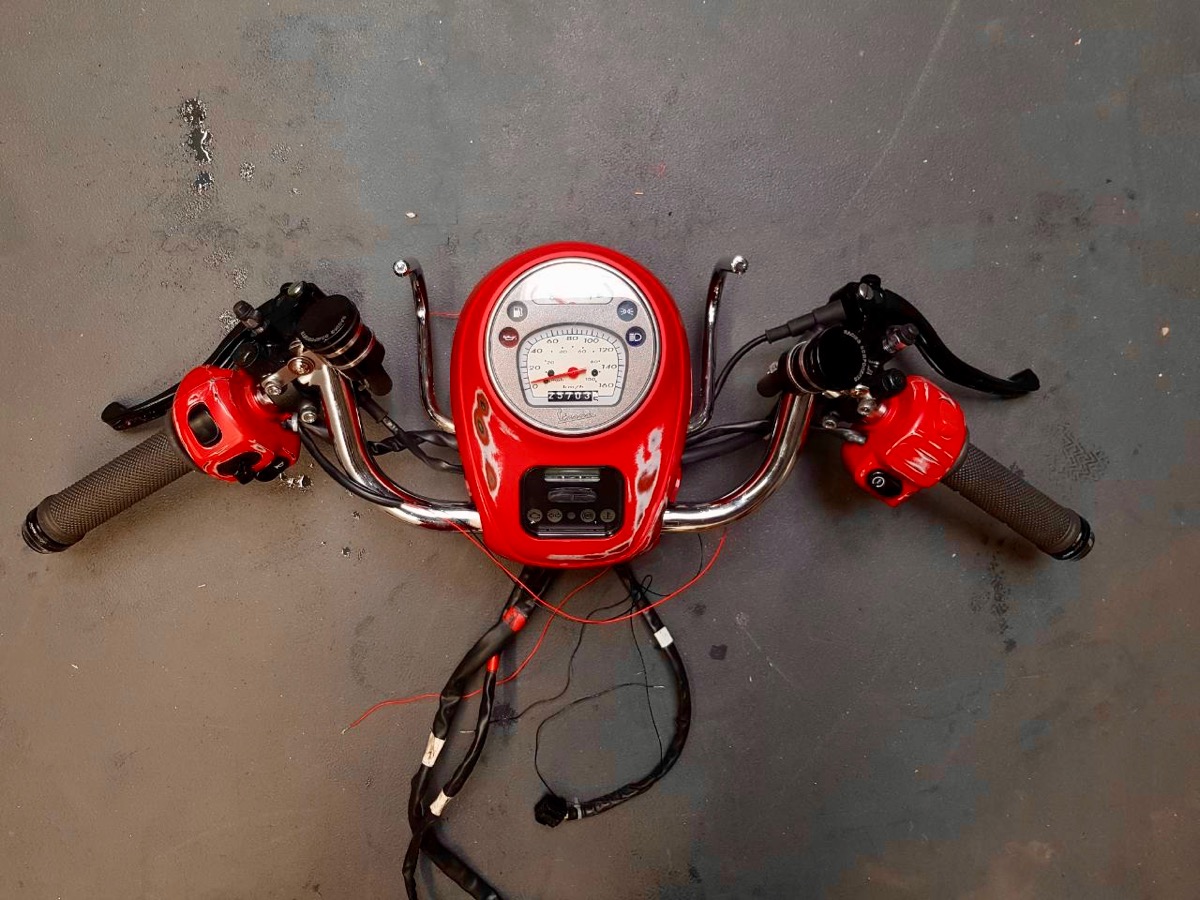
The handle bar was replaced with a M-shaped handle bar by Fehling.

Vespa with race patina

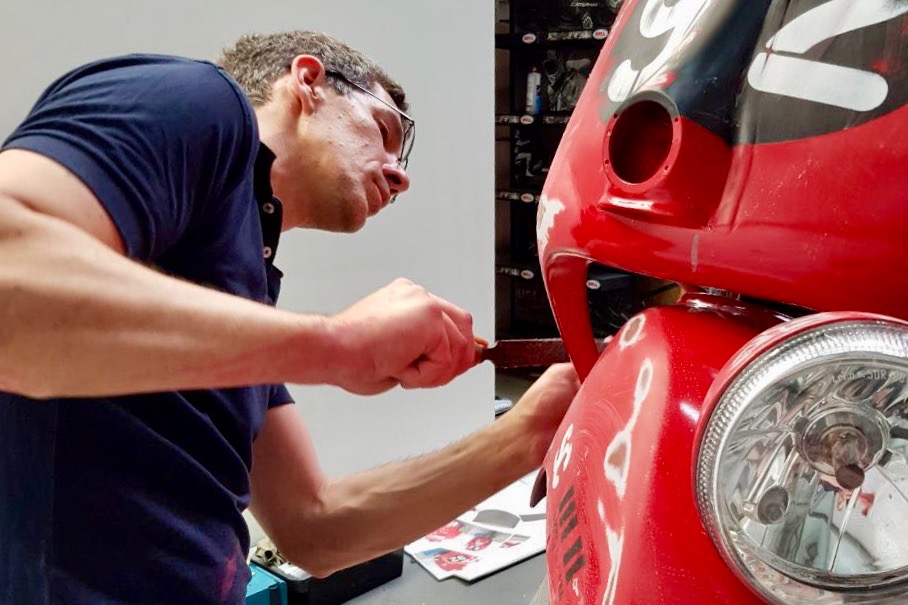
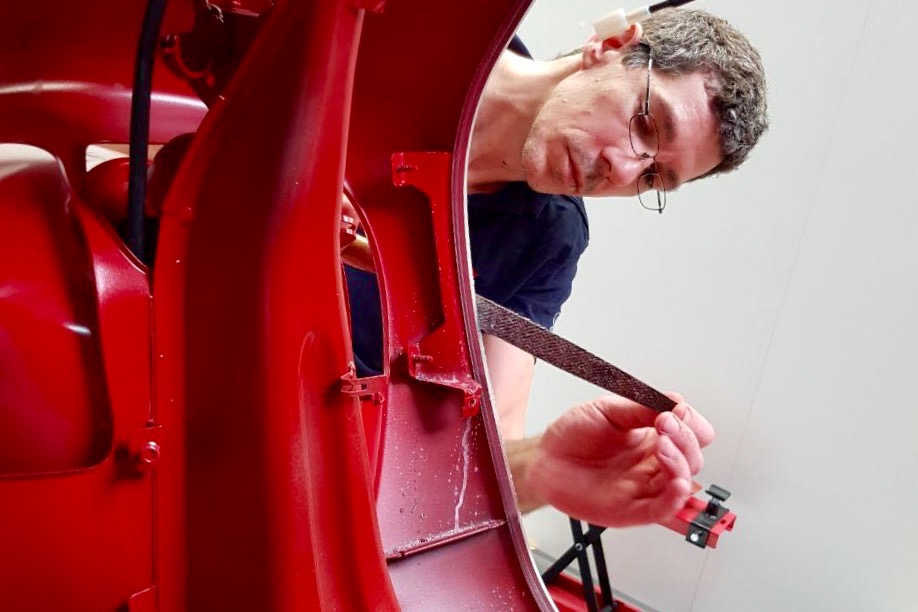
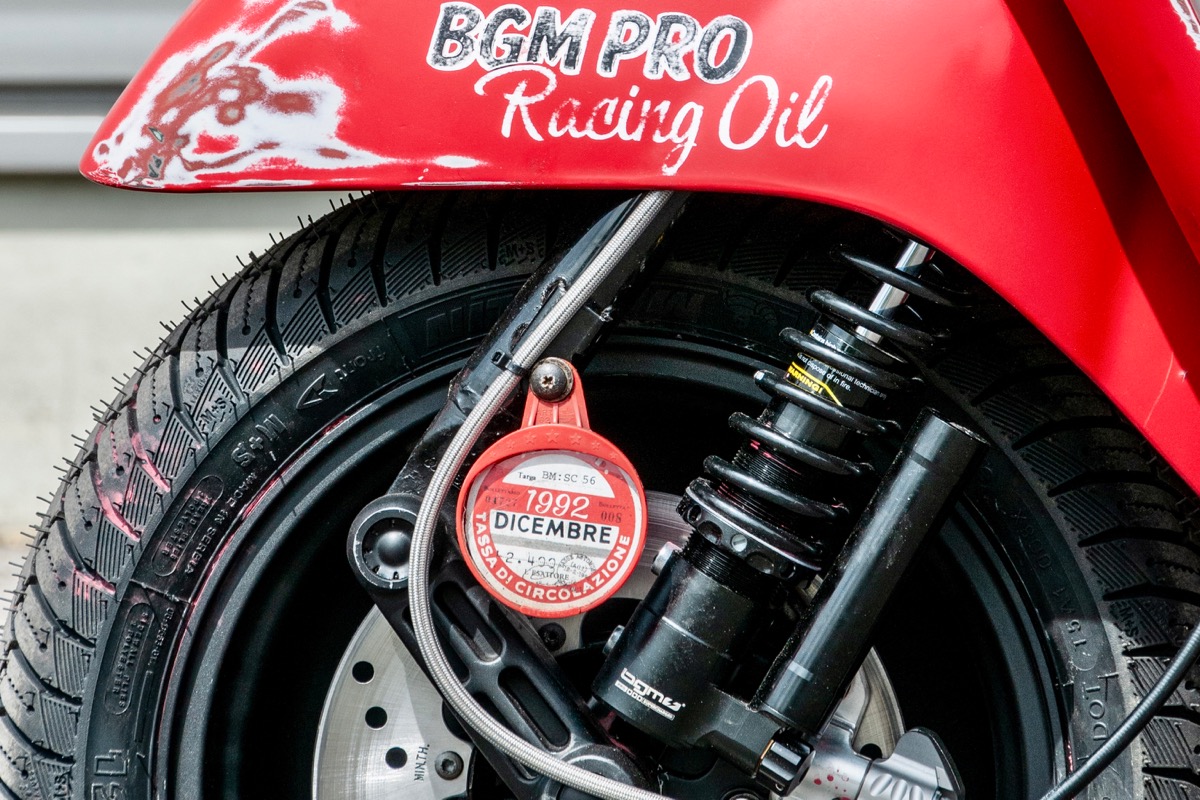
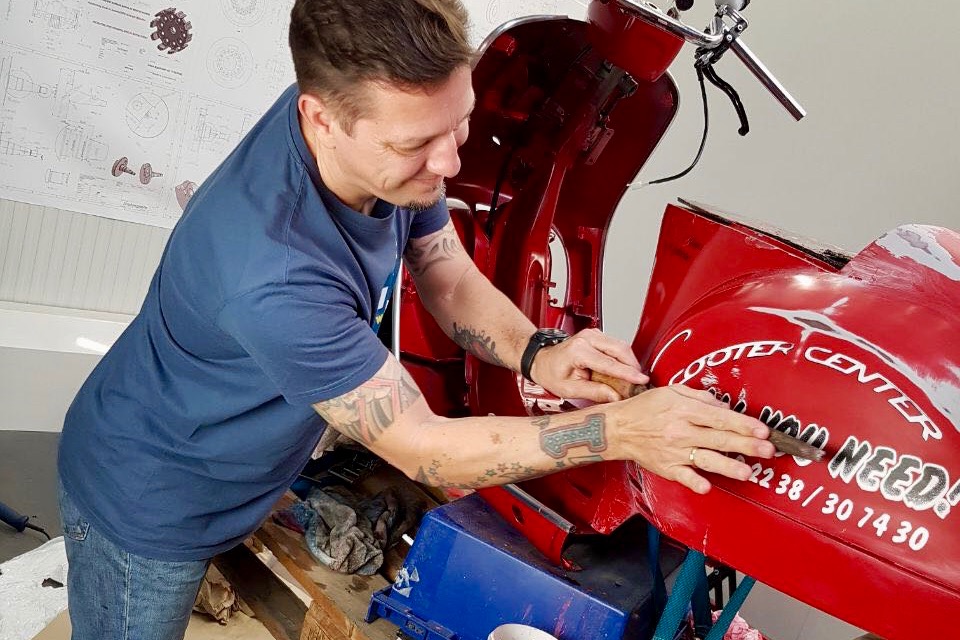
In order to get the patina effect we used files and sandpaper!

Vespa Sei Giorni live!

Want to admire our customised Vespa Sei Giorni live? Then cume and visit us in our store in Kurt-Schumacher-Str. 1 in 50129 Bergheim-Glessen, Germany.

Vespa Sei Giorni Vespa GTV 300 Tuning !

Scooter Center Vespa SC Sei Giorni Scooter Center Vespa SC Sei Giorni Scooter Center Vespa SC Sei Giorni Scooter Center Vespa SC Sei Giorni Scooter Center Vespa SC Sei Giorni Scooter Center Vespa SC Sei Giorni Scooter Center Vespa SC Sei Giorni Scooter Center Vespa SC Sei Giorni Scooter Center Vespa SC Sei Giorni Scooter Center Vespa SC Sei Giorni Scooter Center Vespa SC Sei Giorni

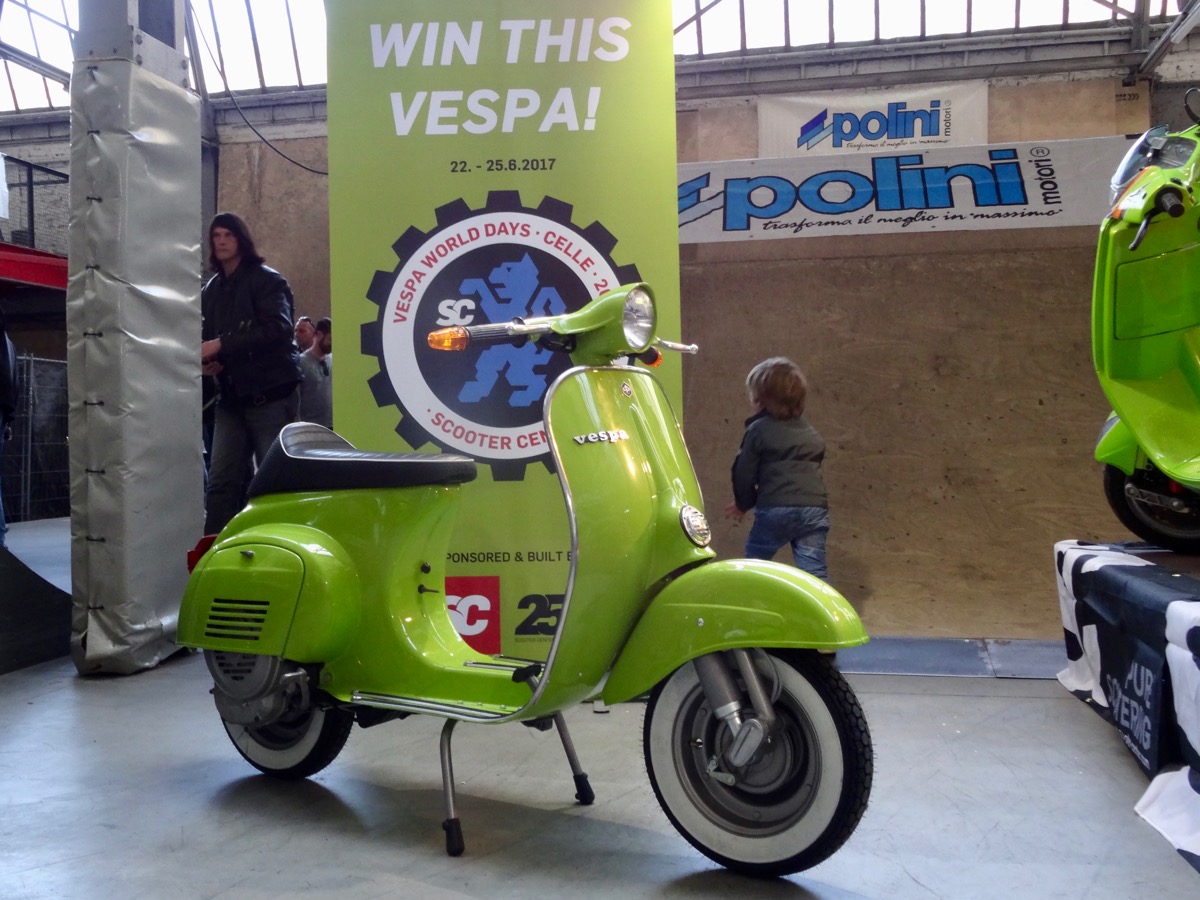
Win this wonderful Vespa V50!

You chose how to customise the VWD Vespa and we restored it the way you wanted it!
The VWD17 Vespa V50 was on display during the Scooter Center Customshow in Cologne and now it will be at stake at the Vespa World Days in Celle, Germany.

VWD17-Vespa - Gewinne eine Vespa bei den Vespa World Days in Celle

Alex has completely disassembled and sandblasted this Vespa V50. After a high-quality professional painting we built it from scratch using our best items.

Here the video of the VWD17 Vespa restoration:

VWD17 Win this VESPA V50S Celle 2017

You can win this stunning scooter at the Vespa World Days in Celle.

Come and see us in Celle!

Scooter Center will be the main sponsor at the Vespa World Days in Germany and will be there with a huge booth.
For all information about the biggest Vespa rally of the year please click here: http://en.vespaworlddays2017.com/

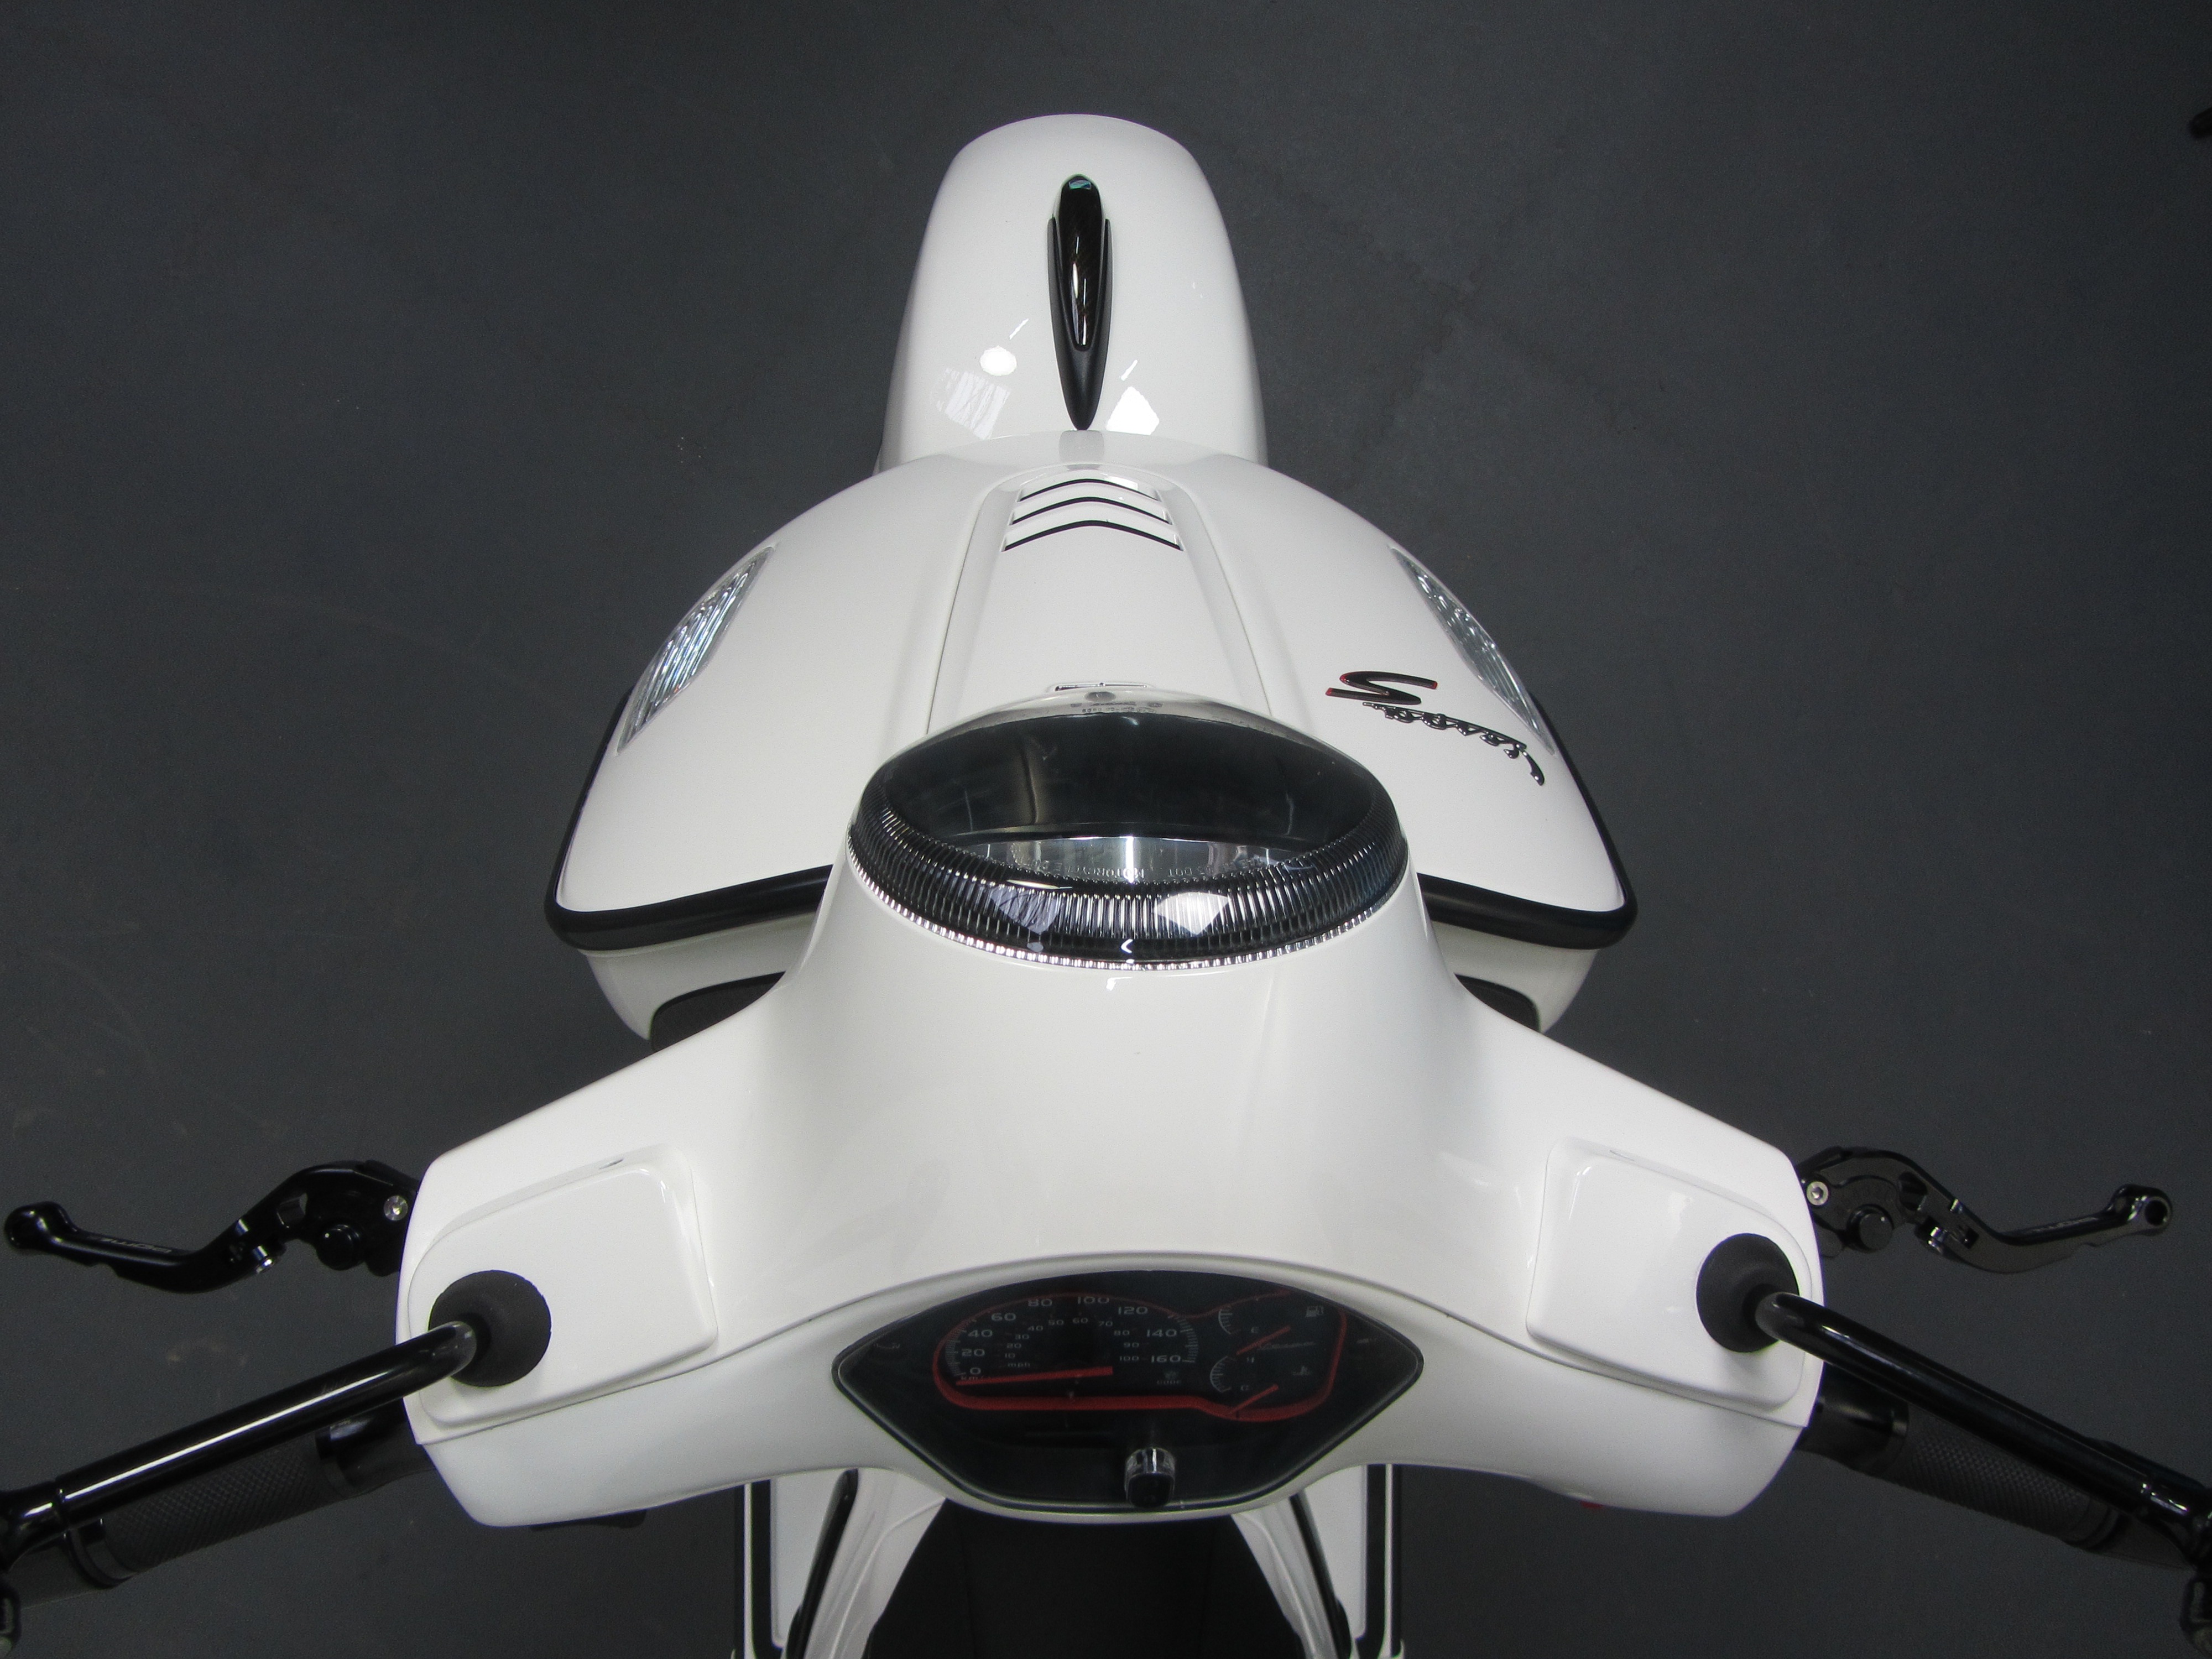
New brake levers for Vespa – Installation guide Vespa GT / GTS

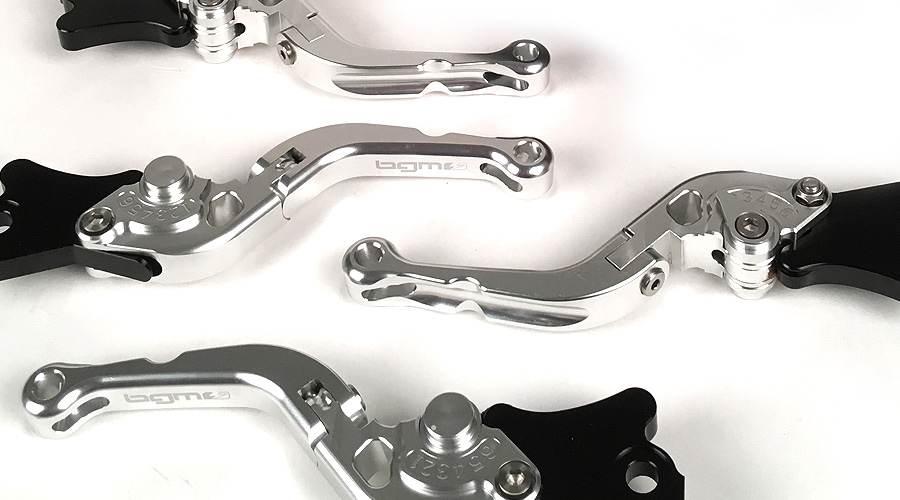
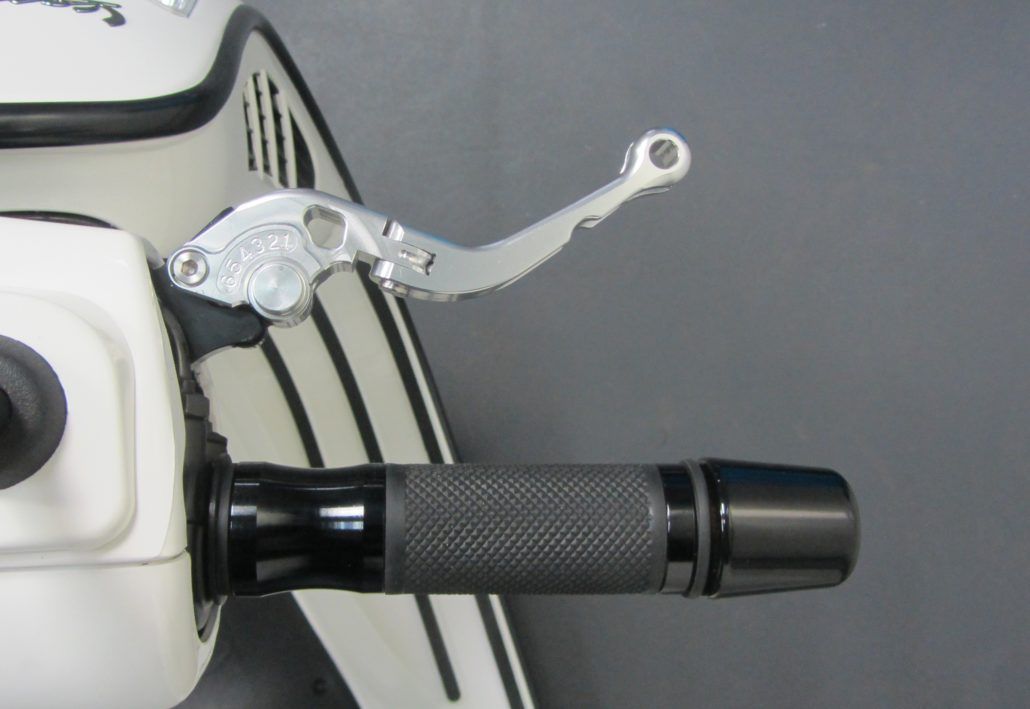
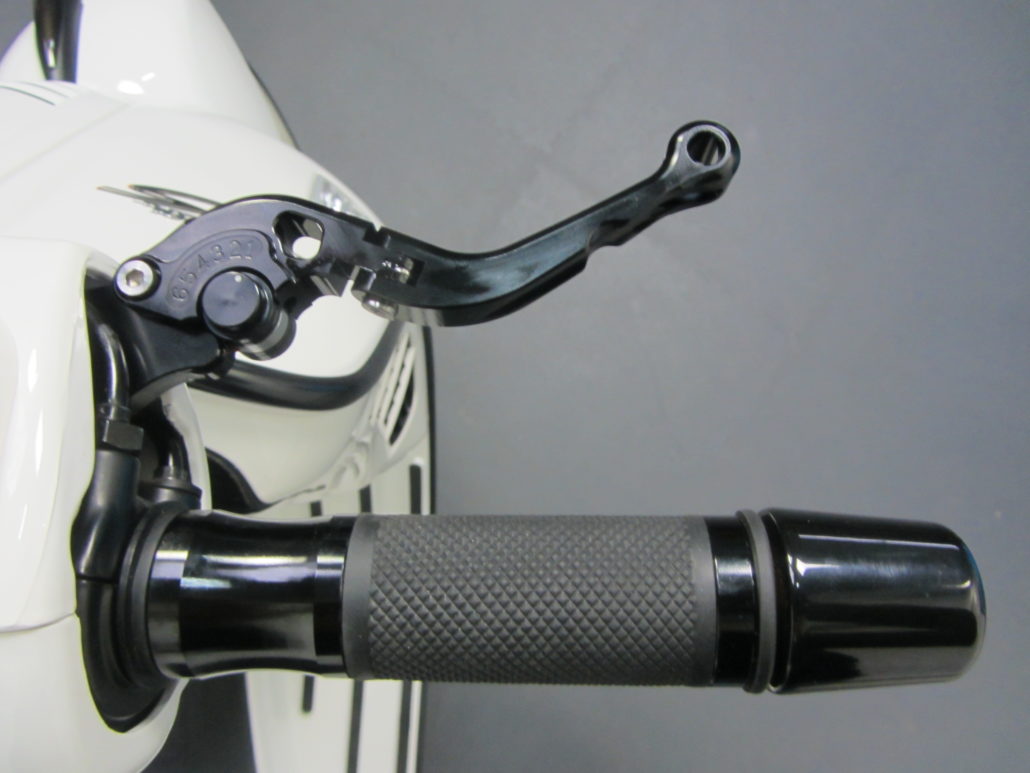
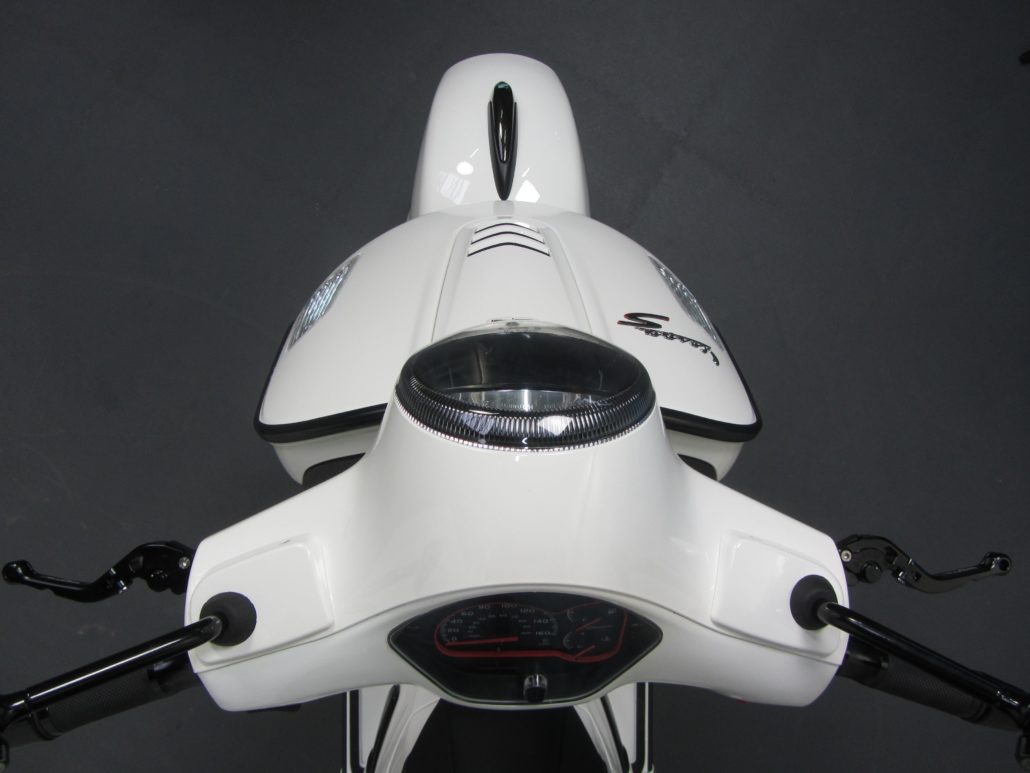
New for Vespa GT / GTS: BGM brake levers for all Vespa GT, GTL, GTS models with a HengTong brake system. This CNC machined lever in high-strength aluminium is adjustable in 6 positions.

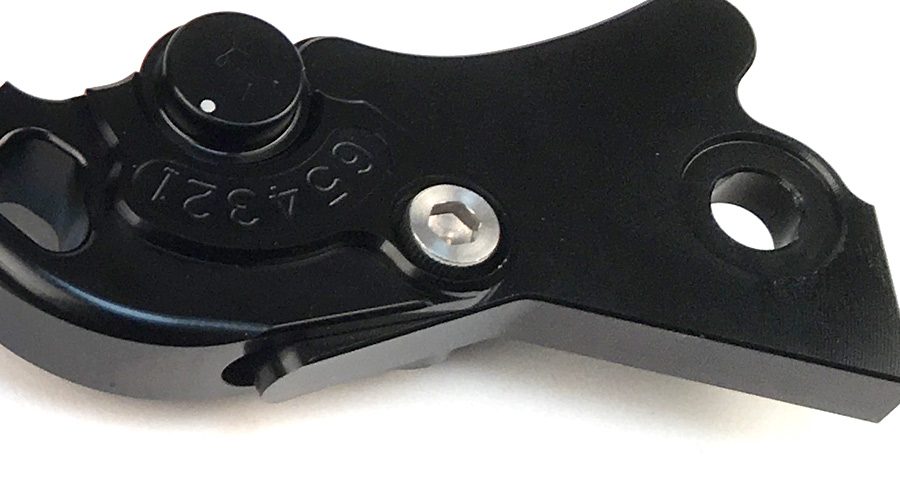
The lever is provided with a span adjuster on the lower side which enables you to tailor the lever length in order to achieve the most comfortable position and a perfect grip.

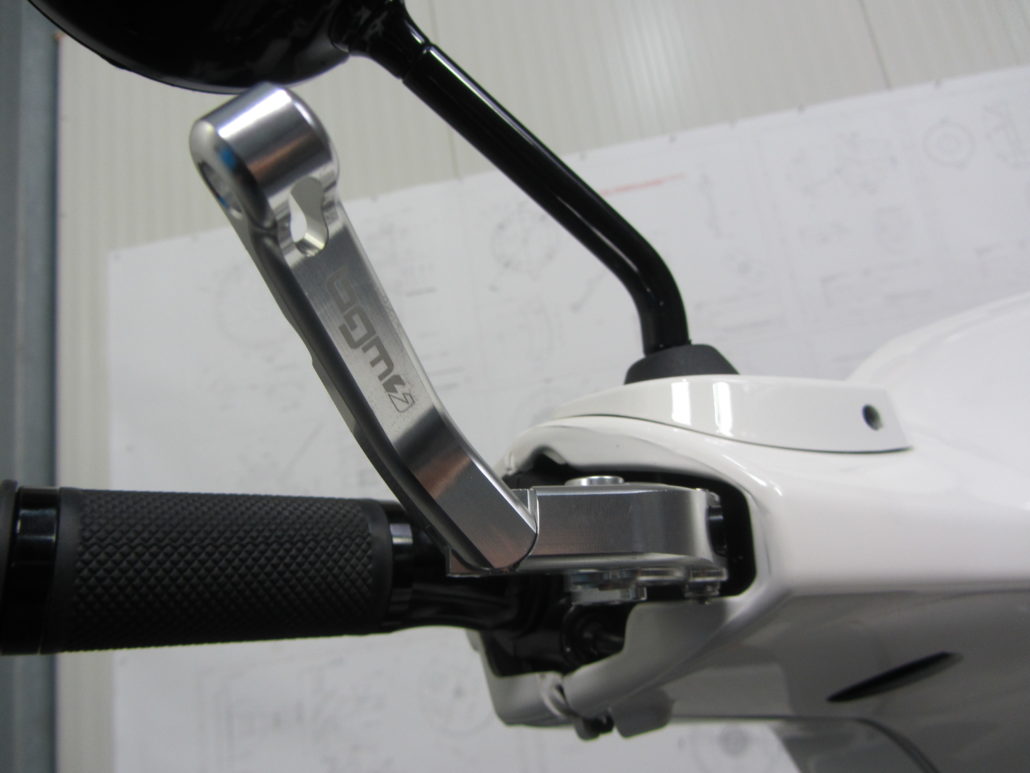
The lever is made up of two parts and it folds up in the event of a fall reducing therefore the risk of breaking.

The foldable design of this lever is ideal if, for instance, you park your scooter in a small garage.

How to mount Vespa brake levers

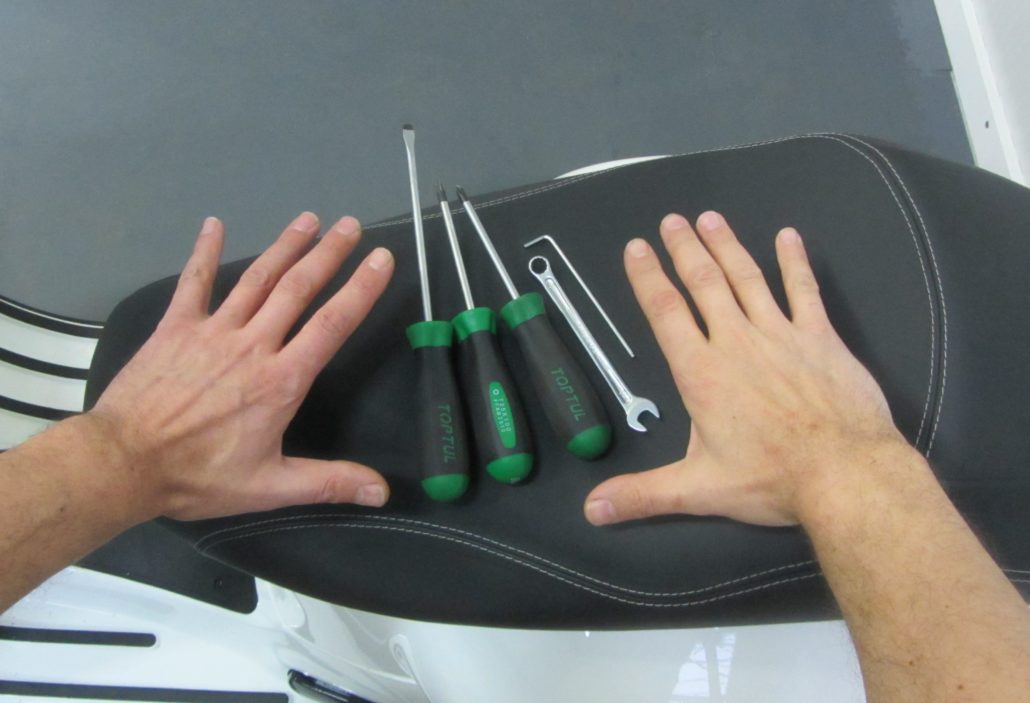
Tools for mounting brake levers:

  • Allen key 2,5mm
  • combination wrench or box spanner SW10
  • slot screw driver, size 2-3
  • slot screw driver, size 5
  • Torx key TX25
  • two hands, right and left, ideally with only one thumb on each hand!
  • open-end wrench SW17 (may vary depending on the model of the mirror)

Preparation

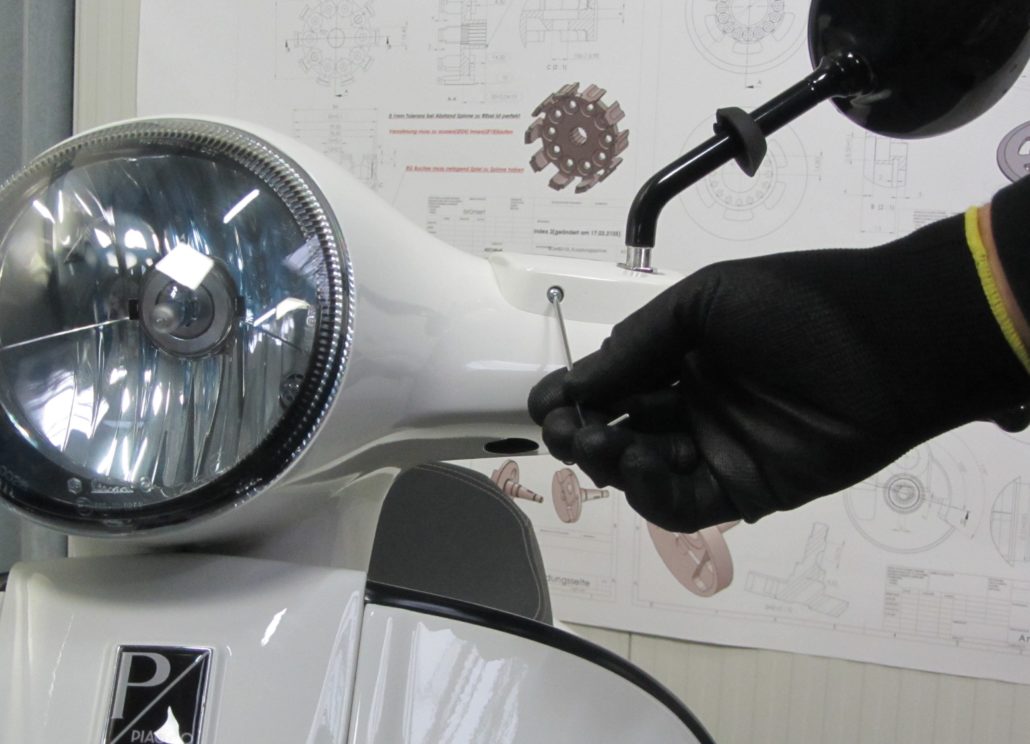
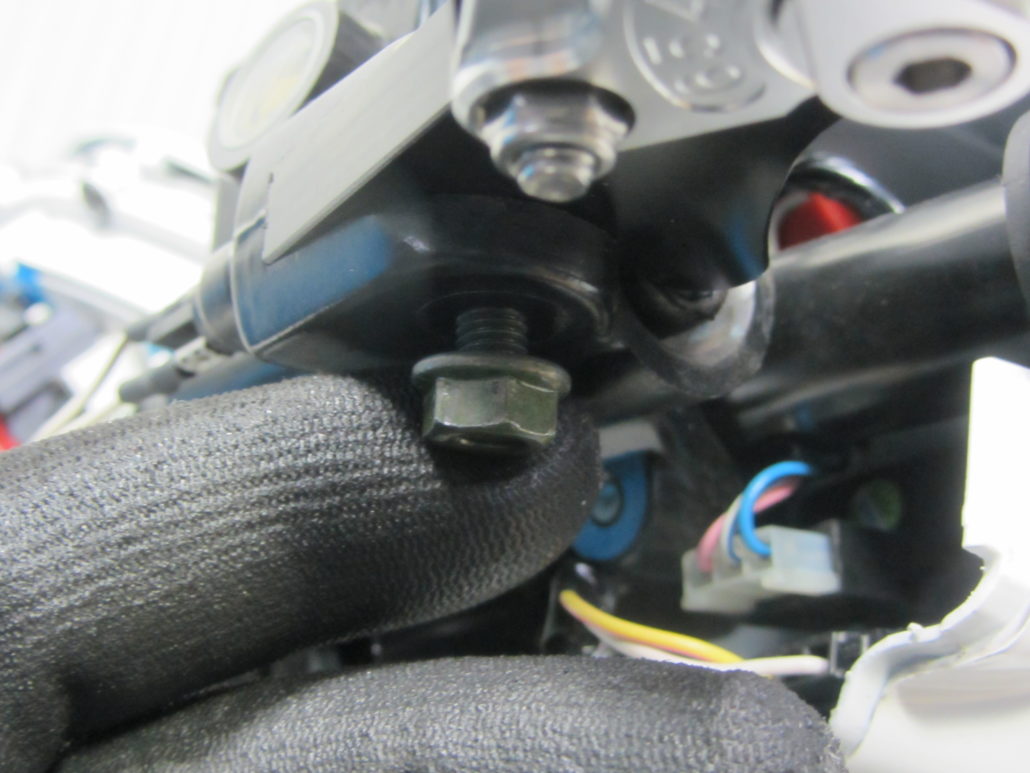
In order to have an easier access to the brake master cylinder, it’s necessary to take off the front headset cover. If you also have a windscreen remove this first. Under the rubber grommet and the master cylinder cover you’ll find the counternuts for the tightening of the mirrors.

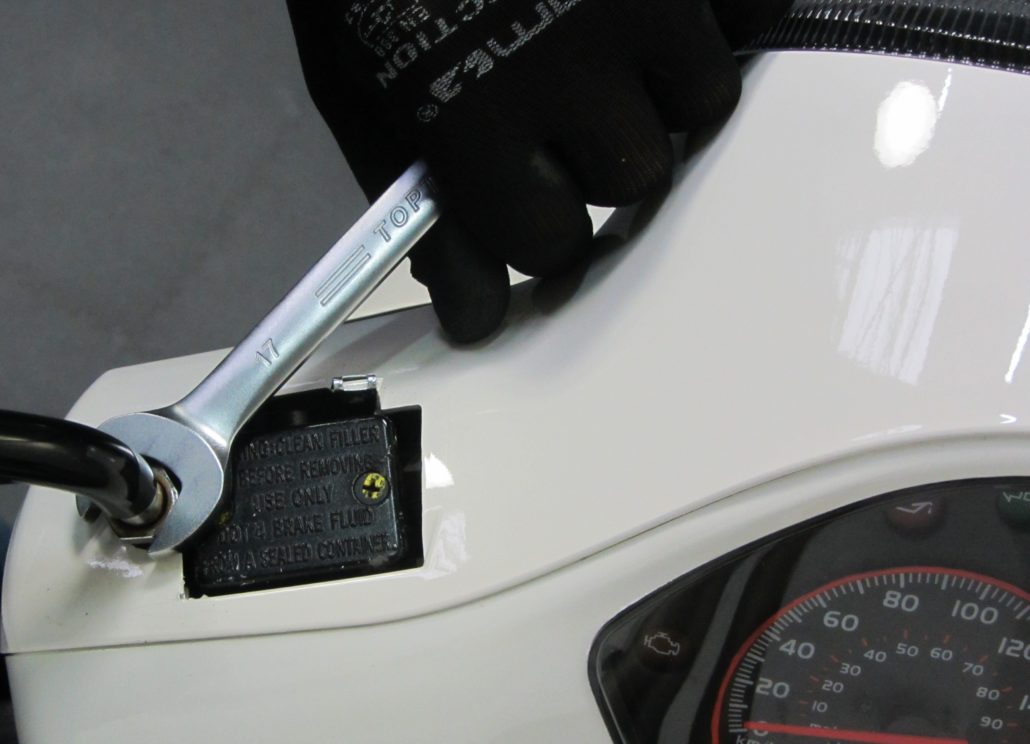
The screw of the master cylinder cover can be removed with an Allen key 2,5mm from the front side. After wiggling the cover loose forwards and upwards, the counternut of the mirror is easily accessible and can be taken off with an open-end wrench SW 17.

Then you can turn the mirror arm anticlockwise.

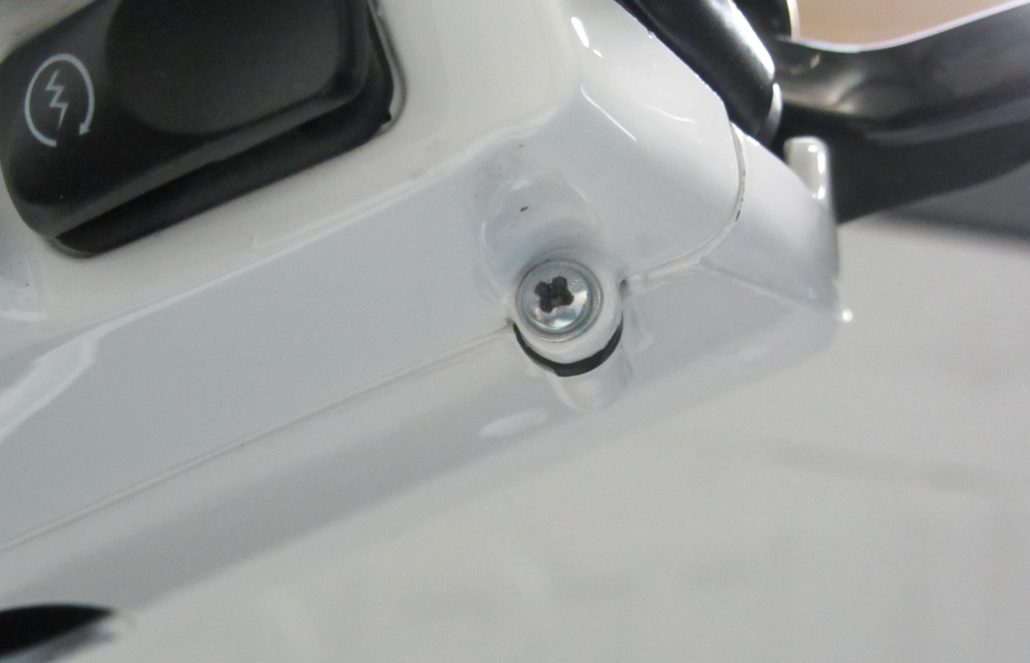
Both mirror arms have a right-hand thread. To tighten the mirror arm turn it clockwise, to loose the arm turn it anticlockwise. In the lower part of the headset cover there are three screws: on the right and left side the screws are accessible from the rear side,

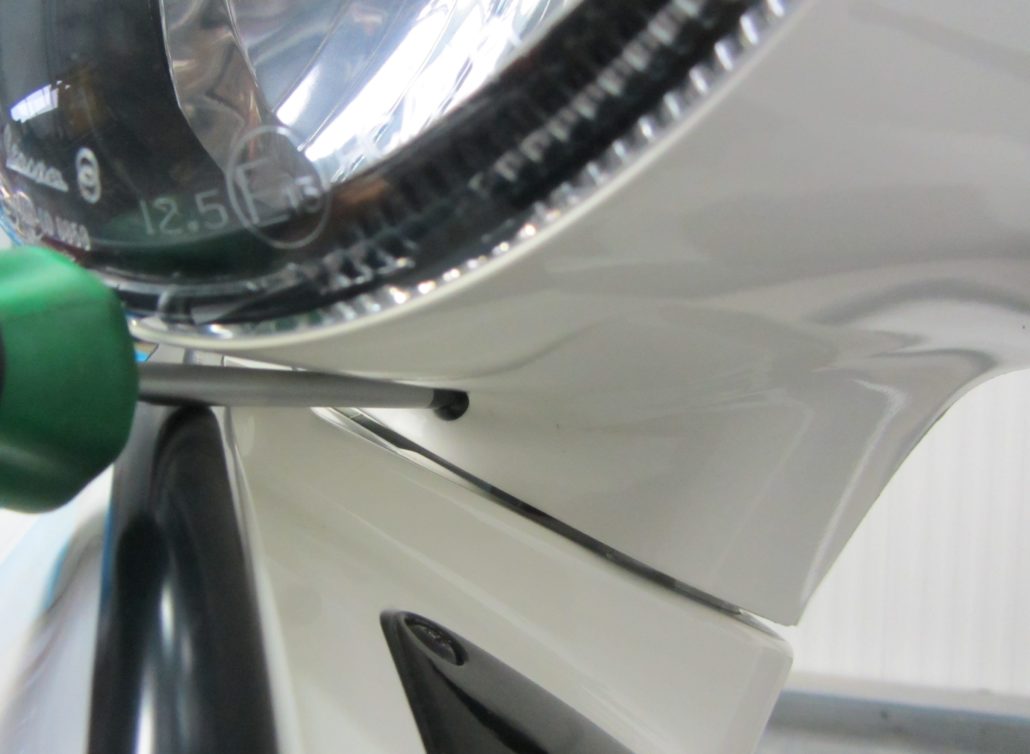
while the third screw is accessible from the front side, under the headlight.

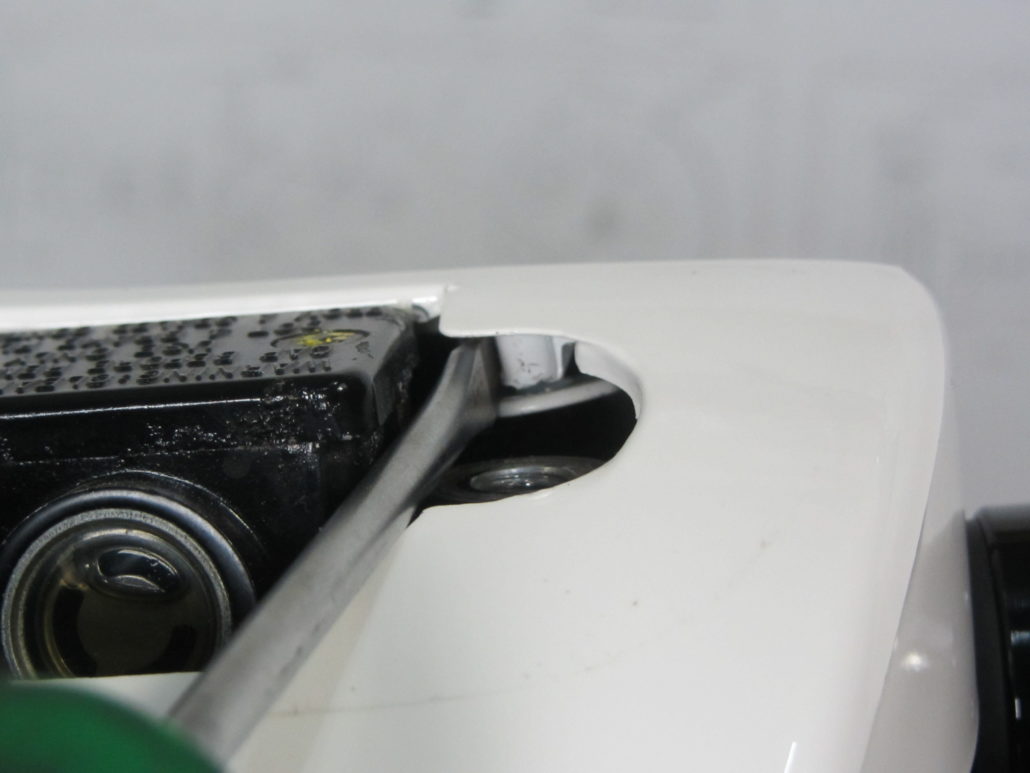
First unscrew all the three screws with a cross slot screwdriver PH2 and then release the retaining clips. These plastic clips are not visible from outside, but accessible from the inspection ports one the left and on right side. Remove carefully the clip with a slot screw driver.

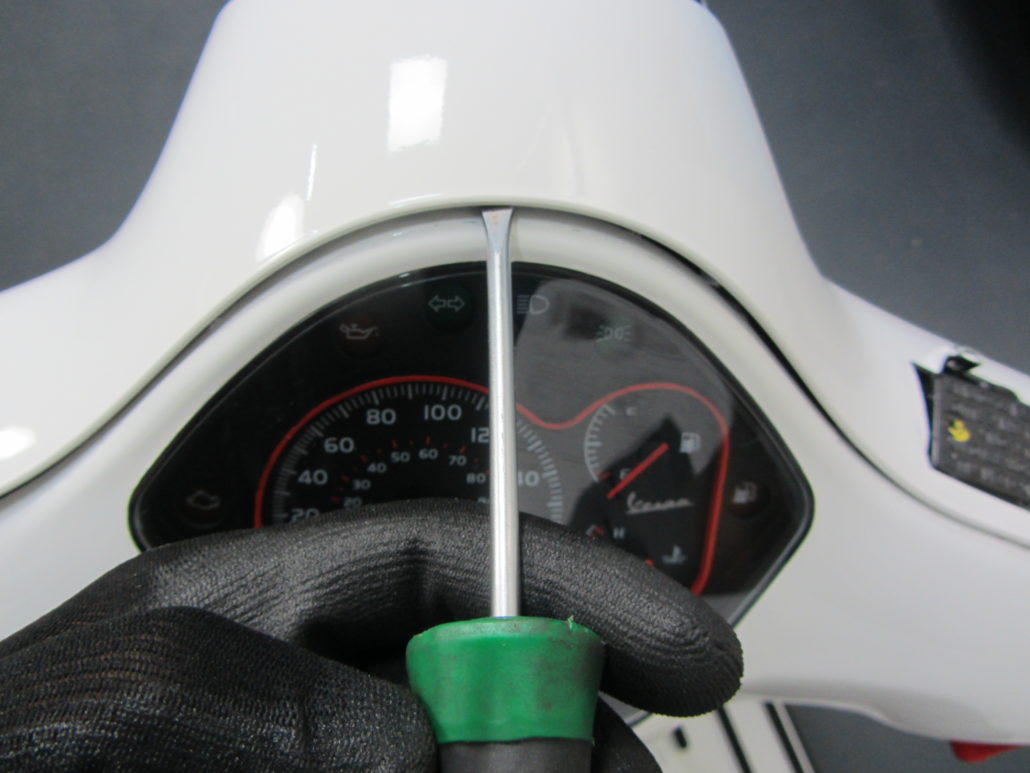
Another plastic clip is placed under the headset cover, in the middle. You can loose it carefully with a thin slot screw driver.

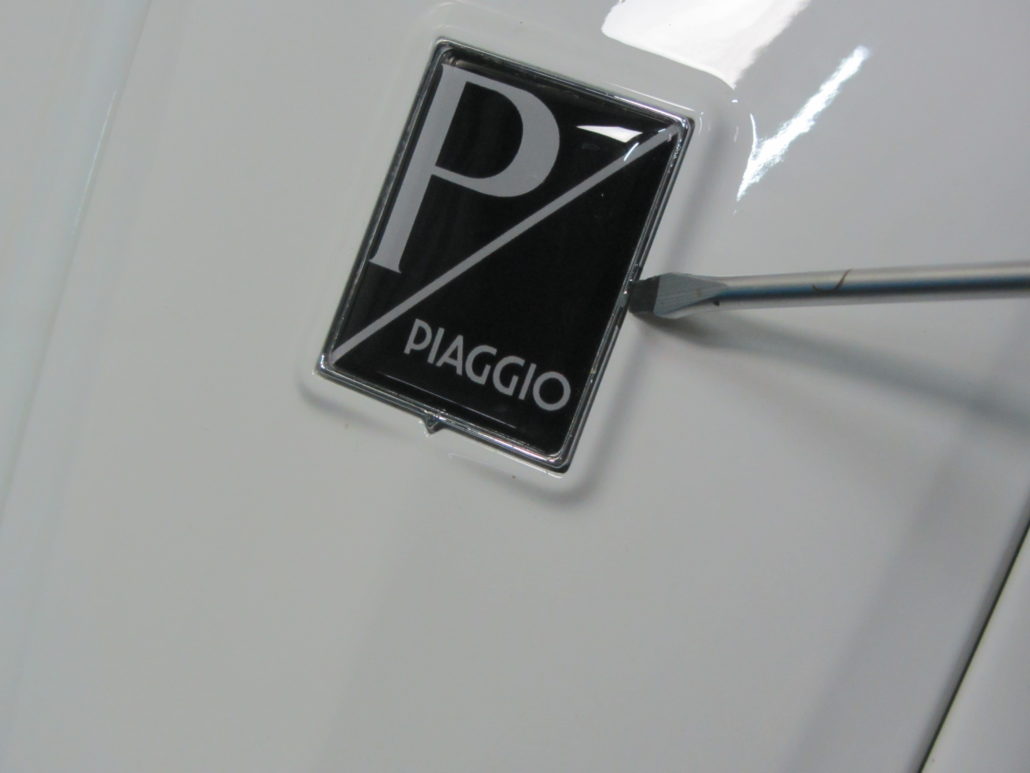
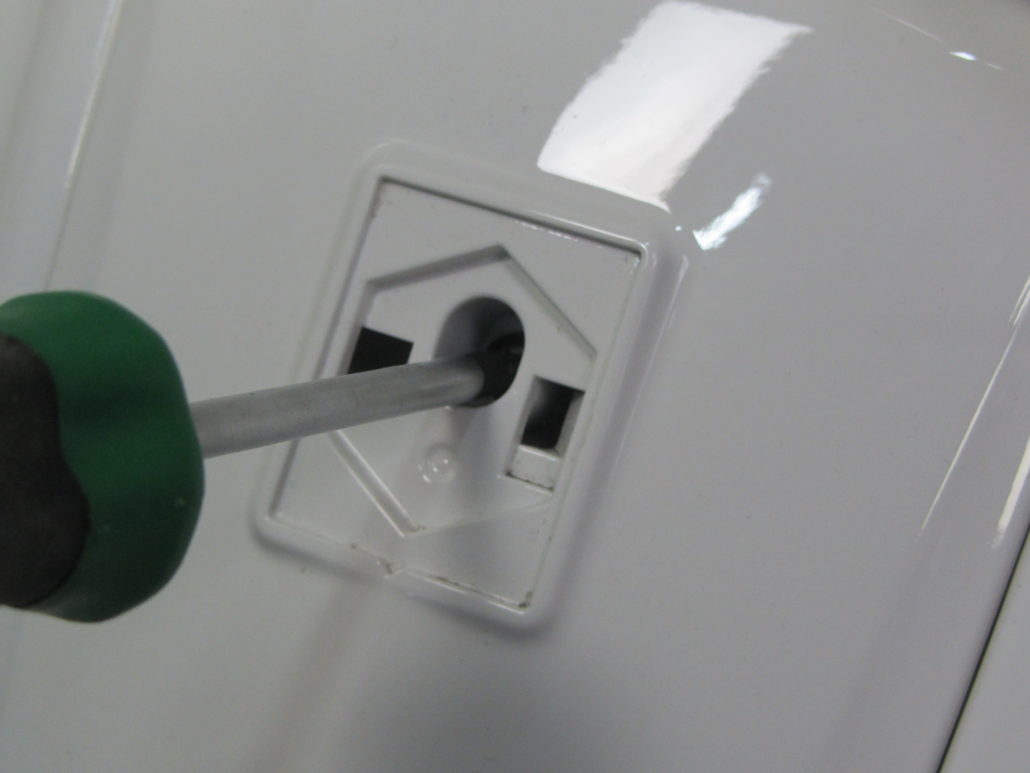
The front headset cover can be removed easily if the front cover has already been taken off. The front cover is fixed with a torx screw (TX) hidden behind the Piaggio logo. On the right side of the logo there’s a small gap, pull out the logo from that side by using a thin slot screw driver.

Under the logo you’ll find the only screw of the front cover which can be loosed and removed with a TX25 torx key.

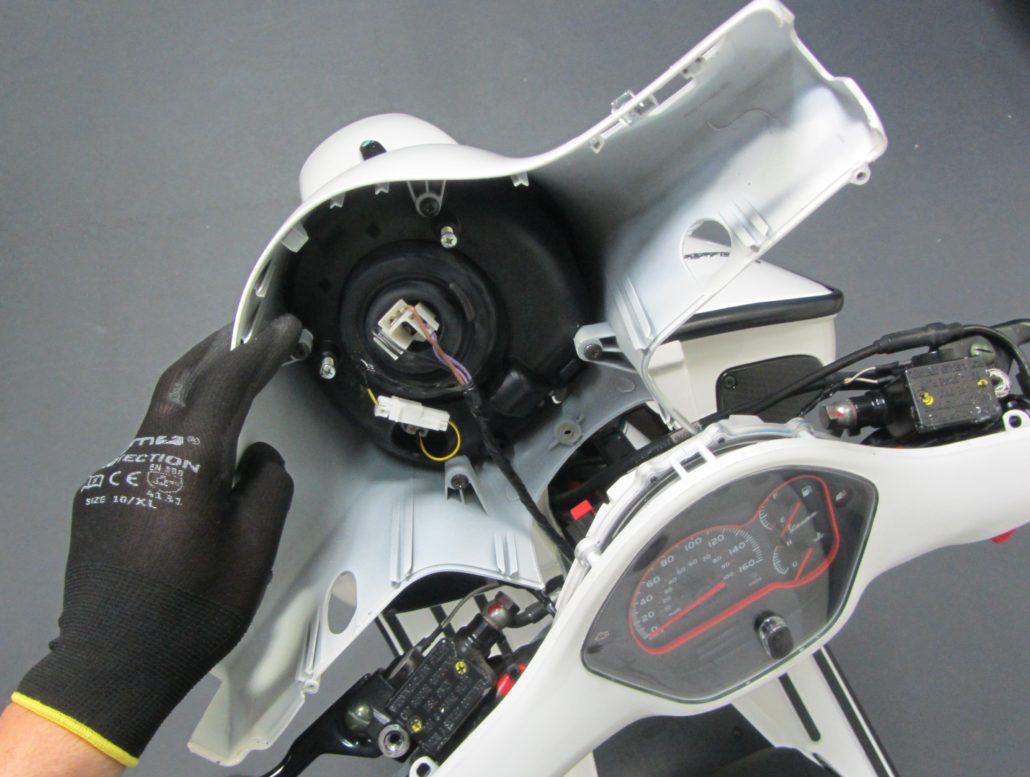
The front cover can be removed by wiggling it loose forwards and upwards. This way you can push the front headset cover upwards in order to loose the retaining clips of the front cover. When the front cover has been removed, you can wiggle the front headset cover forwards and upwards and finally take it off.

Unplug the electrical connections and the cover can be removed completely

How to replace Vespa brake levers

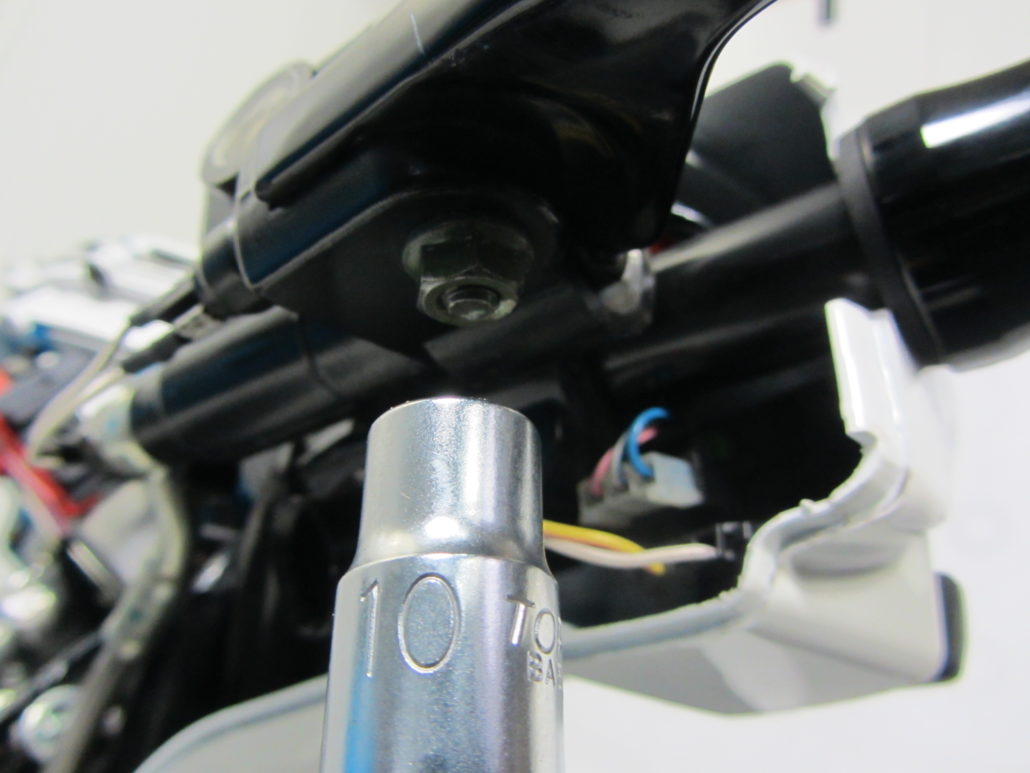
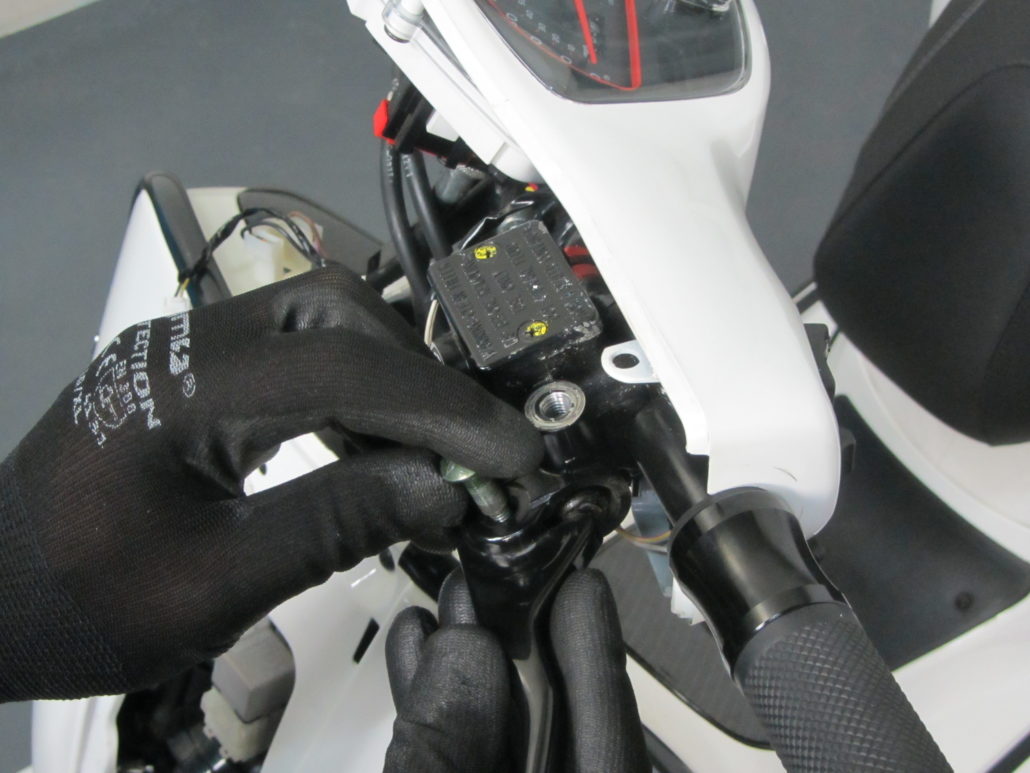
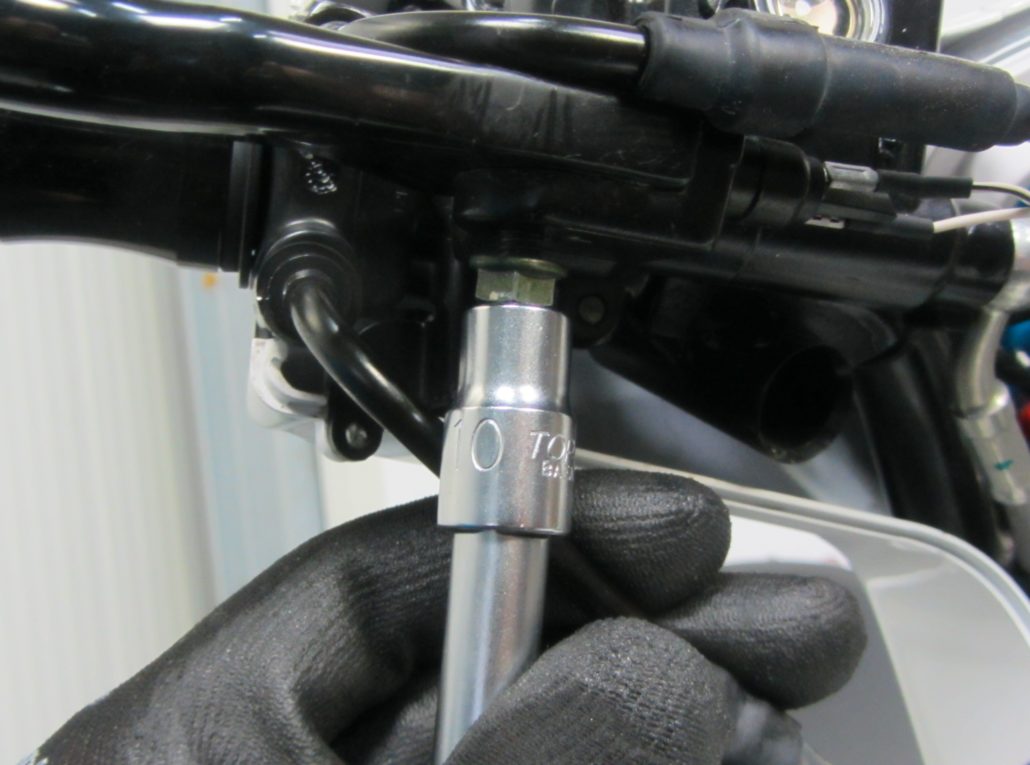
In order to take off the genuine brake levers, remove the counternut under the brake lever support with a combination wrench or box spanner SW10.

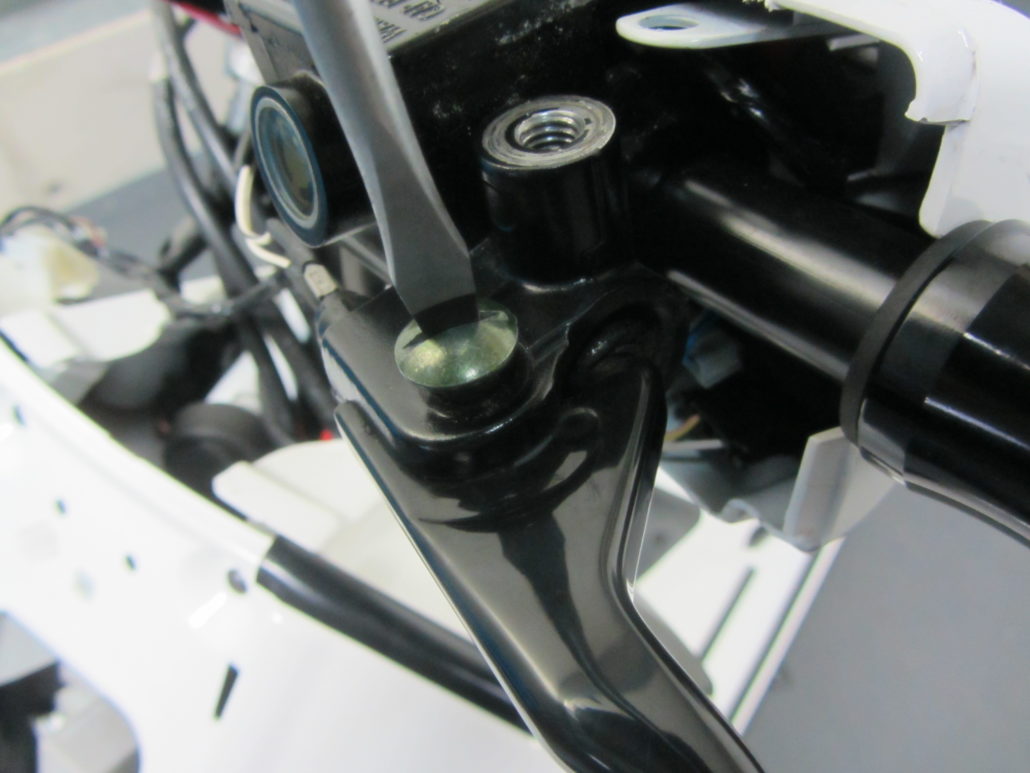
Then loose the guide bolt, to which the brake lever is fitted, with a wider slot screw driver (min. S5.5).

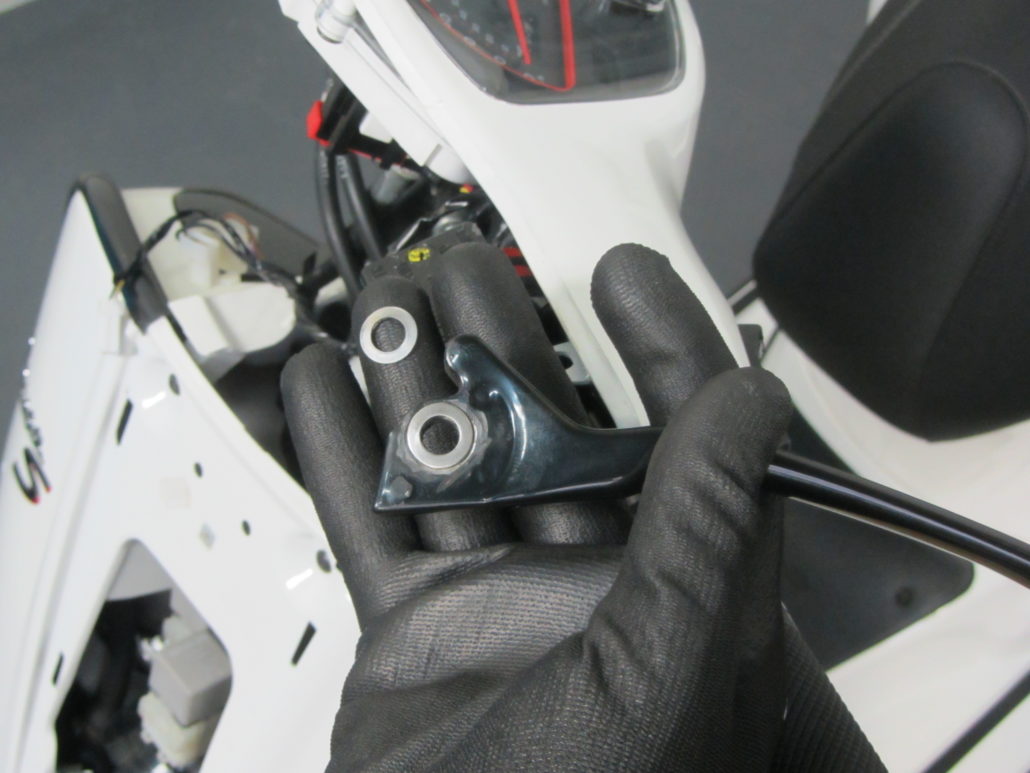
Pull out the bolt carefully and hold the brake lever.

For the mounting and positioning of the brake lever there are two washers. Please make sure you don’t lose them when you disassembly the levers.

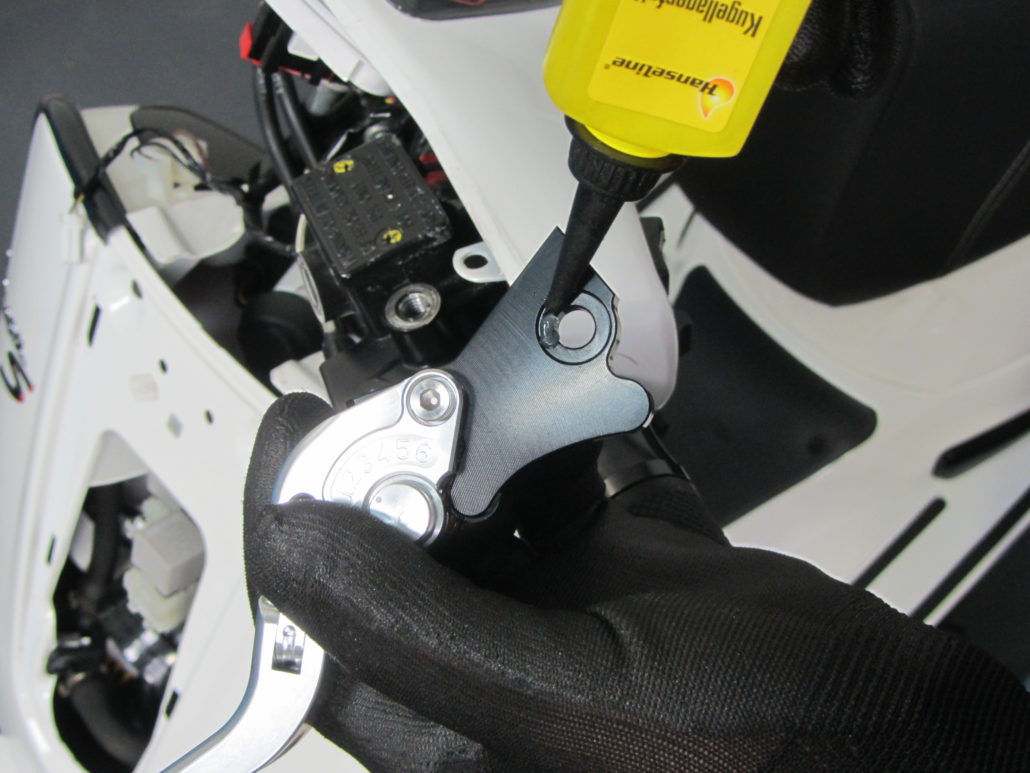
You’ll need the two washers again when you fit the BGM PRO brake levers. For a trouble-free mounting and for an easy movement of the lever we’ll grease the two washers in order to enable the correct positioning of the lever.

For an easy mounting of the lever on the right side of the headset you can slightly spread apart the throttle below so that you can have access to the counternut.

After mounting the lever, screw the guide bolt again and tight it with the counternut.

Finally, plug the headlight again and fasten the headset cover, first with the clips and then with the three screws, fit the mirror – done!

Vespa Wideframe Tuning

Vespa Wideframe models are more popular than ever.

There are not only refined new spare parts on the market, but also development in performance increase.
Existing cast iron cylinders have been refined to wring a little more performance out of them with a rather high input of work.

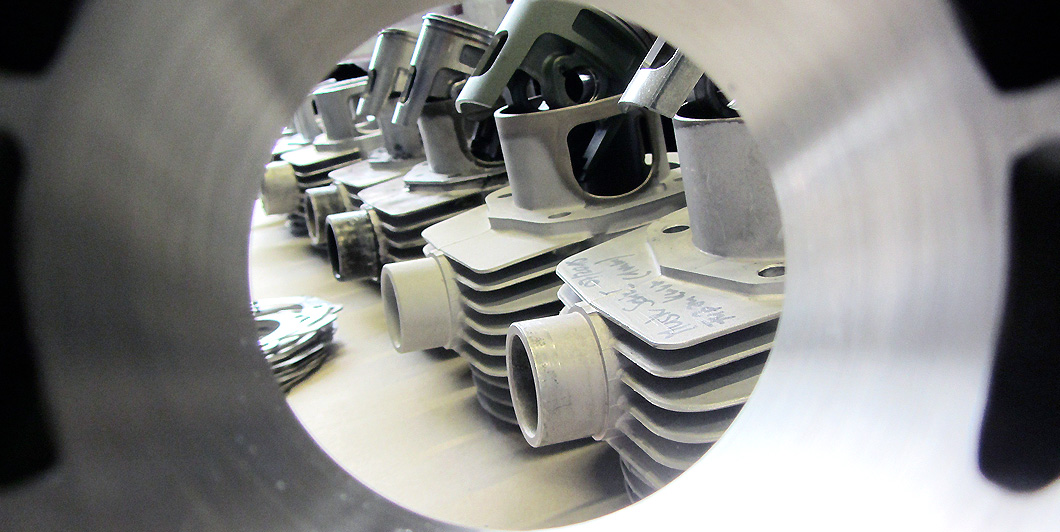
New Pinasco cylinder

Pinasco will soon offer a new aluminium cylinder with 160cc for the old Vespa engines with 3 studs.

Our loyal customer Andreas Nagy has always been a good friend of this slightly particular Vespa model. He puts a lot of effort in increasing performance of the Wideframes and closely cooperates with Pinasco.

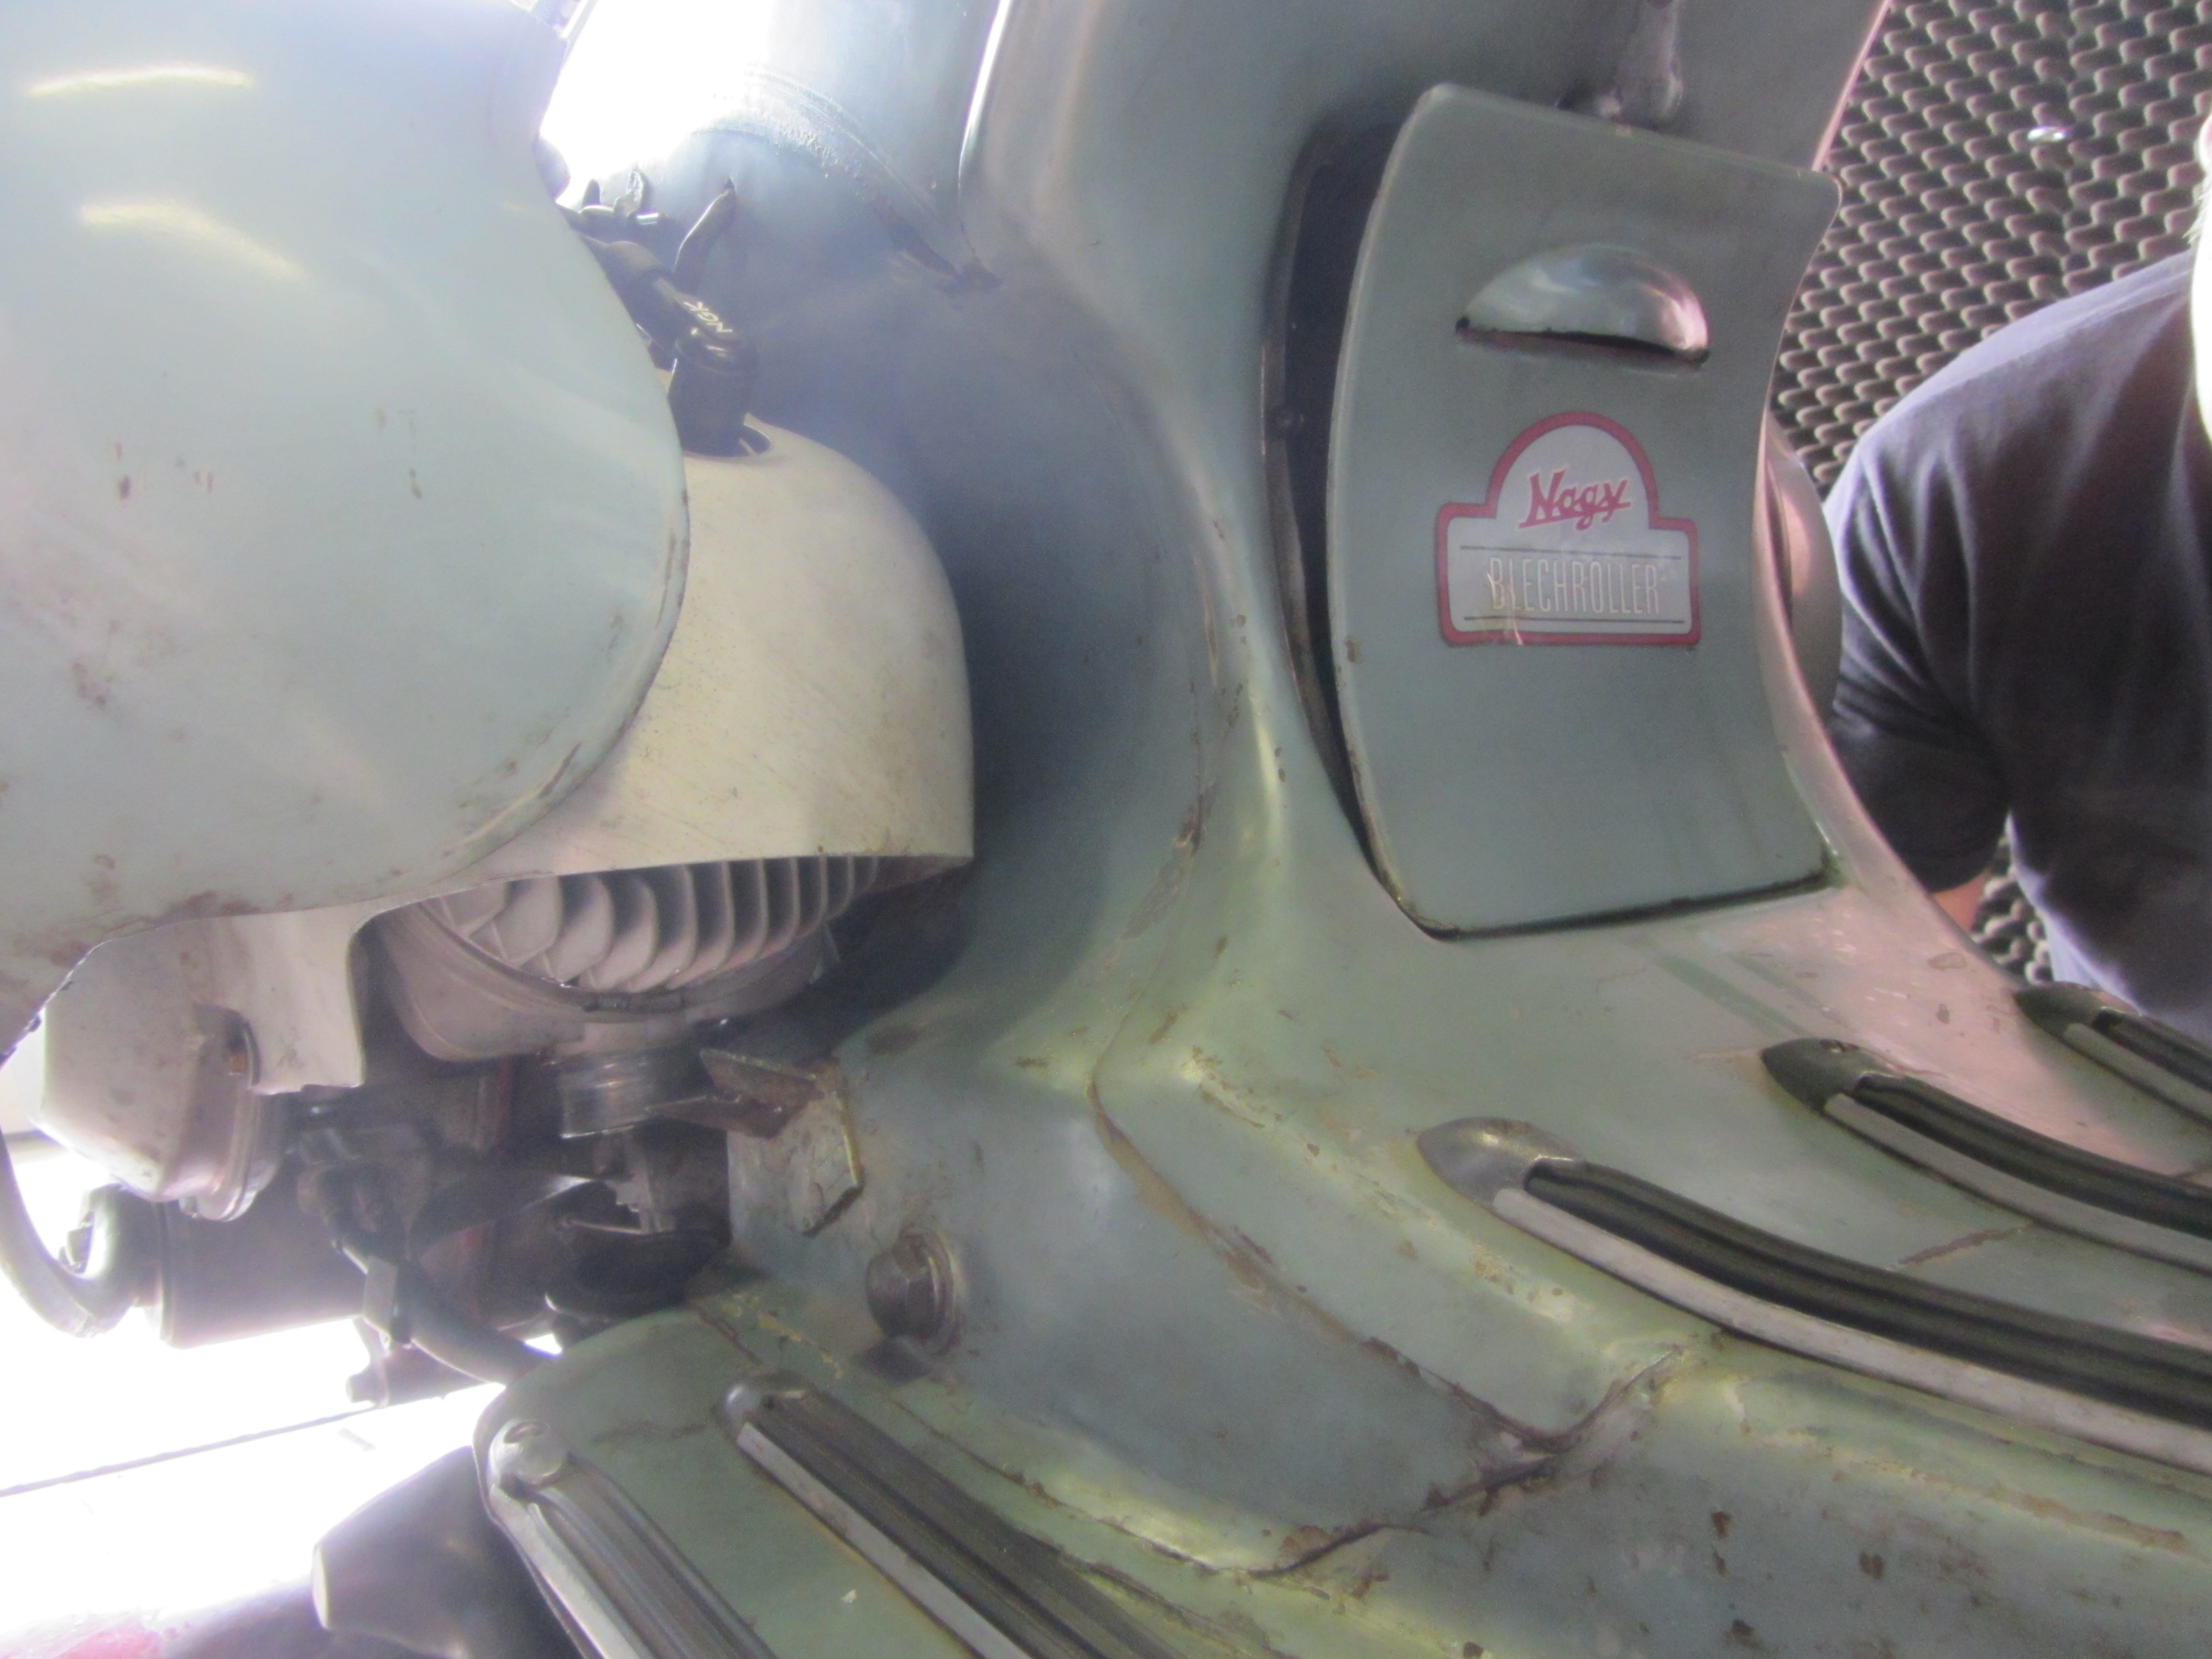
He visited us on our dynamometer with a prototype of the 160cc V2 cylinder. Caliper Bracket 007

Secret prototype of the new Vespa cylinder

Caliper Bracket 009

We would have liked to take an even closer look on the 160 Pinasco.
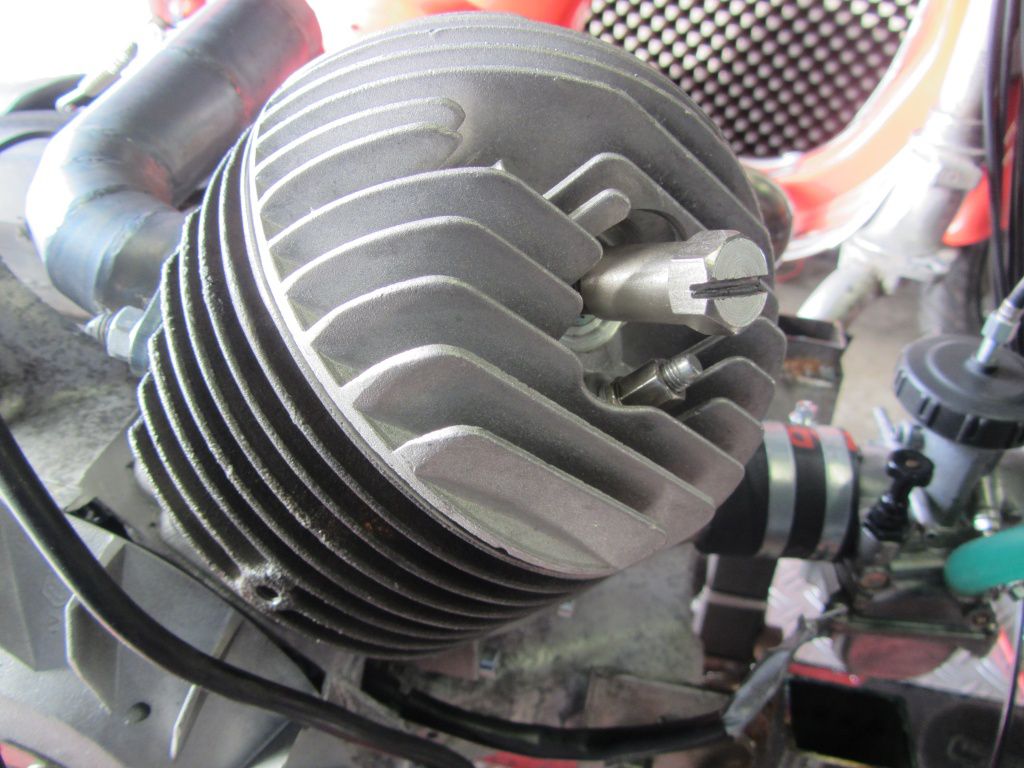
Sadly the prototype of this cylinder remained hidden under the cylinder covering.Caliper Bracket 006

Vespa Wideframe racing cylinder

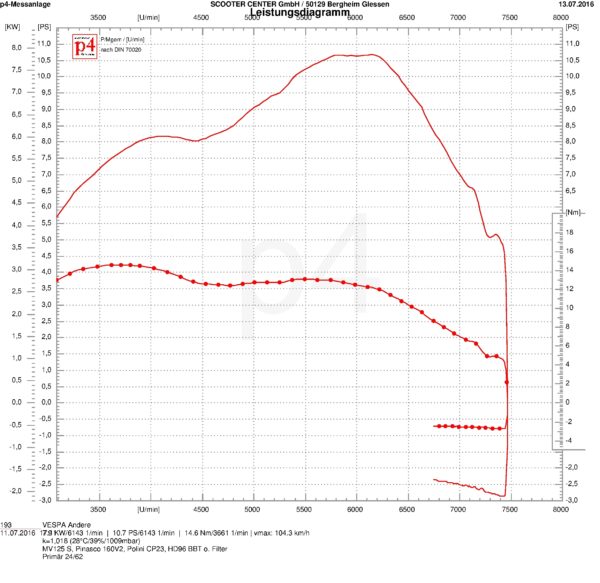
Andreas and we have tested some exhausts on our Scooter Center P4 dynamometer. For example a BGM PRO BigBox Touring exhaust for PX models, whose suspension we have modified to make it fit a Wideframe.

Leistungsdiagramm Prüfstand Pinasco BBT Vespa Wideframe

Performance characteristic dynamometer Pinasco Vespa Wideframe cylinder prototype

10HP and 100 km/h

Sure: a Malossi MHR reaches more than 35HP almost easily on a PX. Compared to this, the 10 horses of a Pinasco racing cylinder won’t take anyone’s breath away. But, please, don’t forget the original “performance” of Wideframes! Original 5HP would have a top speed of about 70km/h on a plain track.

With now 10HP on the 8 inch small rear wheel and a corresponding primary reduction, you may expect more than 100km/h. Just like for an original PX200 for instance.

We are looking forward to the potential of the Pinasco cylinder.

You will of course be kept up to date: here in the Scooter Center Blog!


The new 177 – cylinder for Vespa

We have already presented the new cylinder in this post. Today we would like to offer you an insight into developing this cylinder. The cylinder will finally be available from beginning of April 2016!

Developing the Vespa cylinder BGM177

Developing a two-stroke cylinder is very exciting.
Numerous parameters, which need to be considered, thousands of times on the dynamometer, a repetition of measuring, calculating, testing, thousands of kilometres on the road…

What for? To have a final cylinder, which offers high torque and is willing to deliver maximum performance, at the same time resistant with a low consumption.
And we want it all. A cylinder for tourers, which can be combined with standard components, and for ambitious tuners, who want the highest performance possible. It is about offering the widest range possible.

We would like to give you an insight in the tests, which have been conducted for the BGM177.

THIS IS 177

DESIGN OF TRANSFERS

We tested various options for the outer design of the transfer ports.
We designed various transfer geometries, trigger delay angles and combustion chambers, which were put to practical tests on the road as well as on the dynamometer.

BGM177 cylinder test

TEST ENGINES SPRINT150

We have been using an original Piaggio Sprint engine as starting point for our tests and for some we also have been using a LML engine casing with original inlet membrane control.
The Sprint engine casing represents the very small, original rotary valve inlet of largeframe engines. The rotary valve inlet of a PX125 is only minimally larger than the inlet of Sprint engines. Trigger delay angles of the crankshaft are almost the same. In terms of possible performance, this was the “least attractive” package. However, we wanted to know the performance with basic parts or rather which performance we could expect of the rest.

We have already presented the comparison of a Spring engine with a 24mm SI carburetor of a PX200 and a 12HP 200 engine.

In order to easily understand the following graph, just imagine a normal PX200. With a standard 200cc you will feel something like acceleration up to a speed of about 90km/h. This speed represents about 5500min?¹ of the engine. Once you have reached this torque with a 200cc engine, it will take some time to get to 100km/h (6000min?¹). Now, take a look at the graphs and compare the equivalents of this torque on the blue graph and the red graph. You will see, that the BGM177 even adds more torque. In other words, while a 200 is slowly running out of steam, the BGM177 will continue to accelerate.

BGM177 vs. PX200

BGM177_ROTARY_vs_PX200_std

TEST ENGINE LML150 MEMRANE

The 125cc engine of a Vespa Sprint with small rotary valve restricts the development of performance at a certain level of performance and torque. We have therefore used a LML engine casing for varying tests and comparisons. The standard LML engine casings comes with a reed valve intake and large transfer ports in the casing and is the best basis. This can diminish the influence of e.g. an intake, which is too small, or differently designed transfer ports on the test results within one series of tests.

BGM177_9 023

It’s also fairly easy to switch between a SI carburetor and a large, grown-up intake.

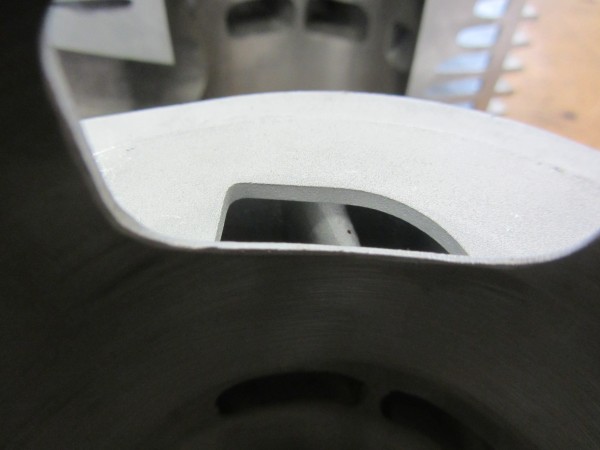
We have started these tests with a pre-series cylinder with small transfers in the cylinder base
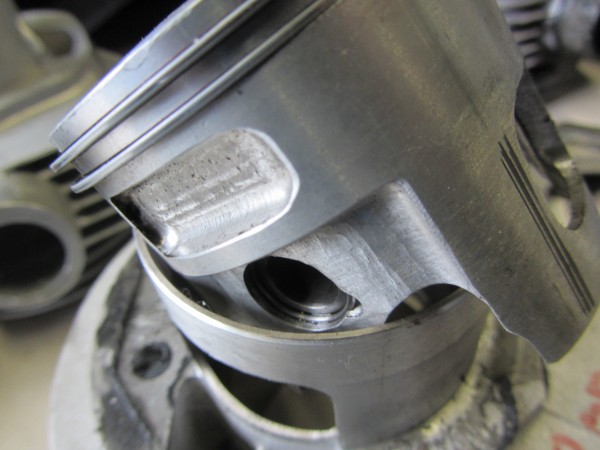
and a piston, which has been specially produced for this test.

BGM177_9 015

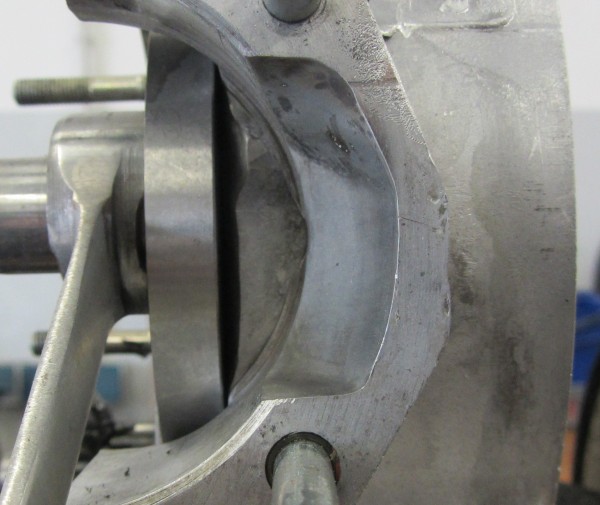
Why? We wanted to find out how the piston needs to be designed in order to give enough room to the transfer ports to guarantee a good situation. The piston had been constructed in a way, that the hole around the gudgeon pin close to the transfer ports could be adapted by milling.
After every little step, we put it to the test on our dynamometer to find out, which shape or which combination works best.

Kolben BGM177 V2

TEST TRANSFER PORT CROSS-SECTION CYLINDER BASE

The following series of tests has been conducted on a LML membrane engine with a 24 SI carburetor, a BigBox Touring and various versions of pistons and transfer ports.
Then, the cylinder head has still had a relatively high compression. We have reduced compression of the standard cylinder head a little to gain a wider range of performance.

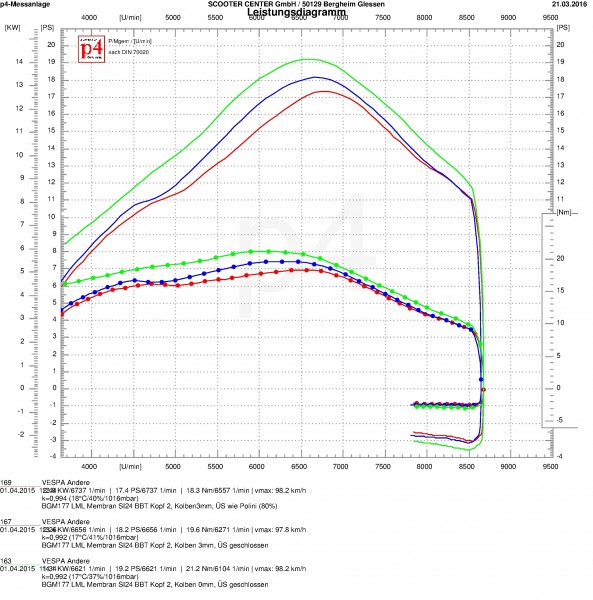
The original test piston was shaped like the original PX piston. So, for the red graph, the piston skirt was closed (like for a Piaggio, Polini, Grand Sport, …).
The blue graph shows the result of the piston with a few millimetres less around the gudgeon pin. You can see such a piston on the picture above.
The green graph shows the performance with a semi-closed transfer port at the cylinder base and an adapted piston. The free space of the transfer ports in the cylinder base represents about 80% of the possible space of the cylinder.

Vergleich BGM177 Kolben und Kanal

  • RED GRAPH: closed piston skirt
  • BLUE GRAPH: semi-closed piston skirt
  • GREEN GRAPH: opened piston skirt

Result: the BGM177 can be combined with the gearbox of a 200cc engine without causing any problems and even performs better than the large 200cc engine.
From about 1982 onwards, engines of PX125 and PX150 have been fitted with a gearbox almost identical to the one of a PX200. In these cases it’s possible to directly extend the primary drive to transfer the plus of performance to speed.
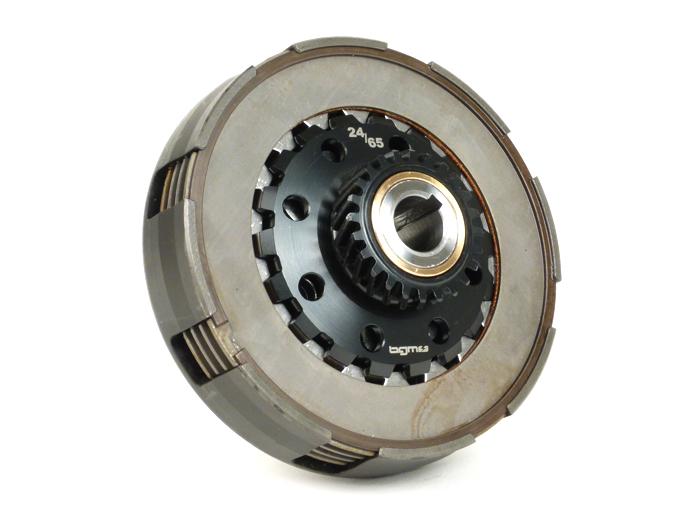
We recommend using a primary drive wheel with 64 teeth. Depending on the area of use, you can adapt the total gear ratio with a clutch sprocket. The advantage of a primary drive wheel with 64 teeth is, that you may use the BGM clutch sprockets with 22, 23 or 24 teeth.
So you can set your engine for anything between “sporty and short for cities (22/64)” and “highway – provide a maximum (24/64)”.

Our next post will be on various carburetors and intakes on our LML test engine.

Vespa special tool for vintage scooters

We have added a nice special tool for Vespa by BGM PRO to our program, which is especially suitable for those loving older Vespa models like the GS or younger, also known as wideframes..

BGM7913TL (29)

Tight drive shaft bearing

The following affects many screw connections of older Vespa ladies: they rust and become to tight to move due to ageing, lacking maintenance and not being used. Sometimes this issue can only be dealt with fiendish tricks.

The bearing shield of the centre main shaft bearing is a fitting example. Usually the threaded face ring, made of plain steel, was exposed to acids, old oil and water for several decades. This was plenty of time to establish an intimate relationship with the engine casing’s alloy.

BGM7913TL (1)

Our special solution works for sure

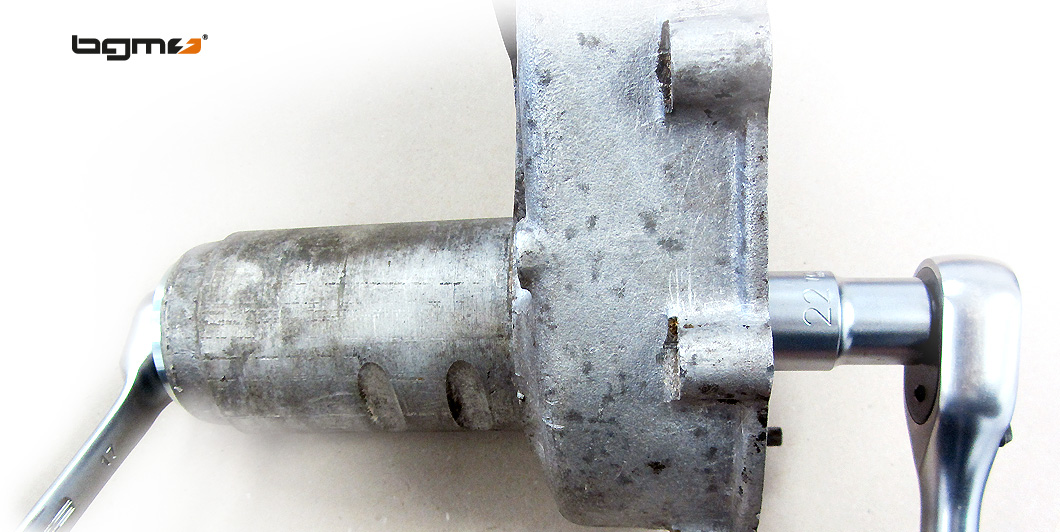
Sometimes it seems impossible to separate these lovers. In this situation a simple face wrench tends to slip off. We therefore “included” the option of preloading to our tool.

BGM7913TL (12)

BGM7913TL (25)

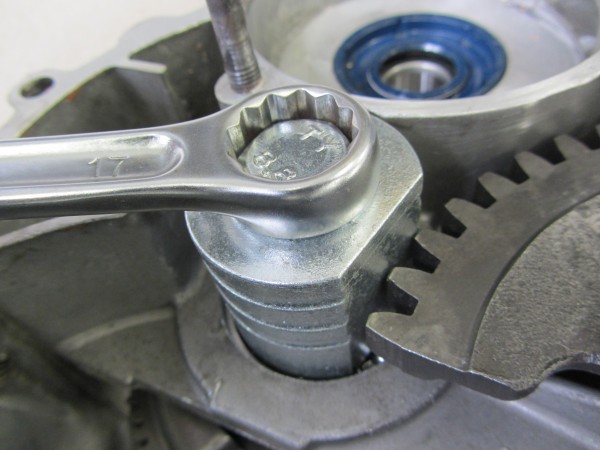
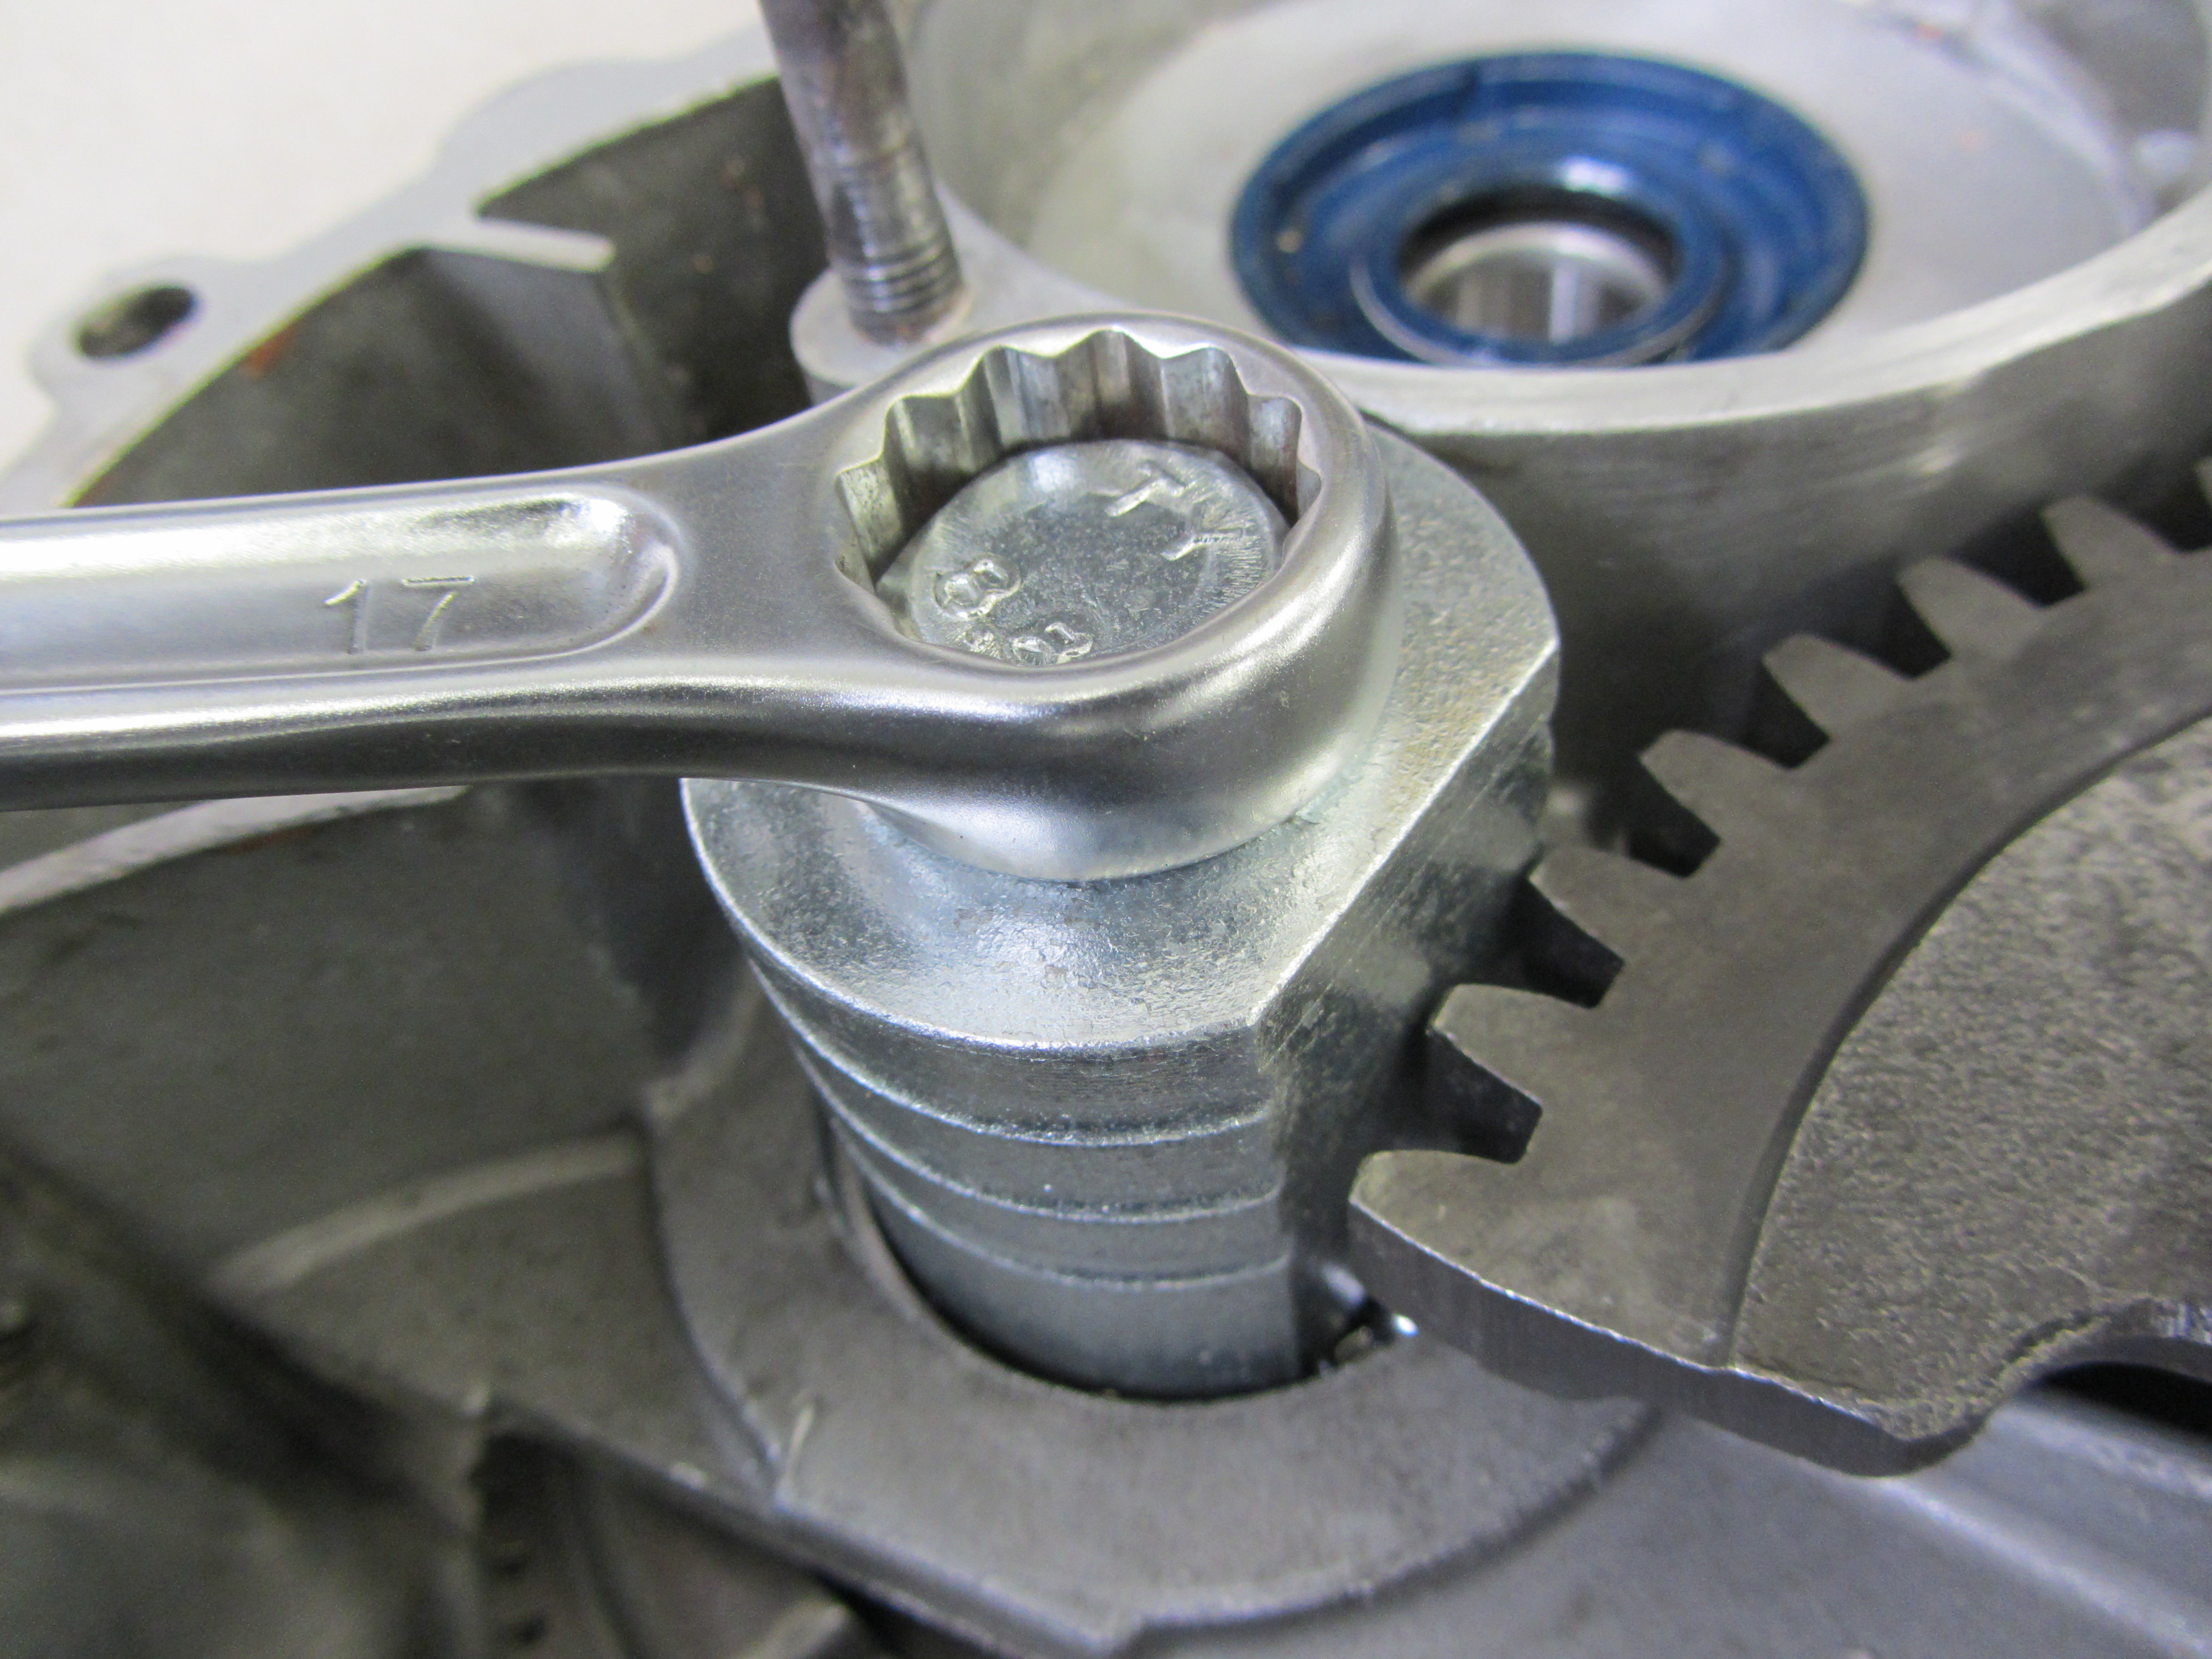
At the end of the bearing guide, you will find a bolt sitting on the drive shaft. This generates preload and prevents the wrench of slipping. You will therefore be able to safely reach the necessary output torque to loosen the nut without a slipping face wrench.

BGM7913TL (3)

The screw will hardly move? Even then you will be able to loosen it without causing any damage to the threaded ring. Wrench in its guide and threaded face ring have the same pitch. Therefore the tool will follow the loosened ring with the same preload. It’s impossible for the wrench to slip off. BGM7913TL (15)

It’s possible to use both popular wrench sizes of threaded rings with this tool.

  • Bolt pitch of face holes 37mm suitable for threaded ring with an inner diameter of 28mm.
  • Bolt pitch of face holes 43mm suitable for threaded ring with an inner diameter of 35mm.

BGM7913TL

The tool is driven by wrench sizes WS22 and WS17. Threaded pins differ in size, which makes it easy to differentiate.
The large pin (l=25mm) fits the threaded ring with the large inner diameter and the small threaded pin fits the threaded ring with the small inner diameter.

Just in case: both pins are available as spare parts.

BGM7913TL (23)

Depending on which threaded ring you want to loosen, you can “hide” the other threaded pin in the tool. BGM7913TL (29)

Face wrench rear hub bearing -BGM PRO Øi=28mm/35mm, Øbolt circle=37mm/43mm, 4-pin– Vespa Wideframe 98/125/150cc V98,V1T-15T, V30T-33T, Hoffmann HA/HB, VM,VN, VL, VB, VGL, VD, GS150, Piaggio APE A1T-15T, AB1T-4T, AC, APA,

Item number BGM7913TL

BGM PRO special tool for bearing shield of rear hub of any Vespa wideframe model.
Thanks to smart construction, you may use this tool for both bolt circle sizes (Ø37+43mm). You will have the possibility to preload the tool on the nut. Tool and nut have the same pitch, which leads to a constant preload, therefore it’s impossible to slip off.

  • Fits Vespa 98cc, 125cc, 150cc: V98, V1T-15T, V30T-33T, Hoffmann HA/HB, VM,VN, VL, VB, VGL, VD, GS150
  • Also fits Piaggio APE: A1T-15T, AB1T-4T, AC, APA, APB, AD, AE0


BGM7913TL fits:


  • 125 (1949)
  • 125 (V15T)
  • 125 (V1T)
  • 125 (V30T)
  • 125 (V33T)
  • 98 1 (1946)
  • 98 2 (1946)
  • 98 3 (1947)
  • 98 4 (V98)
  • 150 (VL1T)
  • 150 (VL2T)
  • 125 (VM1T)
  • 125 (VM2T)
  • 125 (VN1T)
  • 125 (VN2T)
  • 150 GS (VS1T)
  • 150 GS (VS2T)
  • 150 GS (VS3T) GS3
  • 150 GS (VS4T) GS3
  • 150 GS (VS51T) GS3
  • 125 U (VU1T)
  • ACMA
  • APE


Primary drive special tool for Smallframe

Add-ons like the right tools will simplify your work, won’t damage the material and won’t cause stress. We have a wide range of tools on offer for you. Starting with a simple feeler gauge ending with equipped tool trolleys.

To rebuild the entire engine of a Vespa scooter, you will need many things, for instance special tools. Handy tools like our auxiliary stand, assembly aids or our Multitool enhance fun while repairing or maintaining your scooter.

Non-damaging assembly

The mounting tool for primary drive wheels by BGM makes it possible to draw the large primary drive wheel into its bearing seat without causing any damage. It works on any Smallframe Vespa. The bushing of the assembly aid rests on the inner ring of the bearing only, which means that there won’t be any pressure on the sensitive bearing surface, the bearing itself or engine casing.

06.01.2016 021

The tool was shaped in a way that there won’t be any pressure on sensitive parts like the bushing made of gun metal or bearing of the primary drive wheel and the bearing seat of the 16005 in the engine casing.

06.01.2016 019

06.01.2016 005

Safe and easy handling

The mounting tool is safely and easily handled. Therefore it is practically impossible to damage engine casing, primary drive wheel or bearing during assembly.

Suitable for any primary drive of classic Smallframe models:

  • Vespa V50, V50N, V50L, V50R
  • Vespa PK50, PK50S, PK50XL, PK50XL2
  • Vespa V125, PV125, ET3
  • Vespa PK125, PK125S, PK125XL, PK125XL2
Buy tool for Vespa primary drive here


Adjust ignition of a Vespa using “the Whale”

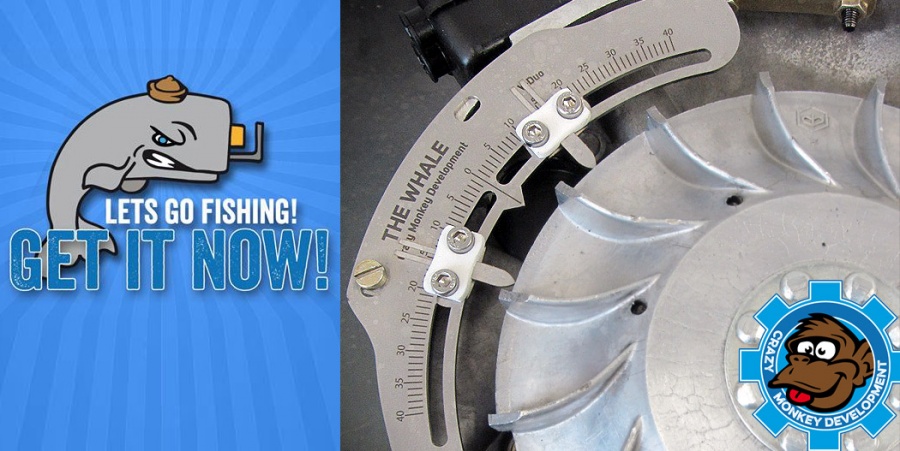
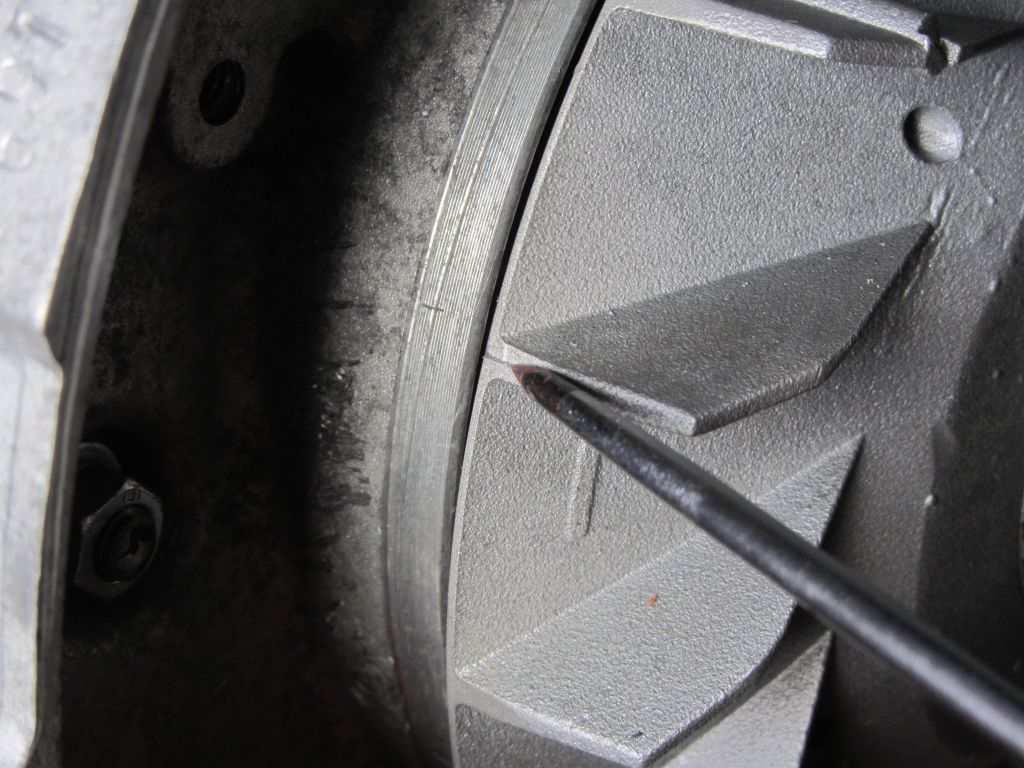
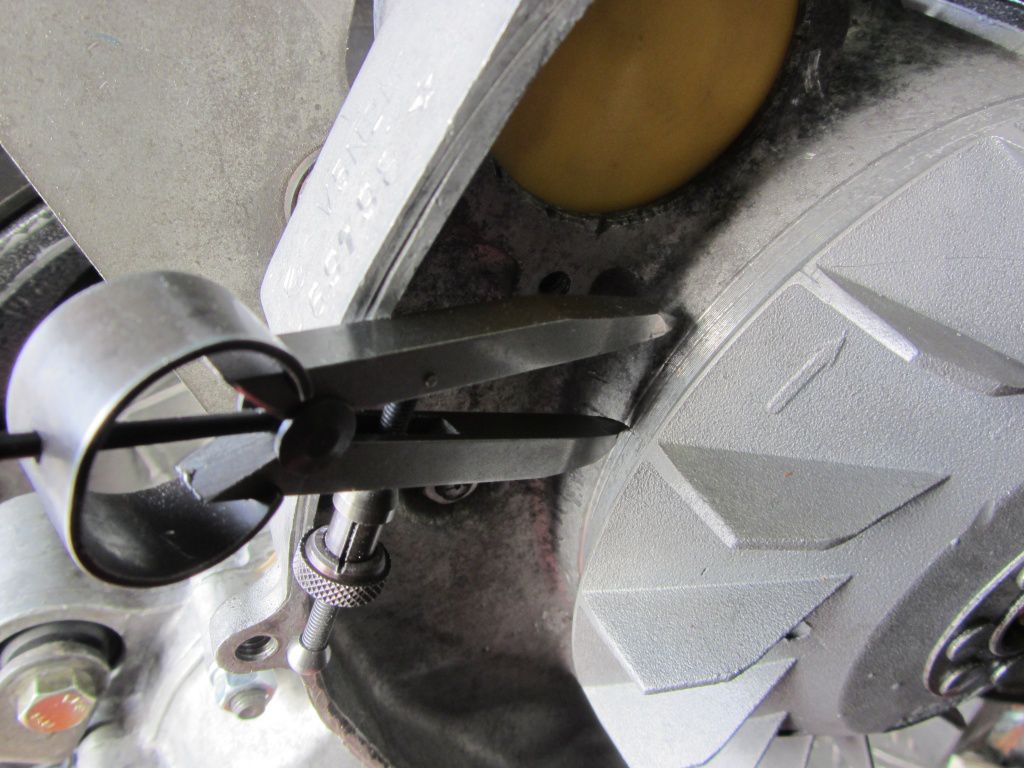
The Whale is a tool, which helps you, to precisely adjust the ignition of your Vespa. “The Whale V-Duo”, a calliper, is suitable for Vespa largeframe and smallframe. A suitable tool for Lambretta is being developed.

The calliper is made of two parts and comes with measuring tips that can freely be moved and an effective measuring range of about 40° each. To easily define the ignition point for static and variable ignition timing.

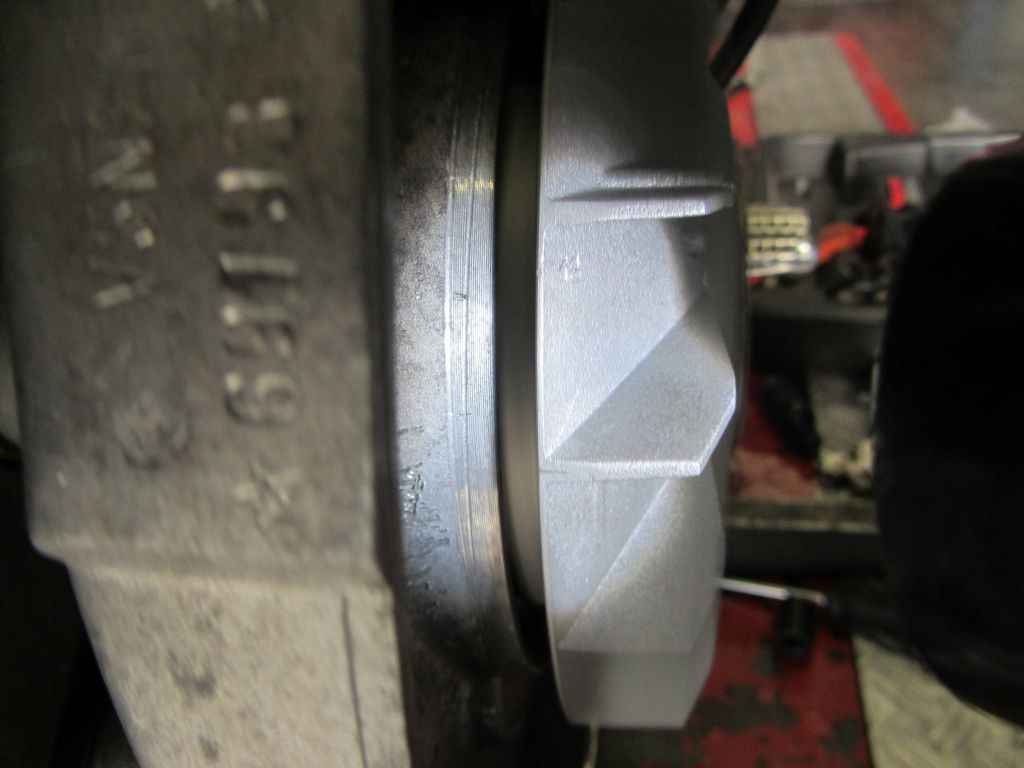
  • Suitable for existing fixation points at the flywheel cover
  • Set 0°-position to perfectly mark the top death centre
  • Stainless steel with resistant industrial engraving
BUY THE WHALE HERE

Video instructions adjusting Vespa ignition

This is the ultimate tutorial (in German) by Jörg Pien and Kevin Wintergrün (PX Garage Nienburg). They demonstrate three ways of adjusting the ignition of your Vespa with “The Whale”, the new ignition-tool for Vespa.

PDF instructions adjusting Vespa ignition

As an alternative you can download the instructions by Jörg Pien here:

CMD_Anleitung_The_Whale_V-Duo_DE (in German)

BUY THE WHALE HERE
Thank you CMD, Jörg Pien and Kevin Wintergrün (PX Garage Nienburg)

Bon voyage – Dean comes with the BSG Corse bike to visit Scooter Center

Dean Orton, the main man behind Rimini Lambretta Centre, came to visit us for a couple of days. On his way from Italy to Venlo Scooter Run and afterwards to the Harz ring for the ESC race, he came to visit his old friends here. The reason for Dean’s days off from work was to give the BSG corse engine a proper test ride and thrash it as hard as possible.

BSG Corse Lambretta test riding

dean-orton-lambretta

The testing of the engine is done in the proper way, just the way it will be used by a common rider. First of all the scooter is packed with Dean’s mod tat and additionally with:

  • a second expansion chamber to be tested
  • a bag full of spares and
  • camping gear for Venlo.

Then the bike is thrashed about the motorways and country roads across Europe (Rimini, Italy – Austria – Germany – Venlo, Netherlands). His test ride also took him to Scooter Center Cologne and to the Harz ring for the ESC race.

80mph – restricted to 50hp

This is real testing over a long distance with sitting happily at 80 mph all day and plenty of throttle left to easily hit 95 mph and all this with a very short gear ratio of 4.9.

The 305 cc barrel on the CNC machined casings is restricted by the programmable ignition to 50 hp. Unrestricted it gave a 63 hp at the Rimini Lambretta Centre dyno.

Scooter Racing at the Harz ring

At the Harz ring this weekend there will be held the next ESC race. Dean met the Casa Lambretta racing team last night. Today the first testing of the Casa race bikes will take place and the last preparation before the races will be done. The Casa Lambretta race bikes feature the Casa Performance range as well as some BGM parts that are used on these bikes. We were happy to supply the front and rear shockers, the Silentblocks as well as our BGM Superstrong Lambretta clutches for the bikes.

Our first time!

Even if we know each other for decades and the shops were founded roughly at the same time, we haven’t managed to visit each other’s shops until the year 2015. dean-orton-lambretta-dean-orton-lambretta

On the 25th of April we were invited to the Open Day and shop opening of the new Rimini Lambretta Centre premises. This weekend was one of the best ever, with a stunning shop, loads of food and drinks and the test riding of scooters that made history –like both Innocenti twin cylinder prototypes- and bikes that probably will make history – like the BSG 305 cc one

Here is the video of Philipp riding the BSG Corse Lambretta

On Monday we finally had the pleasure to welcome Dean at our place! It was a pleasure every single second and a lot of piss taking has taken place. After a first tour through the shop on Monday and even some business talk we had dinner together and the stories never ended. While Dean quotes our Generation XI Smallframe Vespa as the most beautiful object in the universe, he can’t be stopped to let us know that the look of the BGM Lambretta Test Bike is the most shittiest Lambretta he ever came across. A theory we are confronted with from the first day Dean saw the Test Bike at the 2nd edition of the Riva del Garda Customshow in 2013. To stop this, we will send the Test Bike over to them to have the optics matched to the perfectly working engineering of it.

dean-orton-on-a-lambretta

On Tuesday Dean tested the bike in the rain on the beautiful routes around Cologne/Bergheim and came in for the traditional afternoon tea and some more stories and ideas about how to improve Lambretta parts.

On Wednesday the plans were to do another tour and take some pictures of how we proceed orders to show them at home. This has been missed though, because we wanted to see how the BSG engine performed on the dyno with the different pipes Dean had with him. Sadly we ran out of time and hadn’t the chance to put the Big Box on the 305, to modify an U-bend for the exhaust stub took too long and lunch was waiting and afterwards Dean had to leave.

We send our best regards to all the staff at Rimini Lambretta Centre and to Vittorio and his race team and keep our fingers crossed!

Vespa exhaust BGM BigBox Sport on dynamometer

Michael Holden from England is a loyal customer of Scooter Center. On his way to his run “holidays in Sauerland” he paid us a short visit and leapt the chance to test the Vespa exhaust BigBox Sport on the dynamometer.

05_2015 001

Vespa PX 200 with Malossi 210 and PHBH30 carburetor

His Vespa is a German Vespa PX200, which he bought when he was deployed in Germany with the British Forces.

The engine is a simple one and is made up of an “old” Malossi 210 cylinder, DellOrto carburetor PHBH 30, Mazzucchelli racing shaft with 57mm stroke and a Taffspeed MK4.

Michael tells us, that the engine was tested with the same parts in England on a Dynojet before he left. The result was 17.88BHP (Brake Horse Power). Giving us a value to compare with, when measuring and to assess whether the engine’s performance went down. The old 210 with the MK4 demonstrated the predicted performance. The difference in values from the Dynojet and from our dynamometer is only a few tenths. So you can see, the two results are comparable.

M. Holden Malossi 210 PHBH30  MK4

The 90s: Taffspeed MK4 Vespa exhaust

At the time (1996 the first systems with TÜV-certificate have been sold in Germany) the MK4 was a good all-rounder with positive performance. A positive performance was reached before having to respond. Overall you can say that an engine is regarded as one that “drives well” on the street, when it reaches at least 10HP from 5000 revs/min and when performance and torque increase with increasing revs. However, the MK4 is an exhaust with just below 18Nm at about 6000 revs/min and therefore forces the driver to change down to a lower gear when being in 4th gear below 90km/h and higher acceleration is demanded.

7320003

The modern racing exhaust: BGM PRO BigBox Sport

When the MK4 was modern, no-one would have thought, that exhausts, which look like lunchboxes, would ever reach such a performance.

For a while now, more powerful exhausts are being developed with looks that resemble the original.

Leading to the BigBox:

Combining the performance of an expansion exhaust chamber with the looks of an original exhaust.BGM Tuning

BGM1011SP

BigBox Sport vs. Taffspeed MK4

A comparison of BigBox Sport and Taffspeed MK4.

bbs mk4

In contrast to the MK4, the BigBox Sport can add further torque and performance from 4500 revs/min. Comparing the engines on the street, let the scooter seem to drive more easily, because there is more torque for acceleration. The additional torque becomes crucial when the scooter is driven at at least 5500 revs/min on a motorway or highway.

Michael was convinced of the BigBox Sport. He wouldn’t even let us detach the test-exhaust and continued his trip to the Sauerland with a fitted BigBox Sport.05_2015 019

Test the new Vespa exhaust now:

Would you like to know, what happens if we fit the Bigbox Sport to your engine? Send us a date inquiry:

pruefstand@scooter-center.com

New Vespa touring exhaust

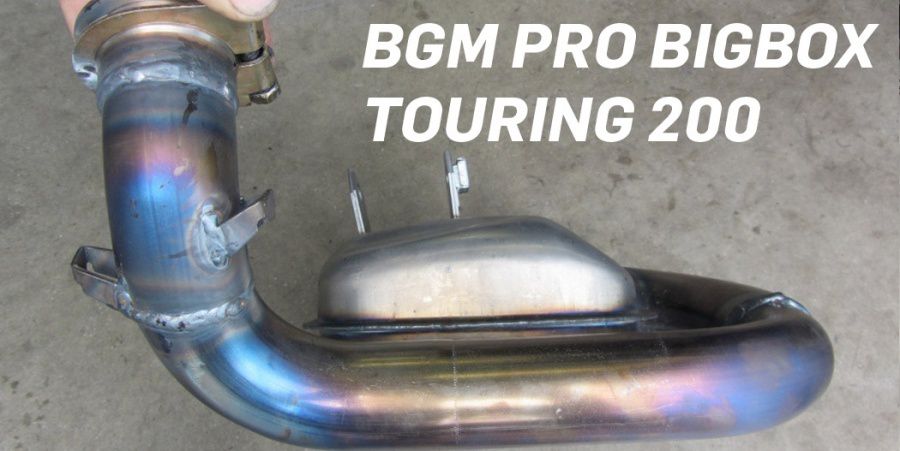
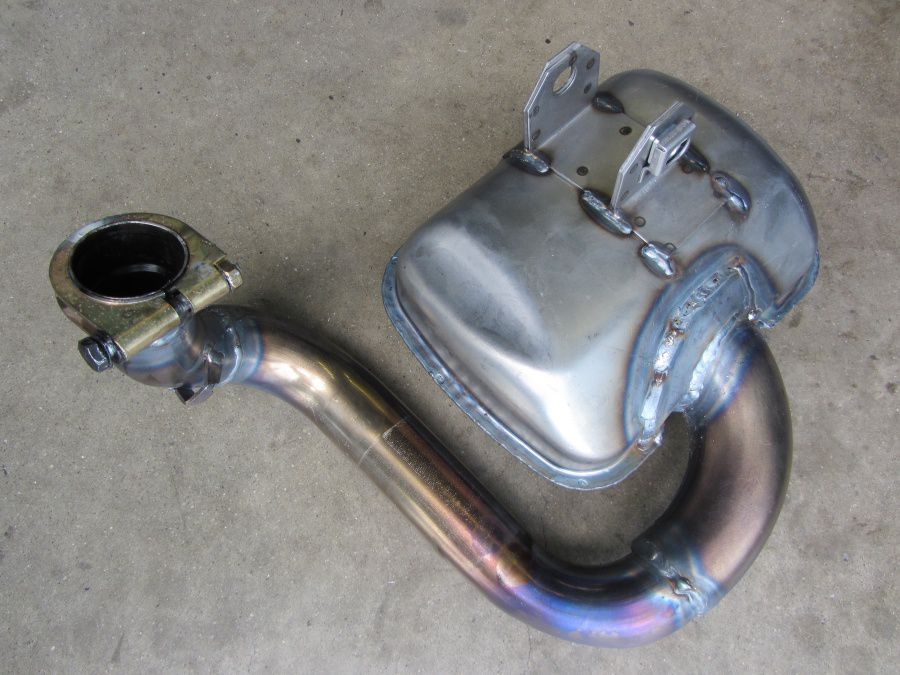
We received the first production pattern of the BigBox Touring for 200cc Vespa PX engines today.

Assessing looks and fit are part of a normal sample exam. And so are test runs on our Scooter Center P4 dynamometer.

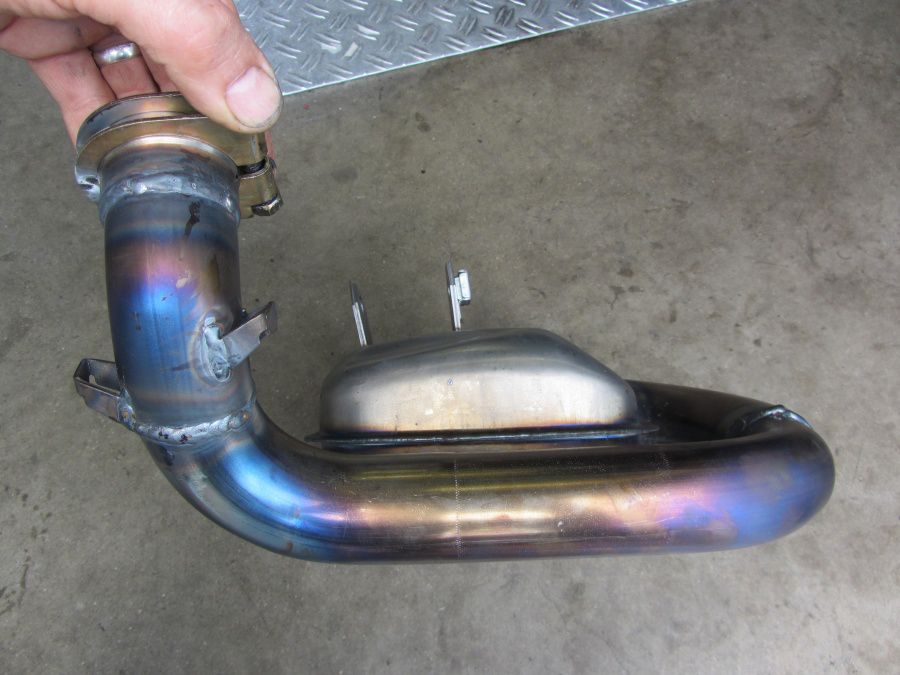
We already mentioned in previous entries relating to this Vespa exhaust, that the BigBox Touring has a drastically smaller U-bend than the BigBox Sport, its larger sister.

BigBox P200_2

The missing black, heat-resistant cover layer makes the BigBox Touring look somewhat naked. We also attach significance to closely assessing all the joints without the cover layer, though.

BigBox P200_3

Test assembly on a Vespa Sprint with a 200cc engine

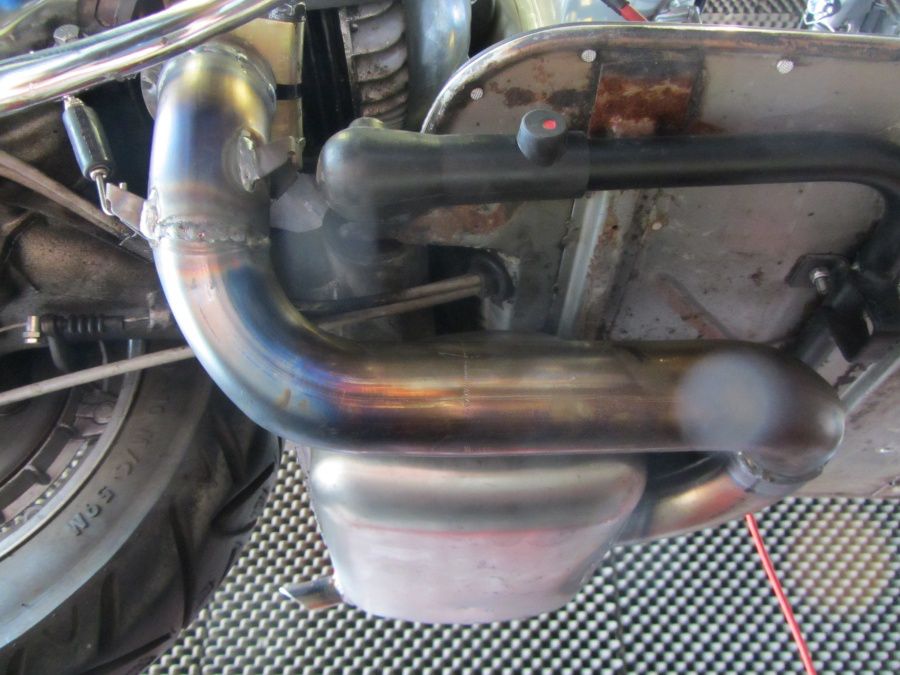
One of the first parts of the exam was the assembly in a Vespa VLB (Sprint). Usually space issues arise, when fitted in combination with a 200cc PX-engine. Especially around the centre stand, in particular in the “U’s” and the laps for the stand springs. Depending on the assembly of the exhaust, stand feed rubbers might collide with the U-bend.

We especially focused on these narrow spaces to see whether everything fits. The BigBox fits even to vehicles with a two-spring-system at the centre stand, which has only be introduced to the German market. The stand feed rubbers have a save distance to the hot U-bend.

BigBox P200_4

Just as its larger sister the BigBox Touring comes with a solid clamping and additional holders for exhaust springs.

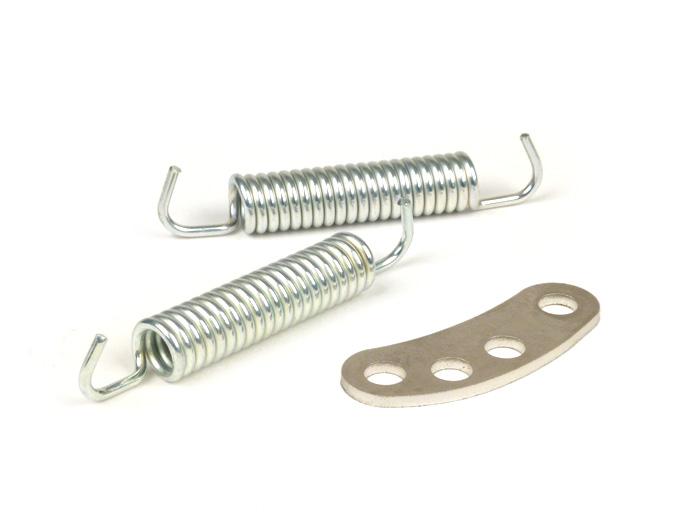
You want to play it safe? Our retaining plate incl. exhaust springs perfectly matches your BigBox.

BGM101HMSR(1)

Performance measurement Vespa exhaust

Once we agree with the looks, processing and fitting we continue with performance measurements.

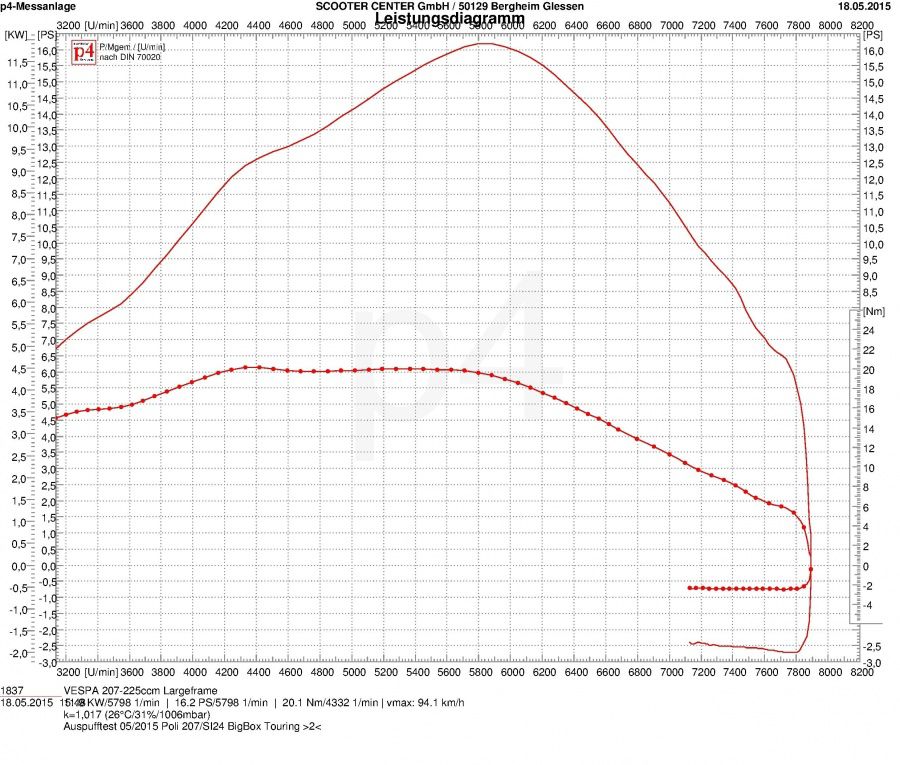
First “testing victim” is a cast iron Polini with 207cc, SI24 carburetor in a standard Vespa PX200 engine.

bigbox touring 200

Early torque for day to day use and touring

When developing the BigBox Touring we focused on having the possible torque available early and that there is a high amount of pressure in the exhaust with low revs.

The earlier and more homogeneous torque is provided by the engine, the nicer is a day to day drive. Our cast iron test engine by Polini with a BigBox touring reaches more than 18Nm at 3900rpm. Translated to the 4th gear this means smooth cruising at 50km/h with a very good potential to accelerate up to the final revs.

Increased transmission possible

Depending on the engine you fit the BigBox Touring on, an increased primary transmission can be used reasonably to go easy on revs while retaining the same cruising speed. Increasing transmission is easiest when using a clutch sprocket. The BGM clutch sprocket for Cosa clutches or a sustainable solution like our BGM Superstrong clutch are very fitting examples. An increased transmission may increase the top speed by 5km/h at same revs.

BGM8099D

Let’s test – BigBox Touring is waiting for you!

You want to know what the Vespa Touring exhaust BGM PRO BigBox Touring can do to your personal engine? Just send us a date inquiry to

pruefstand@scooter-center.com

Our test pattern is waiting for you on our dynamometer.

Swing arm Piaggio Maxi Engine Gilera Runner and Co.

Good news for performance fetishists and lovers of Piaggio automatik two-stroke-engines.

For you, we further developed our BGM PRO swing arm to reinforce the engine case, optimized it and have it produced in a new design:

Swing arm BGM PRO Superstrong Piaggio 125-180 cc 2-stroke BGM7900N

BGM7900N(4)

The legendary BGM PRO swing arm

bgm pro motorschwinge

This idea originated during the construction phase of our shop demonstrator. A reasonable reinforcement of the engine case was particularly needed for the 50 hp strong twin.

Usage notes

As for the previous version, some things have to be considered in order to link the swing arm to your engine whilst protecting the large, and now rare, Piaggo two-stroke engines:

  • fits Piaggio 125 -180 engines with disc brake
  • exhaust support at engine case needs to be adapted
  • exhaust systems need to be adapted for assembly
Order your swing arm here

Easy assembly

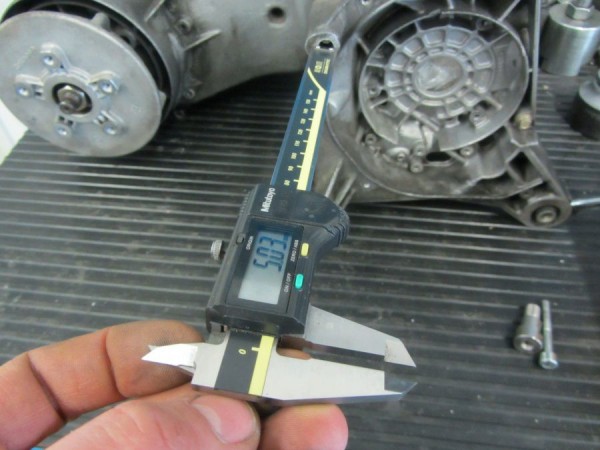
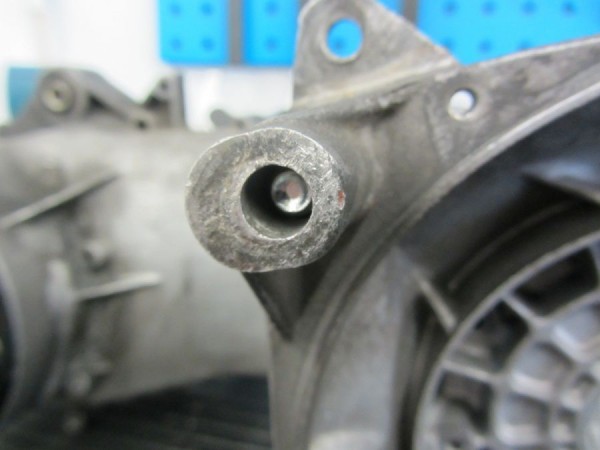
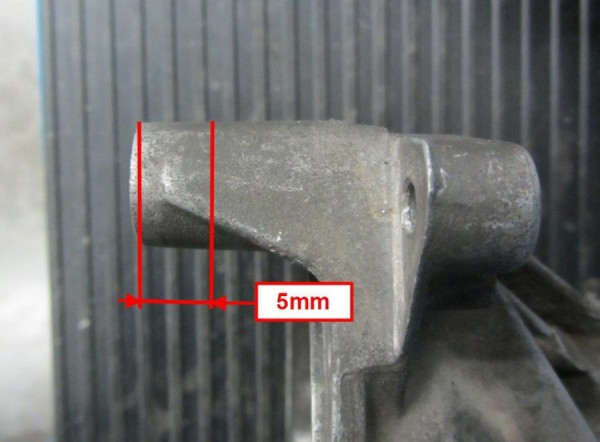
First, the engine case has to be adapted. The easiest way is to “adjust“ the screw, which is screwed through the support from behind, with a gap of 5mm.

BGM7900N_2 BGM7900N_5 BGM7900N_4

For security reasons you should, as a trial, assemble and check, if it runs parallel to the surface at the Vario cover. Shortening by at least 5 mm is usually always necessary. Depending on the combination of assembly parts, the gap can vary and be up to 10 mm wide.

BGM7900N_2

Fastening the rear wheel

The two-rowed self-aligning ball bearing can be fitted at a maximum angle of 5°. The swing arm comes with longer screws to fit the rear wheel. The screws should be fitted with liquid screw locking.

BGM7900N

Security advice

The swing arm was produced for race use only.

There are many variations of hubs, rims and engine cases on the market.
Therefore we advise you to thoroughly check if the parts fit before the assembly and finally to very thoroughly assemble the parts.

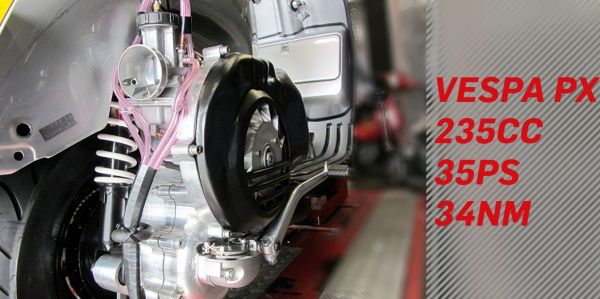
35PS und 34NM at the start

Vespa 235cc

More than 235ccm and a CNC motor housing on a Vespa PX are the exception on our Scooter dnyo jet.

Only a few enthusiasts venture out to such financial and screw generic challenge on a Scooter.

Look at this outwardly unassuming, silver Vespa PX:


27.06.2014 007

38er Keihin Airstriker

27.06.2014 002

Gearing is designed to more than 50hp

Aeroengine Simonini clyinder with 70mm bore and 235cc!

Simoninii235

At the moment “only” 35PS and 34nm – BUT: the owner will be further optimizing this engine. We will meet again on the dyno :-).

We are very excited!


We had a closer look at the new Malossi Sport and MHR cylinder kits earlier. Now we check the new Polini 221 cc cylinder kit that is supossed to be used with 60 mm stroke crankshafts.

The cylinder head ist the one that is used on the Polini 210 cc as well. So let us have a look at the compression ratio of the head that is used with both kits.

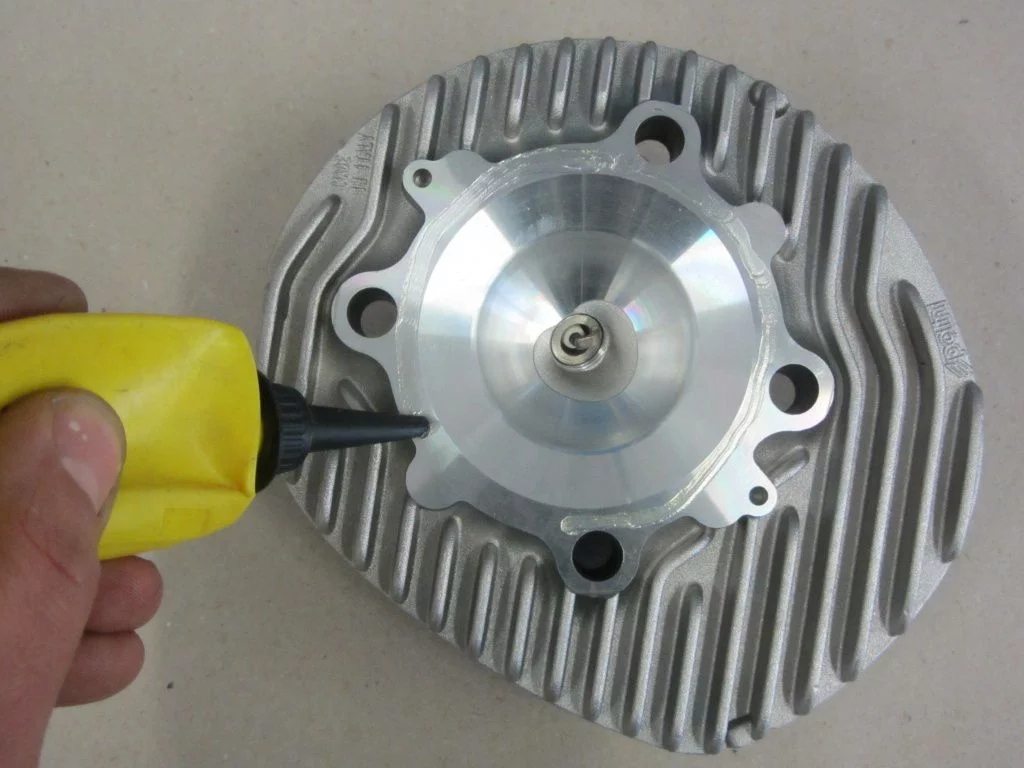
Once the long threaded spark is fitted the head is tight enough for it’s closer inspection. To have our Plexiglas high tech measurement equioment sealed properly too with put a little bit grease on the head’s gasket surface.

Zylinderkopf Polini221

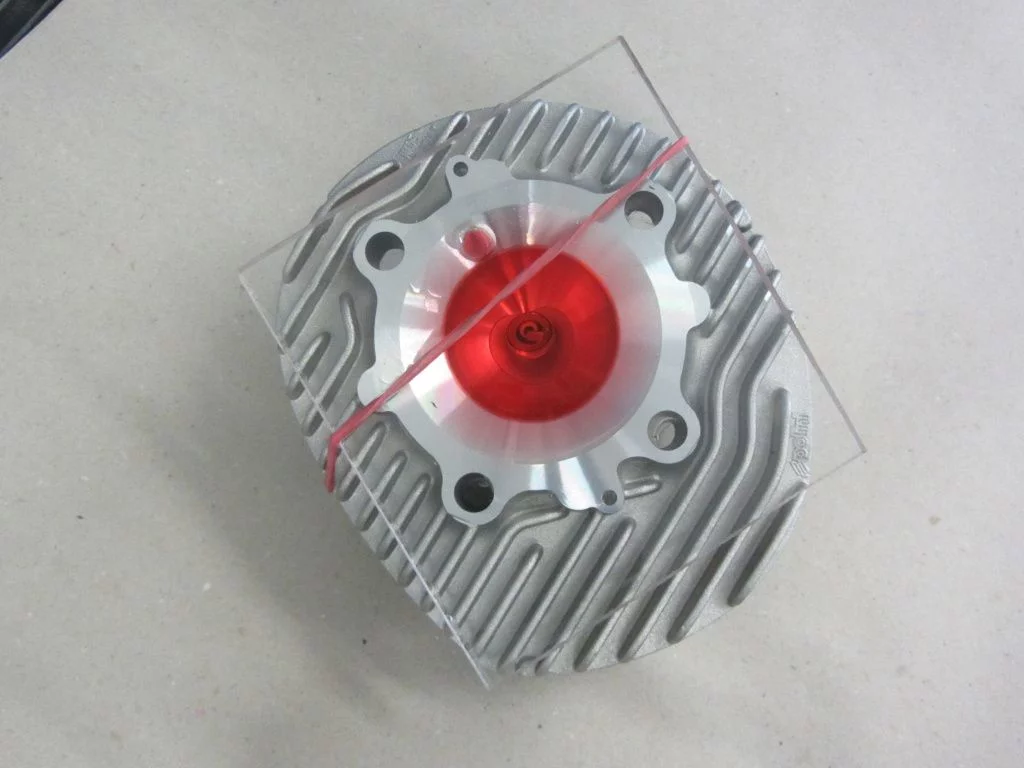
With Plexiglas plate attached we fill up the combustion chamber with oil to get the volume of the combustion chamber.

Zylinderkopf Polini221_2

With 25 ml putted into it, we have a 25 cc combustion chamber volume.

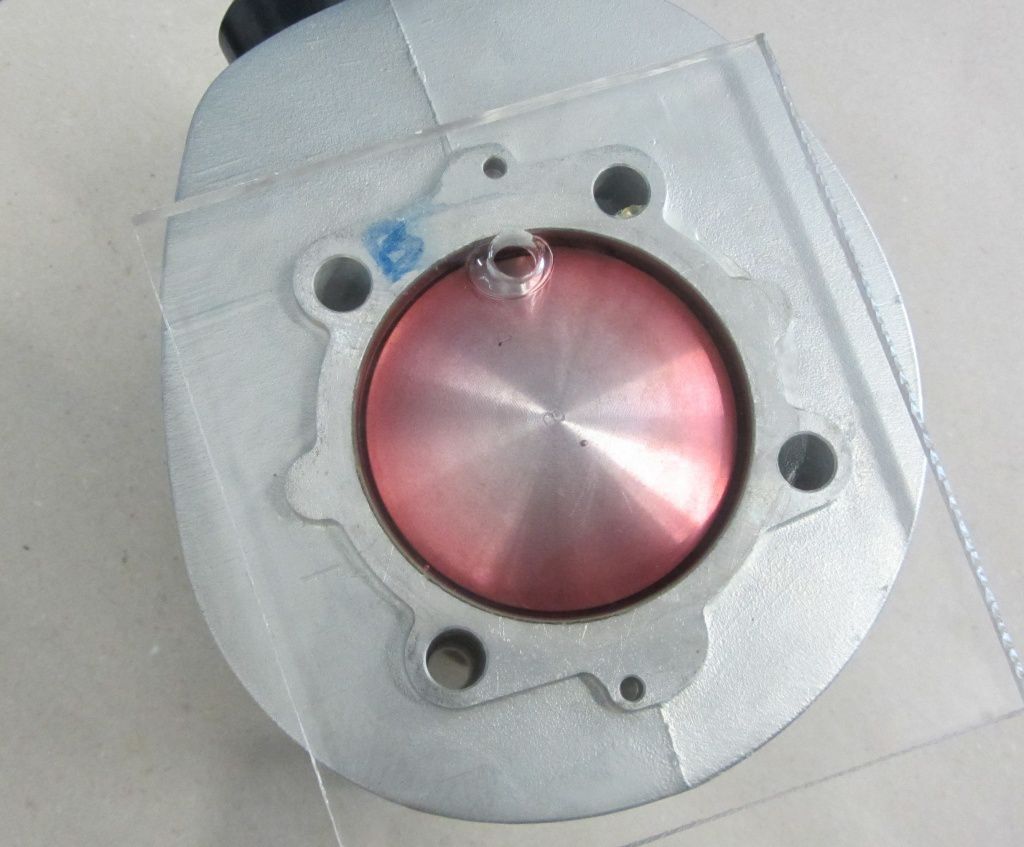
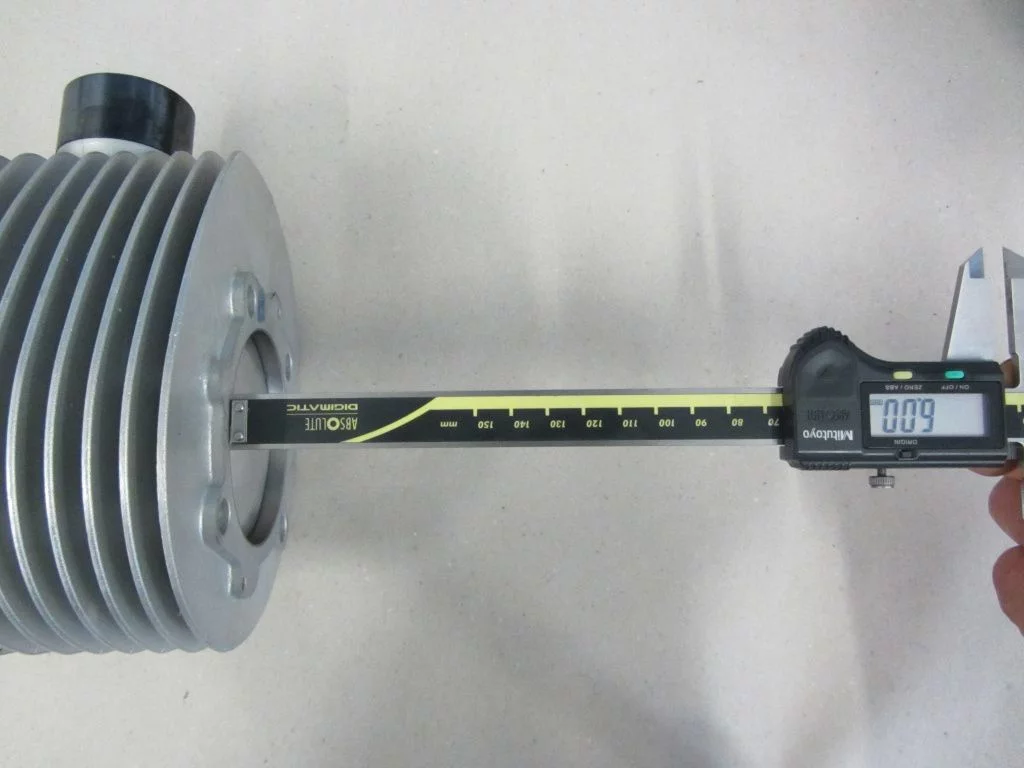
To get the complete combustion chamber volume (Vc) we need the volume of the curved piston dome. With a freely selected recess of the piston we can calculate the volume above the piston. We have the piston recessed by 6 mm here.

kolbenboden polini221

6.85 x 6.85 x 0.785 x 0.6 = 22.1 cc is the Volume of this area.

Sealed with grease and filled up with a light oil we see 14.6 ml (= 14.6 cc). So we have 22.1-14.6=7.5 cc for the volume of the piston dome.

To get the show complete we know need to have a look at the squis area volume. This needs to be measured at the engine with the parts like crank, barrel, piston and head mounted. We measure a 2.2 mm squish clearance. This gives a volume of 8.1 cc.

So we have a combustion chamber volume of:

Cylinder head 25 cc

+Squish clearance 8,1cc

-piston dome 7,5cc

=25,6cc

This gives a compression ratio ? of

Cylinder 221 cc + combustion chamber area 25,6 cc / combustion chamber volume 25,6 cc

= 246,6ccm /25,6ccm

?=9,63

So slightly higher compression ratio then the Malossi with ?=9,3 (on a 57 mm stroke engine!)

This is the Polini 221 engine of a customer.

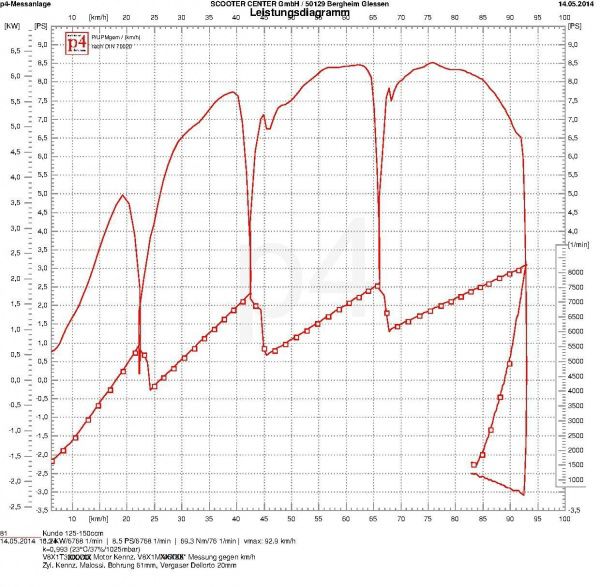
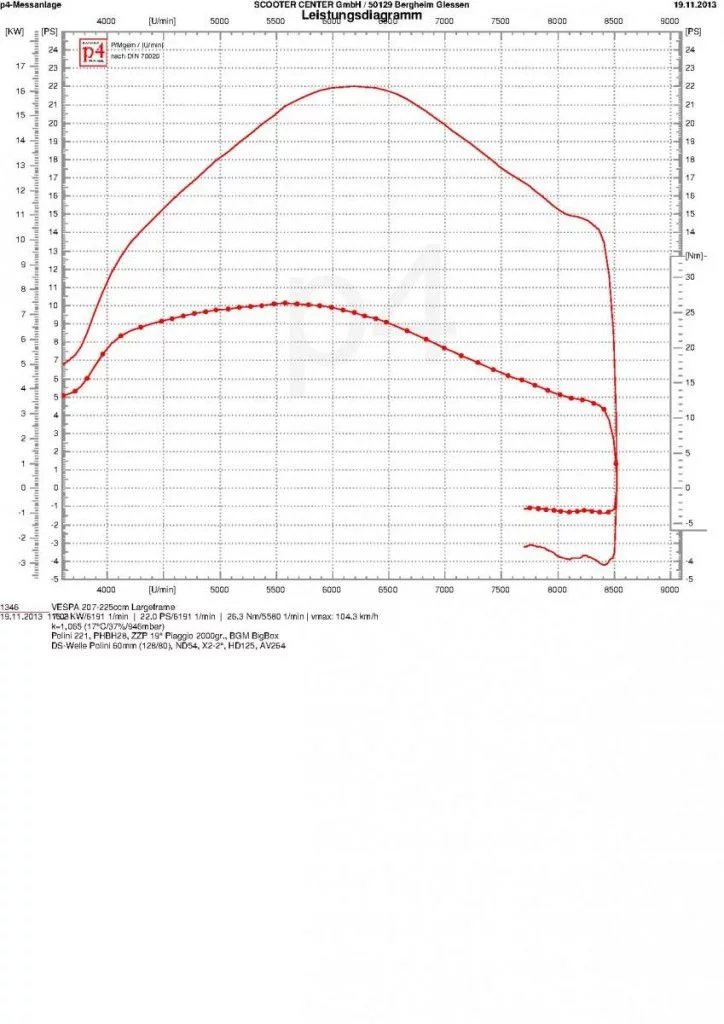
Polini 221cc, Kurbelwelle Polini 60mm stroke, Dellorto PHBH 28, Polini inlet manifold for rotary valve and with our bgm BigBox. With a standard base gasket there are port timings of 120°/170°. All details are written in the diagramm.

Polini221

This is a Plug & Play engine with no further porting. And one has to admit that 26 Nm of torque are lots. Especially if they are so low down in the power band.

At 4.000 rpm we have 20 Nm this is double the torque a standard P2 engine has at peak.

Depending on the preferred riding style and for what the scooter should be used too, a taller gear ratio makes sense to not over-rev the engine all the time. The very well balanced and smooth running Polini crankshaft is a perfect companion for travelling as well as street racing…

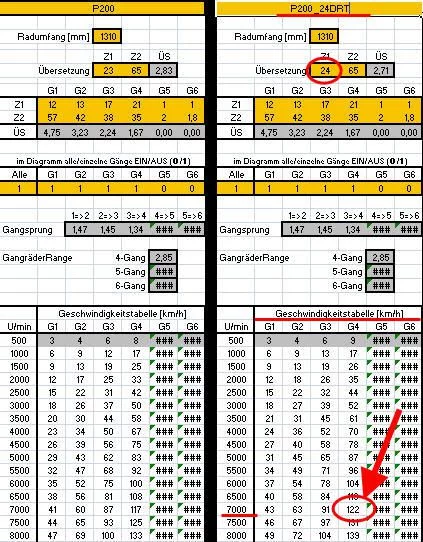
This engine setup and a longer gear ratio should give an engine that should sit for long distance travells easily at 120 km/h. Here **as an example with an original gearbox, compared to our bgm bgm Superstrong clutch with DRT sprocket with one tooth more and the original primary drive of the P2 with 65 teeth.

PX200 24_65

With 20 hp at 7.000 rpm it should be easy to do the often quoted 120 km/h mark.

** The”GearCalc” calculator was given to use from GSF member Motorhead. Cheers!

Vespa Auspuff Exhaust bgm PRO MB Big Box Prototype

Vespa exhaust bgm PRO

Our exhaust manufacturer has delivered the first samples made after the sample developed by Mark Broadhurst. We received samples for the P2 as well as for the 125 and 150 P-range engines.

First sight: Well done! Optics and machining as desired. Thick, massive made, shape of the U-bend spot on and the measurements of the exhaust bushing is right too.

If it proofs itself at the dyno, the manufacturer could start. An a delivery date within this year could easily been done.

For testing we had this engines:

All dyno runs were done on proper warmed up engines. The comparsion is against the exhausts already fitted to each scooter and against SIP Road exhaust.

Nearly all scooters were used on the road afterwards to see the changes done to the power characteristics in the real world too. And all the riders were happy how the engines transformed and were much faster and easier to ride.

Upshot: Production can be started!

Not long till the first ESC- races are started. Good for the ones who have their racing machines already sorted out and are waiting now. True to the motto: “Racing is life anything that happens before or after is just waiting.”

If you haven’t your preparation done yet, it is time to start things for the racing series everywhere.

We too have to build an engine. This will be used for the Klasse 2 of the ESC. This is the the cream of the crop class at the Euro Scooter Challenge. Nothing is forbidden here and most things are allowed as well. All info about it can be found here: www.eurochallenge.de. The only restrictions that can be found is no larger capacity than 150 cc, while the top notch engines have a power output of 35 – 38 hp at the rear wheel.

On most of these engines you’ll find the stroke of 53 mm combined with a 60 mm bore what gives 149.85 cc. This formula for power and success is used on our engine as well. The Falc cylinder kit with 60 mm bore and a special made 53 mm stroke crank will be put onto the Quattrini engine casing.

We don’t want to keep back this awesome panorama of all the parts that make such a nice engine…
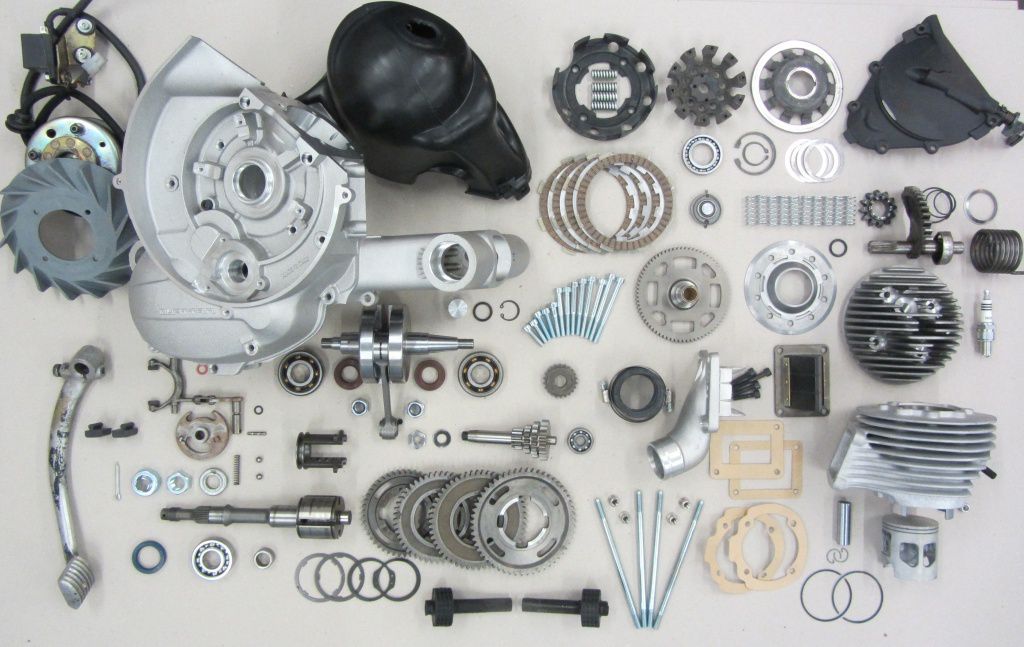
04.04.2 017

…and we did a nice shopping list for recreating this view in your living or sleeping room. Wherever you like it more. This is the download file CSV-Datei that you can upload to your shopping basket in the online shop.

Before we are even think about putting all the parts together, everysingle one gets a closer inspection. With such high power outputs even small mistakes can cause big trouble. If it happens while racing the trouble gets even bigger. Because Racing is life, anything else is just waiting to bring this saying. Because we have used parts that are going to the engine, we take double care.

At the casings we start with checking the gasket surfaces and bearing seatings. The Xmas tree is not really free running…
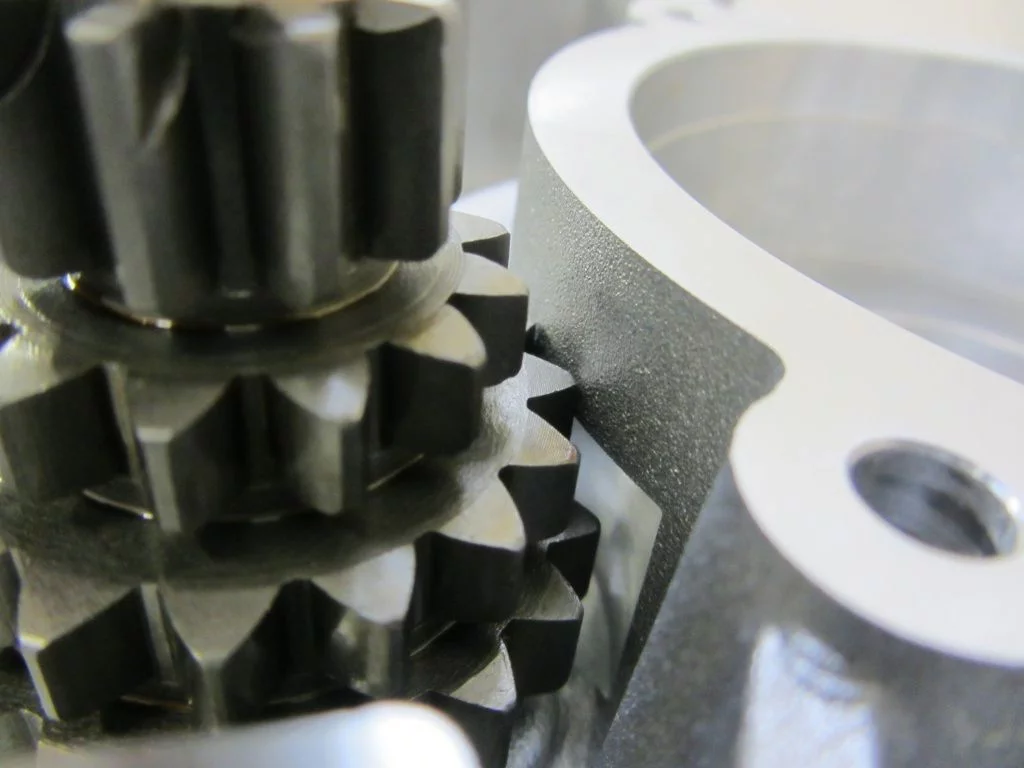
Quattrini K2 005

And fitting like it is would cause problems. Latest if the bearing is been fitted. One more to watch: If you are on the race track and have to change the gear ratio a larger gear wheel would cause real problems. And this is nothing that will cure itself during running.

The clearance needs to be milled much larger to easily get the Xmas tree out and to fit taller gearing when this is needed.
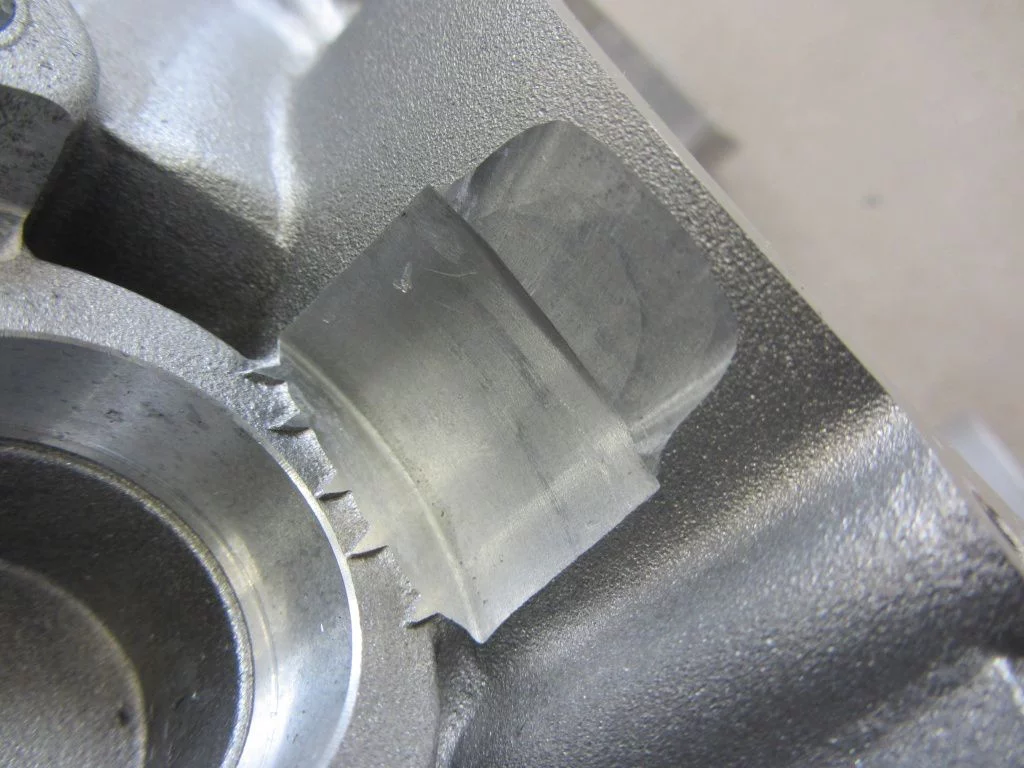
Quattrini K2 008

At least we are so lucky that there are no further surprises in bottom end.

The small casings half gives some nice little perfidy though. Normally you fit the stator plate of the ignition kit, take the cables put it thru the hole for the cable. But…wait…
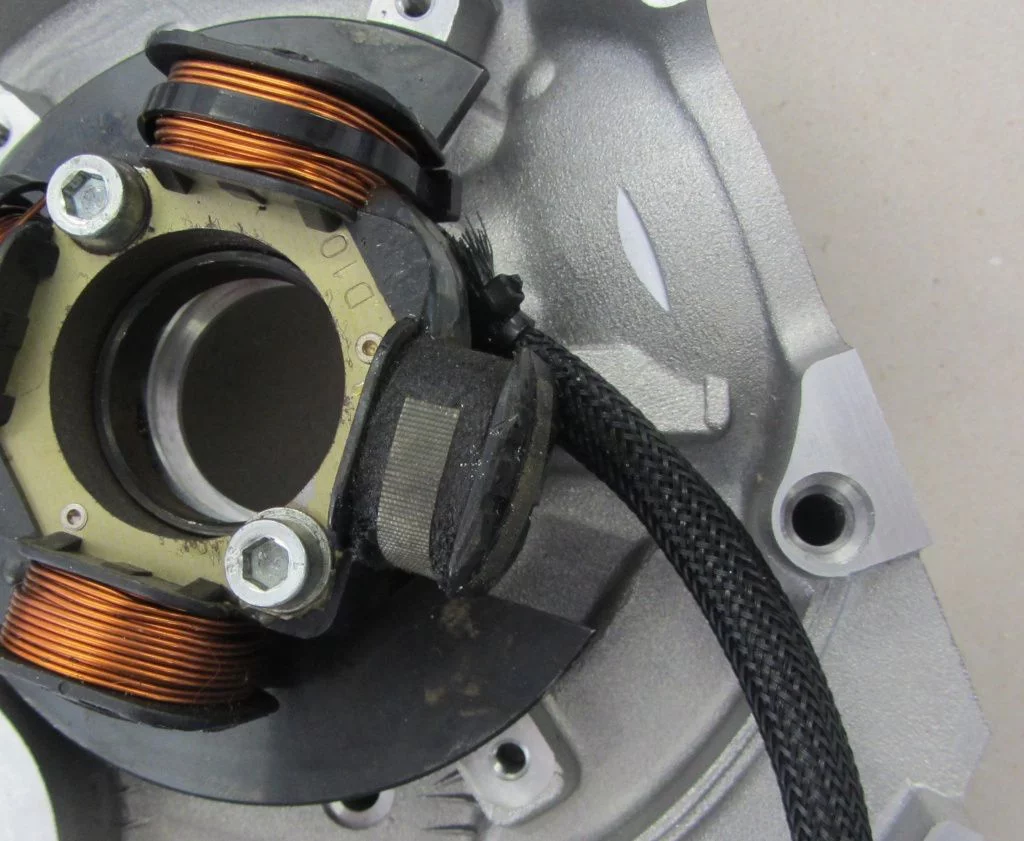
quattrini falc003

This is special, maybe this construction is for one of those WIFI ignitions. Where you no longer need wiring loom for the stator plates. Who knows? Anyway we opt for taken out the drill and get this sorted. The design of the original engine casings gives a good indication where to drill the hole makes sense.

As a protection for the stator wiring loom we take the rubber of the V50.

The right size for this is 12.5 mm. For bore holes of more than 10 mm a good practice is to use a smaller drill to get the things done step by step.
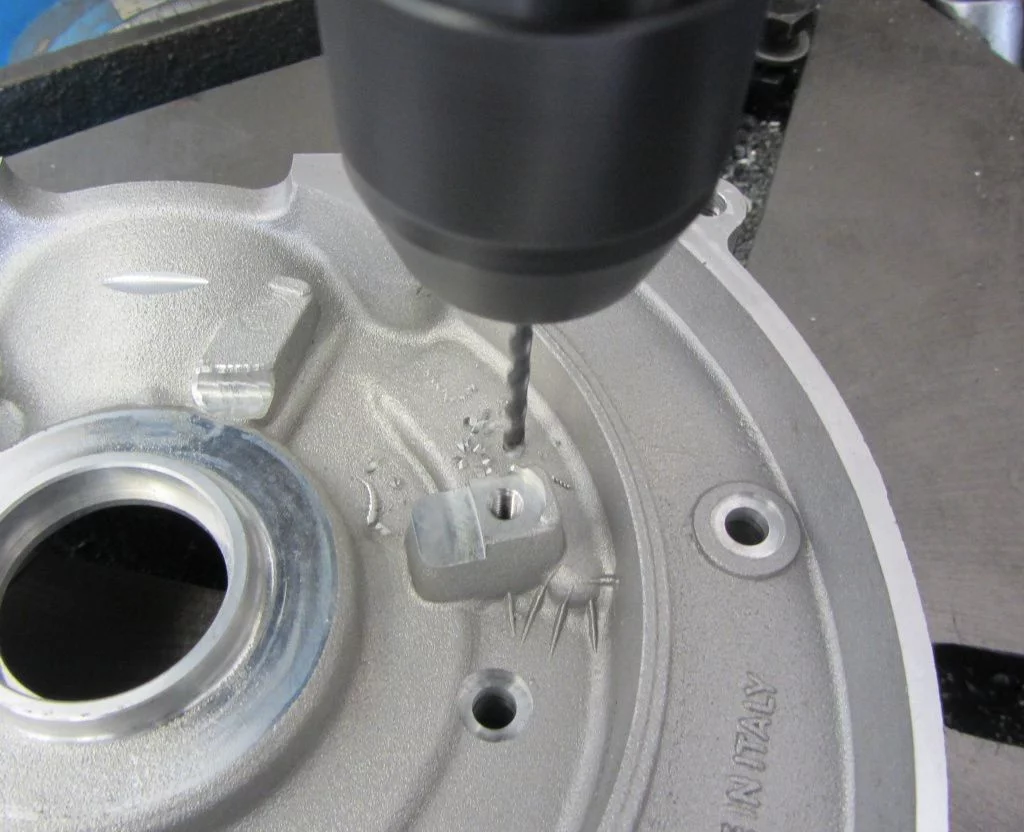
quattrini falc004 (1)

…and then you can work your way up to the desired size.
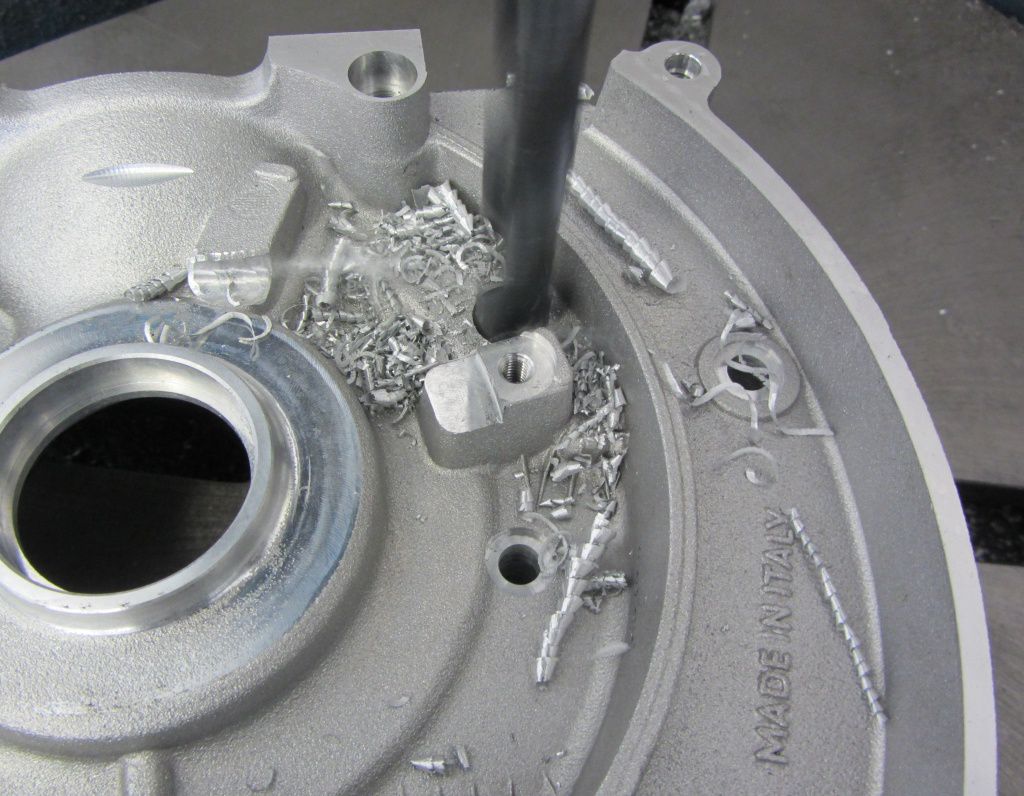
quattrini falc004 (3)

Chamfering done and then a quick try on.
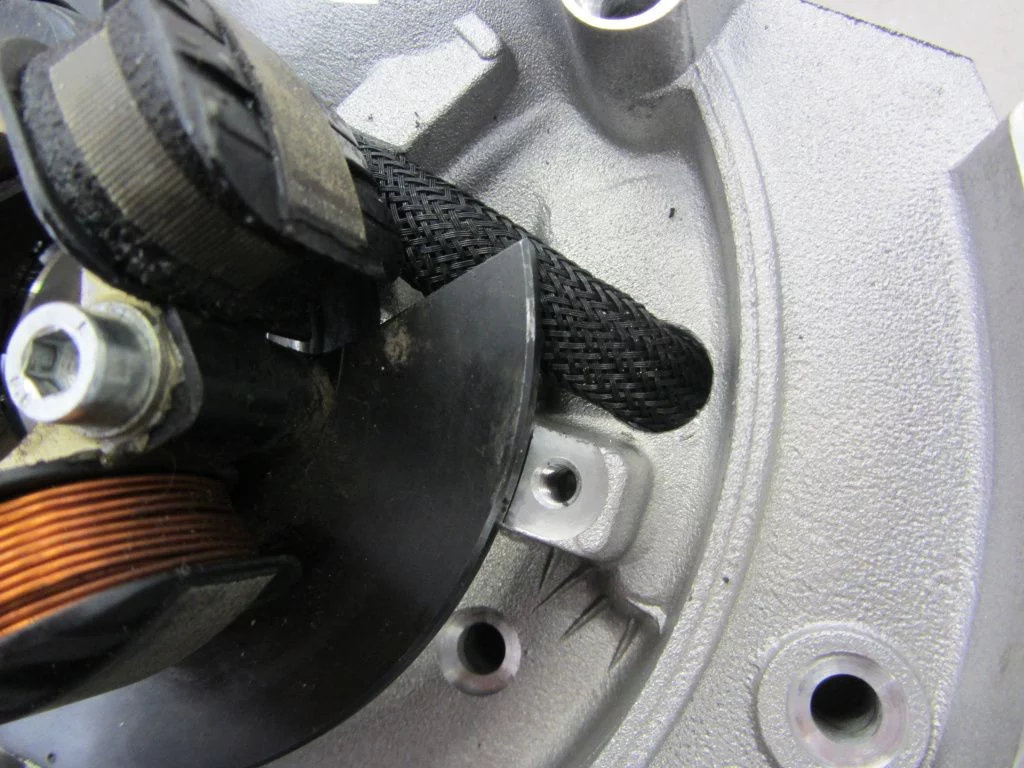
quattrini falc2 012

Everything is spot on. Now the dirty work on the small half of the casing is done.

Next we check the area of the top end for any design faults or imperfections that need to be sorted out.

While the Falc cylinder kits are manufactured with a diameter of 66.5 mm, the Quattrini engine casings are machined to a diameter of 65.2 mm suited to the Quattrini cylinder kits. Standardisation on these thing would be to nice. Why isn’t it simply done in a way that items that were on the market earlier also fit?
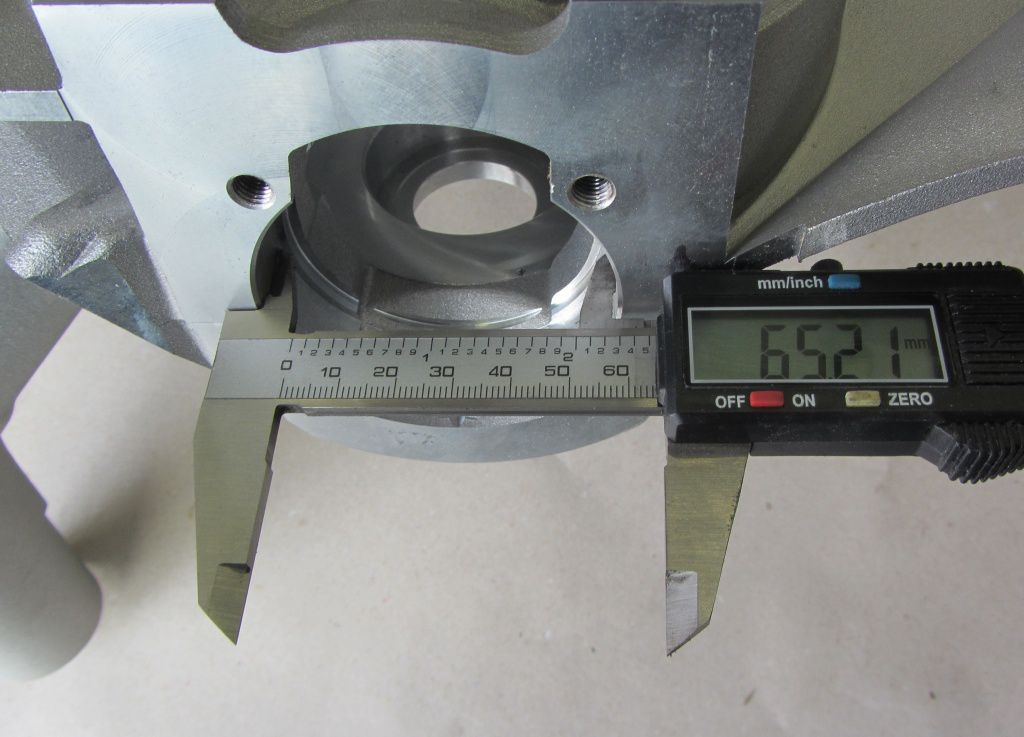
04.04.6 001
So know it is up to us what we do. There are two options that need to be considered:

1. The neck of the casing can be machined to the diameter of the casings.

2. The cylinder can be machined down to a new smaller diameter.

We opt for the second one.

If one wants to any other cylinder kit in future times, this can easily be done. The thickness of the spigot is more than enough.

After the barrel is machined down we check that it really fits and everything is spot on. that is the case and we can now see what needs to grind out at the transfers.
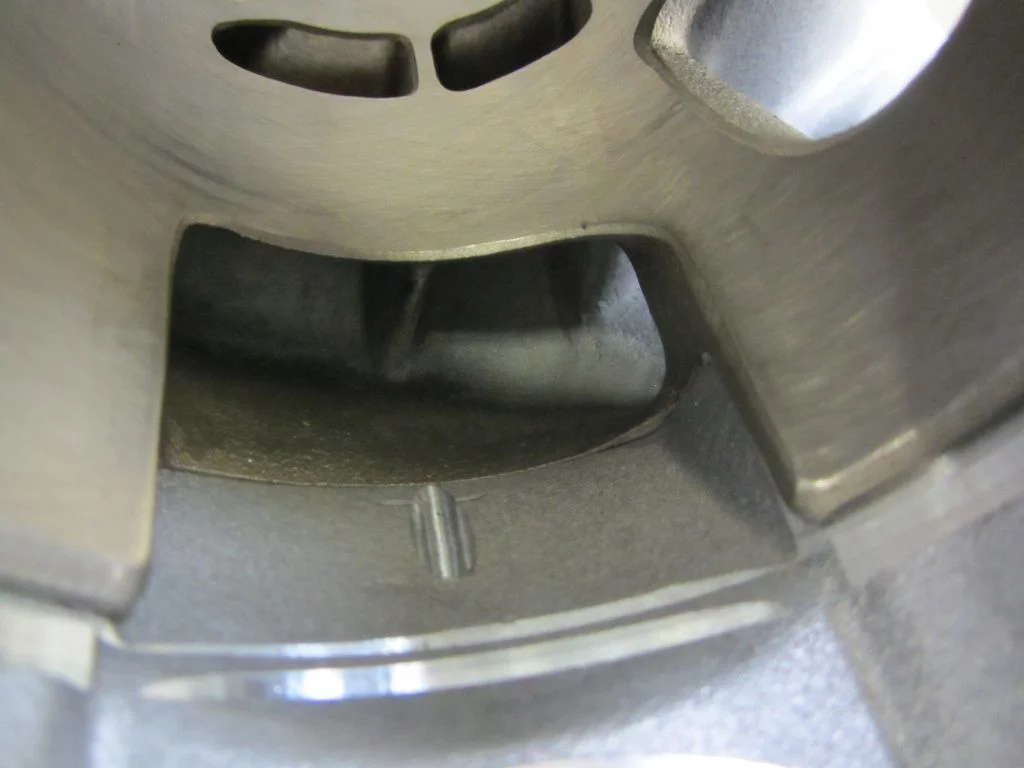
Quattrini K2 004

Very close to perfection! Just the cylinder needs to be matched very slighthly to the surface are at the casings. The casings leaves at it is for the moment and we check port timings before anything else is done to the casings.

The engine casing comes bare without any silent bushings fitted. There are lots of solutions for this on the market. Some make more sense, other not so much. If the rubber is to stiff it is nice for going on fast and long straights. But as soon as you need to take some fast cornering those hard rubbers are no longer suited for the job. For the rubber it is the same as for the suspension: “As hard as necessary, as soft as possible.”

Because this is done for the circuit we use the silent rubbersof the V50/Primavera with roughly 50 50 Shore hardness.
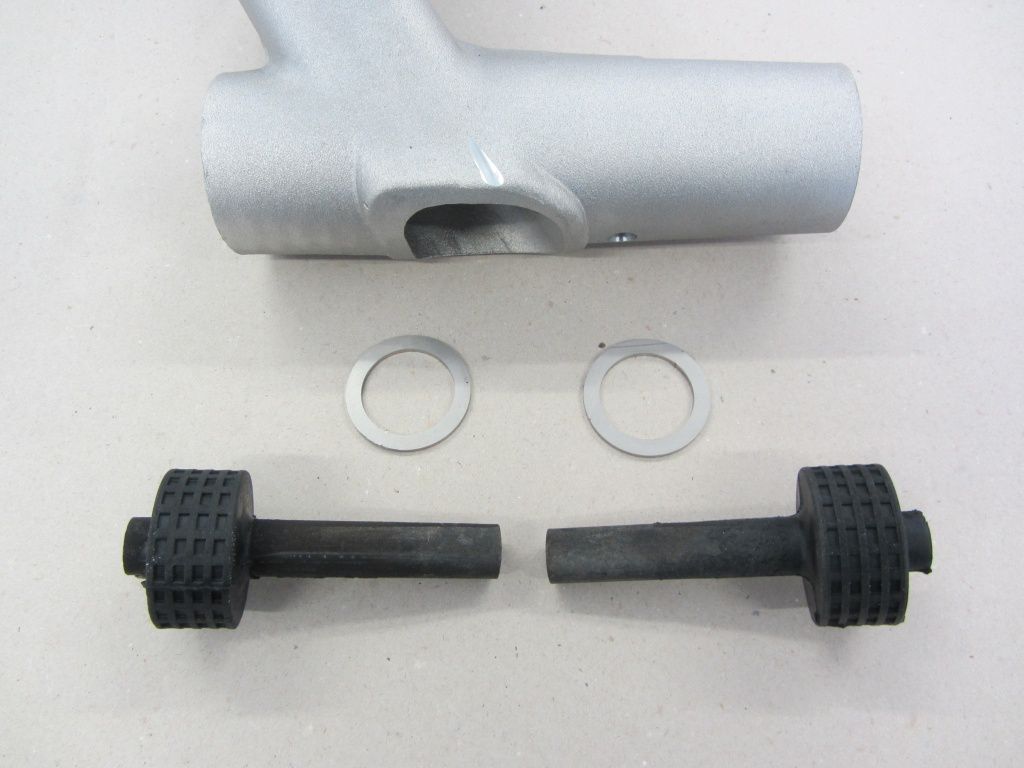
quattrini falc 001

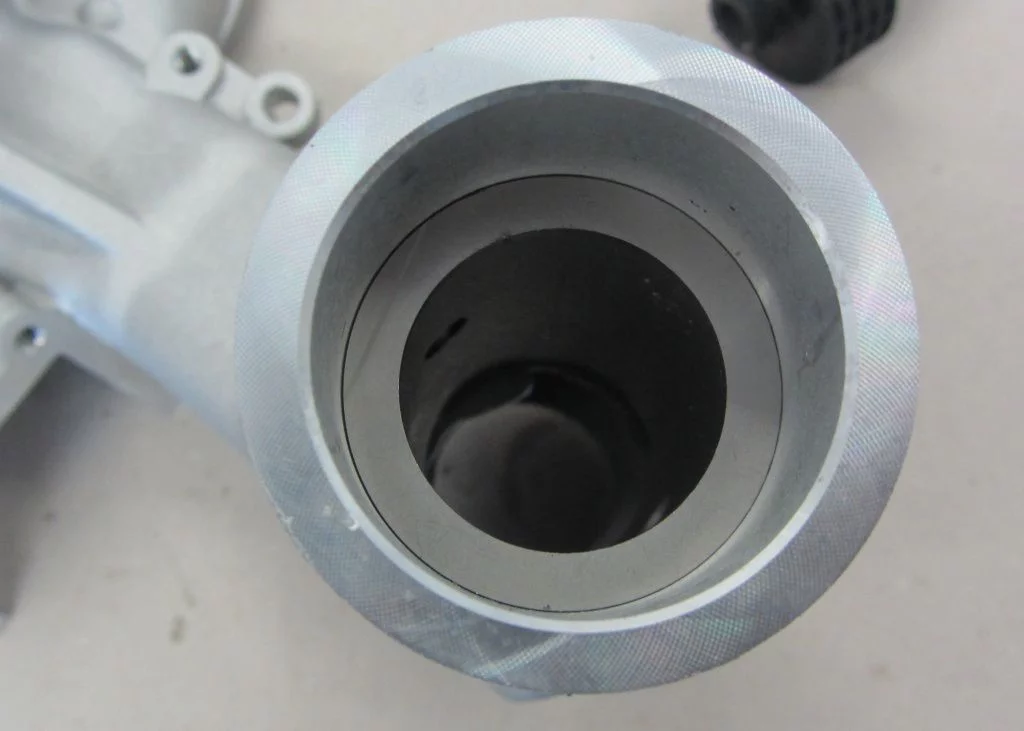
Even on a quick look it comes clear that the bed stop for the rubbers is not dimensioned right. With high side forces put on the rubber these could be pressed deeper into the casings. To prevent this we fit the stops of the PK range models additionally.

Here you see the too small bed stop:
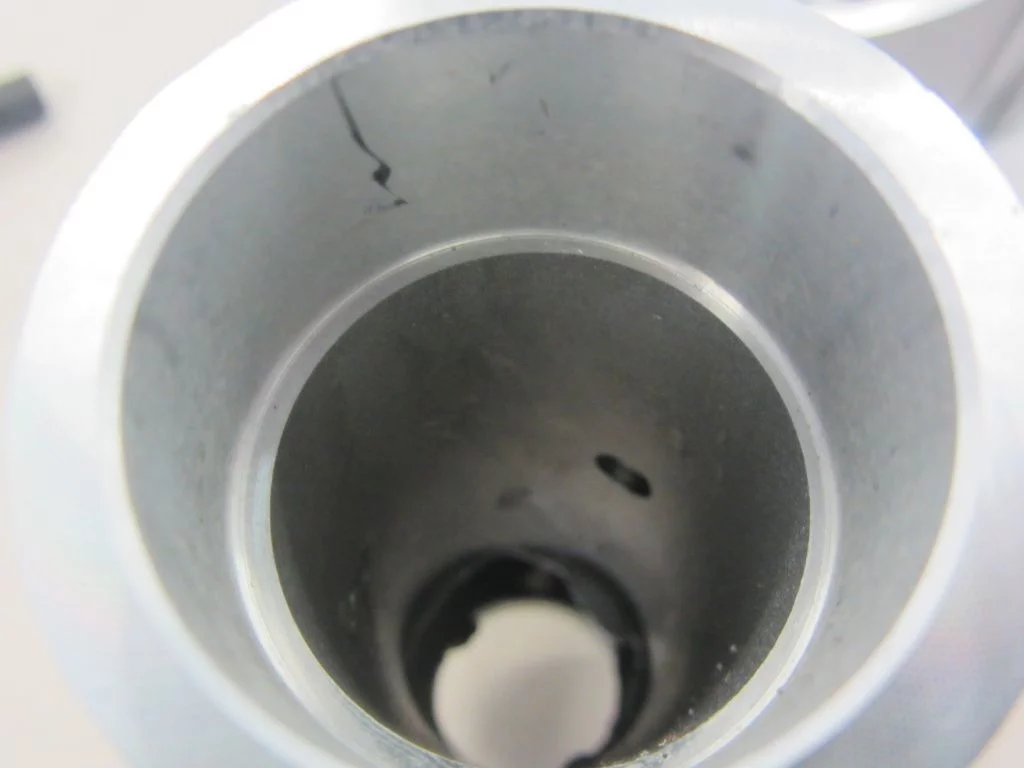
quattrini falc 003

The stop of the PK range is simply put into place and prevents the rubber getting forced deeper into the bore.
quattrini falc 009

The relatively soft rubbers can be easily put into place using a little bit of Talkum or mounting paste.

For the rear shocker support we use our own rubber together with the original bushing.

Compared to the original Piaggio rubber ours are a little bit wider…
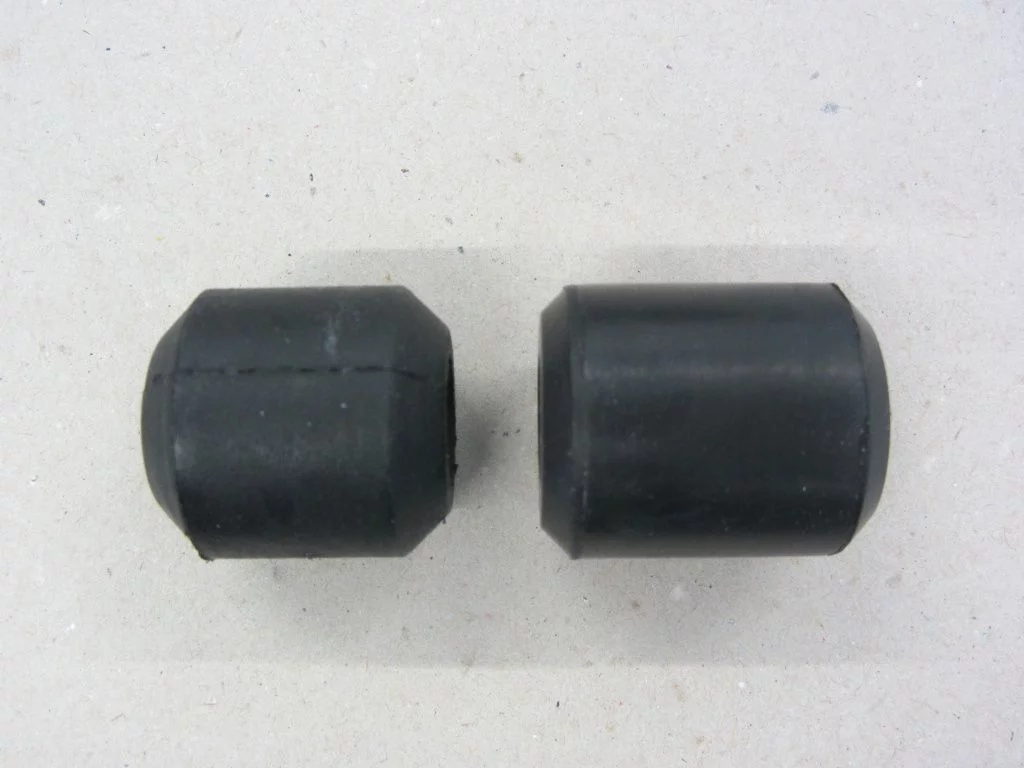
quattrini falc 002

…and they match better to the casings. This gives a better side support.
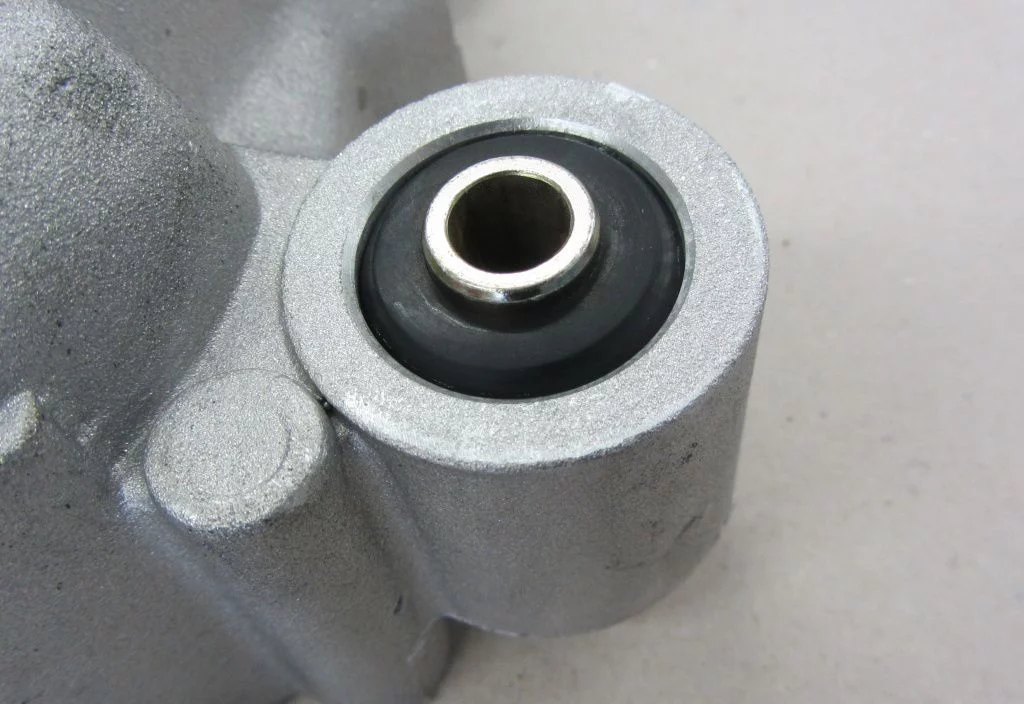
quattrini falc 013

The next episode will show how we fit the bearings and how to level up the crankshaft. Watch this space!

To do the first dyno runs, we just had to fit the cables. You might remember?

The engine came at least the idel and main jet, while the needle were missing.

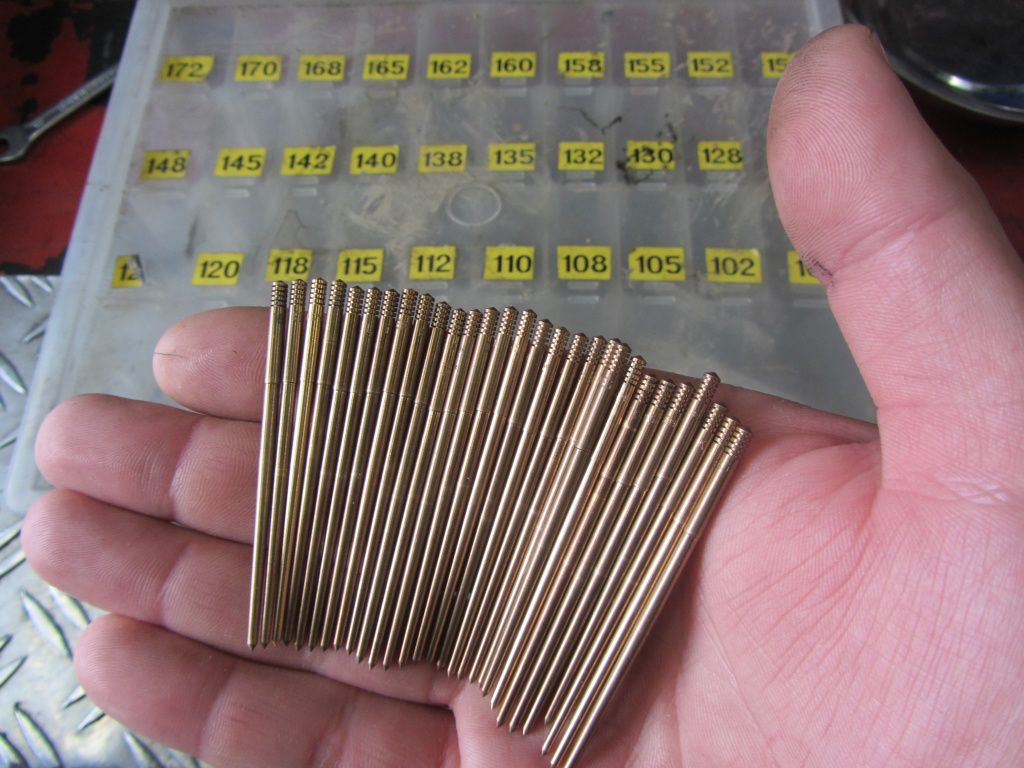
The needle is very important for a smooth engine run and picking the right one can be tricky. In our online shop, you can find our pre-selction of needles. All these are good working ones on scooter engines. Here you see our dyno colletion of the D needles only.

Kleine Auswahl an Keihin Nadeln

Kleine Auswahl an Keihin Nadeln

From our experiences and findings the DGL needle works very well on rotary valve engines. The DEK needle with which the Keihin 35 is delivered, is a little bit on the rich side low down.

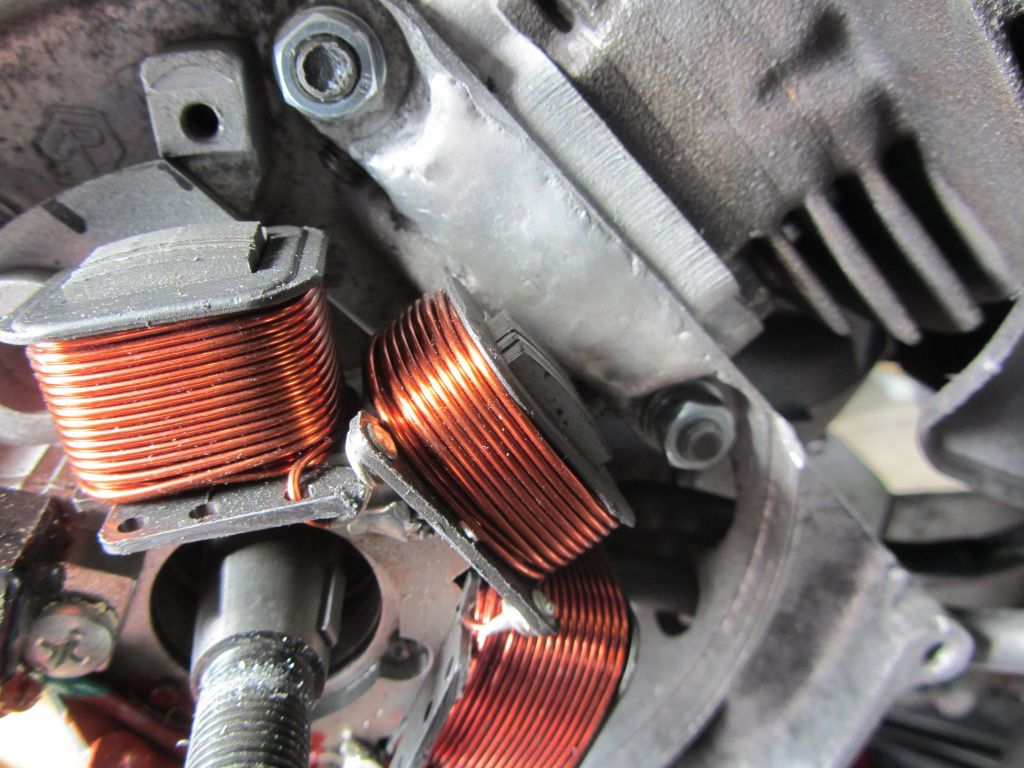
Next step is to check the timing of the ignition system. Vespatronic. Sadly the welded engine casing makes it necessary to modify the stator plate. And even more sad, it is where the ignition marks are and after the mods are done were.

gsf wsm2012 018

We need to do new markings using a piston stopper. Using a piston stopper we fimitteln wir wie immer durch eine Umschlagsmessung.

We know turn the flywheel clockwise and anti clockwise untill it is blocked b ythe stopper.

Kolbenstopper zur Umschlagsmessung

Kolbenstopper zur Umschlagsmessung

We know mark the stops at the casing with the arrow on the flywheel as reference. This need to natch exactly, sadly the camera doesn’t justice to this at the picture.

OT Markierung 1

OT Markierung 1

We know need to find the middle between the two marks. This is our top dead centre.

gsf wsm2012 009

After finding the top dead centre, we know need to figure out where our 18° pre-ignition settimng is.

We measure the circumfarance of the flywheel.

This is 529 mm. If you divide this by 360, you know the mm of the circumfarance that equals 1°. We take this and multiplie it with the wanted 18°.

Here it is like this: 529/360*18= 26.45 mm.

We know measure this 26.45 mm on the flywheel starting from the arrow on the flywheel.

gsf wsm2012 010

Know it is time to strobe the setting to be sure that everything is spot on.

We found the ignition timing is 16° instead of the 18°. We leave it as it is for the moment and idle the engine up for the first runs.

gsf wsm2012 013

While warming the engine up and switching thru the gears, we find the 3rd gear jumps out. Damn! Okay, the solution for the moment is to measure it in fourth. Because of the higher gearing the power output is not as high as it would be in the 3rd gear. Which is normally used for dyno work.
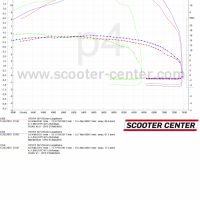
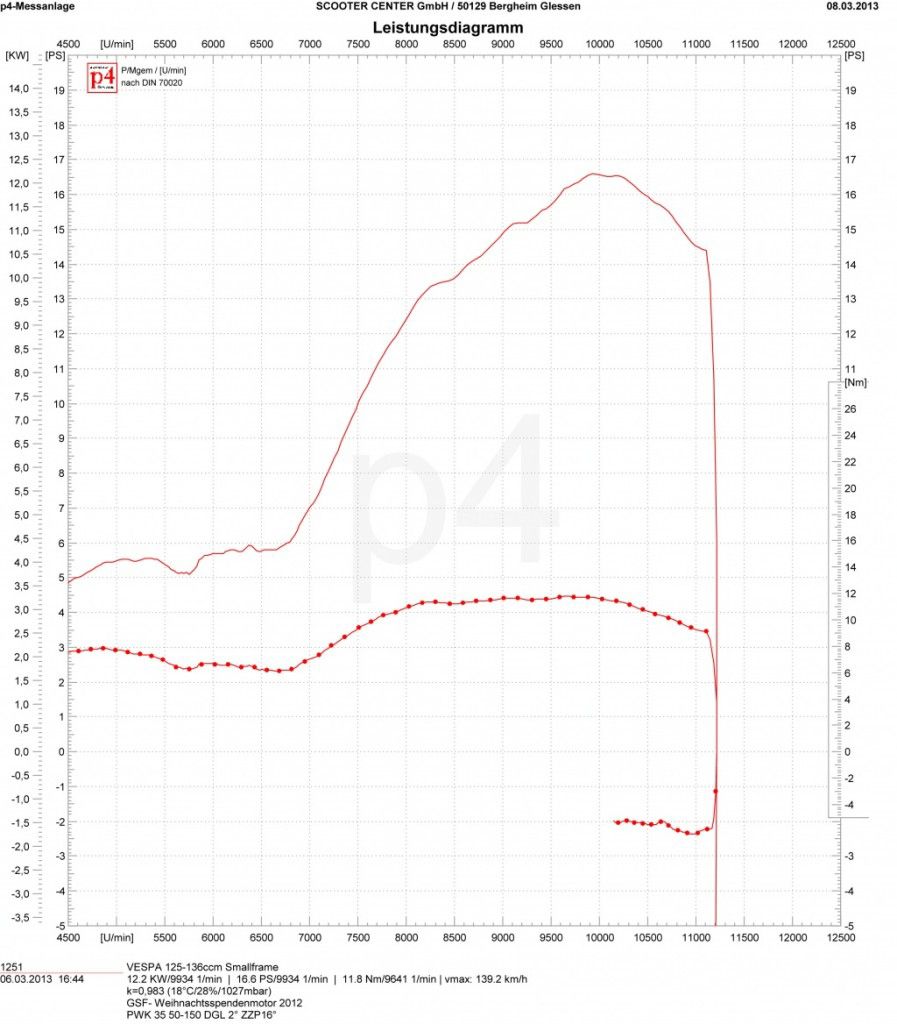
First try…

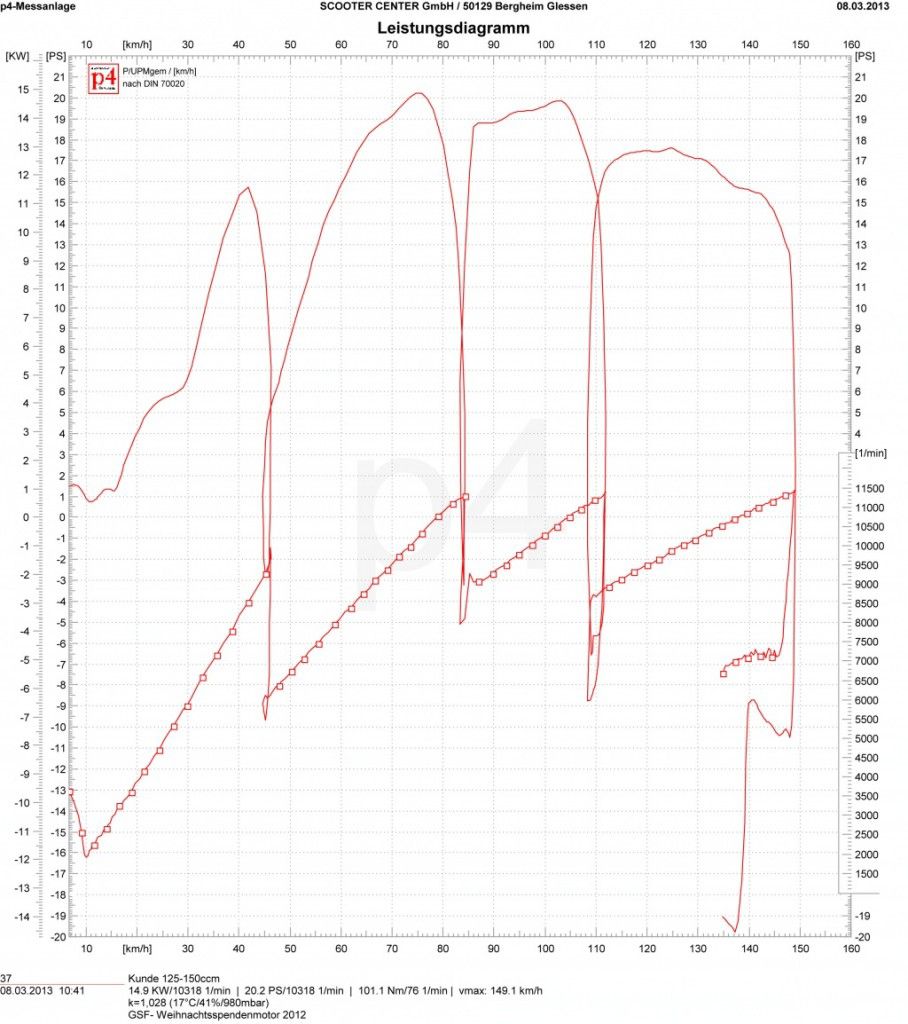
1 GSF- Weihnachtsspendenmotor 2012

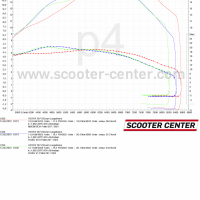
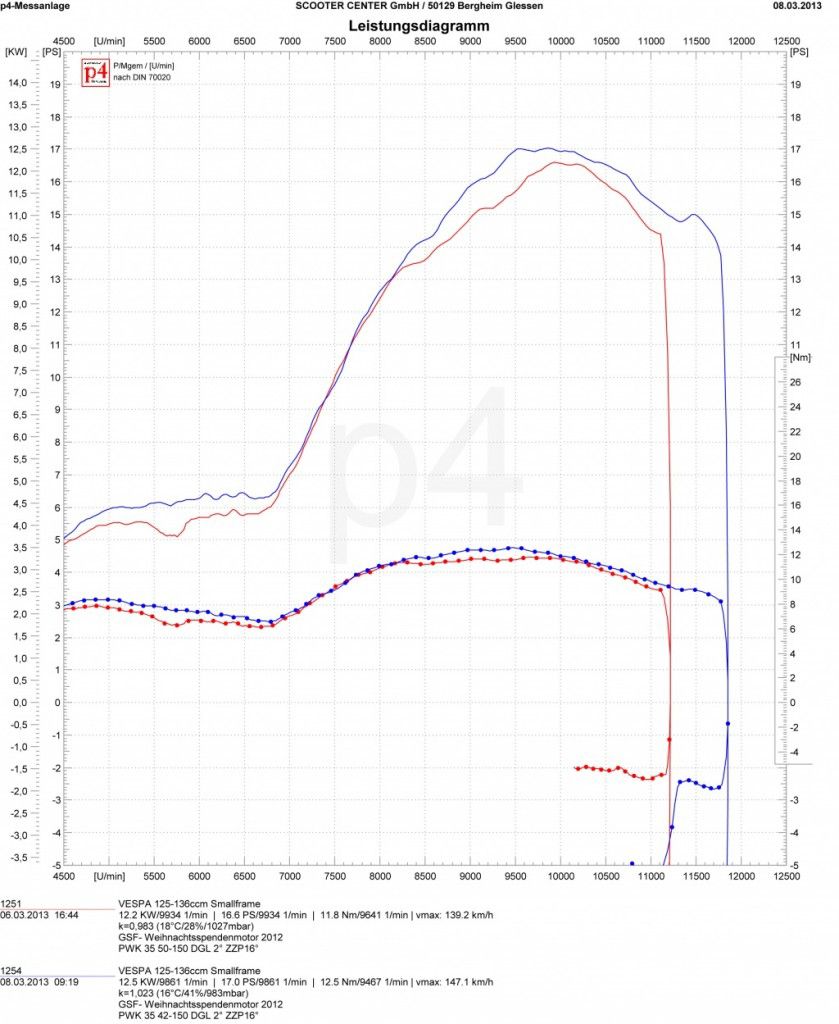
The carb setting is too rich. The power before the exhaust starts to work is very bad.

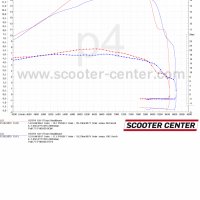
We change the idle jet to a 45 and see…

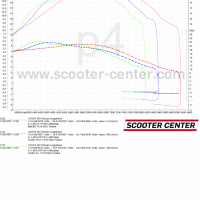
2 GSF- Weihnachtsspendenmotor 2012

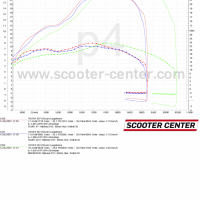
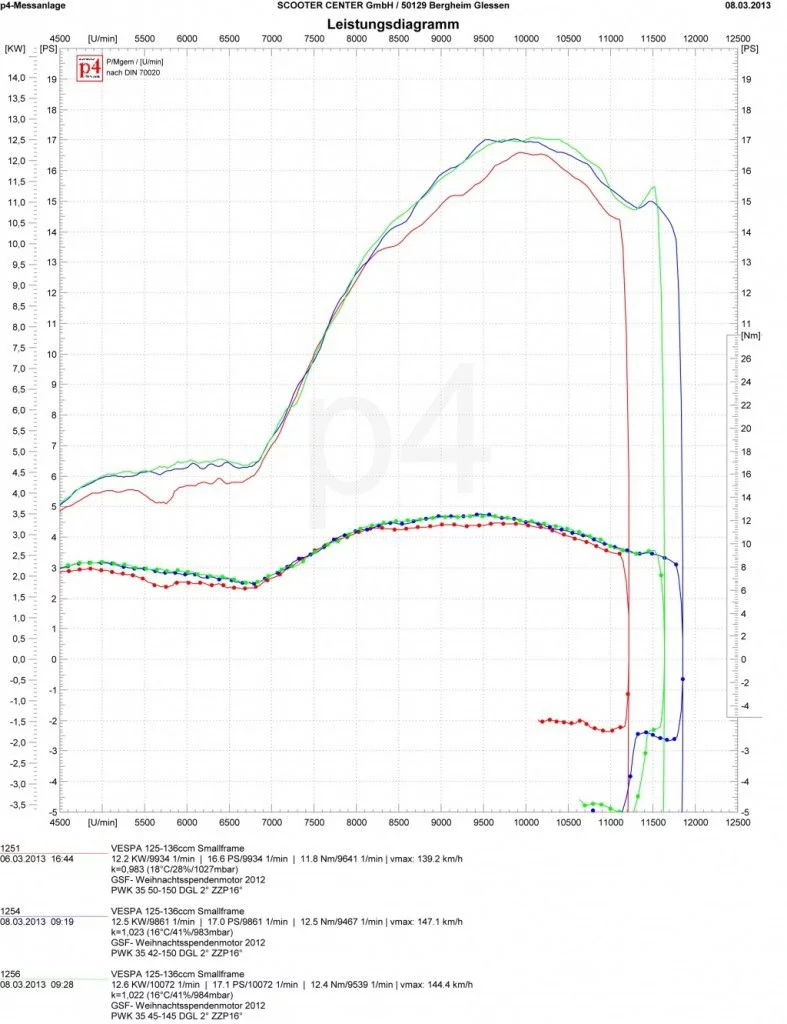
Because we are not 100% happyyet, we try the 145 main next::

3 GSF- Weihnachtsspendenmotor 2012

We haven’t found more peak power. But the graph is much smoother and the engine responds much better to the throttle action. Something you simply can’t picture with a graph only.

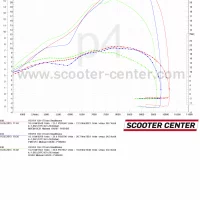
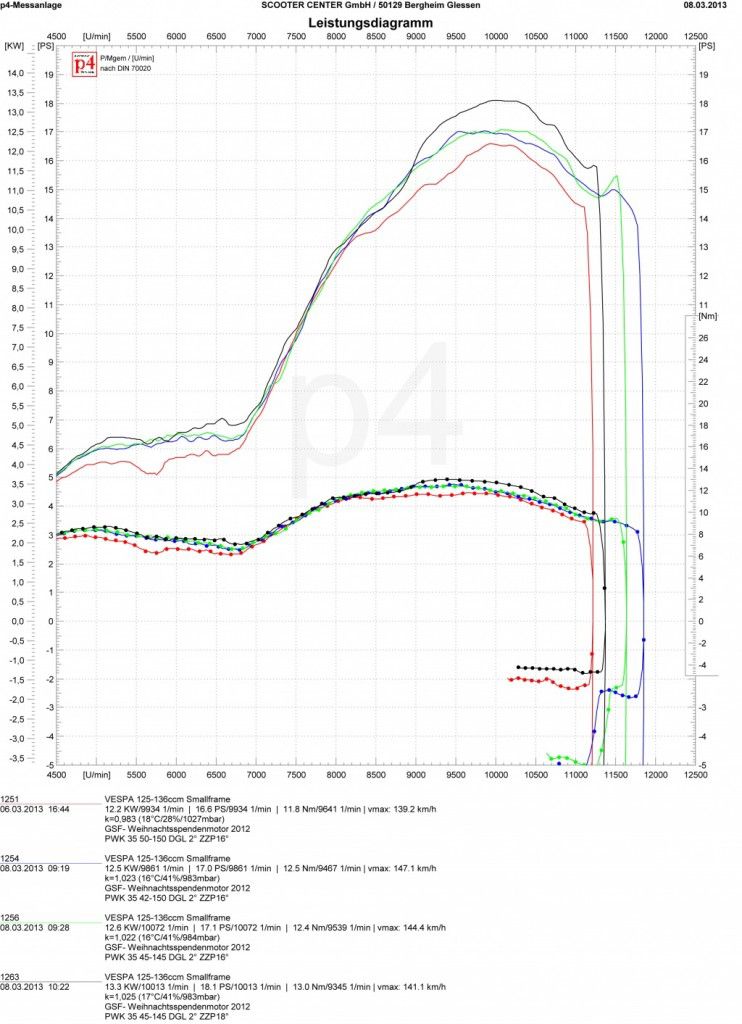
Now we change the ignition timing to 18°…

4 GSF- Weihnachtsspendenmotor 2012

That was it, more power before the pipe starts to work, more peak and more torque.

Now we finish with a run thru all four gears.

GSF- Weihnachtsspendenmotor 2012 kmh

20 hp in third gear. Mission completed.

This is the final report about our pre-Xmas dyno shootout!
The 29.9 hp at the rear wheel of a Cast Polini 133 cylinder kit with 54mm bgm crankshaft, Keihin PWK35AS carb and Feuerzauber exhaust had to be bettered.

With 29.3 hp Jonas did very well, but missed the goal. Followed by Mathias with 29.2 hp on a Polini 133 rotary inlet engine.

Together -Jonas and Scooter Center- decided to donate the 100€ shopping voucher for “scooterist-chairty / GSF-Spendenaktion.

Scooter Center likes the idea and is addiotionally offering free dyno time to set up the Charity engine.

The gallery shows the atmosphere of the dyno shootout. Something that will hopefully continued very soon. What do you think?fin.

Because virtual reality can hardly ever beat proper live action, we recommend to have a look at the small but mean Smallframe engines the next time.

Thanks to all the people that dropped in during the day. It was pure fun and we hope to see you soon!

[nggallery id=19] [nggallery id=18]