New tool for ignition adjustments of a Vespa

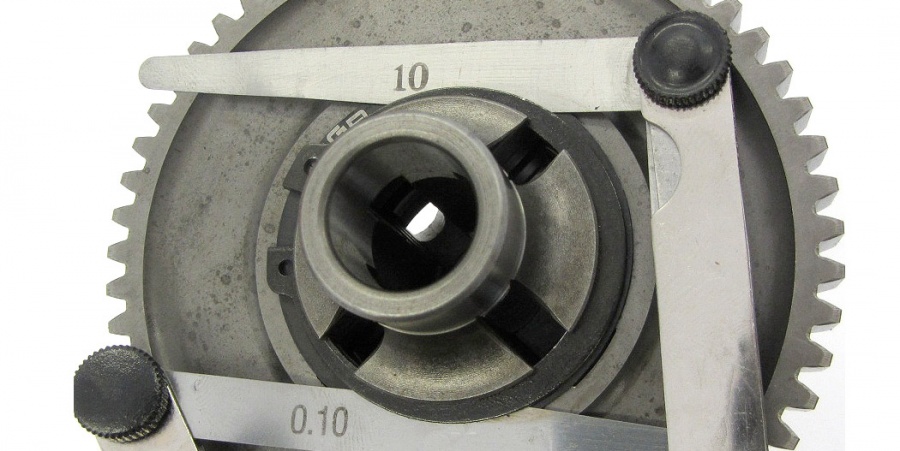
The calliper by CMD allows adjusting the ignition of your Vespa in only a few steps. Messschieber für Zündungseinstellung -CMD The Whale V-Duo- Vespa Largeframe und Smallframe

We closely cooperate with CMD. Therefore we suggested to design the current version of the Whale with adjustable tips, because it always took a little while to exchange the tips of the calliper.

Now you can adjust this great tool to almost any possible combination of engine casing and flywheel. Der Wal CMDTW0010 010

Adjustable tips of the calliper for any Vespa engine

Due to adjustable tips it is now possible, to quickly adapt the calliper to various conditions.

BUY HERE

Suitable for Vespa smallframe (PK, V50, Primavera) and largeframe, (PX, Rally, Sprint, VNB,…)

Be it an e-start flywheel of a PX

Der Wal CMDTW0010 002

or the other extreme; a milled flywheel of a PK with an e-start engine casing – Der Wal CMDTW0010 006

The new, adjustable tips of the calliper perfectly suit this cause. Der Wal CMDTW0010 011

BUY HERE

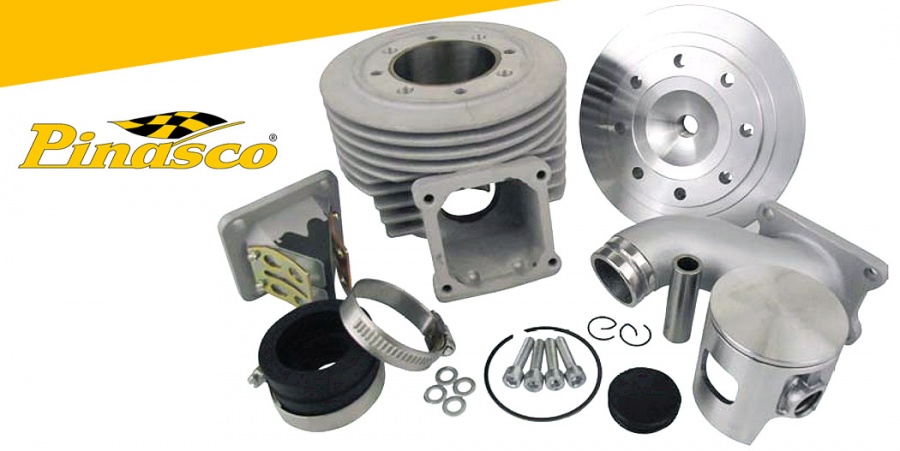
Vespa Cylinder Pinasco 135cc

We would like to present two new Pinasco Zuera cylinders for Vespa V50, PK, Primavera, etc.

There are some novelties in the largeframe sector, such as:

And Pinasco is also offering two new cylinders for 125cc smallframe models.Pinasco Vespa-Zylinder Zuera

Both cylinders have been thoroughly tested, for instance on the very popular 24h of Zuera (Spain), which is why both cylinders have been named Zuera.

Reed valve direct intake and reed intake cylinders

The model with reed valve direct intake has the byname SRV 135, while the version with reed intake cylinder was named Zuera SS 135.

Today we will take a closer look at Pinasco SS135 .

21.09.2015 054

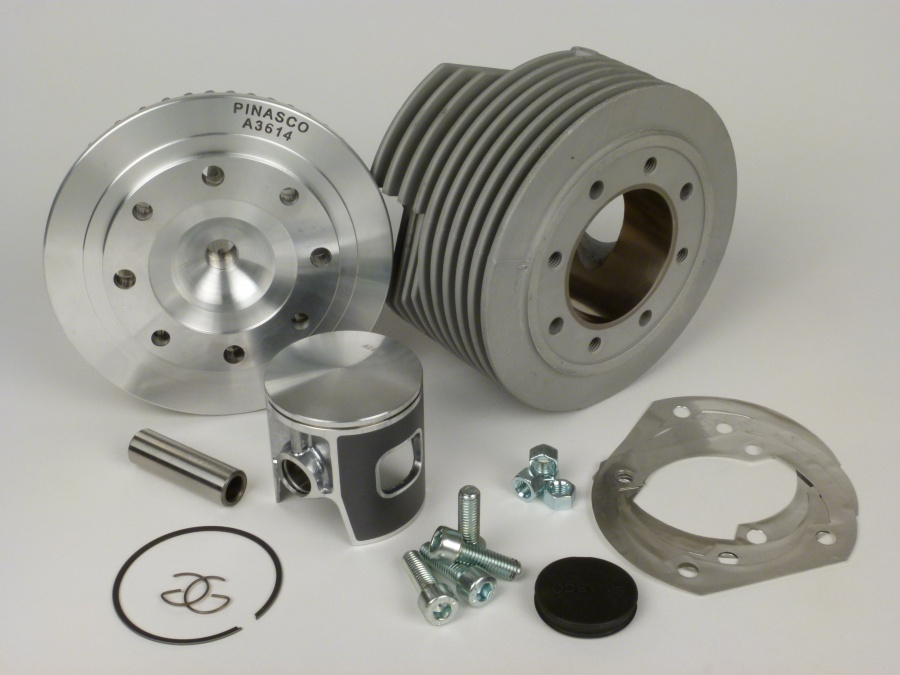
Delivered with

  • Cylinder and cylinder head
  • Piston, incl. gudgeon pin, piston ring and locks
  • Material to fasten cylinder head
  • Gasket set for cylinder base
  • Plug for cylinder cowling
Pinasco sports cylinder for Vespa smallframe
Cylinder -PINASCO Zuera SS 135cc- Vespa V50, PV125, ET3, PK50, PK80, PK125

  • Hole 57,5mm
  • Stroke 51mm
  • Cubic capacity 135cc
  • 5 transfers

Cylinder head

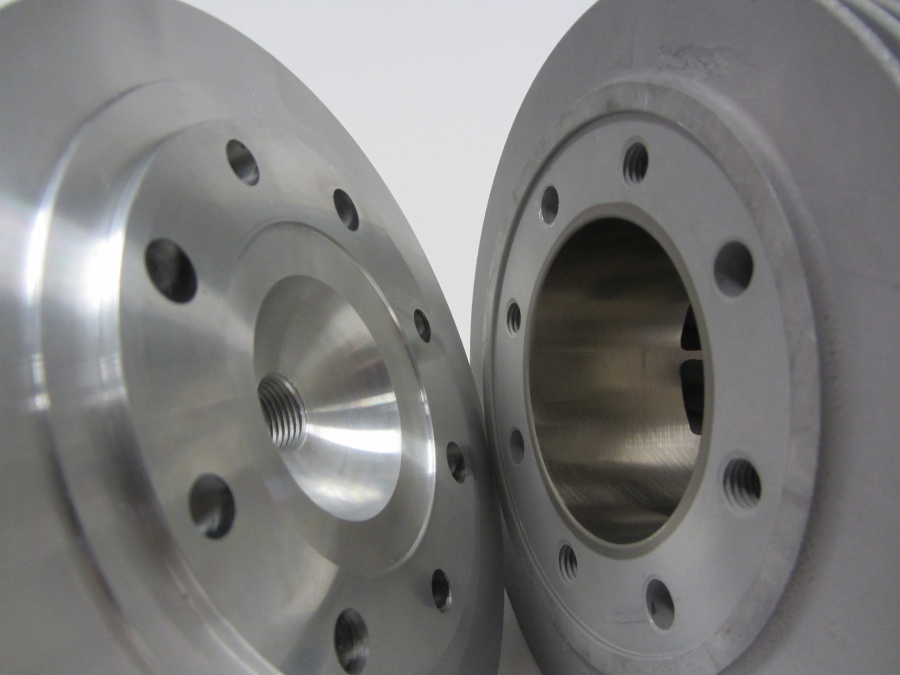
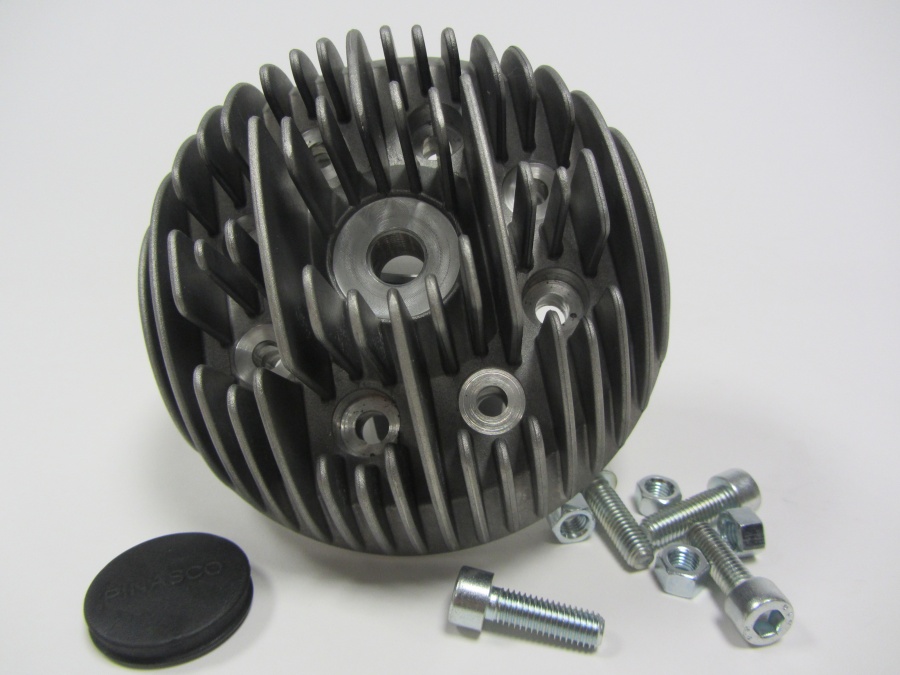
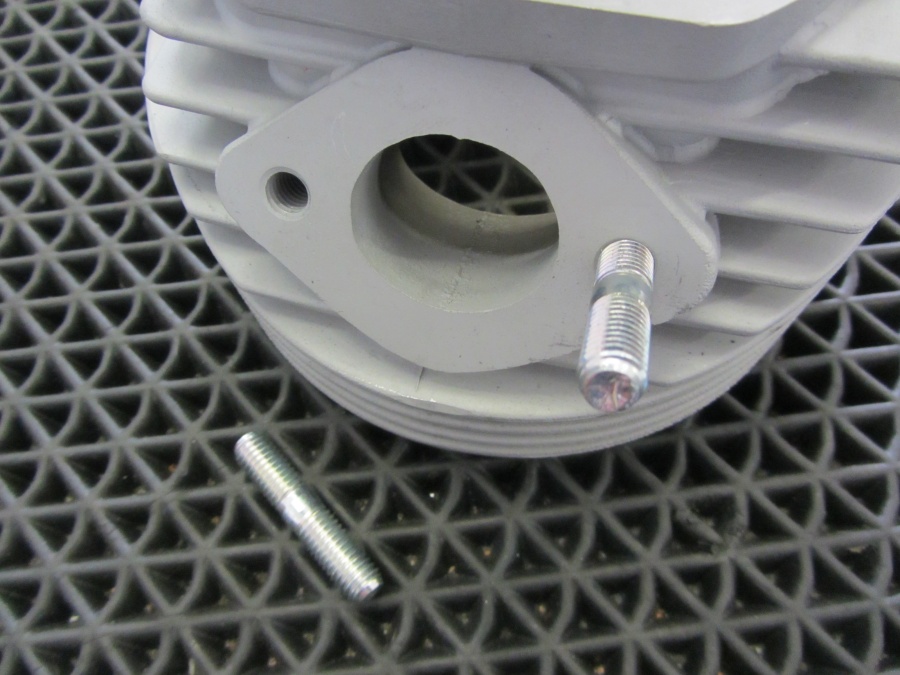
The cast cylinder head is rather massive. Your eyes first hit the processed bottom side. The combustion chamber in the centre of the ignition plug is about 1mm withdrawn. Following the sealing surface’s outer contour, the cylinder head is centred. A cylinder gasket is not planned. Because the cylinder head is screwed 8 times and the sealing surface is rather large, a reliable sealing should also be guaranteed without any additional sealing elements. Pinasco recommends a torque of 12Nm for cylinder studs and the additional M8x25 screws of the cylinder head.

Zuera 135SS (5)

Due to the central ignition plug, the original opening in the cylinder covering needs to be closed. Pinasco paid attention to this small detail and also supplies a fitting plug. You will need an ignition plug with long thread. You are using a NGK ignition plug? We recommend a B9ES. You want to use a Zuera 135SS and are an ambitious racer? We recommend a B10EG.

Zuera 135SS

Piston

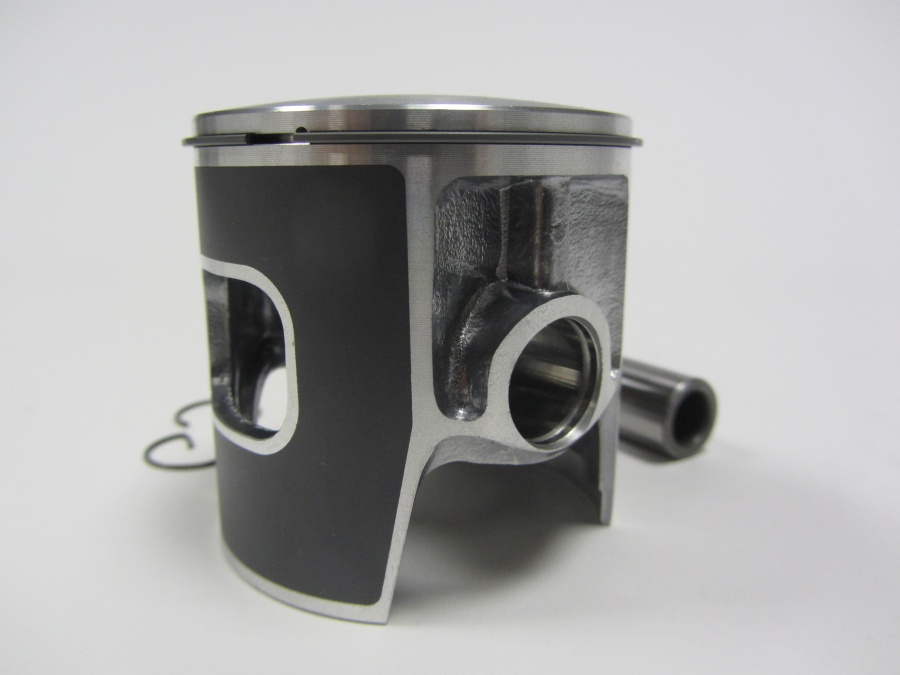
The forged piston is 169 g light. Pinasco equipped the piston with a 1mm rectangular piston ring and 1mm G-shaped locks.
The hint of a gas flow guide in the shape of a small, bevelled edge beneath the gudgeon pin is very cute.
Before it was modern to have an open contour at the sides, this little trick was often used for pistons with a long piston skirt.
The Zuera 135SS piston has an additional sliding coating, just like many modern cylinders.
Pinasco does not fool around with gudgeon pins. The thin walls of the bolt were meant to reduce its weight.

Zuera 135SS (1)

Cylinder

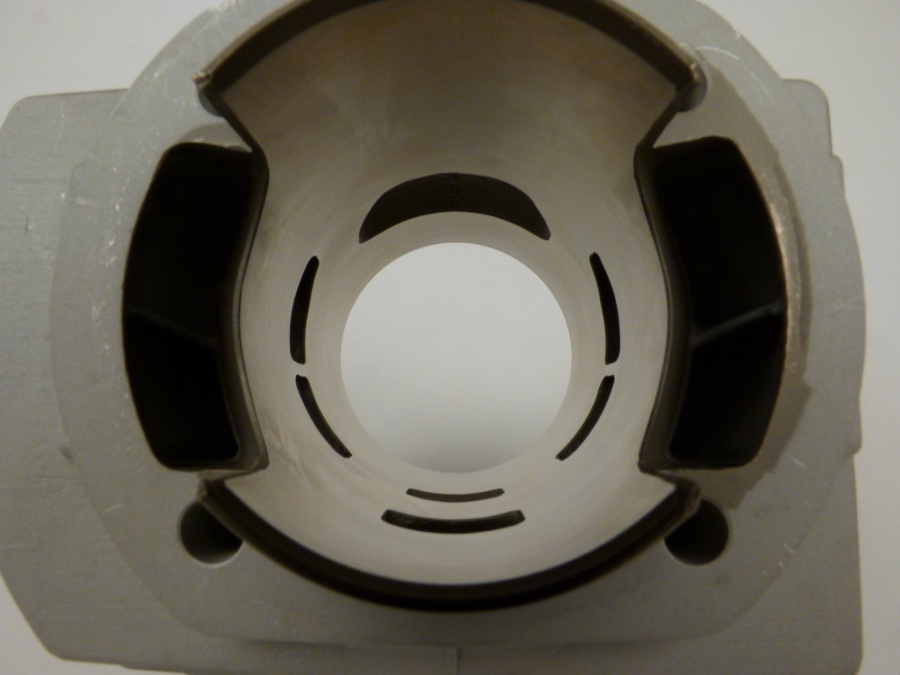
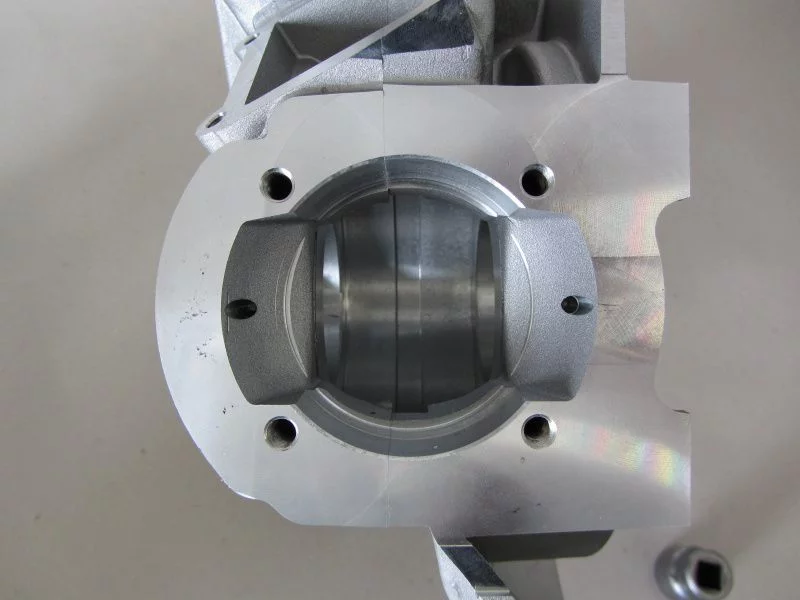
At first glance the design of the transfers in the cylinder highly resemble those of Polini Evolution. You will see the difference though, when taking a closer look. The angles of the entry surface are clearly different from one another.

The height of the outlet and transfers and an assumed deck height of 0mm lead to a sporty trigger delay angle of 125°/185°.

The openings of the transfers in the cylinder base are already open, which is a variation to other cylinders.
The cylinder base has a diameter of 61.33mm. Therefore enlarging the hole in the engine casing is not necessary.

21.09.2015 060

Just like for almost all the other performance oriented cylinders, the open transfers in the cylinder base demand you to adapt the cooling port of the stator housing.

Zuera 135SS 004

The one-piece outlet with a width of about 66% was made to endure. We would assume that the Zuera 135SS with its really sporty outlet design has a higher performance than Polini Evolution I.
The angle between the outlet and the transfers lead to the assumption that the Zuera 135SS also supports those exhausts with high revs.

Pinasco recommends a squish gap of 1.0 – 1.1mm. You may adjust it with 3 cylinder base gaskets, which are also supplied. When it comes to cylinder gaskets or sealing and links to the exhaust, Pinasco is reserved. No fitting exhaust gasket or outlet stud is delivered with the Zuera SS135.

You may well use material by Piaggio as a fitting outlet stud.

25.09.2015 008

A combination of M8 outlet studs and the distance between them limits the variety of possible exhaust gaskets.
Sadly Pinasco does not supply fitting gaskets.
PK125 exhaust gasket by Piaggio fits the flange. However, the outlet of the SS135 measures 31 x 27mm, not making the PK125 exhaust gasket
with a smaller diameter the perfect fit.
The BGM exhaust gasket is an alternative, in which case you need to enlarge the bolt pitch in the gasket by a few millimetres.

Technical details of the Zuera SS135 cylinder

  • Hole 57,5mm
  • Stroke 51mm
  • Cubic capacity 135cc
  • 5 transfers
  • One-piece outlet, trapezoidal, chord 38.5mm ? 66%
  • Outlet stud M8 (not included, we recommend Piaggio)
  • Bolt pitch exhaust flange 52mm (we recommend a BGM exhaust gasket)
  • Three cylinder base gaskets 0.1mm each
  • Cylinder base Ø=61.3mm (suitable for Piaggio)
  • Forged piston 169g, one piston ring 1mm
  • Piston pin retainer type G, 1mm
  • Cylinder head, screwed 8 times (stud + 4 pieces M8x25mm)
  • Ignition plug 14mm, long thread, recommendation B9ES, B10ES
  • Position of ignition plug, central
  • Ignition point 17° (recommended by Pinasco)
  • Trigger delay angle 125°/185° with a gap dimension of 1.0mm and 51mm stroke


Conclusion new Pinasco Vespa cylinder smallframe

In total Pinasco has put together a sporty cylinder, which offers positive performance at little effort.

Be it in combination with SHB19, CP carburetors by Polini and Piaggio or Polini banana or in combination with a Keihin 28 and a Franz – in combination with a suitable carburetor and exhaust, Pinasco SS135 offers a performance range from moderate to sporty.

Pinasco sports cylinder for Vespa smallframe
Cylinder -PINASCO Zuera SS 135cc- Vespa V50, PV125, ET3, PK50, PK80, PK125

  • Hole 57,5mm
  • Stroke 51mm
  • Cubic capacity 135ccm
  • 5 transfers
Pinasco Vespa tube tubeless

Tubeless Vespa rims

For some time you can now find more examples of Vespa rims for tubeless tyres on the market. Pinasco Vespa Tube Tubeless

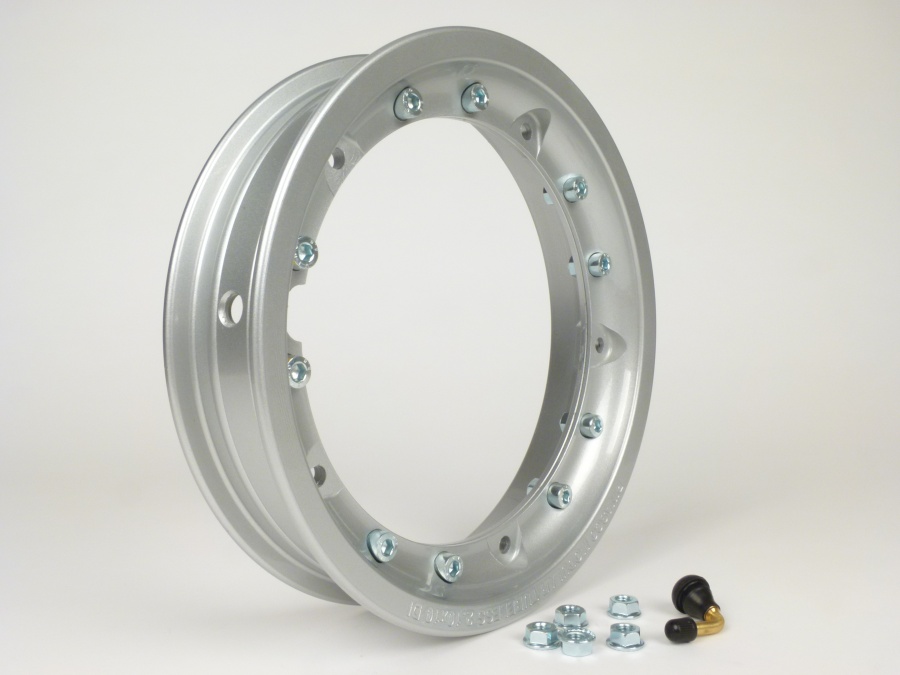
Pinasco alloy rim for Vespa

Pinasco is now offering a version including laboratory report by TüV.

However, the report is no guarantee for the e-pass remaining valid. So please check with the registration office responsible for restrictions on admission.

Felge Pinasco KBA 264

Which are the advantages of tubeless tyres?

  • in case you damaged the tread, air can only escape slowly. The tyre remains solid for a longer period of time.
  • no tube, which could burst or be jammed while assembling.
  • in case the tread punches on the rim, there is no tube that might be damaged.
  • if there is an increase in stress on your tyre or low pressure making the tyre move on the rim, the air valve won’t rip off.
  • no tube that might ream by the tyre


VESPA ALOY RIM
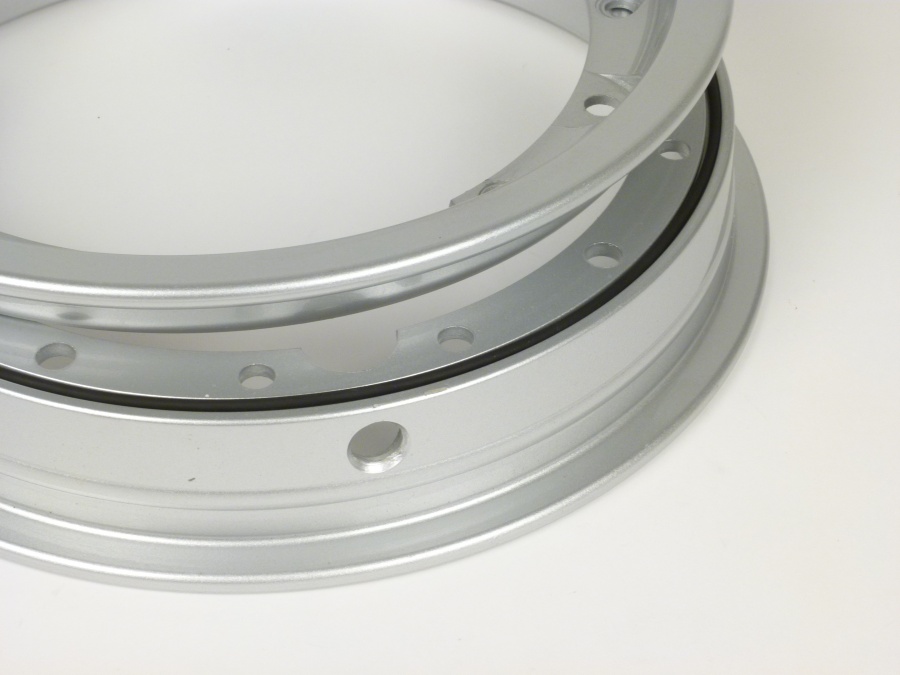
  • Split rim
  • O-ring to seal the two halves of the rim
  • Set of screws to link the two halves of the rim
  • Air valve
  • Nuts with flansh to fasten the rim to the brake drum
  • How to install
  • Laboratory report by TüV


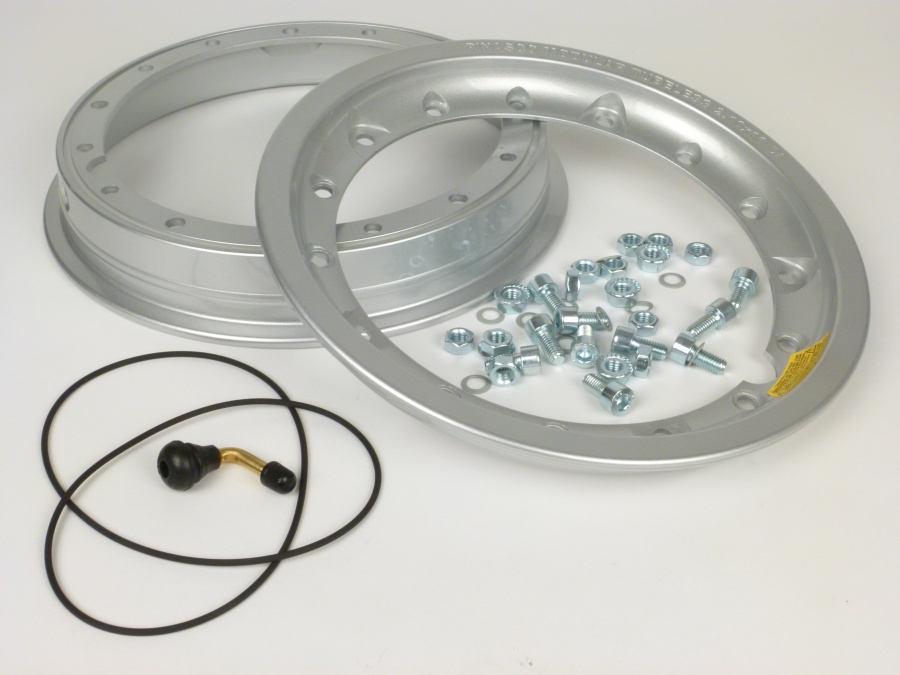
Split rim – easy assembly

So far, all rims for tubeless tyres on the market have been one-piece rims, as for cars or motorbikes.
For classic scooters however, necessary brake drums have limited the design of rims immensely.
This limitation meant that mounting tyres on a one-piece rim was hard work and in some cases you even had to damage the tyre.

Split rims have always been a strong selling point of Vespas, because this led to quick mountings of tyres.

For mounting tyres on a one-piece rim, you need suitable equipment, which you will only find in a garage. There is no way to do it at the side of the road.

Pinasco dealt with this deficiency and finally launched a tubeless split rim onto the market, which rejuvenates the advantages of a quick change of tyres.

We took a closer look at the new Pinasco rim for you.

Delivered with

  • Split rim
  • O-ring to seal the two halves of the rim
  • Set of screws to link the two halves of the rim
  • Air valve
  • Nuts with flansh to fasten the rim to the brake drum
  • How to install
  • Laboratory report by TüV


Felge Pinasco KBA 254

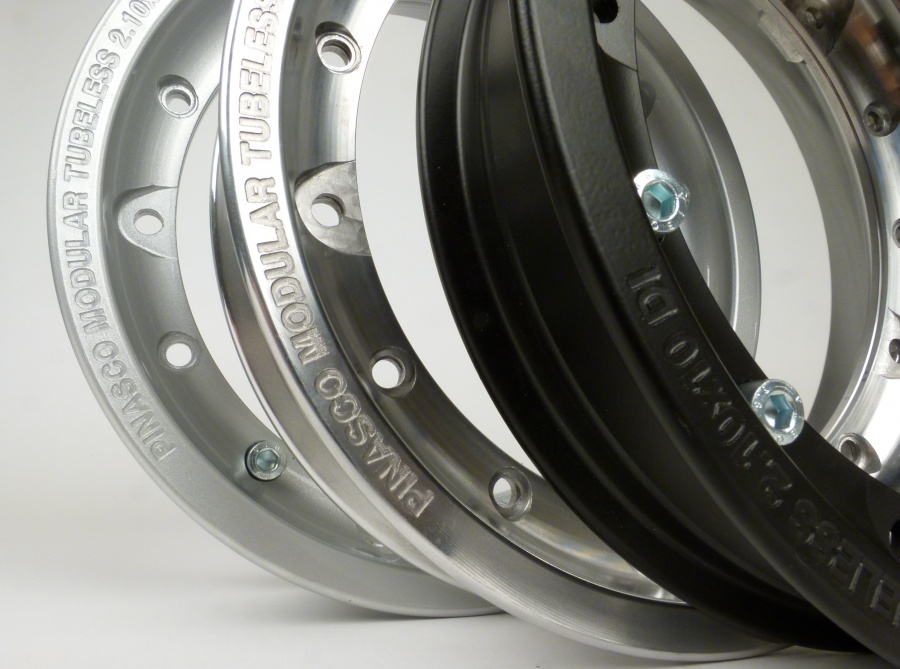
Colours Vespa alloy rims

Pinasco offers a traditional range of colours. You can buy rims in black, polished alloy and traditionally in silver.

Pinasco Rim 001

Wheel rim -PINASCO, V2.0, tubeless 2.10-10 alloy, split rims- Vespa (type PX) – silver

Wheel rim -PINASCO, V2.0, tubeless 2.10-10 alloy, split rims- Vespa (type PX) – black

Wheel rim -PINASCO, V2.0, tubeless 2.10-10 alloy, split rims- Vespa (type PX) – alloy polished

Assembling the Vespa rim

First step should be to assemble the air valve. It’s easily done with the help of tyre mounting paste.

Secondly you should prepare the wider half of the rim with tyre mounting paste and put on the tyre, starting at the valve.

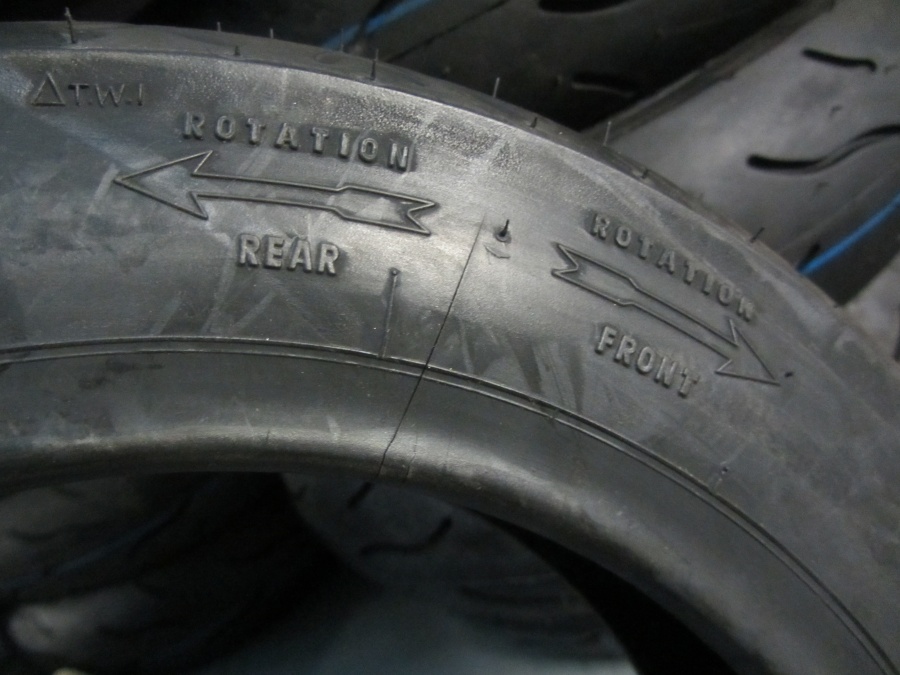
Please note: your tyre may have a profile that is bound to a running direction. This may vary for front and rear tyres.

Felge Pinasco KBA 294

If the tyre is well placed, the o-ring will find its way to the groove.

Felge Pinasco KBA 262

Once the o-ring is well placed, you may put on the second half of the rim.

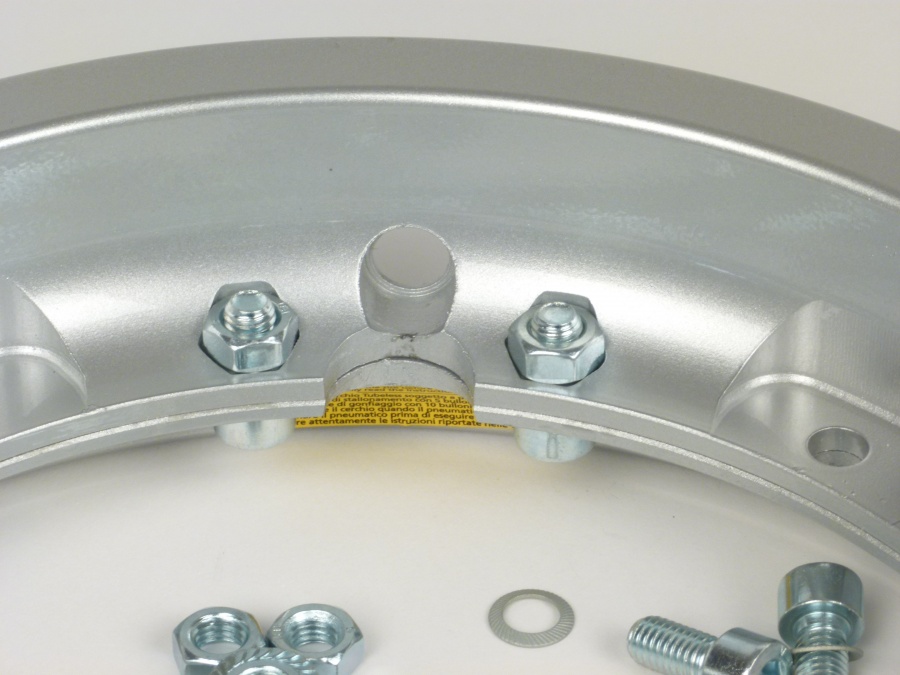
Now, both halves have to be linked with 10 screws. Pinasco sets a maximum torque of 18Nm.

Nuts are interlocked in the larger half of the rim. The head of the allen screw is being secured with a schnorr washer, so that it won’t open without someone’s ado.

Felge Pinasco KBA 260

Fastened by 10 screws, you can now inflate the tyre to a maximum of 1.8bar. You used mounting paste, but the tyre won’t lie nicely in the rim base? If the entire wheel is fastened to the brake drum you may fit the tyre by inflating to a maximum of 3bar. Without the five additional fixation points of the brake drum, it might happen that the two halves of the rim spread, causing pressure to escape. After fastening to the brake drum, this won’t happen and pressure is kept reliably.

Pinasco recommends nuts with flansh to fasten the rim to the brake drum. When using snap rings for steel rims, the rim was being damaged when unfastening the screws. This won’t happen here.

Trace offset

Due to their design, there is trace offset with some one-piece tubeless rims. Due to the two-piece design of the rim, Pinasco managed to stick to the original rim offset.

Spare wheel

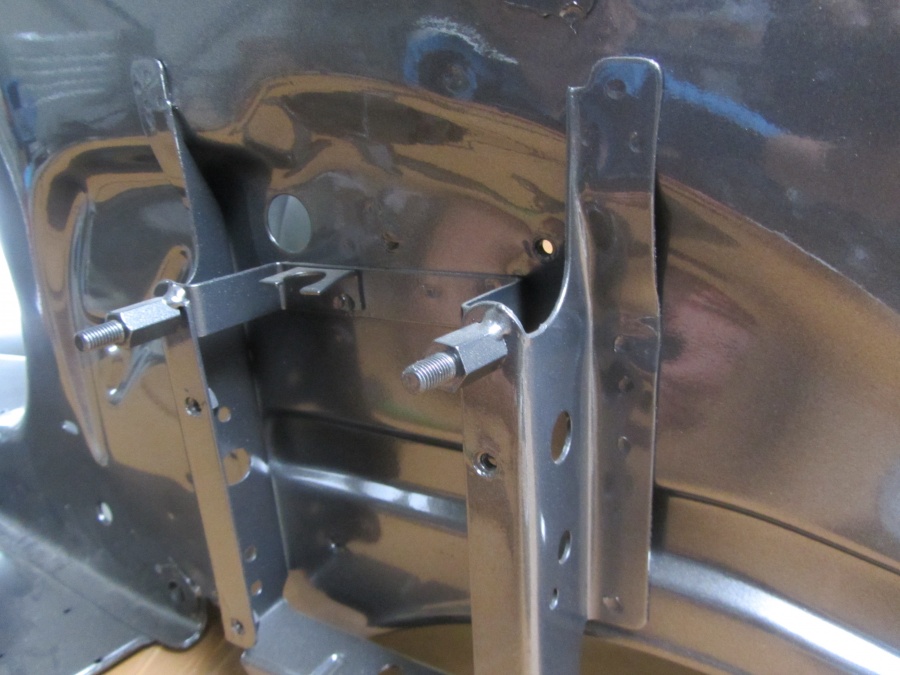
Due to its design and with a small trick you may fasten the Pinasco rim as spare wheel to your PX. You adapt the bracket for the spare wheel with spacer nuts in a way, that you fasten the wheel “upside down” – valve facing side panel.
This is an example of a LML frame. Having adapted the bracket also makes it easier to get to the valve of a standard wheel.

LML Rahmen

Which wheels fit?

As mentioned before, all common wheels of the sizes 90/90-10, 3.00-10 and 3.50-10 fit the Pinasco rim.
In case of one-piece rims it usually used to be luck to find a wheel that wouldn’t be damaged during assembly.
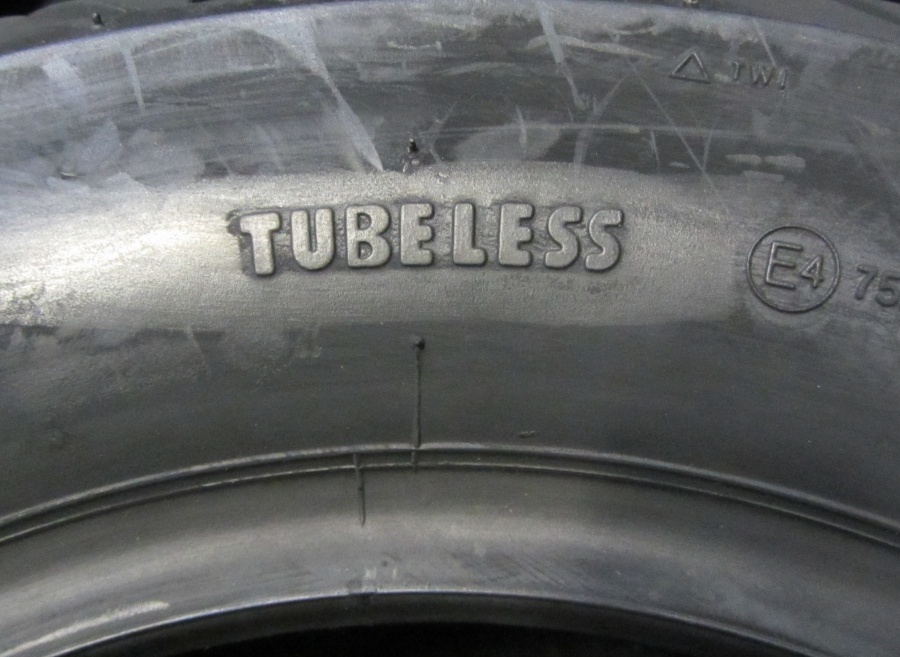
You should still pay attention to one small but crucial detail when buying wheels. Your new tyre should have the important “TL” or “tubeless” label.
A tyre labelled “TT”, meaning tube type, is not necessarily gas-proof.
So please only use “TL” labelled tyres with your tubeless rim.


Felge Pinasco KBA 302

You will find further information on your new tyres in our online manual and on Vespa-Reifen.de

Disc brake

The Pinasco rim also fits vehicles with disc brake. However, you should check clearance. We installed a PM brake caliper for test reasons. But sadly it didn’t fit the Pinasco rim. Standard brake calipers by Grimeca, LML und HengTong (Piaggio) fit the radius of the Pinasco rim without problems.

In case of damage to your tyres, you should have the following with you

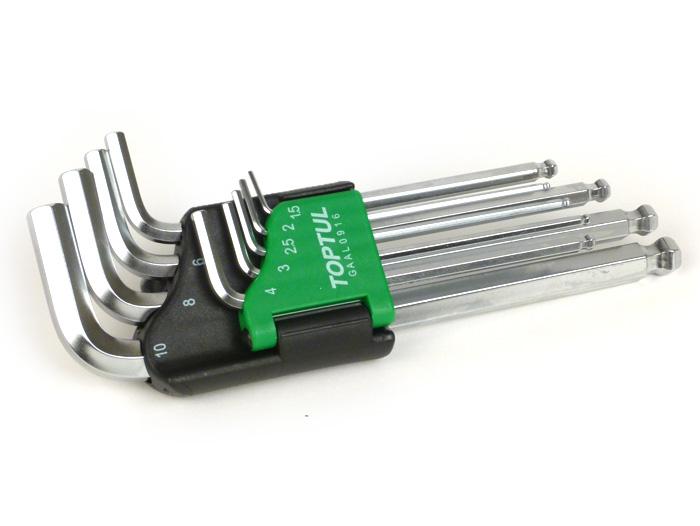
Your Pinasco rim is fastened by allen screws. Should you get embarrassed on the way and need to unfasten your rim, you should have a fitting allen key on board. The key set by Toptul includes all common sizes from 1.5mm – 10mm and the handy box makes it easy to transport the allen keys in the glove compartment without causing noise.

Toptul Inbus

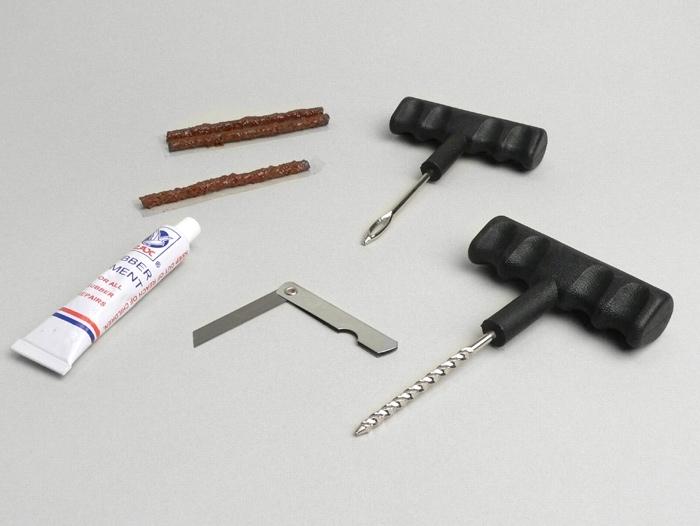
We recommend a repair set for tubeless tyres, so that you are able to continue your journey even without a spare wheel.

BGM8803


After removing the air valve you could even install a tube to the Pinasco rim.

VESPA ALOY RIM
  • Split rim
  • O-ring to seal the two halves of the rim
  • Set of screws to link the two halves of the rim
  • Air valve
  • Nuts with flansh to fasten the rim to the brake drum
  • How to install
  • Laboratory report by TüV


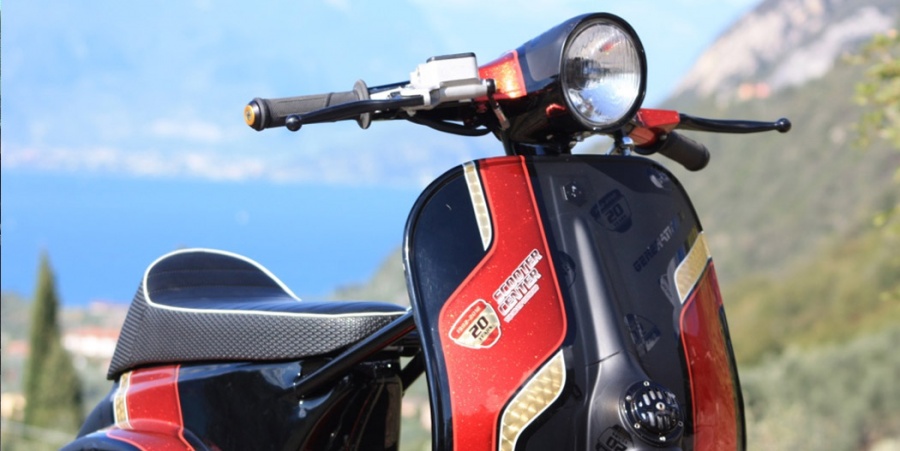
The most beautiful Vespa at Lake Garda

The most beautiful Vespa is our Scooter Center Demonstrator, Generation XI. It is a Primavera ET3, which is a Vespa of highest quality, both in technology and looks. The latter thanks to Pfeil-Design from Austria. This Vespa has already been awarded with many prices by various international customshows. Awesome work of our old friend Pfeili.

“The most beautiful Vespa on earth“. This also is a quote by Dean Orton. If he as the very model of Lambrettistas says so, we won’t disagree. But we’ll say thank you.

Mission two of our trip to Italy:

The guys at Kerresinhios are well known for their happy families games, which are lovingly designed and depict classic scooters. The first edition already turned into a sought-after collectors item.

We wanted to find an awesome location for a photo of our Demonstrator “Generation XI” at Lake Garda that could be part of the new Kerresinhios happy families “Scooter scenes”.

DSC00709-imp

DSC00745-imp

IMG_9397-imp

DSC00757-vespa-lambretta-italien-sc

Scooter Center and Lake Garda

Lake Garda. But why? Lake Garda plays an important role in the history of Scooter Center. Plus, Generation XI is a very special scooter by Scooter Center. We have put our heart and soul, sweat, brains and love for technical and optic details in it.

Therefore we considered a photo of this custom Primavera ET3 in front of our shop or the Cologne Cathedral to simple and unimaginative. And we were around Lake Garda for another mission anyway. So it seemed the right thing to have a photo shooting 1,000 km from home at Lago di Garda. You will see the result soon in the most current Kerresinhio happy families game.

Best wishes from Lago di Garda :-)

IMG_3568-vespa-lambretta-italien-sc

Off to the Promised Scooter Land by Vespa and Lambretta

We love Italy and recently toured beautiful Italy. Italy is obviously the birthplace of Vespa and Lambretta. VW Bus mit Vespa und Lambretta in Italien-sc

And how could things be any different: More than 23 years ago the story of Scooter Center has begun right there, at Lake Garda in Italy. Which should be the case for any real scooter shop.

Malcesine vespa lambretta italien-sc

Malcesine is located in the midst of lovely olive groves at the eastern shores of Lake Garda. It was right here that Oliver Kluger bought Scooter Center’s very first scooter (a Vespa Rally TS 125), which was then sold to “Mod-Volker” from Cologne. Volker is still driving this excellent Vespa, he was our very first customer and is loyal to us. vespa Primavera ET3 italien

Scooter Center – spare parts, add ons and tuning parts for scooters

Today we are rather focussing on spare parts, add ons and tuning parts for scooters. However, we are sometimes offering used Vespas. Scooter Center Italia

Used Vespa

Recently we received a large delivery of used Vespas. But first of all we need to gain an overview.

We will keep you posted.

The reasons for the last trip to Italy were two extraordinary missions:

  1. The most ugly Lambretta in the universe
  2. The most beautiful Vespa on earth

…to be continued

Shimming the Vespa transmission made easy

In order to be able to adjust the sprocket free play on the main shaft you will need the corresponding transmission shims and two thickness gauges (you really need them twice) for measuring the transmission.

vespa-getriebe-distanzieren-fuehlerlehre

It is best if you begin in first gear with a standard shoulder ring measuring 1.0mm so that later on when everything is mounted the gears firmly stay in place and you can properly shift the transmission into the neutral gear.

BGM6020 004

Beginning below the first gear using a shoulder ring that is too thick could cause the gear selector cruciform to no longer be in a free position between the sprocket segments and make it want to engage the sprockets in the neutral.

BGM6020 015

Therefore it is wise to first of all place the necessary shim behind the fourth gear. BGM6020 002

Checking the transmission free play

You can now check the sprockets‘ free play using the thickness gauges.

After mounting the parts the free play should range from 0.05mm to 0.15mm. In transmissions that entirely consist of new components you should rather opt for a tighter free play because the components have yet to “adapt to one another”. BGM6020 006

Do not choose too little free play

What you should not do either is overdoing it and allowing too little free play. This will result in the contrary of what you want on a running transmission. The hardened surfaces of the sprockets and shoulder rings tend to chew in, hence drastically increasing the free play within a short period.

If you want to replace individual sprockets of your transmission, we recommend that you order a set of shoulder rings ranging from 1.0mm to 1.3mm right away. And while you’re at it anyways, have a look at the gear selector cruciform. Do not try to save on transmission oil and replace it – and don’t forget to use new O-rings.

The right tools in good quality for your scooter will always help you do the job.

BGM6020 019

Vespa BGM PRO transmission shims
BGM PRO shoulder rings

  • hardened and grounded parallely
  • just +0/-0.04mm tolerance
  • available in many thicknesses
  • for a precise gear change
  • and a long lasting gearbox

BGM shock absorber with TÜV for Vespa

As of today, our top selling article among Vespa shock absorbers is available again. You can easily adjust a perfect setup for the BGM PRO suspension for Vespa and it is available with TÜV [German Association for Technical Inspection corresponds to MOT] certification for many vehicles.

The BGM PRO shock absorbers have been successful on the race track and, of course, in everyday use, on tours and when riding with a companion they offer the necessary comfort and safety, too.

bgm-vespa-suspension

Finally available again
BGM PRO shock absorber for Vespa

  • comes with „ABE / TÜV“ [homologation/MOT]
  • available individually or as a set
  • sportive
  • comfortable
  • fully adjustable
  • very long lasting
  • massive CNC body, anodized
  • very strong aluminum for low weight
  • rebound damping adjustable in 12/16 modes, according to model
  • continuous spring preload adjustment is possible

THE Vespa – shock absorber with TÜV certification!

BGM PRO SC series shock absorbers for Vespa scooters are THE suspension system for your Vespa. With TÜV certification!
The suspension system designed by BGM in Germany is available with homologation for many Vespa classic scooters.

The shock absorbers are fully adjustable. You can find a perfect setup for every purpose of use thanks to the continuous spring preload adjustment and the adjustable independent rebound and compression damping. No matter if you are carrying luggage on a long tour across the Alps or riding in everyday use or on one of the race tracks anywhere in the world.

Buy BGM PRO SC shock absorbers for your Vespa

Stainless steel rims for Vepa on sale

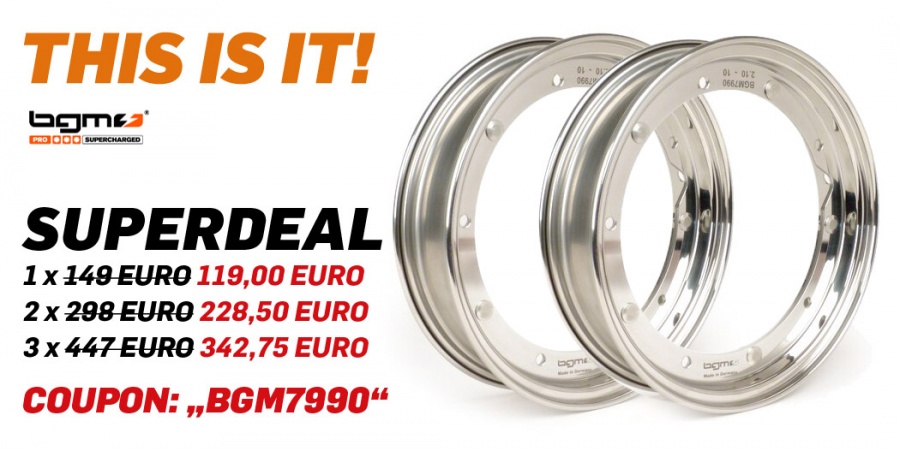
We now have our top selling article among the Vespa stainless steel rims on offer at a special rate. If you purchase more than one rim, i.e. when getting three rims with our voucher you can save over 100 Euro:

edelstahl vespa-felgen rabatt

Superdeal on Vespa stainless steel rim
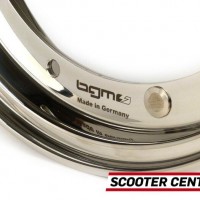
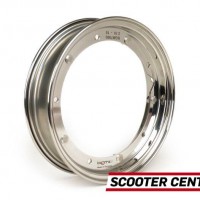
  • made in Germany
  • stainless steel with polished or raw finish
  • perfect concentricity
  • reinforced rim flange thanks to a folded edge

Made in Germany and tested under extreme conditions

During a desert race scootering legend Sticky was able to convince himself in regard to the BGM PRO Vespa rims’ extraordinary quality and reliability.

Rims‘ details

The BGM stainless steel rim is made in Germany using high precision production methods by a renown and, of course, certified company. This results in a rim that could not have been made any better by Enrico Piaggio himself. The rim is characterized by its perfect concentricity and reinforced rim flange and it is absolutely stainless.The rim is mounted with the included special nuts made of stainless steel. The nuts’ four edged profile locks into the rim and serves as a perfect anti-twist safeguard. Naturally, the bolts are available individually as spare parts as well.

Photos of Vespa rim

360° – view

Vespa rims


  • made in Germany
  • stainless steel with polished or raw finish
  • perfect concentricity
  • reinforced rim flange thanks to a folded edge
Superdeal on Vespa stainless steel rim
SUPERDEAL
1 x instead of 149 EURO now just 119,00 EURO
2 x instead of 298 EURO now just 228,50 EURO
3 x instead of 447 EURO now just 342,75 EURO

The crossed out price is the current MSRP price

Suits these Vespa models

This rim suits the following models: Vespa

  • 50 Special Elestart (V5A3T)
  • 50 Special (V5B1T)
  • 50 Special Elestart (V5B2T)
  • 50 Special (V5B3T)
  • 50 Special Elestart (V5B4T)
  • 50 PK XL2 (V5N1T)
  • 50 PK XL2 HP (V5N2T)
  • 50 PK XL2 automatic (V5P2T)
  • 50 PK SS (V5S1T)
  • 50 PK XLS (V5S2T)
  • 50 Sprinter (V5SS2T, -1975)
  • 50 SR (V5SS2T, 1975-)
  • 50 PK (V5X1T)
  • 50 PK S (V5X2T)
  • 50 PK S EFL (V5X2T)
  • 50 PK XL (V5X3T)
  • 50 PK XL Rush (V5X4T)
  • 50 PK N (V5X5T)
  • 50 PK XL2 (V5X3T)
  • 80 P X (V8X1T, -1983)
  • 80 PX E Lusso (V8X1T, 1983-)
  • 80 PX E Lusso Elestart (V8X1, 1984-1990)
  • 80 PK S (V8X5T)
  • 90 Super Sprint (V9SS1T)
  • 50 PK S automatic (VA51T)
  • 80 PK S automatic (VA81T)
  • 150 GL (VLA1T)
  • 150 Sprint (VLB1T)
  • 150 Sprint Veloce (VLB1T)
  • 125 GTR (VLB2T)
  • 150 P X (VLX1T, -1980)
  • 150 PX E EFL (VLX1T, 1984-1997)
  • 150 PX E (VLX1T, 1981-1983)
  • 125 Nuova (VMA1T)
  • 125 Primavera (VMA2T)
  • 125 ET3 (VMB1T)
  • 125 PK ETS (VMS1T)
  • 125 PK (VMX1T)
  • 125 PK S (VMX5T)
  • 125 GT (VNL2T)
  • 125 TS (VNL3T)
  • 125 P X (VNX1T, -1983)
  • 125 PX E EFL (VNX2T, 1984-1997)
  • 125 T5 (VNX5T)
  • 150 GS (VS51T) GS3
  • 180 Rally (VSD1T)
  • 200 Rally (VSE1T – Femsa)
  • 200 Rally (VSE1T – Ducati)
  • 200 P E (VSX1T, -1980)
  • 200 PX E EFL (VSX1T, 1984-1997)
  • 200 PX E (VSX1T, 1981-1983)
  • 125 PX E EFL (ZAPM09300, 1998-2000)
  • 125 PX E EFL (ZAPM09302, 2001-2010)
  • 150 PX E EFL (ZAPM09400, 1998-2000)
  • 150 PX E EFL (ZAPM09401, 2001-2010)
  • 200 PX E EFL (ZAPM18, 1998-)


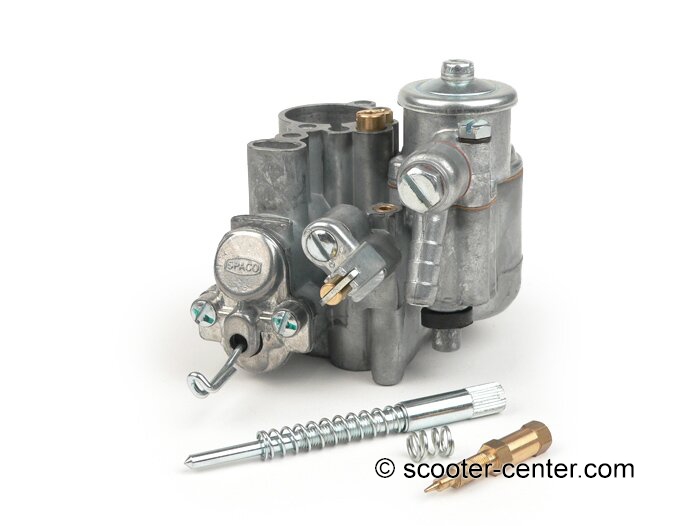
bgm PRO FASTER FLOW SI Vergaser für die schnelle Vespa

Die SI Vergaserbaureihe ist ein millionenfach bewährtes Design mit großem Potential.

Gerade in den letzten Jahren sind die Vergaser aufgrund ihrer kompakten Bauform und kurzer Ansaugwege auch auf leistungsgesteigerten Motoren wieder beliebter geworden.

Vespa Faster Flow Vergaser hier kaufen

Mit einer Leistungssteigerung des Motors müssen auch die Düsen im Vergaser angepasst werden. Bei den aktuellen Motorkonzepten sind Hauptdüsen in einer Größe von über 140 keine Seltenheit. Um eine ununterbrochene Kraftstoffzufuhr bei größeren Hauptdüsen zu gewährleisten, muss der Vergaser zwingend recht aufwändig bearbeitet werden oder gleich zu unseren fertig bearbeiteten Vergasern zurückgegriffen werden:

 PRO FASTER FLOW SI Vergaser

SI FASTER FLOW Tuning Vergaser für Vespa

Wir können Dir für Dein Motor-Projekt den optimal fertig bearbeiteten Vergaser anbieten. So behältst Du den originalen SI – Vergaser als Backup und erhältst einen professionell getunten Vergaser. Hier findest Du unsere PRO FASTER FLOW SI Vergaser

Sicher und flott unterwegs ohne Abmagern

Mit dem optimierten bgm PRO Faster Flow Vergaser lassen sich auch Leistungen deutlich über 20 PS mit Dauervollgas ohne Abmagern oder sonstige Probleme fahren.

Bereits fertig bearbeitete Vergaser
Um eine ununterbrochene Kraftstoffzufuhr bei größeren Hauptdüsen zu gewährleisten, muss der Vergaser zwingend recht aufwändig bearbeitet werden oder gleich zu unseren fertig bearbeiteten Vergasern zurückgegriffen werden:

Details zu den optimierten 26er SI Vergasern

Bei unserem Vergasertuning werden Schwimmerkammerdeckel, Düsenstock und Bohrungen professionell bearbeitet.

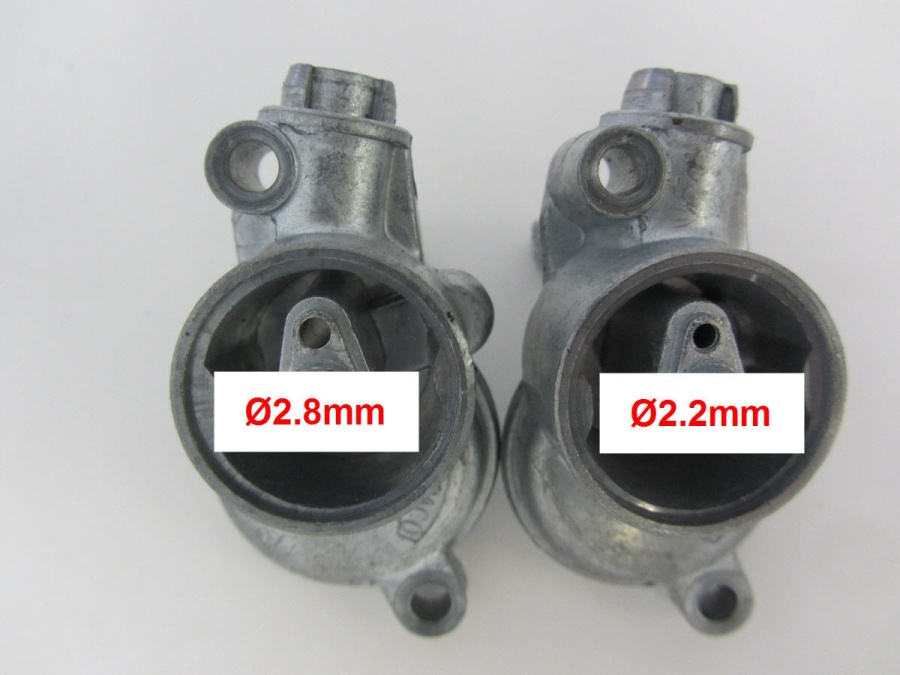
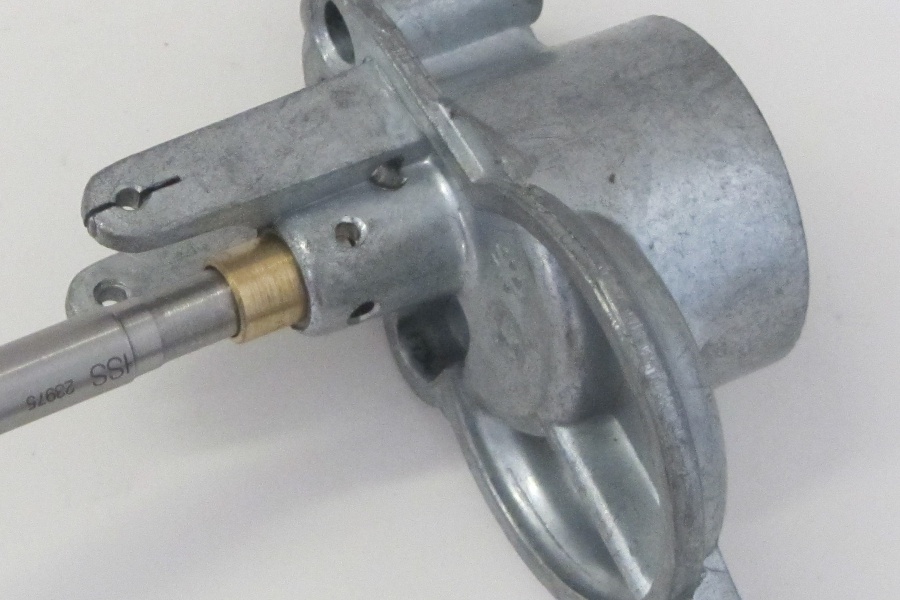
Im Einzelnen wird die Bohrung zur Schwimmernadel auf 2,8mm vergrößert und die Führung der Schwimmernadel mit zwei weiteren Bohrungen für schnelleren Kraftstoffzulauf versehen.


FasterFlow float hole


Wichtig: Die Dichtfläche des Schwimmernadelsitzes wird mit einem angefertigten Werkzeug nach dem Bohren wieder hergestellt.


SI FasterFlow float valve


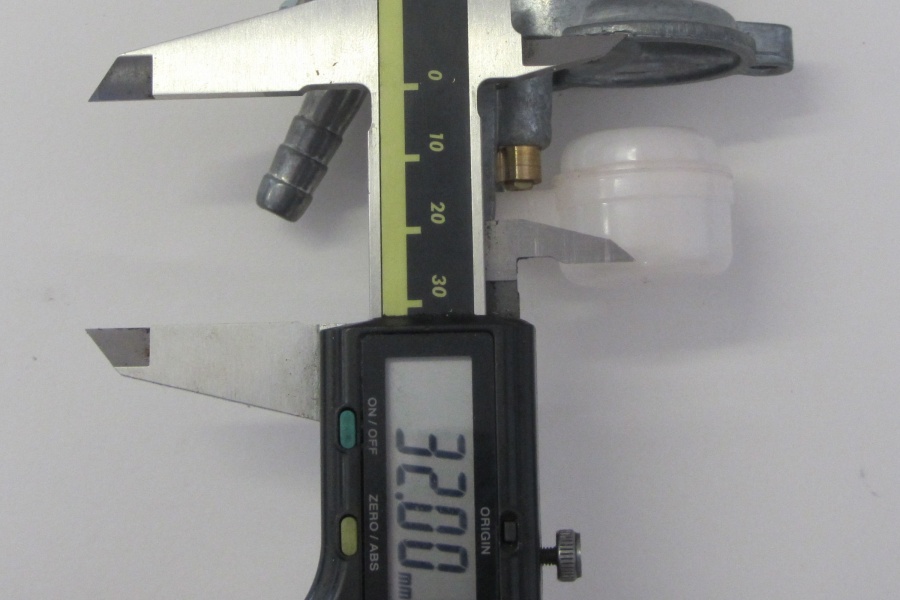
Feintuning: Der Schwimmerstand wird kontrolliert und auf 32mm eingestellt.


SI FasterFlow 029


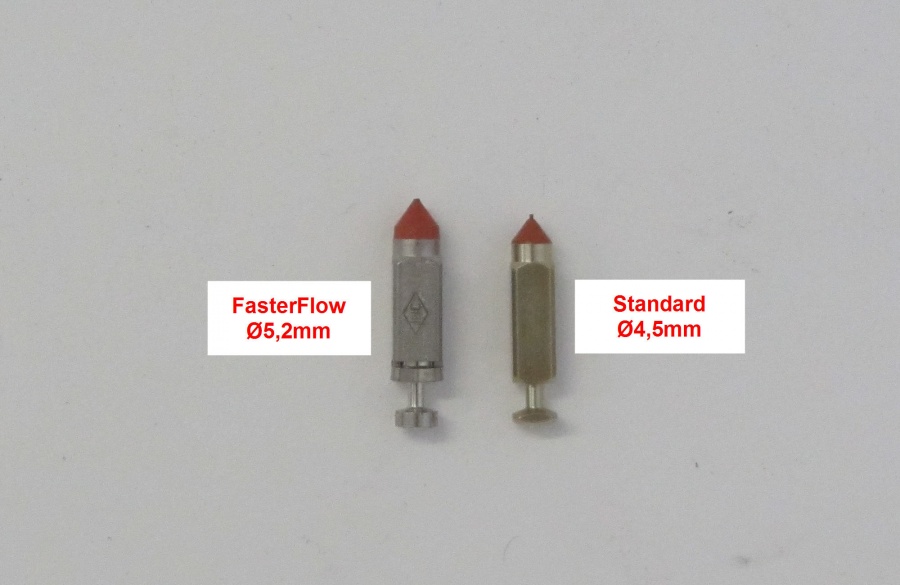
Die 5,2mm große Schwimmernadel ist federbelastet und verhilft der Schwimmernadel zu einer längeren Lebensdauer – muss sie doch den Benzinfluss mehrere tausend Male in der Stunde unterbrechen und wieder freigeben.


SI FasterFlow 042

Schnelle und konstante Spritzufuhr bis 180er Hauptdüse

Durch die vergrößerte Ventilbohrung im Schwimmernadelsitz und durch die zusätzlichen Bohrungen in der Führung für die Schwimmernadel fließt der Treibstoff ungehindert nach. Dadurch bleibt das Treibstoff-Niveau in der Schwimmerkammer konstant.

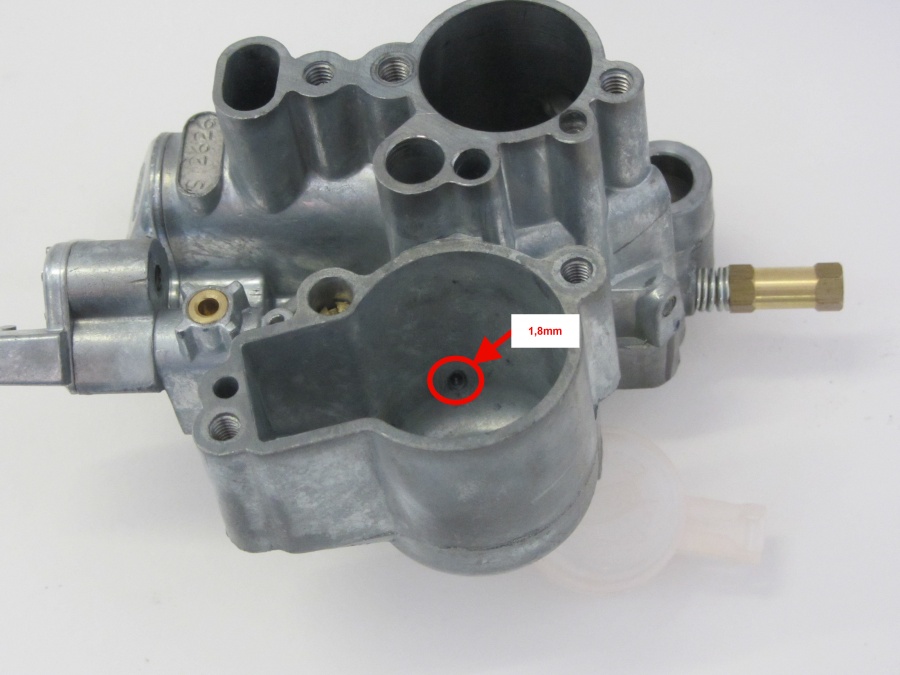
Damit der Kraftstoff auch ausreichend schnell bis zum Düsenstock fließen kann, wird die Bohrung von der Schwimmerkammer zum Düsenstock von 1,2mm auf 1,8mm erweitert. Dieser Durchmesser ist mit einer 180er Dellorto Hauptdüse gleichzusetzen – eben diese Düsengröße kann somit, falls benötigt, auch bedient werden.

Derzeit sind uns allerdings keine Motoren bekannt, die eine Hauptdüse in der Region um 180 fordern. Der Fasterflow bietet also in diesem Bereich noch Reserven.

Touring Setup mit 25PS mit Hauptdüse bis zu 160

Bei aktuellen Touring-Motoren mit ca. 20-25PS kommen oft Hauptdüsen im Bereich von 135-160 zum Einsatz.

SI FasterFlow 040

Ein Abmagern während der Beschleunigungsphase oder ein Verschlucken aus Treibstoffmangel bei Lastwechsel gehören, mit der richtigen Düsenbestückung, somit der Vergangenheit an.

25er sind die besseren 26er SI – Vergaser

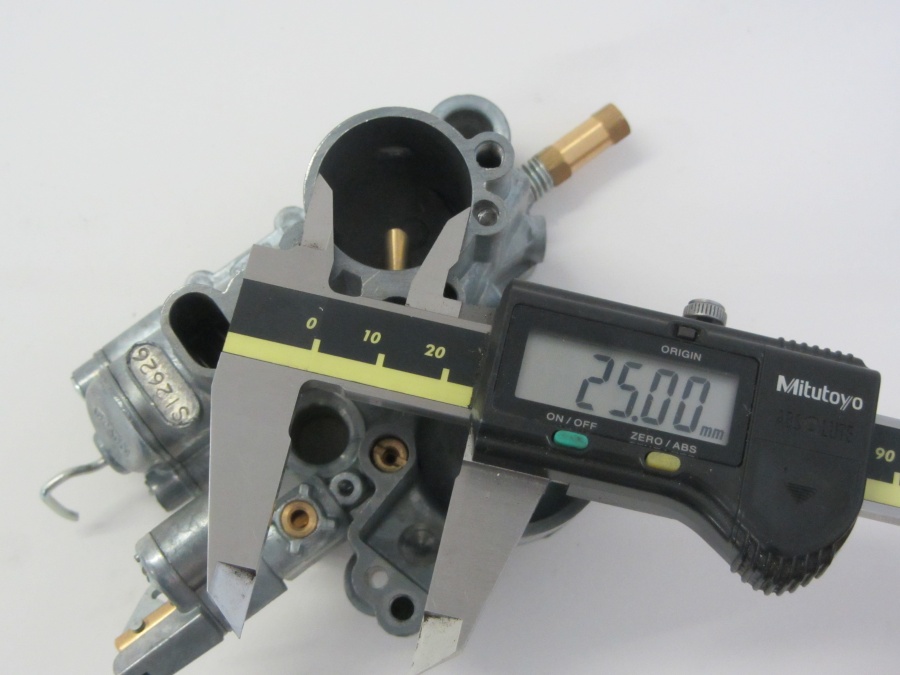
Bei näherer Betrachtung wirst Du feststellen, dass der als 26/26 gekennzeichnete Vergaser eine effektive Bohrung von 25mm hat.

SI FasterFlow 041


Vespa SI-Vergaser mit einer Bohrung von echten 26mm neigen zu vorzeitigen, hohen Verschleiß im Bereich der Schieberführung. Ist dieser empfindliche Bereich einmal verschlissen, ist der Vergaser unbrauchbar.

Durch die geringe Überdeckung von Schieber und Führung bei einer 26mm Bohrung kann sich in den verschlissenen Bereichen der Führung zusätzlich Luft am Schieber vorbei mogeln und die Laufkultur des Motors stark beeinflussen.

Das geht bis hin zum unfreiwilligen Hochdrehen im Leerlauf und deutlichem Abmagern oder Magerruckeln beim Beschleunigen.

Daher sind die bgm PRO 26er SI – Vergaser mit einer optimalen effektiven Bohrung von 25mm versehen.

Tipp: bgm PRO Faster Flow Benzinhahn

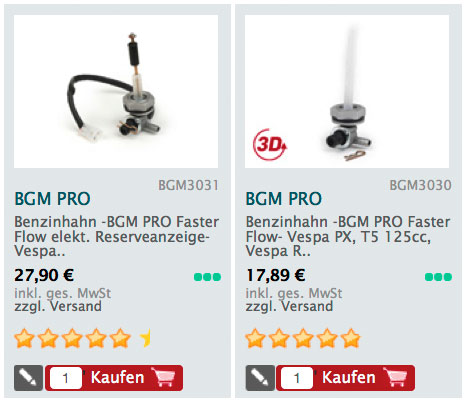
Zusammen mit unserem bgm PRO Faster Flow Benzinhahn sind die überarbeiteten Vergaser ein perfektes System für eine zuverlässige Treibstoffversorgung.

Vespa Benzinhahn - Das Original! Vespa Tuning Benzinhahn bgm Faster Flow

faster flow benzinhahn vespa

Si Tuning Vergaser Vespa
Die heutige Ausführung der Fasterflow Vergaser mit 25mm ist also ein unauffälliger und dauerhafter Begleiter für viele Kilometer. Der Verschleiß der Schieberführung ist durch eine größere Überdeckung auf das mögliche Minimum reduziert.


Not long till the first ESC- races are started. Good for the ones who have their racing machines already sorted out and are waiting now. True to the motto: “Racing is life anything that happens before or after is just waiting.”

If you haven’t your preparation done yet, it is time to start things for the racing series everywhere.

We too have to build an engine. This will be used for the Klasse 2 of the ESC. This is the the cream of the crop class at the Euro Scooter Challenge. Nothing is forbidden here and most things are allowed as well. All info about it can be found here: www.eurochallenge.de. The only restrictions that can be found is no larger capacity than 150 cc, while the top notch engines have a power output of 35 – 38 hp at the rear wheel.

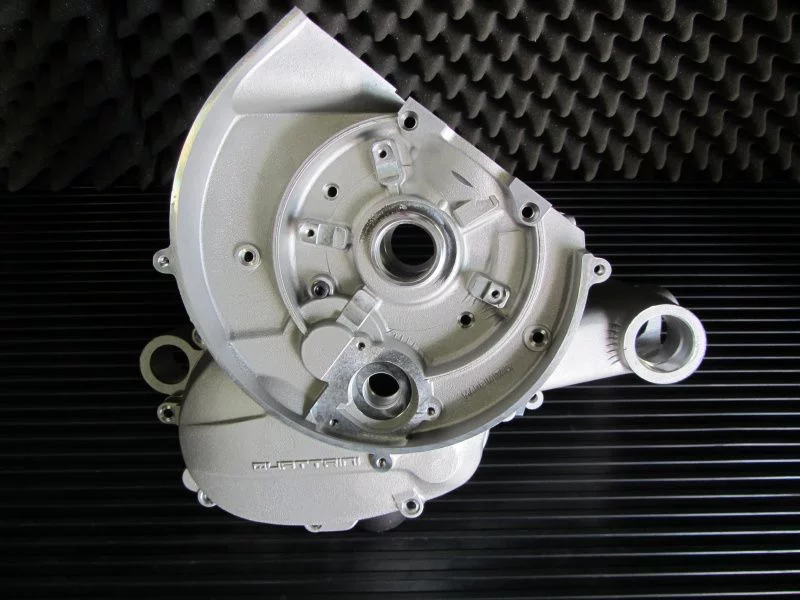
On most of these engines you’ll find the stroke of 53 mm combined with a 60 mm bore what gives 149.85 cc. This formula for power and success is used on our engine as well. The Falc cylinder kit with 60 mm bore and a special made 53 mm stroke crank will be put onto the Quattrini engine casing.

We don’t want to keep back this awesome panorama of all the parts that make such a nice engine…
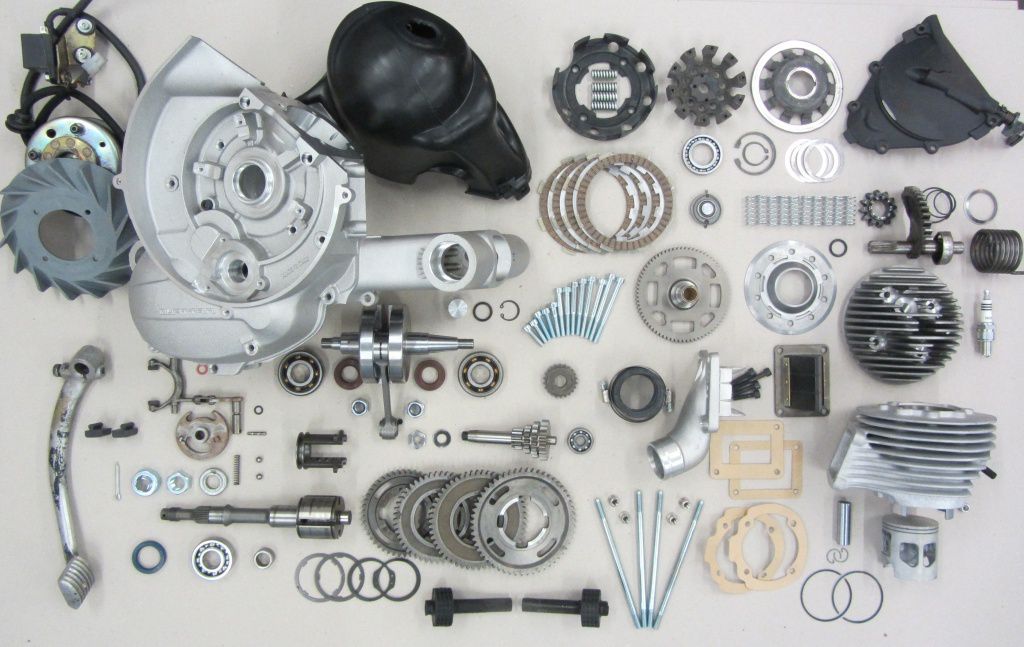
04.04.2 017

…and we did a nice shopping list for recreating this view in your living or sleeping room. Wherever you like it more. This is the download file CSV-Datei that you can upload to your shopping basket in the online shop.

Before we are even think about putting all the parts together, everysingle one gets a closer inspection. With such high power outputs even small mistakes can cause big trouble. If it happens while racing the trouble gets even bigger. Because Racing is life, anything else is just waiting to bring this saying. Because we have used parts that are going to the engine, we take double care.

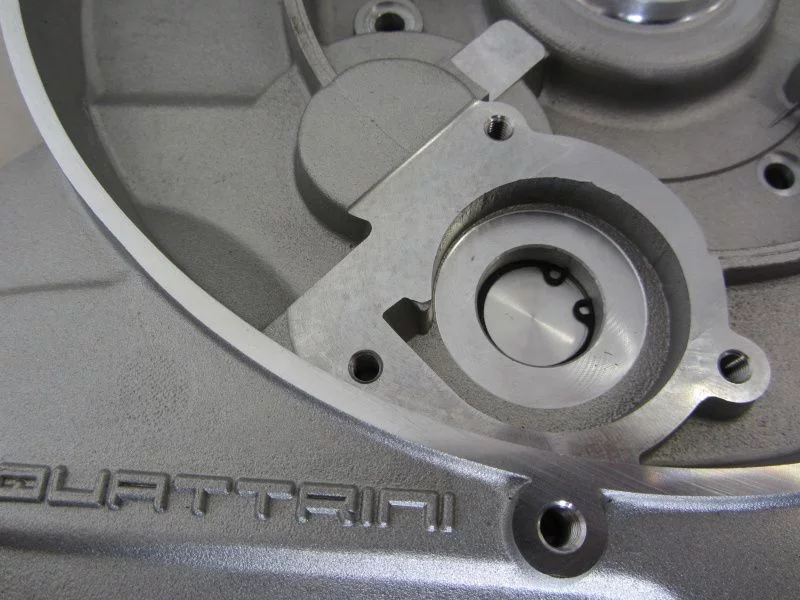
At the casings we start with checking the gasket surfaces and bearing seatings. The Xmas tree is not really free running…
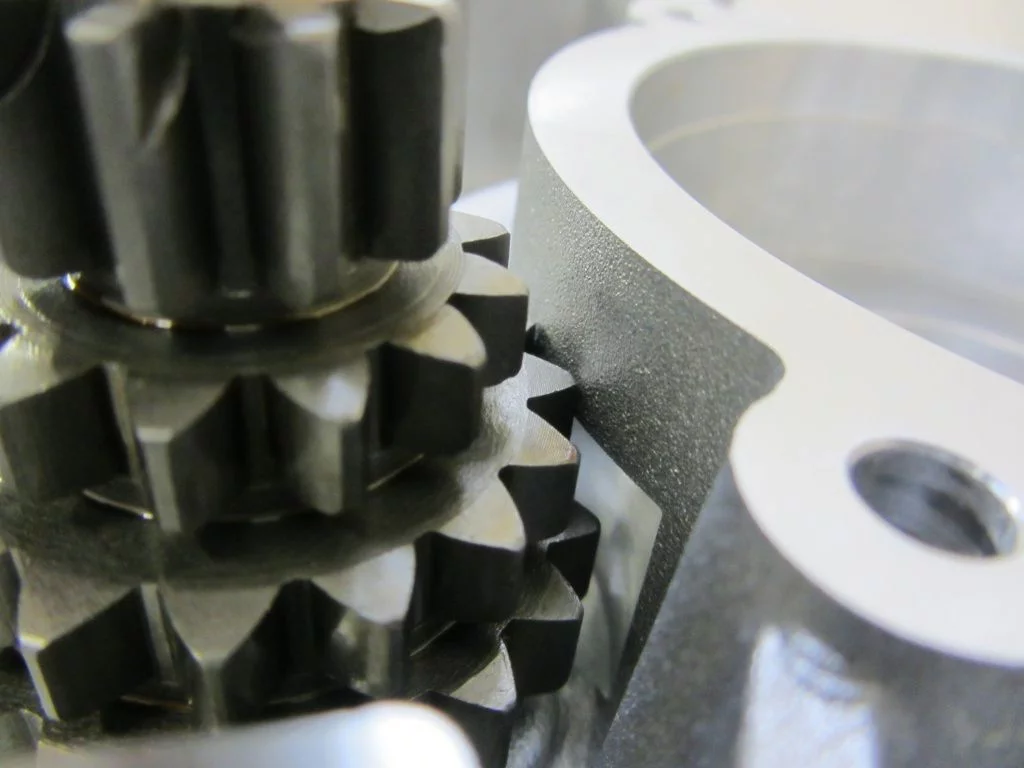
Quattrini K2 005

And fitting like it is would cause problems. Latest if the bearing is been fitted. One more to watch: If you are on the race track and have to change the gear ratio a larger gear wheel would cause real problems. And this is nothing that will cure itself during running.

The clearance needs to be milled much larger to easily get the Xmas tree out and to fit taller gearing when this is needed.
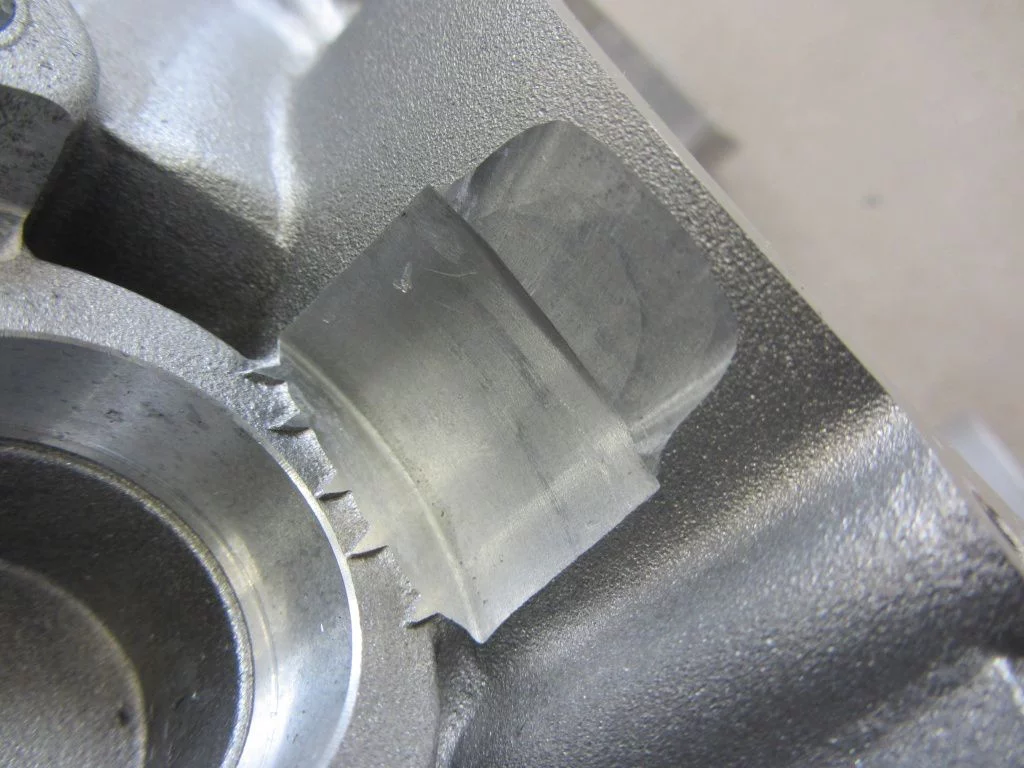
Quattrini K2 008

At least we are so lucky that there are no further surprises in bottom end.

The small casings half gives some nice little perfidy though. Normally you fit the stator plate of the ignition kit, take the cables put it thru the hole for the cable. But…wait…
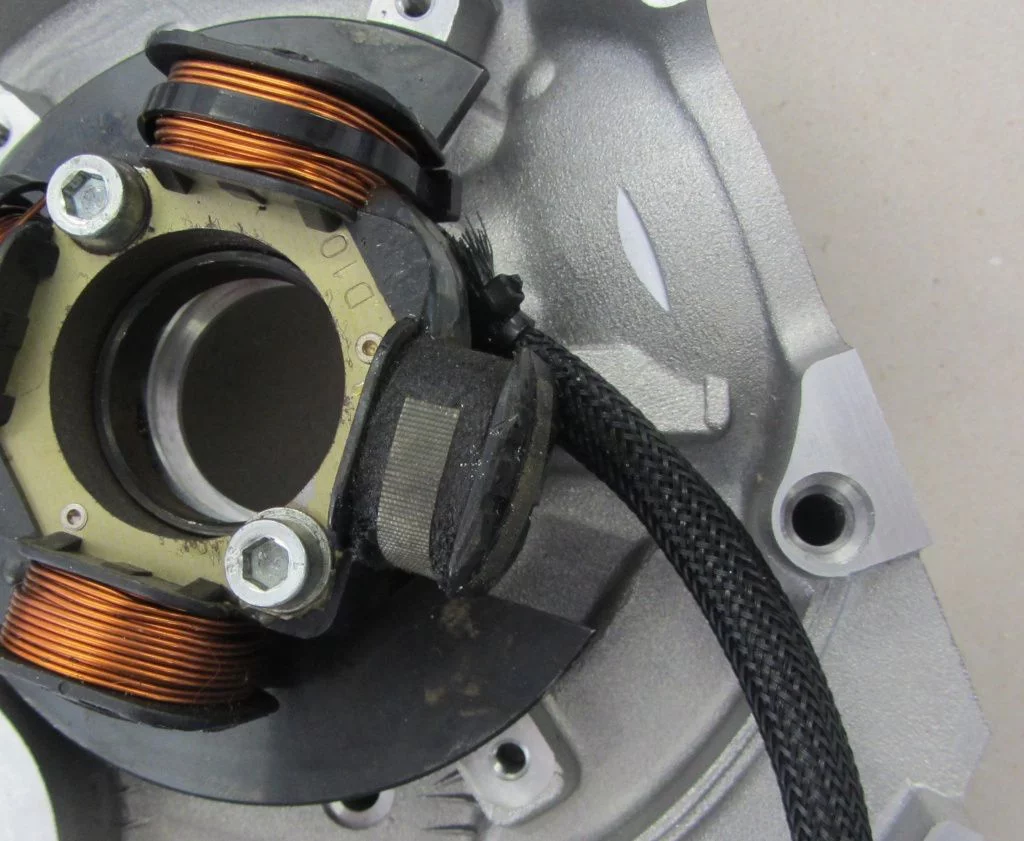
quattrini falc003

This is special, maybe this construction is for one of those WIFI ignitions. Where you no longer need wiring loom for the stator plates. Who knows? Anyway we opt for taken out the drill and get this sorted. The design of the original engine casings gives a good indication where to drill the hole makes sense.

As a protection for the stator wiring loom we take the rubber of the V50.

The right size for this is 12.5 mm. For bore holes of more than 10 mm a good practice is to use a smaller drill to get the things done step by step.
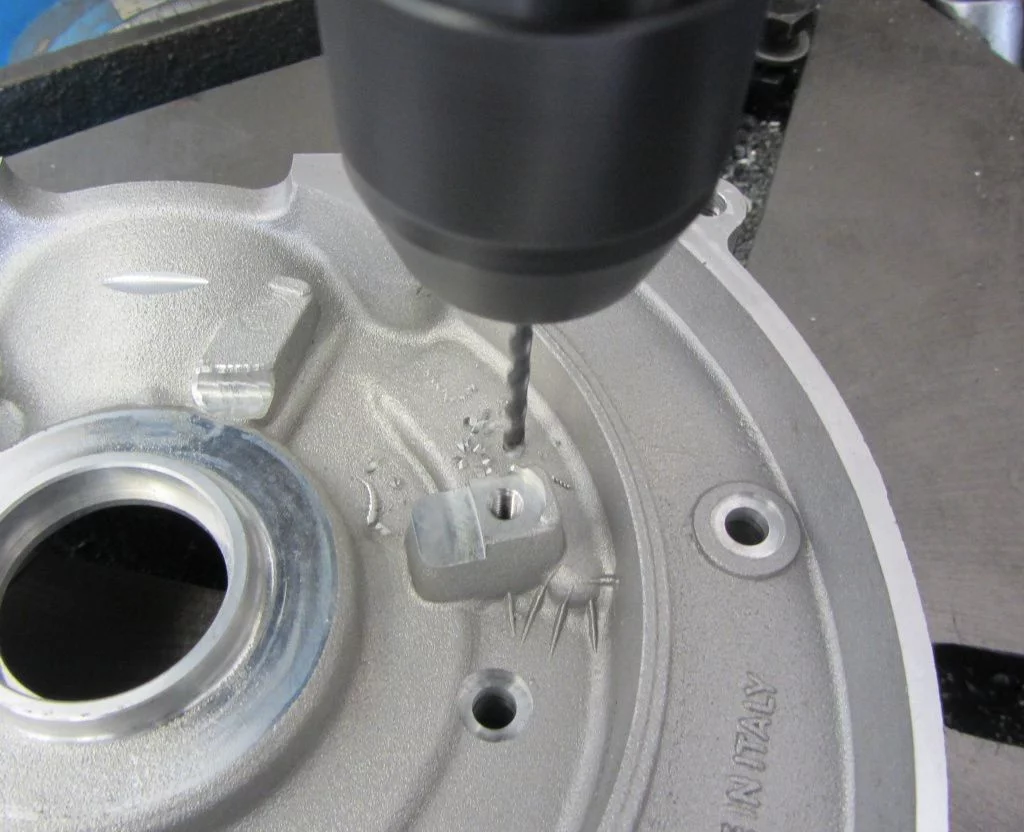
quattrini falc004 (1)

…and then you can work your way up to the desired size.
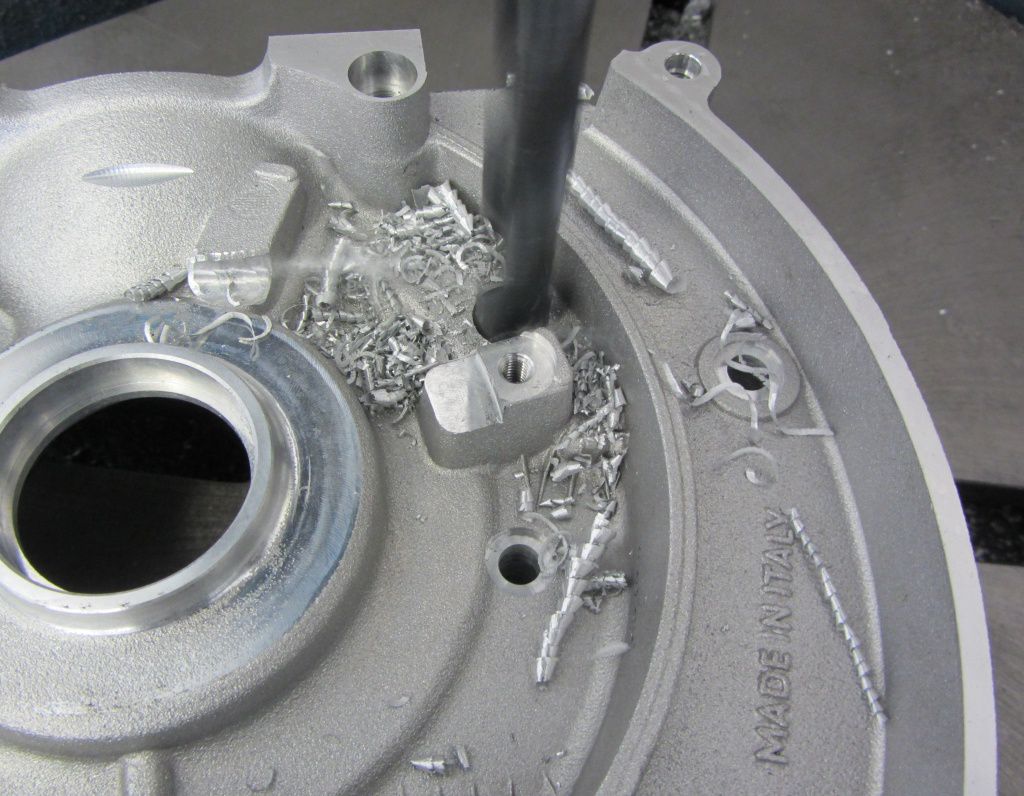
quattrini falc004 (3)

Chamfering done and then a quick try on.
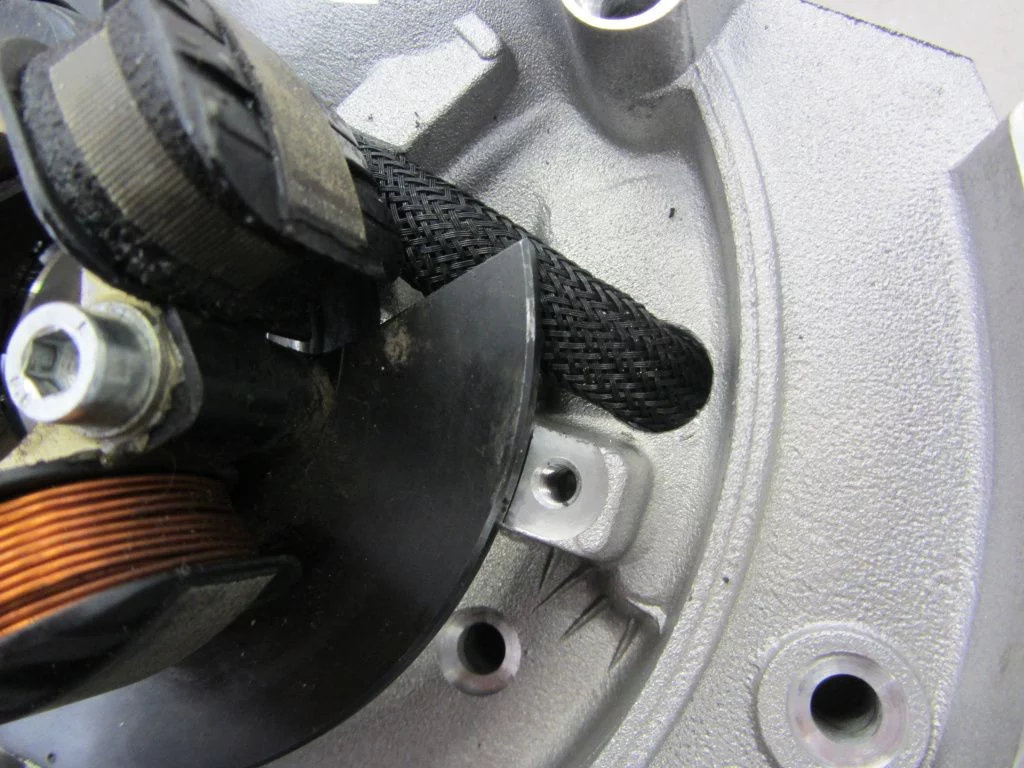
quattrini falc2 012

Everything is spot on. Now the dirty work on the small half of the casing is done.

Next we check the area of the top end for any design faults or imperfections that need to be sorted out.

While the Falc cylinder kits are manufactured with a diameter of 66.5 mm, the Quattrini engine casings are machined to a diameter of 65.2 mm suited to the Quattrini cylinder kits. Standardisation on these thing would be to nice. Why isn’t it simply done in a way that items that were on the market earlier also fit?
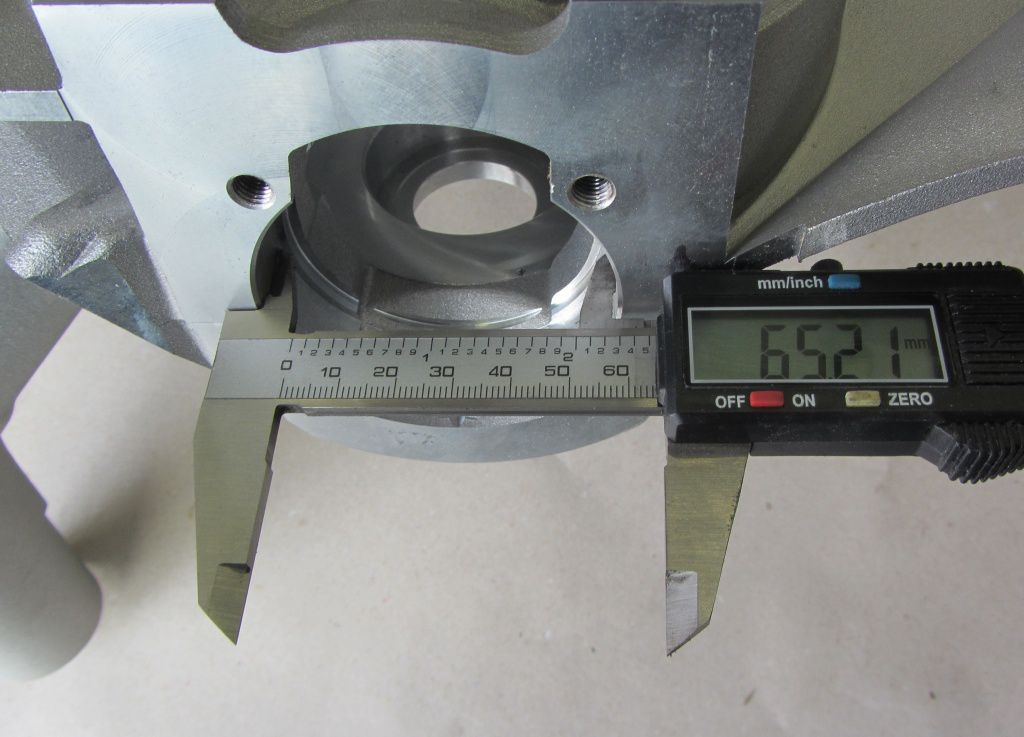
04.04.6 001
So know it is up to us what we do. There are two options that need to be considered:

1. The neck of the casing can be machined to the diameter of the casings.

2. The cylinder can be machined down to a new smaller diameter.

We opt for the second one.

If one wants to any other cylinder kit in future times, this can easily be done. The thickness of the spigot is more than enough.

After the barrel is machined down we check that it really fits and everything is spot on. that is the case and we can now see what needs to grind out at the transfers.
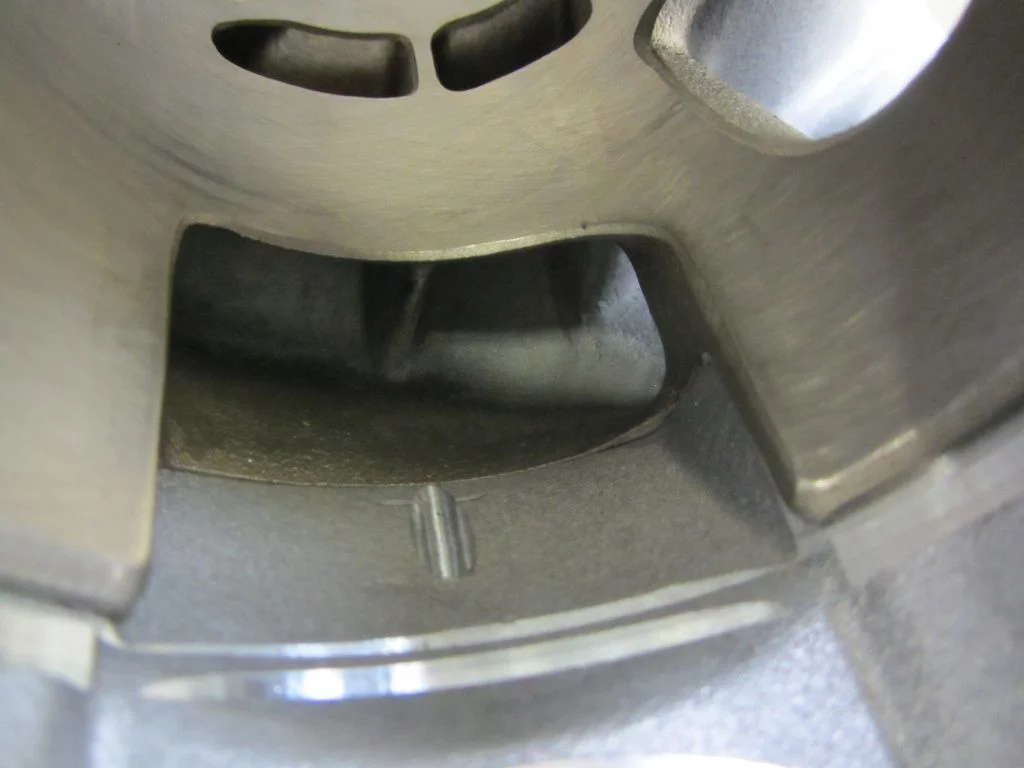
Quattrini K2 004

Very close to perfection! Just the cylinder needs to be matched very slighthly to the surface are at the casings. The casings leaves at it is for the moment and we check port timings before anything else is done to the casings.

The engine casing comes bare without any silent bushings fitted. There are lots of solutions for this on the market. Some make more sense, other not so much. If the rubber is to stiff it is nice for going on fast and long straights. But as soon as you need to take some fast cornering those hard rubbers are no longer suited for the job. For the rubber it is the same as for the suspension: “As hard as necessary, as soft as possible.”

Because this is done for the circuit we use the silent rubbersof the V50/Primavera with roughly 50 50 Shore hardness.
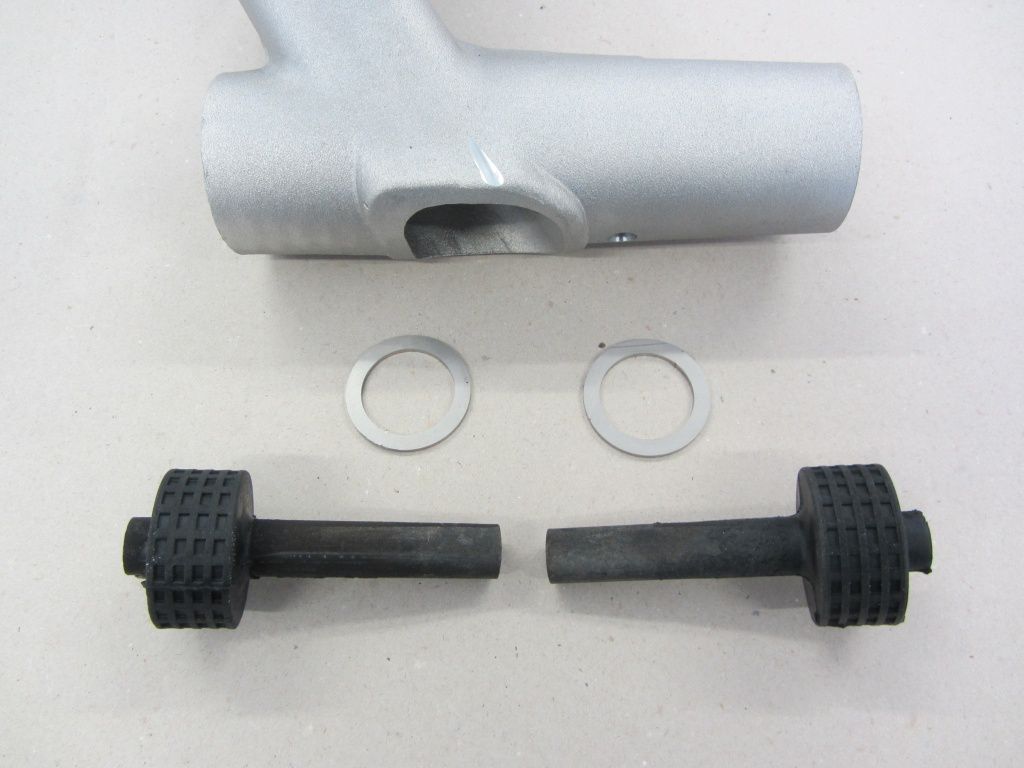
quattrini falc 001

Even on a quick look it comes clear that the bed stop for the rubbers is not dimensioned right. With high side forces put on the rubber these could be pressed deeper into the casings. To prevent this we fit the stops of the PK range models additionally.

Here you see the too small bed stop:
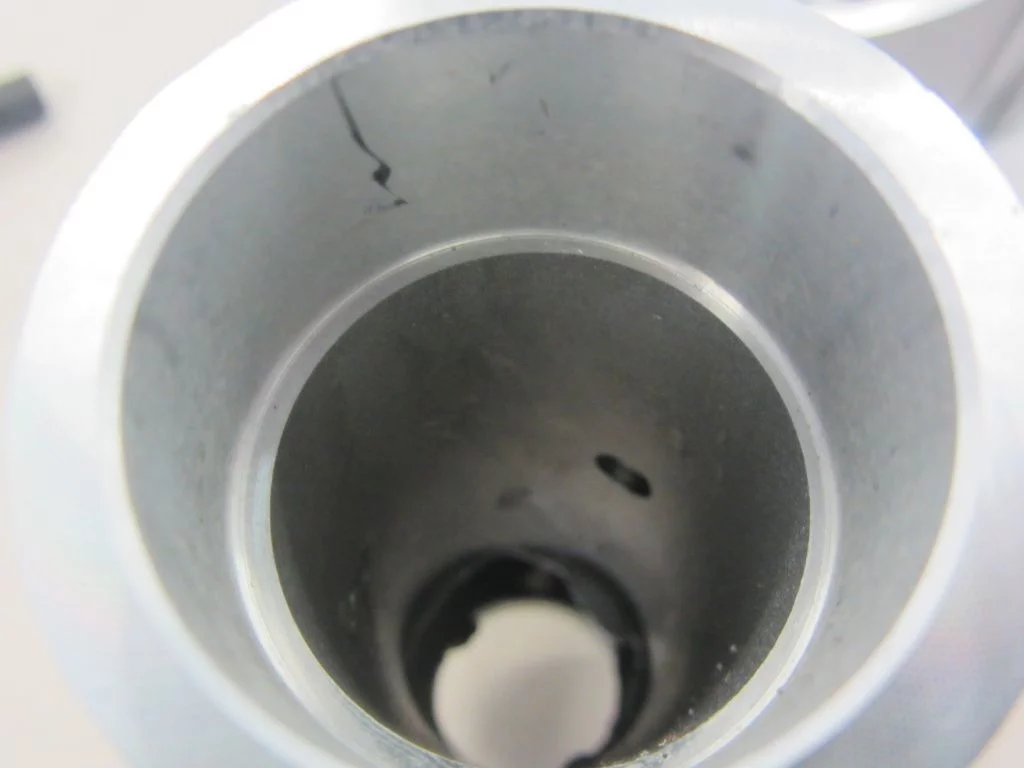
quattrini falc 003

The stop of the PK range is simply put into place and prevents the rubber getting forced deeper into the bore.
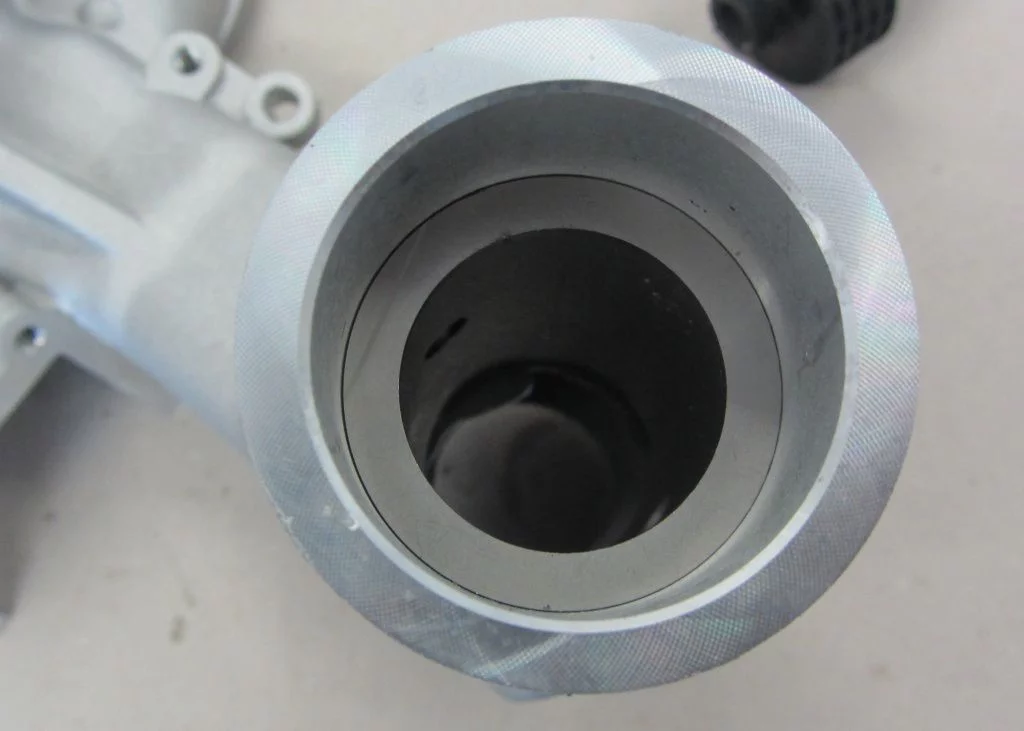
quattrini falc 009

The relatively soft rubbers can be easily put into place using a little bit of Talkum or mounting paste.

For the rear shocker support we use our own rubber together with the original bushing.

Compared to the original Piaggio rubber ours are a little bit wider…
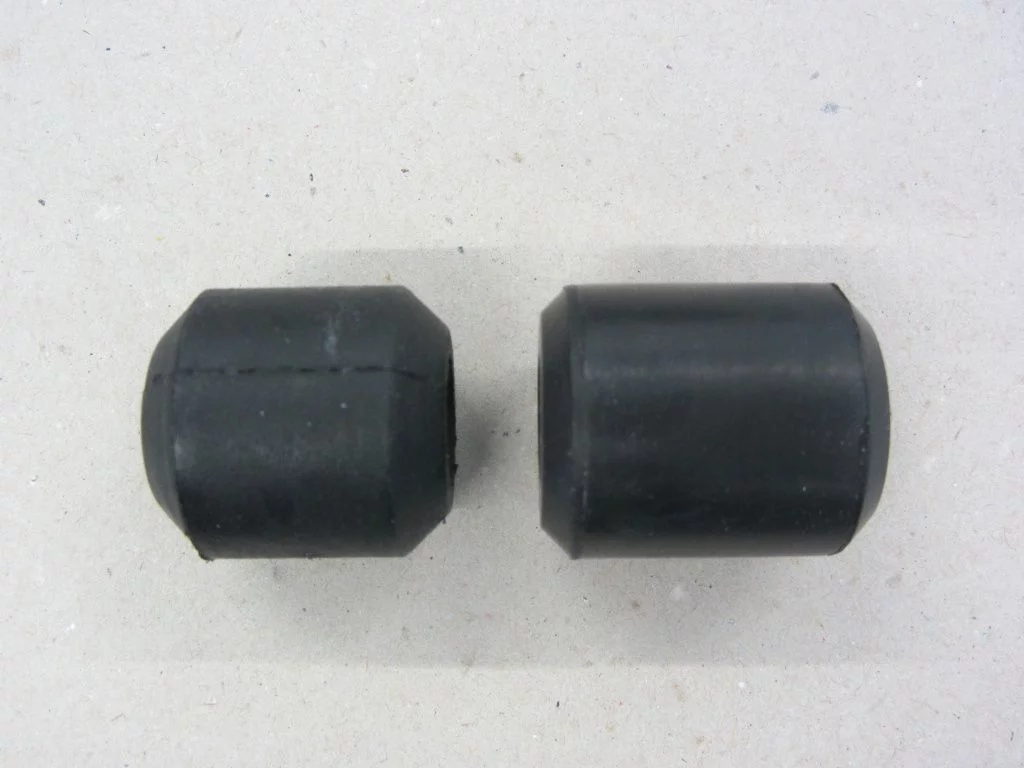
quattrini falc 002

…and they match better to the casings. This gives a better side support.
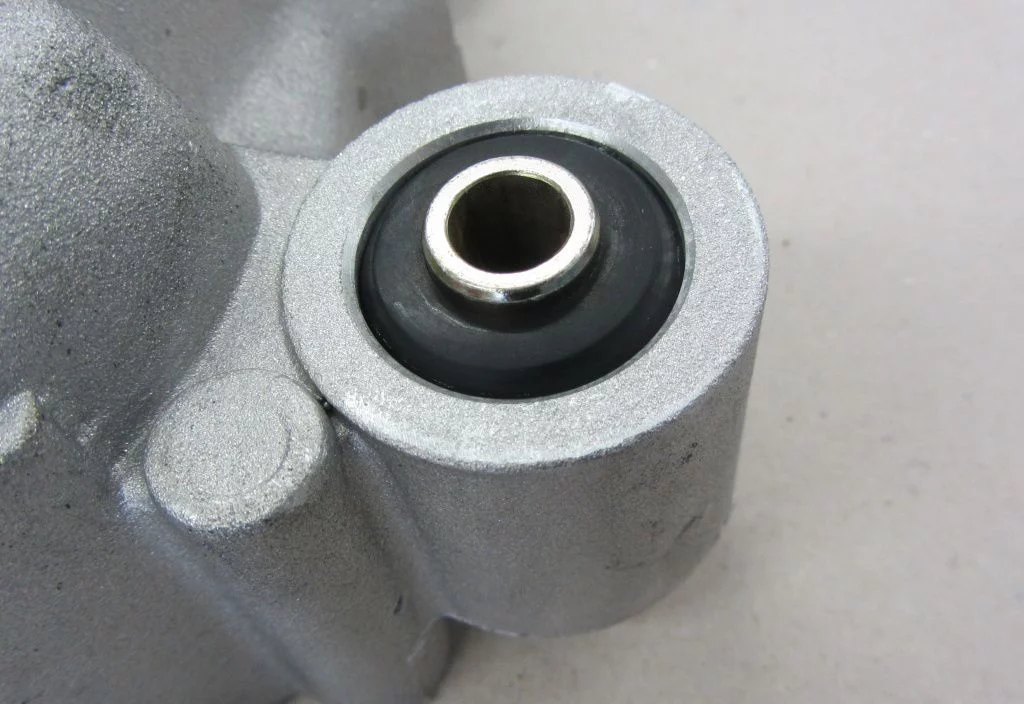
quattrini falc 013

The next episode will show how we fit the bearings and how to level up the crankshaft. Watch this space!
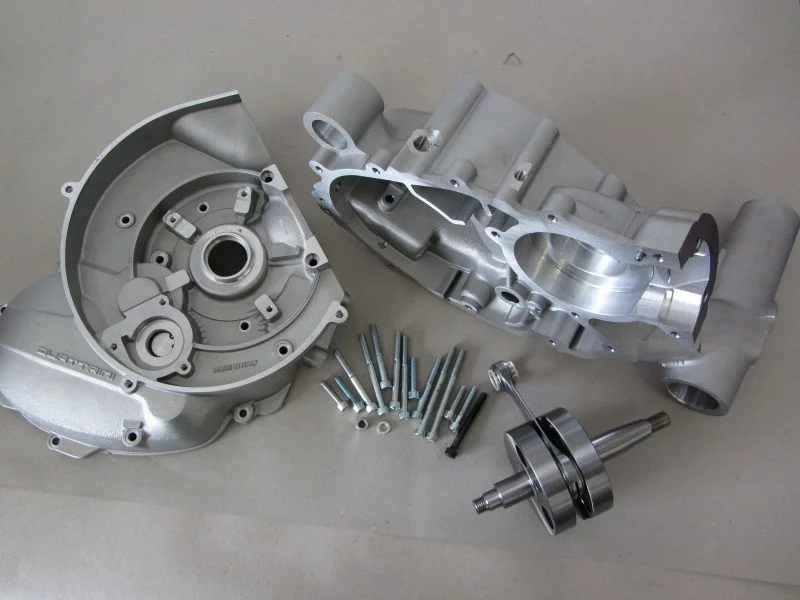
Finally the new Qattrini C1 Smallframe Engine Casings are available.
For all tuning scooterists out there a must-have.

In the past few years the Smallframe tuning become more and more versile.
Smallframe engines with more than 40hp are no longer unique nowadays. The original Piaggio engine casings were produced for power around 10hp. The power given through cylinder kits like Parmakit, Falc or Qattrini are just too much for the original casings.

Quattrini has met demands and developed a very sophisticated engine housing..

We are going to show you the new features below.

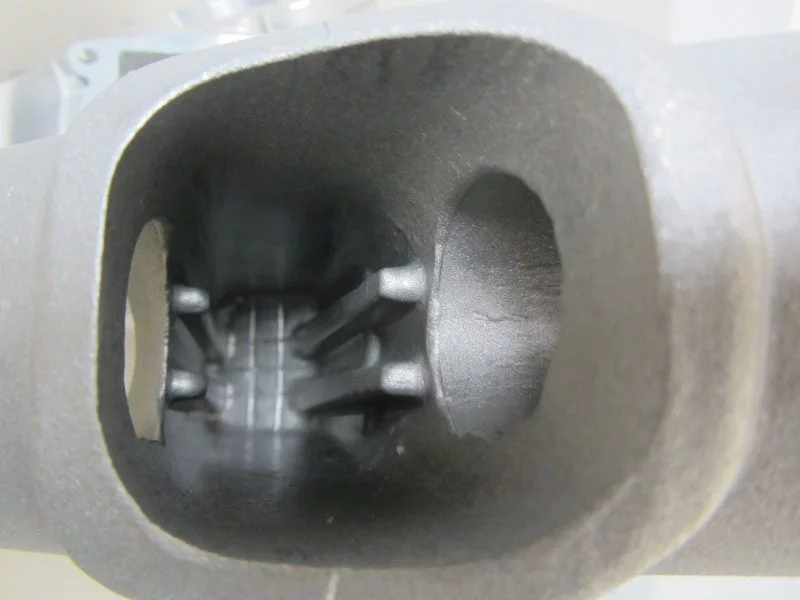
The first eye-catching feature is the adapter for a mechanical water pump to install water-cooled cylinders.
If you make use of the classical forced air cooling, Quattrini also included an aluminum plug to close the bore of the pump.

The area around the floating ports and the cylinder base is made considerably more massive in order to prevent casing failure or cracks.

Quattrini already spindled the cylinder base to 64.8 mm diameter and 17.5 mm deep.
Including a range up to 21mm deep, which is suitable for the original spindled cylinder base diameter.

The area around the engine mount is adjusted so that you can use Tyres in the dimension of 3.50×10.

To compensate the weakening of the engine mount through the heel, this was reinforced with 4 solid ribs.

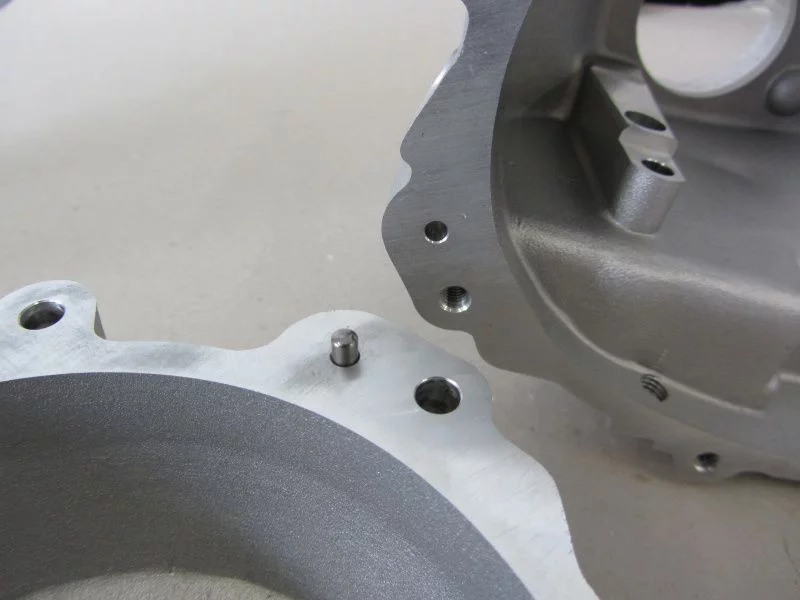
The two housing halves are connected with two centre pins and M6 screws, which will prevent the mounting with separate nuts. Because of the cast membrane and the lack of box centered on the crankcase cover gasket also eliminates the paper based engine seal. Common practice today is to use sealant in order to put the engine together sealant. We recommend from experience Dirko HT.

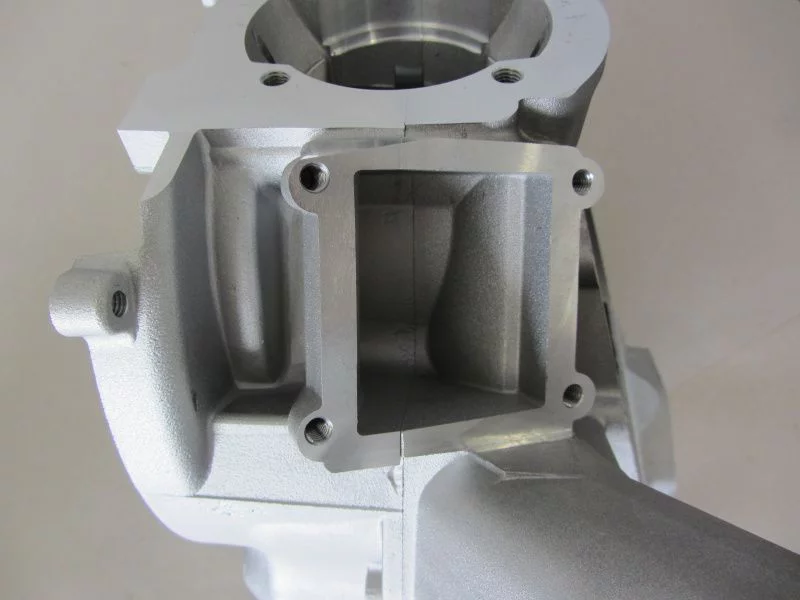
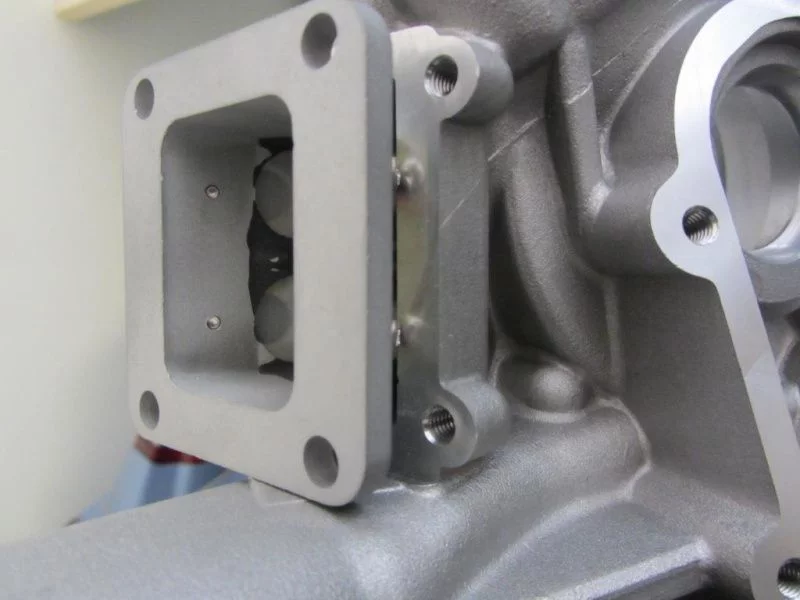
Condition as supplied to customers the casings are ready to use with direct intake cylinders. Additionally Quattrini also designed a box for all friends of membrane intake.
The connection to the crankcase must be machined if required, however, on its own power out.

Unfortunately, until now it is not absolutely clear which membrane can be used.
Therefore, we have already taken care of a solution and started to adjust aRD350 and V-Force³ Membrane.

Regarding the gear shift Quattrini stayed with the good old 2 cable technique.

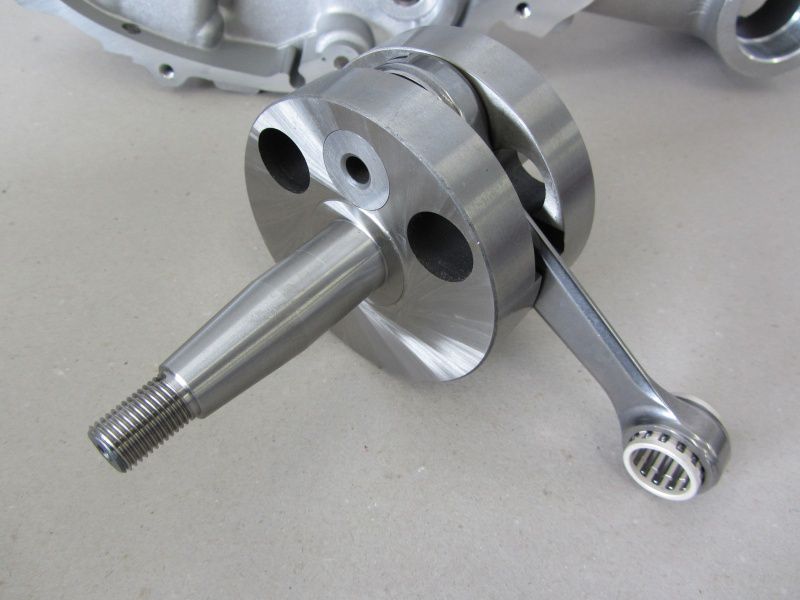
The heart of the whole new design is based on the 48mm broadend crank shaft with 51mm rod.
This measure ensures that the press dimension of crank pin increases significantly
and the crankshaft is turning resistance in terms of not to being twisted.
The high quality 102mm conrod round off the overall good impression. The dimension of the center crankshaft bearing and cylinder base sealing is 69mm and is thus provided for the use of 102mm connecting rod.

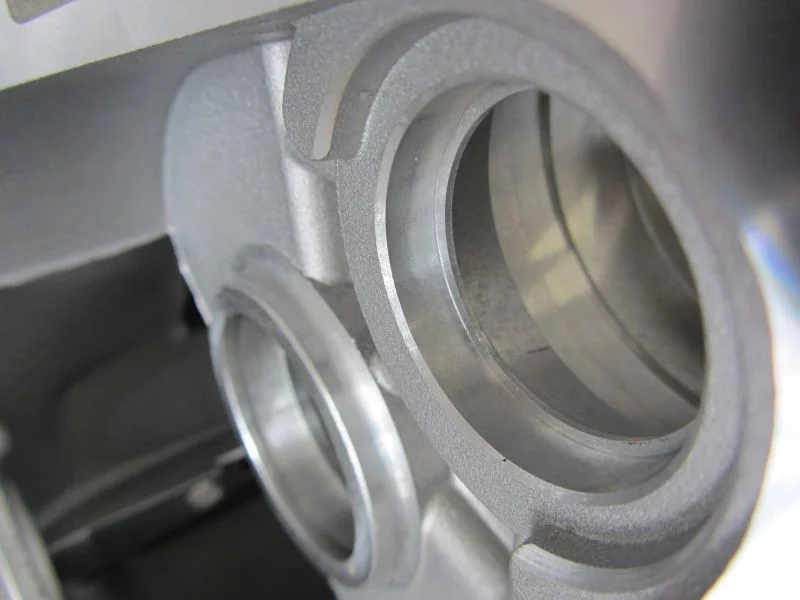
As crankshaft bearings we are using 6304TN9C4 on both sides.
It is also conceivable to mount a NU205 on the generator side, but we do not recommend it.

The crankcase is additionally sealed with 2 oil seals from both sides with the dimensions 20x35x7. Here we can offer youseals in good old FPM-Quality.

Depending on the ignition used for this engine, a whole for the cable set must be made in the dynamo casing.

The air channel has been changed already for the use of Race Exhaust.

After the spectacular performance of the Quattrini engine casings at the start of the ESC season in Mirecourt, we are curious to see who is using them first.