2016 is a classic Vespa year

We are celebrating 70 years of Vespa. Celebrate with us:

  • From 19th February 2016
    We will award the most beautiful Vespa at our online Customshow – prizes worth 600 Euros
  • 9th April 2016
    You will have the opportunity to be amazed by the most beautiful custom Vespas at our Customshow in Cologne on 9th April.
  • 11th June 2016
    Scooter Center Classic Day 2016 – Vespa and Lambretta – Event

We will award the most beautiful Vespa

We are looking for the most beautiful Vespa. Upload a pic of your Vespa here and win prizes worth 600 Euros.

Even though it’s the year of the Vespa anniversary, there will be a category for Lambretta and automatic scooters (without manual transmission).
We have started a online-Customshow on our Facebook page. Online Scooter Customshow

Finally buying your own Vespa

You have always dreamed of your own Vespa?
You used to have a Vespa, but kind of lost your connection to scooters and now you would like to own a nice classic version again?

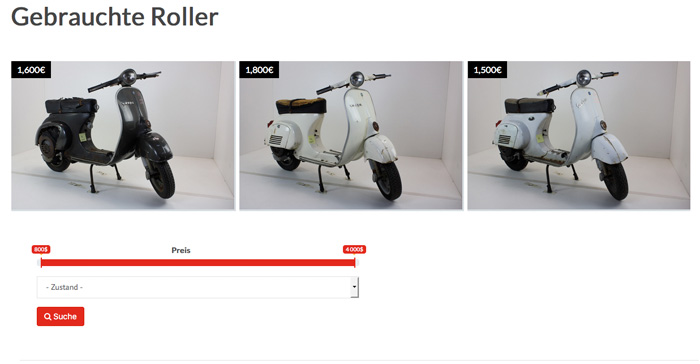
In this case, this is for you: VESPA FOR SALE

Vespa zu Verkaufen

Impact wrench by TOPTUL for your scooter garage

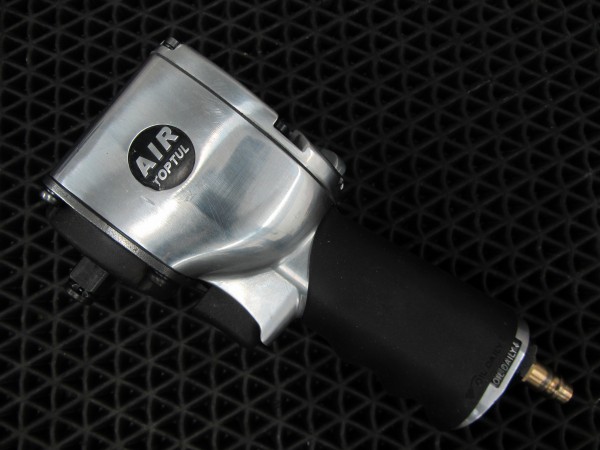
The small but powerful tool by Toptul.

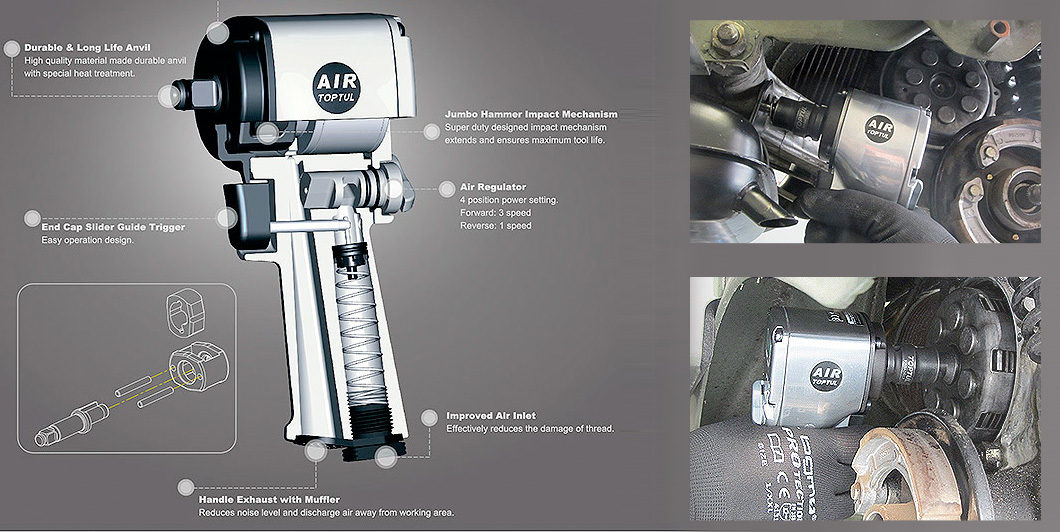
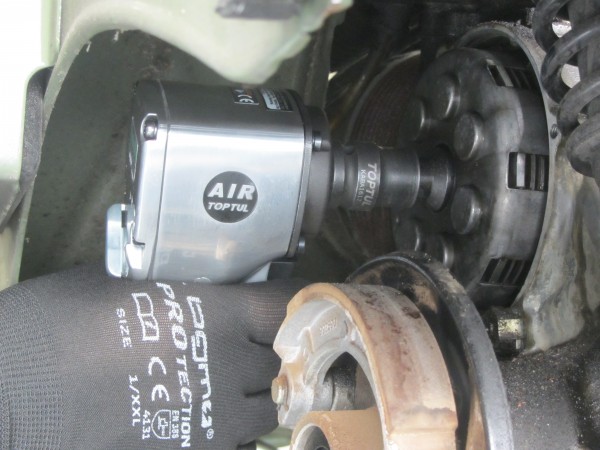
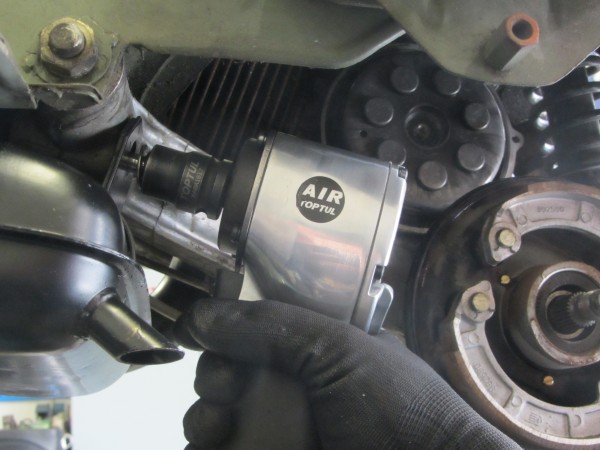
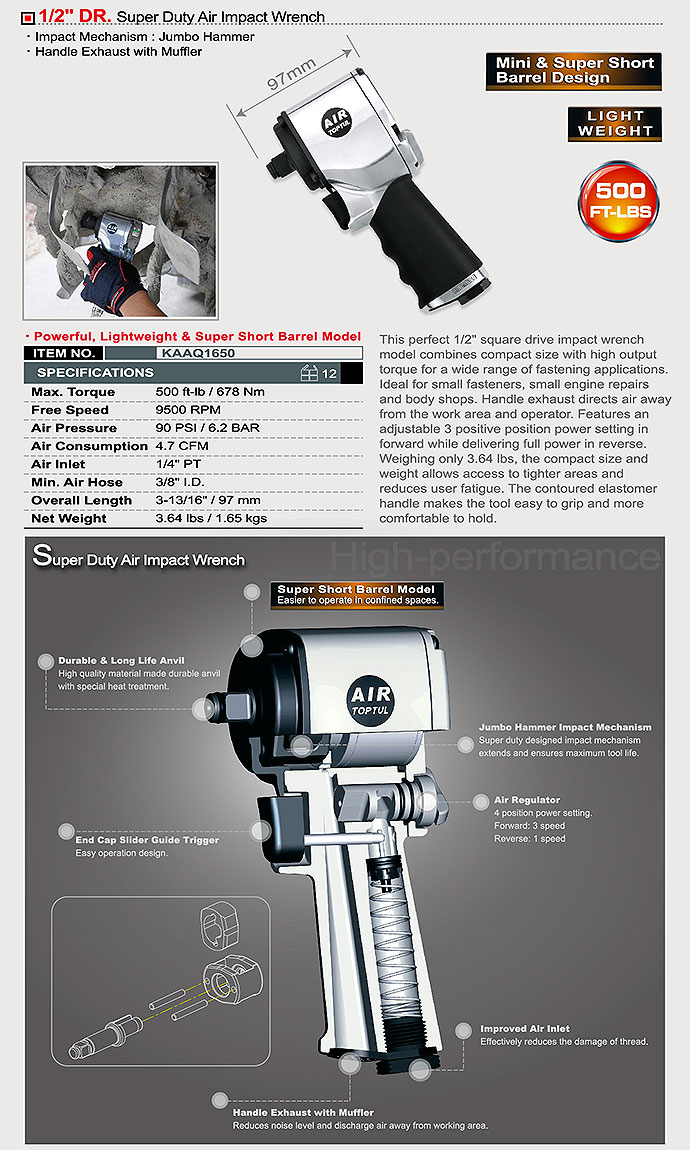
The very compact size of only 97mm head length make the Toptul impact wrench the perfect tool for very tight areas as with the engine still in place.

08.02.2016 040

Small, light, STRONG

With an output torque of 678Nm the little fellow helps in unscrewing unmanageable screw connections. This even eases the task of untightening rusted rear hub nut.

You may also use the impact wrench by Toptul to untighten hardly accessible clutch nuts of largeframe Vespas, because of its small dimensions.

You will always have enough space to work comfortably, even if equipped with a heavy nut and a castle nut wrench for works on the engine still in place.

You will always remain in control of this 1.6kg lightweight of a bully.

Toptul impact

Perfect impact wrench for Vespa

A special principle of operation of the impact wrench allows you to easily loosen screw connections with nuts that could possibly turn or with bolts that are almost too tight.

With the exhaust screw of largeframe engines being the perfect example. A normal sized impact wrench would reach as far as the rear brake, making a straight access impossible.

Toptukl impact_2

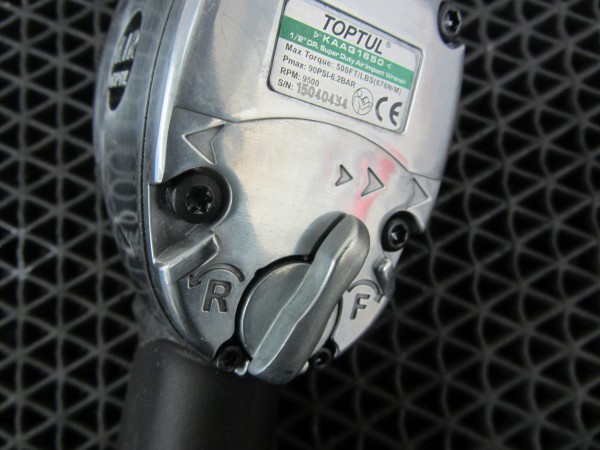
The selector lever is positioned on the back of the impact wrench in order to be used with one hand only. The desired force will be made available when pulling the trigger, thanks to clear interlock.

08.02.2016 041

IMPACT WRENCH BY TOPTUL - PERFECT FOR SCOOTERS
This handy and strong impact wrench by Toptul is ideal for working in tight spots. A compact size with 97mm head length only but 678Nm output torque are perfect for hard works such as clutch nuts in largeframe Vespas.

  • The 1.6kg lightweight is easy to use with one hand
  • Adjust torque with one hand
  • Ratchet connection: 1/2″
Schlagschrauber (Druckluft) -TOPTUL 1/2" 678 Nm- Artikelnr. KAAQ1650

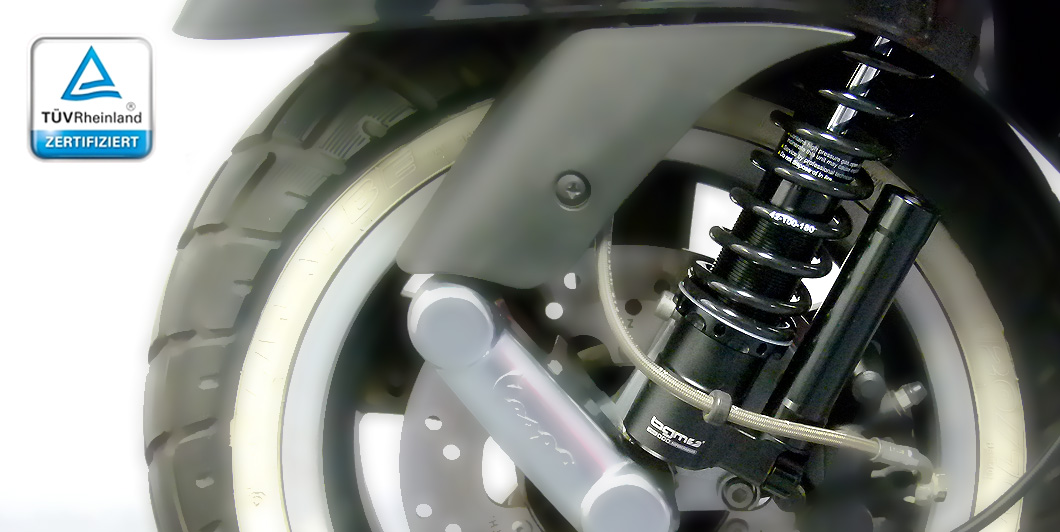
Shock absorber set -BGM PRO SC FR1 SPORT – Vespa GT, GTV, GTS (-2013) 125-300 – black

Shock absorber Vespa GT GTS Super Sport with MOT

Buy the new BGM shock absorbers here
Fine tune the suspension of your GTS with the new shock absorbers BGM PRO SC/F16 and SC/R1: BGM7788BKTS
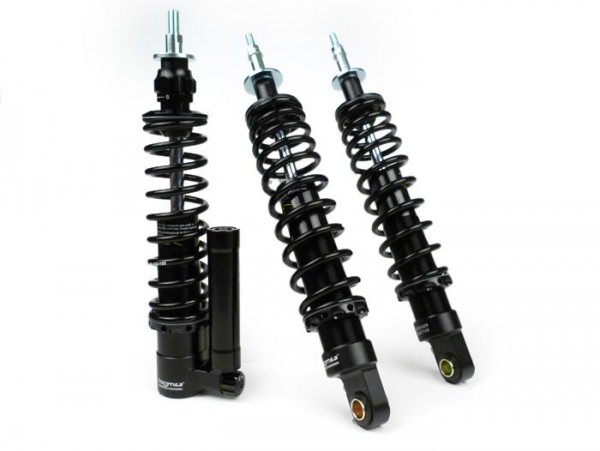
Suspension tuning by adjusting pressure, rebound damping and spring preload

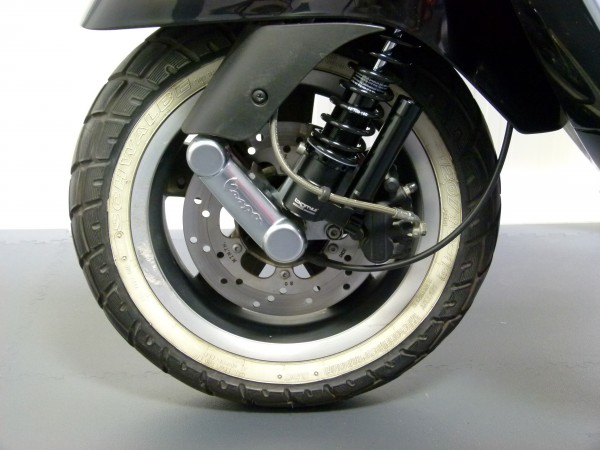
Individually adjust the front shock absorber of your Vespa to your riding habits by adjusting pressure, rebound damping and spring preload.

The back SC/R1 shock absorbers offer stepless adjustment of the spring preload and are easily adapted to varying loads. Lightswitch 567
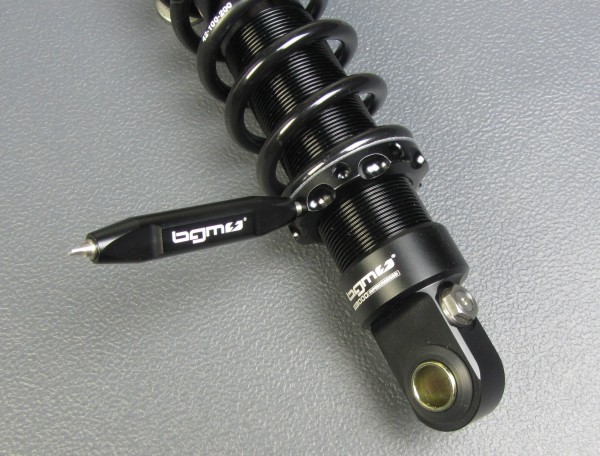
Do you prefer soft cruising or sporty tours in the mountains? A BGM PRO suspension is perfect for any kind of situation.
Of course you will get a MOT certificate for your BGM PRO suspension in order to add the changes to the registration papers of your Vespa without stress. Lightswitch 559
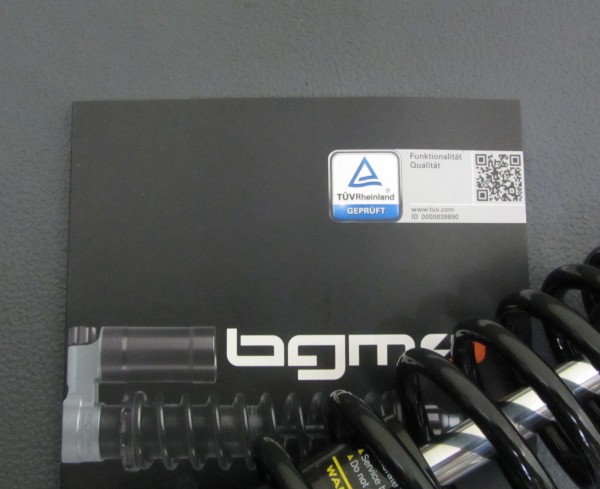
BGM PRO SC SPORT shock absorbers -sporty- comfortable-adjustable-with MOT-
BGM PRO SC SPORT shock absorbers -sporty- comfortable-adjustable-with MOT

08.01.2016 404

HARMONIOUS
The harmonious basic tuning of the BGM PRO SC SPORT suspension is convincing. The basic tuning of shock absorbers and spring constant were adjusted to a sporty driving style on roads, perfectly balancing sporty and daily riding styles. The front absorber even is an improved copy of the BGM PRO SC COMPETITION series. Rebound damping can be adjusted 16-fold.

DIRECT
The BGM PRO SC SPORT suspension reduces diving while braking, which usually is characteristic for scooters. It also reduces horizontal shaking when accelerating. This results in unadulterated directness, which, in combination with a sportier handling, leads to more safety and enjoyment.

SIMPLE
The slim line of the front absorber’s compensation container is intentional. It makes a quick and easy assembly possible without the need to take off brake hoses.

E-PASS
The BGM PRO SC SPORT shock absorbers come with a KBA (German Federal Powered Vehicle Agency) approval and e-pass to grant pure relish without regrets. These approvals allow you to directly ride your scooter after assembling the shock absorbers according to the requirements in the e-pass. No need to register, you have to carry the e-pass along.

  • with KBA (German Federal Powered Vehicle Agency) approval / e-pass (no registration needed!)
  • high strength alloy, CNC machined
  • hard-anonized surfaces for perfect protection
  • already perfectly adjusted
  • front rebound damping adjustable 16-fold
  • sporty-harmonious damping technology
  • high-quality parts for a long life
  • massive 12.5 mm piston rod
  • stepless adjustable spring preload
  • set ready to install

TECHNOLOGY
The SPORT series inherited its technologic features from its big brother BGM PRO SC COMPETITION shock absorbers. The SPORT is also made of the same massive 12.5 mm piston rod and high strength and anti corrosion alloy body, which was additionally hard-anonized and is supplied in stylish mat black.

Conclusion:
Sporty comfortable shock absorber with approval and unrivalled cost-benefit ratio!

Installation guide Vespa shock absorbers

Easy installation of the new suspension

Installing these shock absorbers is relatively easy. We have summed some hints and the most important steps of installation up for you:

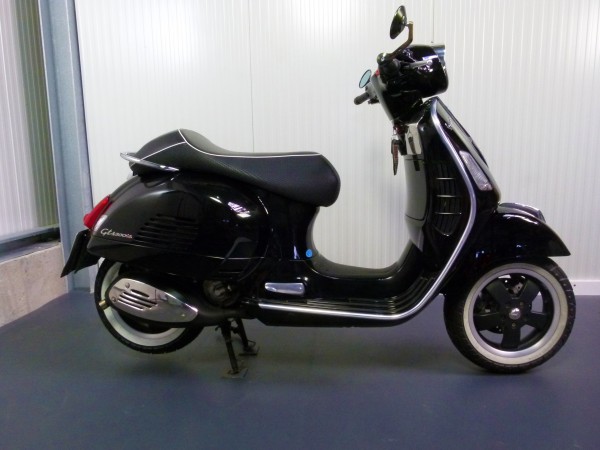
In order to guarantee a well and safe installation you should place your Vespa on a level and firm ground.
08.01.2016 182

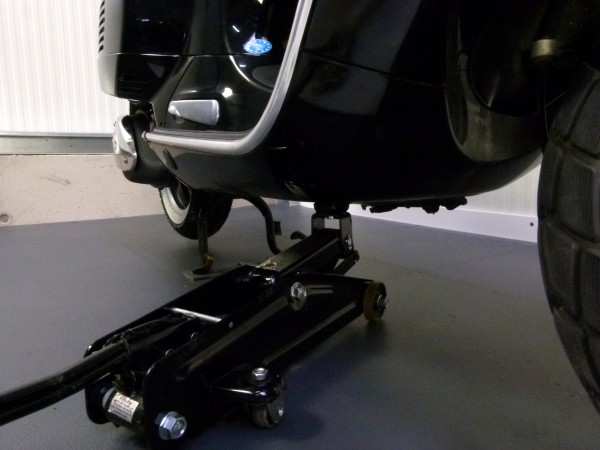
In order to exchange the front shock absorber, the front wheel should be freely accessible. It would be easiest to either shim your Vespa under the frame or to use a jack to lift the front wheel. By doing so you can jack up your Vespa without someone to help.
08.01.2016 185

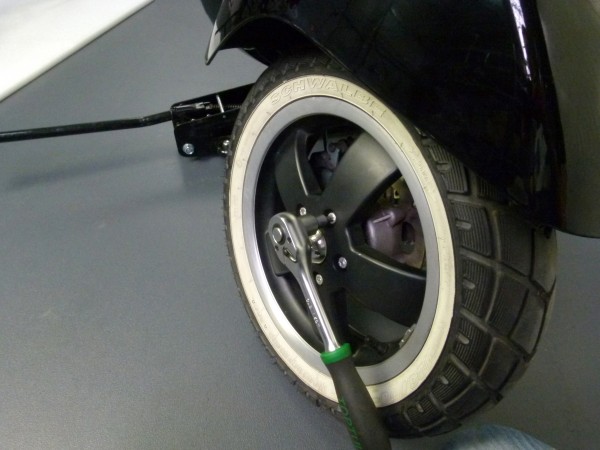
Unscrewing the five screws of the front wheel rim is easiest when the front wheel is blocked.
08.01.2016 208

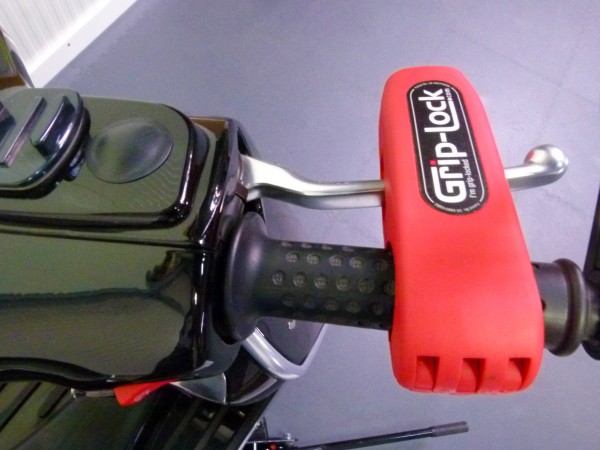
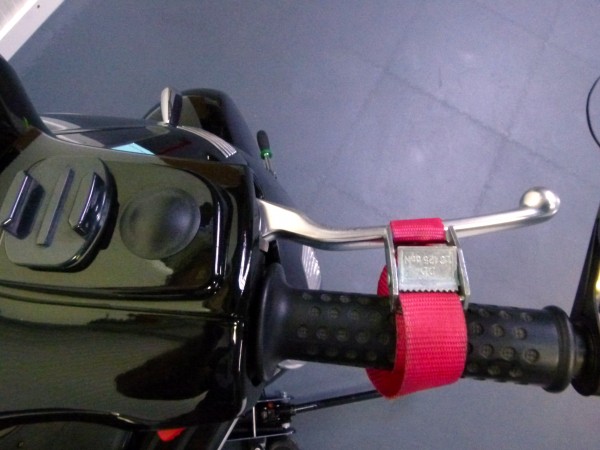
Do you have a lock for the brake lever? In that case this security lock could be the substitute for a third hand. This task can also be accomplished by cargo lashing or, if you don’t have anything else, by cable straps. A blocked front wheel will also come in handy when working at the rear. Your scooter won’t roll away.
08.01.2016 220

08.01.2016 221

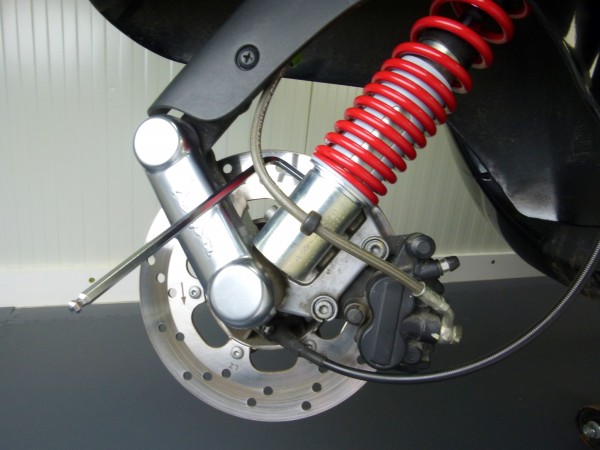
First use an angled hex wrench to unscrew the lower two mounting screws.
08.01.2016 289

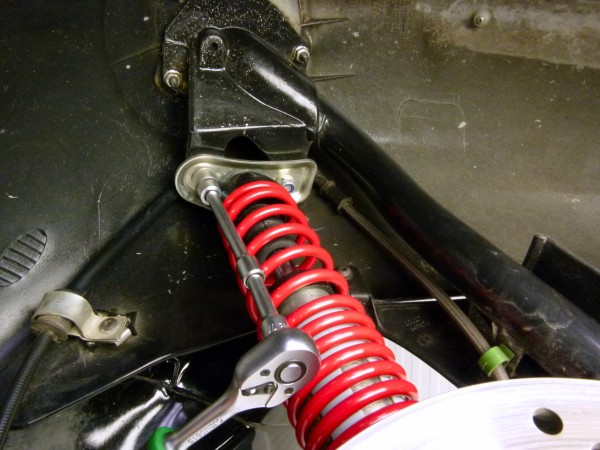
Next are the two nuts of the upper shock mount. Once you took these off, you can easily remove the shock absorber in direction of the front wheel.
08.01.2016 286

To loosen the upper nut, you may hold the shock absorber at the dome top cap.
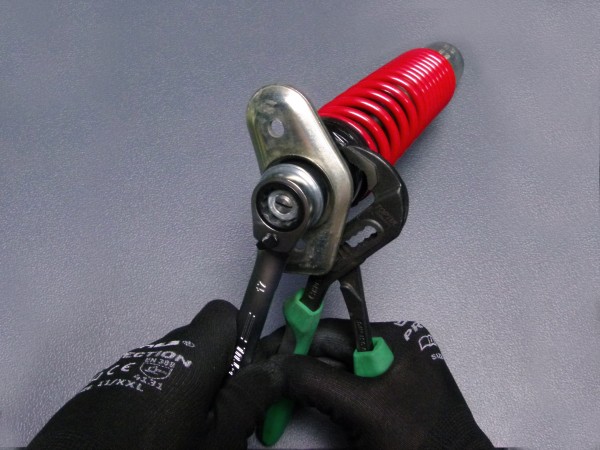
08.01.2016 163

Once you removed the upper mount, quickly check the silent rubbers. The rubbers are hard or brittle? It would be best to replace them. 08.01.2016 167
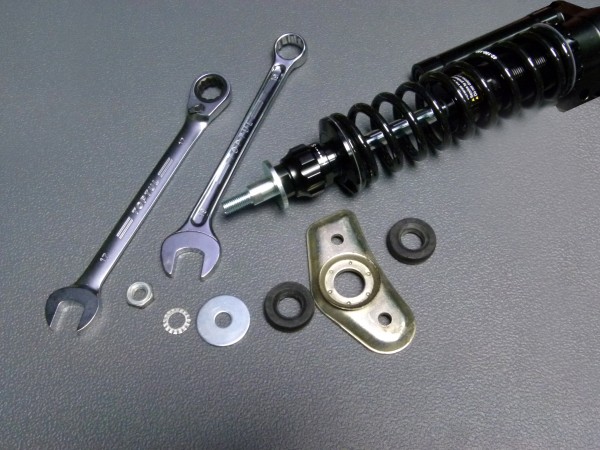
The BGM shock absorber also has two assembly aids, which can be used to hold the absorber during installation. 08.01.2016 172
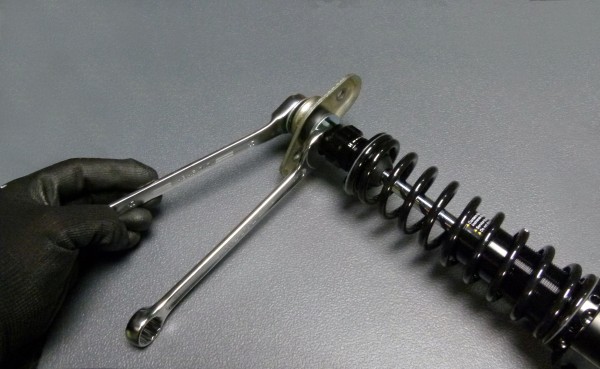
You must not hold the absorber’s piston rod with pliers or any similar tool. Marks on the surface of the piston rod caused by a tool, would immediately lead the shock absorber to leak when snapping in.

Once the mount is installed, you may place the absorber from the side of the wheel. BGM shock absorbers are supplied with spacer shims to make up for gaps between shock absorber and brake caliper.
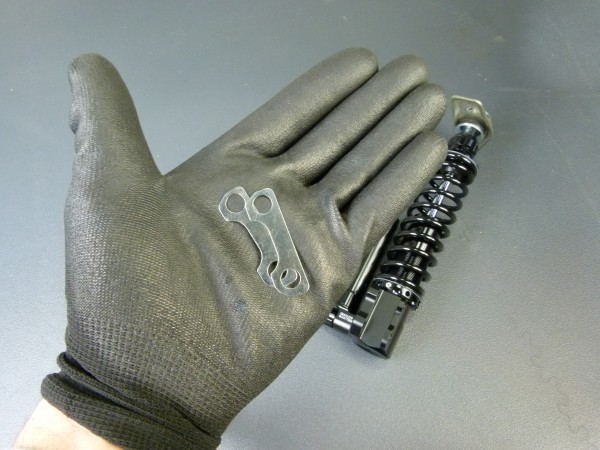
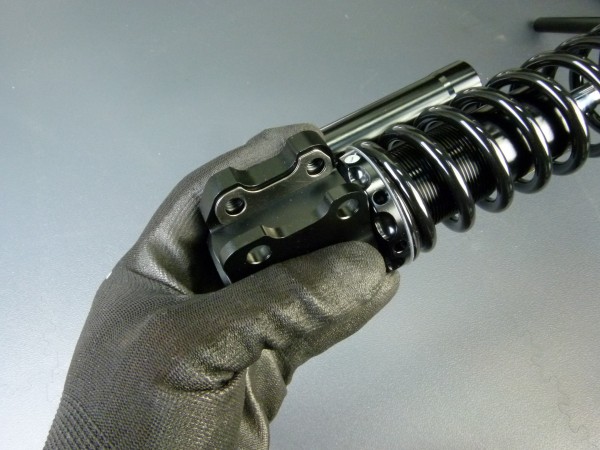
08.01.2016 296

08.01.2016 298

Should you need the spacer, you may first fix it with a screw through the lower hole and then place the absorber on top of the mount of the brake caliper and the spacer shim.
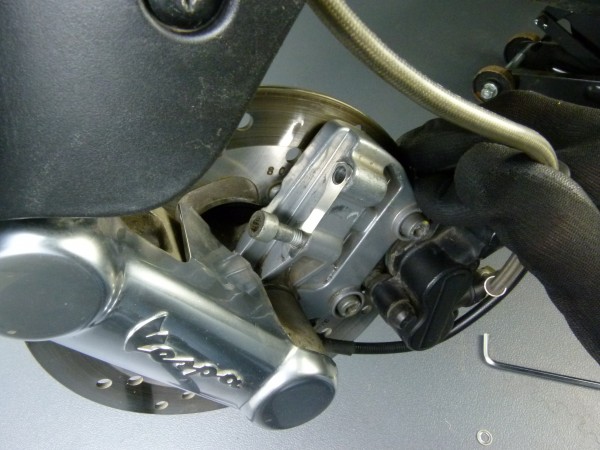
08.01.2016 307

Once the screw in the upper hole and the spacer shim fixes the shock absorber, you may correctly position and fix the absorber. 08.01.2016 308
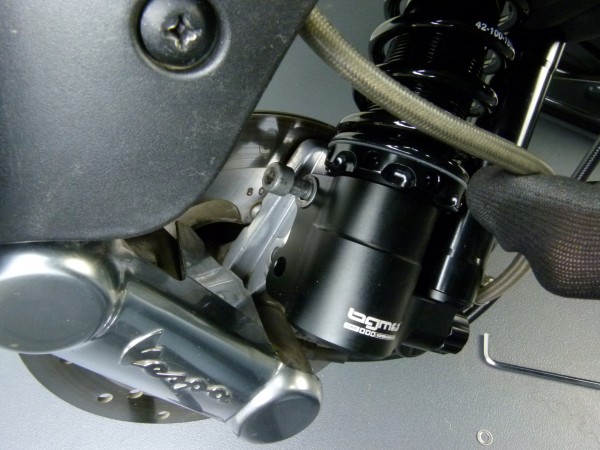
The steering tube secures the screws of the upper mount.
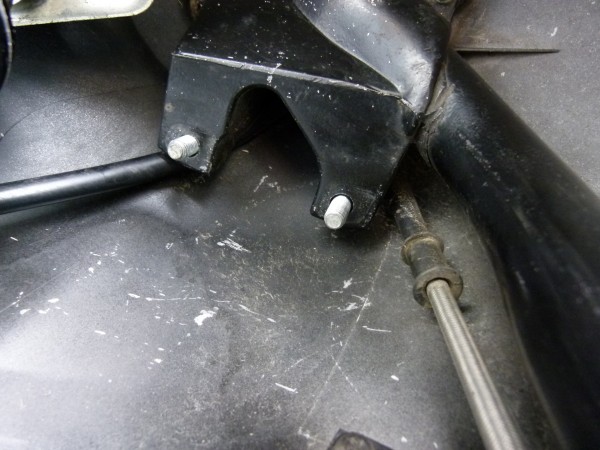
08.01.2016 310

Simply secure the mounts of the shock absorber with nuts from below.
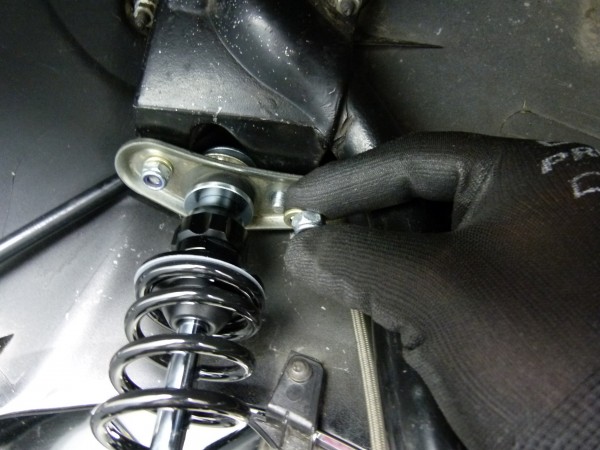
08.01.2016 312

Once you reinstalled the front wheel with the five hex socket screws, you may now address the rear shock absorbers.

The lower mount of the shock absorber is hidden on the left hand side of the vehicle behind the air filter box.
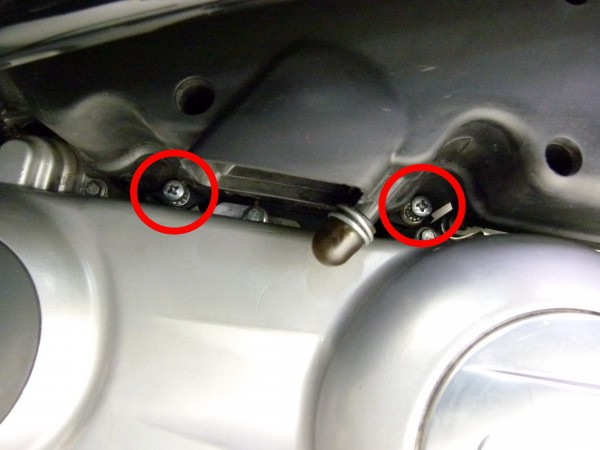
08.01.2016 314

You have to lift the air filter box to access the mount.

To lift the air filter box you need to unscrew the two back screws and loosen the front screw. You don’t need to fully remove the air filter box.

The exhaust on the right hand side of the Vespa blocks access to the lower shock mount.
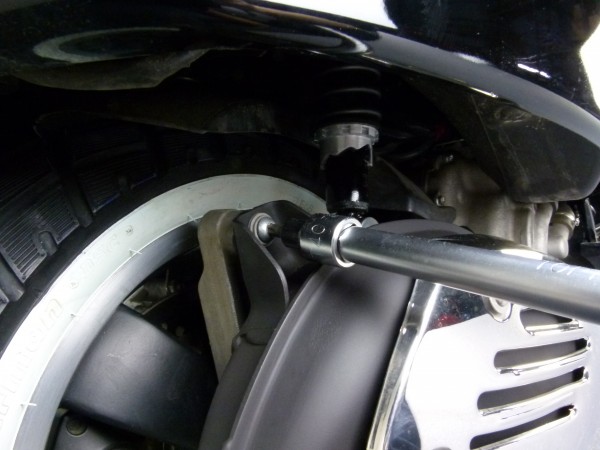
08.01.2016 242

Beware: Did you just go for a ride on your Vespa? It would be better to postpone your work until exhaust and engine have cooled down.

The exhaust is fixed with three screws and the clamp of the manifold. Wires of the lambda sensor or cooling hoses might be close to the clamp. Please watch out and don’t damage these parts.

It would be handy to loosen the clamp of the manifold first, before unscrewing the screws of the rear swing arm, which fix the exhaust body.

Please watch out: when unscrewing the last screw, the exhaust might fall down. You can now pull the exhaust from the manifold.
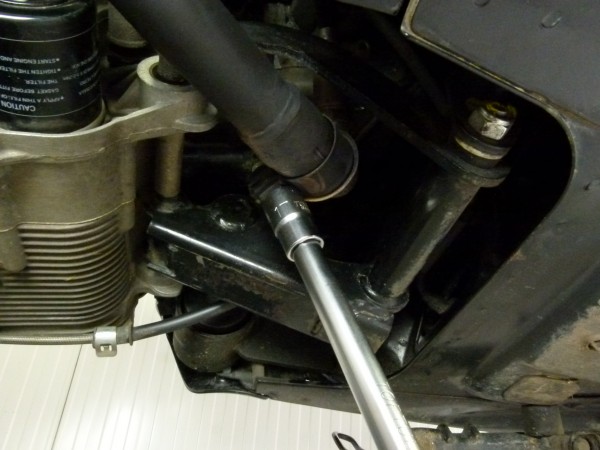
GTS shock35

Original Piaggio exhausts have a graphite gasket between exhaust and manifold. This gasket is sensitive to mechanic strains and should be replaced in case of visible damage.
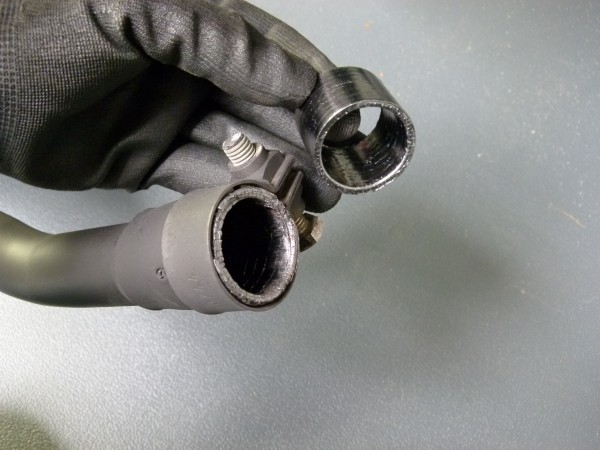
08.01.2016 402

In order to remove the shock absorber from the frame, you have to remove the helmet box and the cover of the seat lock.

You can simply lift the helmet box.

Four screws fix the back cover to the vehicle.
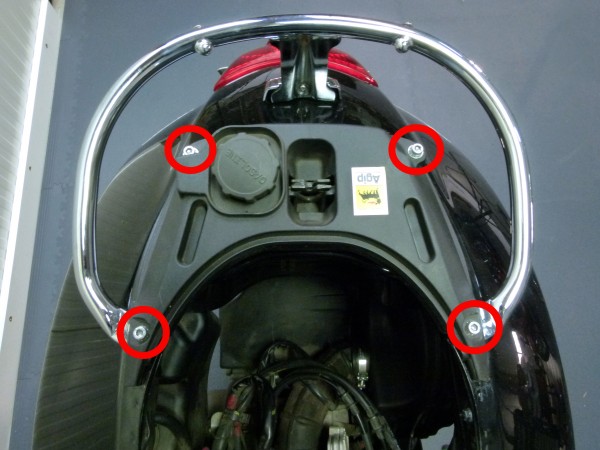
08.01.2016 328

Once you removed the screws, you only need to take off the cover of the tank cap.

Just in case, put the cover immediately back on the fuel filler.

You will find the upper fixation points of the two shock absorbers on the right and on the left of the seat lock. Please check the secure stand of your Vespa, before removing them. The front wheel should be blocked and should touch the ground.
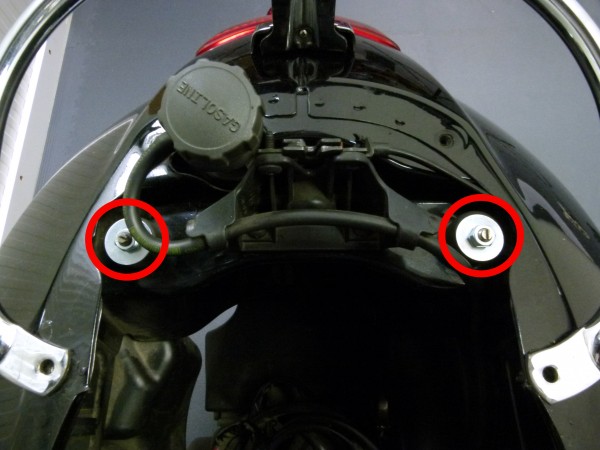
08.01.2016 336

Loosening the two upper fix points of the shock absorber will cause the engine to lower down. So please watch the shims and silent rubbers.

After removing the nut you can simply pull the shock absorber from the bolt of the swing arm. Pull downwards out of the frame.

You will find another silent rubber on the shock absorber. After a short -positive- check, it can be reused. 08.01.2016 367
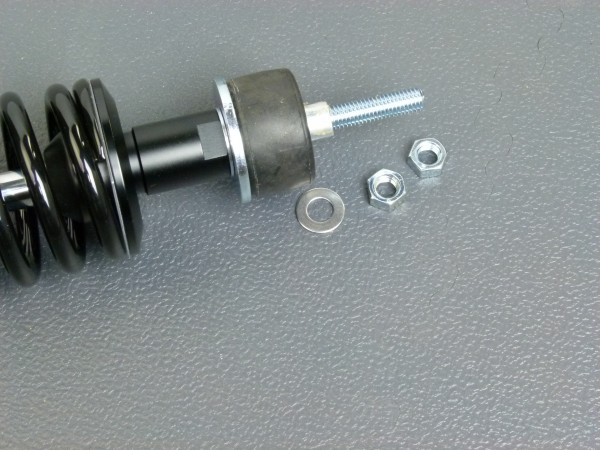
When removing the left shock absorber you have to watch out for the two bushes of the lower mount.
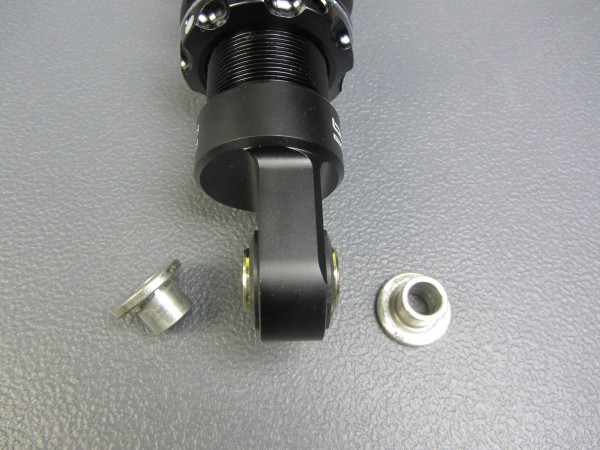
Lightswitch 564

Place these two bushes in the eye of the BGM shock absorber. These two bushes are obligatory for a safe installation of the left shock absorber.

Watch out for the correct alignment of the lower mounts.

When watching from behind in direction of travel, the mounts are placed to the right at both absorbers. LH shock Vespa GTS
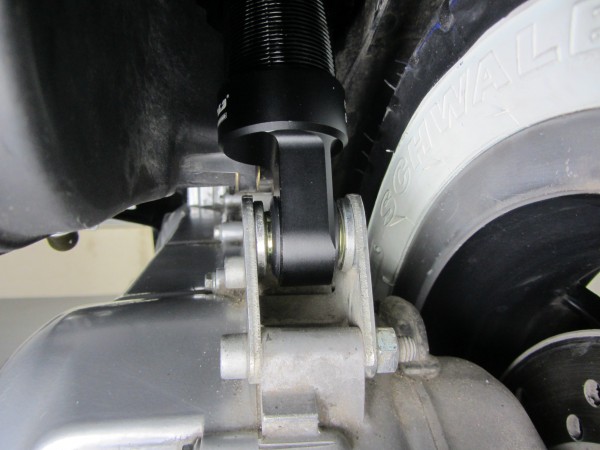
The sequence of installation remains the same for the upper mount. The silent rubber is followed by the large shim. Now secure the absorber with the two included nuts.
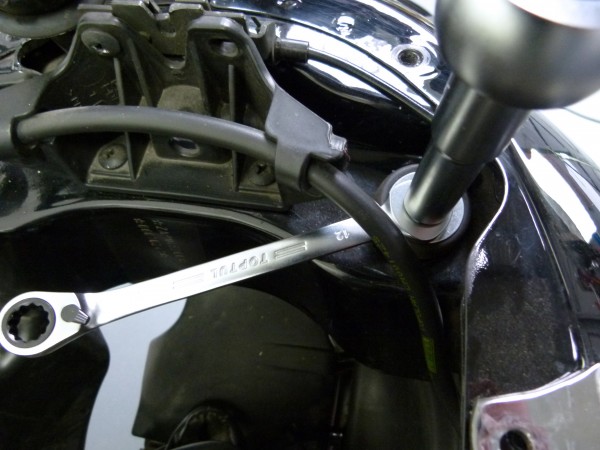
08.01.2016 371

Once you reassembled the cover of the seat lock, helmet box, exhaust and air filter box, you may start with test rides for your suspension.

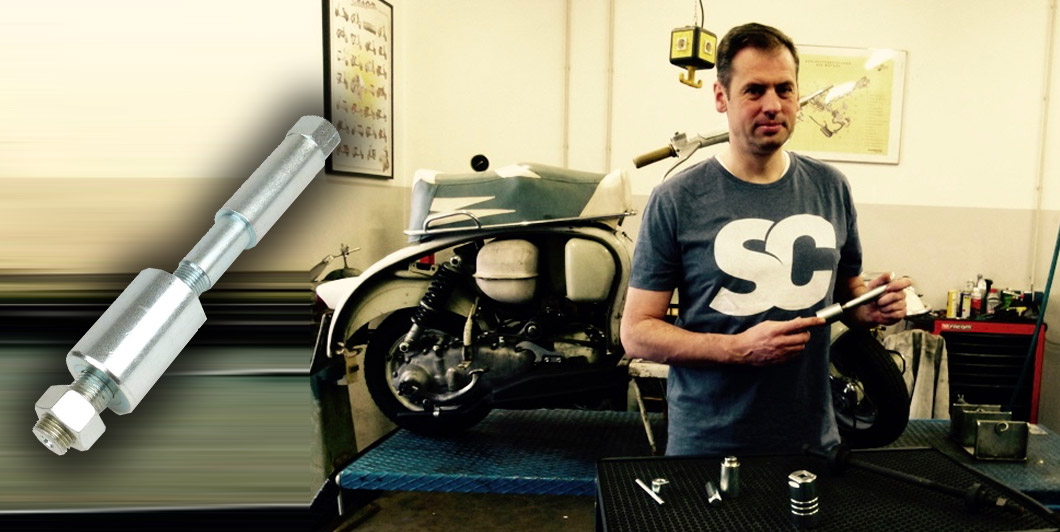
Primary drive special tool for Smallframe

Add-ons like the right tools will simplify your work, won’t damage the material and won’t cause stress. We have a wide range of tools on offer for you. Starting with a simple feeler gauge ending with equipped tool trolleys.

To rebuild the entire engine of a Vespa scooter, you will need many things, for instance special tools. Handy tools like our auxiliary stand, assembly aids or our Multitool enhance fun while repairing or maintaining your scooter.

Non-damaging assembly

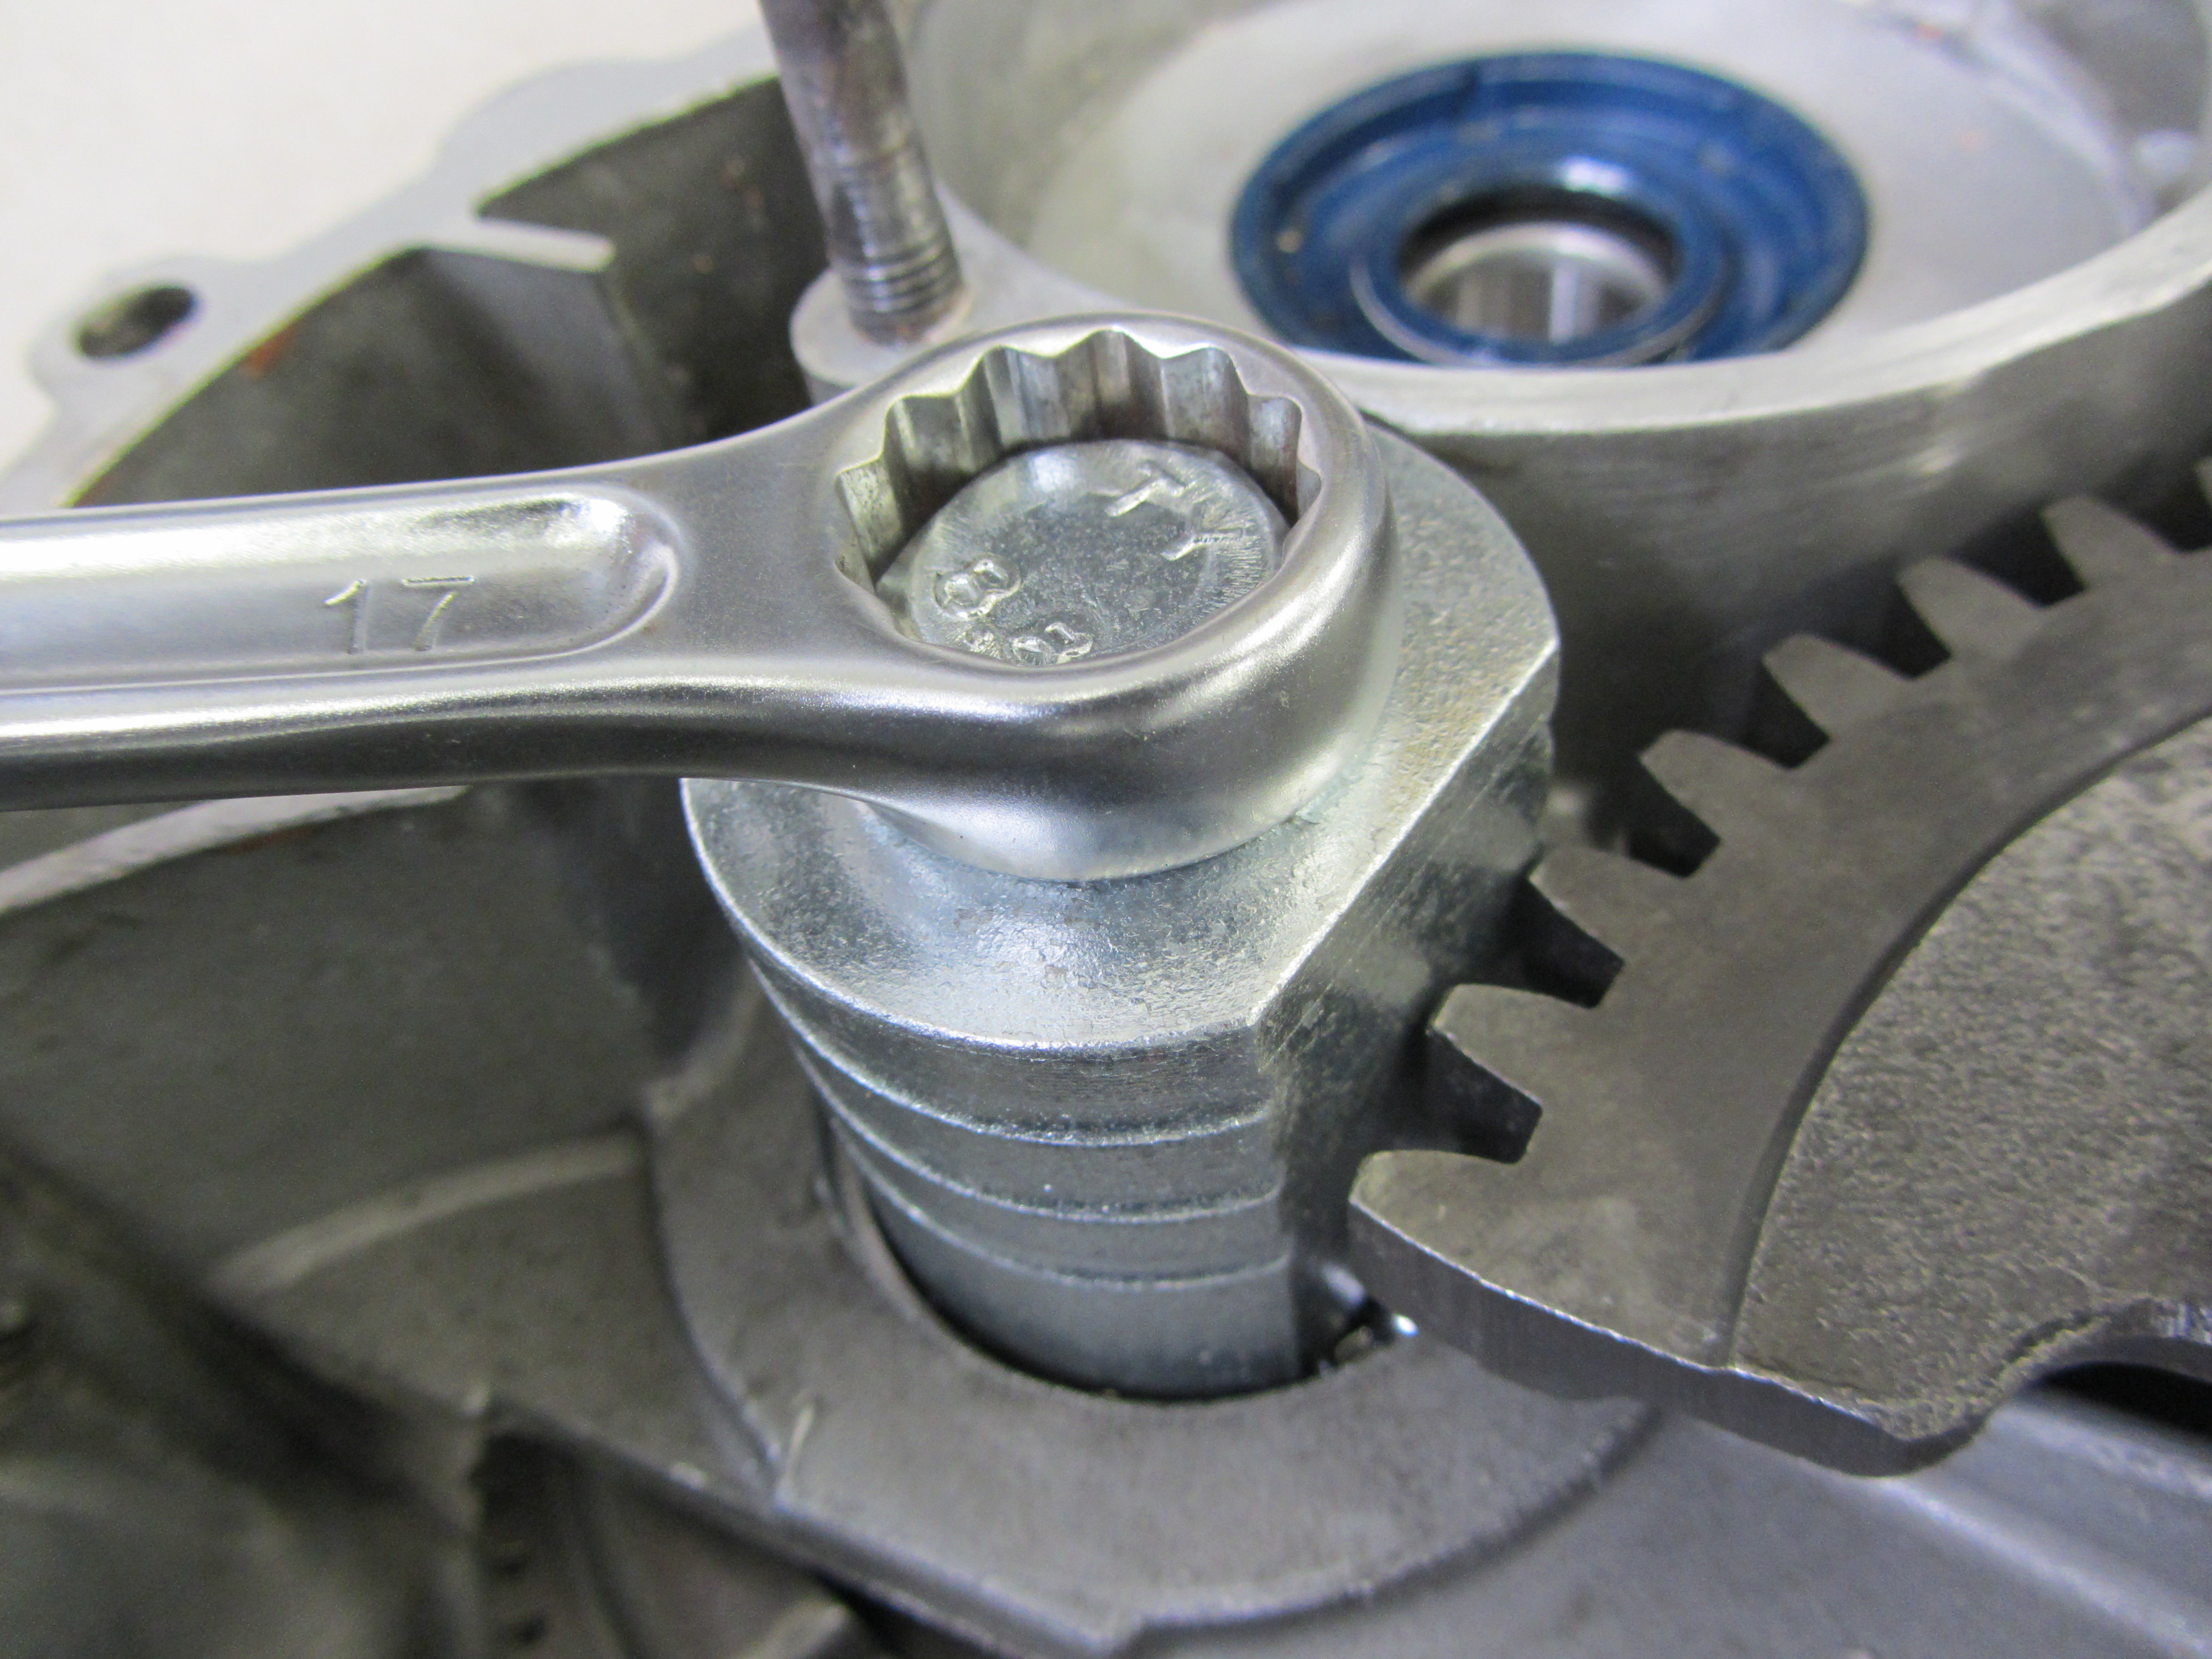
The mounting tool for primary drive wheels by BGM makes it possible to draw the large primary drive wheel into its bearing seat without causing any damage. It works on any Smallframe Vespa. The bushing of the assembly aid rests on the inner ring of the bearing only, which means that there won’t be any pressure on the sensitive bearing surface, the bearing itself or engine casing.

06.01.2016 021

The tool was shaped in a way that there won’t be any pressure on sensitive parts like the bushing made of gun metal or bearing of the primary drive wheel and the bearing seat of the 16005 in the engine casing.

06.01.2016 019

06.01.2016 005

Safe and easy handling

The mounting tool is safely and easily handled. Therefore it is practically impossible to damage engine casing, primary drive wheel or bearing during assembly.

Suitable for any primary drive of classic Smallframe models:

  • Vespa V50, V50N, V50L, V50R
  • Vespa PK50, PK50S, PK50XL, PK50XL2
  • Vespa V125, PV125, ET3
  • Vespa PK125, PK125S, PK125XL, PK125XL2
Buy tool for Vespa primary drive here


Individual gift ideas for scooterists by the Scooter Center team

Name: Friedemann

vespa-spezialwerkzeug-friedemann

How long have you been working for Scooter Center:

For half a year

What is your task at Scooter Center:

I work somewhat everywhere. I focus on IT, mainly interfaces and data streams. In terms of technology I clearly prefer classic Vespas.

What’s your relation to scooters:

My first vehicle was a Vespa. At the age of 18 I bought my first PX. Then the first Malossi cylinder lasted for about 2 days…
This scooter is still with me, but I have added another dozen geared scooters to my fleet. I spend a lot of time with time-consuming restorations and am always on the hunt for technical improvement. There is less and less time every year, but it’s sufficient for 2-3 meetings or runs per year.

Gift idea for scooterists:

Vespa special tools

Why:

When possible I use special tools to facilitate work and more importantly, to not damage anything while working. It’s an investment that always pays off.
I have not been able to decide for a clear preference, I therefore recommend several tools:

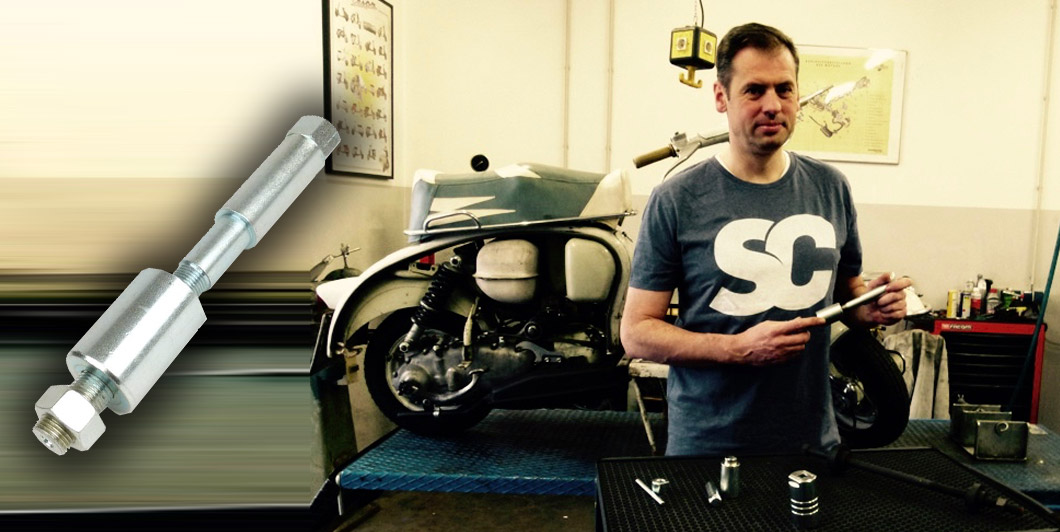
On the photo in my hand is: 7675207
Equipment on the tool trolley from left to right: BGM7997TL, BGM7912TL, BGM7901TL, BGM7999TL, 1800024

Mounting / dismantling tool for swingarm bearing needle bearing HK 1816 (18x24x16mm) -VESPA- Vespa V50, V90, SS50, SS90, PV125, ET3

Part no. 7675207

1

Crankshaft drive side pulling tool -BGM PRO- Vespa PX, Cosa, T5, Rally, Sprint, GT, GTR, Super, GL, VNA, VNB, VBA, VBB, GS160, SS180

Part no. BGM7997TL

2

Punch for roller bearing auxiliary shaft -BGM PRO- Vespa GS160 / GS4 (VSB1T), SS180 (VSC1T)

Part no. BGM7912TL

3

Mounting tool inner needle roller bearing front hub back plate -BGM PRO (made in Germany) for HK2212 (22x28x12mm)- Vespa PX (1982-), T5, Cosa, PK S, PK XL

Part no. BGM7901TL

4

Steering nut tool -BGM PRO- Vespa PX, T5, Cosa, Sprint, Rally, TS, GT, GTR, Super, GS, V50, PV, ET3, PK S, PK XL, Vespa ET2, ET4, GT, GTS, GTL, GTV, LX, LXV, LT, S, 946, Primavera , Sprint, Piaggio Beverly ,…

Part no. BGM7999TL

5

Steering nut tool -VESPA- up to 380mm distance between shells

Part no. 1800024

6

Vespa special tools
When possible I use special tools to facilitate work and more importantly, to not damage anything while working. It’s an investment that always pays off.
geschenkidee-vespa-spezial-werkzeug

Vespa World Days 2017 Website

Great Vespa events are often foreshadowed.

First the Scooter Center Customshow in Cologne in April: http://www.scootershow.de

Followed by the Vespa World Days 2016 in France in summer.

And the website of the VWD in the following year, the Vespa World Days 2017 in Celle / Germany has currently been put online: http://www.vespaworlddays2017.com

It is stated on the website:

Welcome to Celle, where Germany’s Vespaheart beats. A small town with a big heart and a group of passionate Vespa drivers. Look forward to four days of Vespa fun, great tours into the local heathlands and a chance to catch up with other like-minded Vespisti.
See you in Celle – 22nd to 25th June 2017Vespa Club Celle

We are already looking forward to it!

VWD 2017

Here you will find every spare part for Vespa and other scooters

To some it is carburetor, to others carbureter, and to yet someone else it may be carburator, carburettor or carburetter. The search engine of our Scootershop tries to eliminate this malice. Which term do you use? No matter what terms are used by others or if you don’t know the correct term: rollerteile explosionszeichnungen

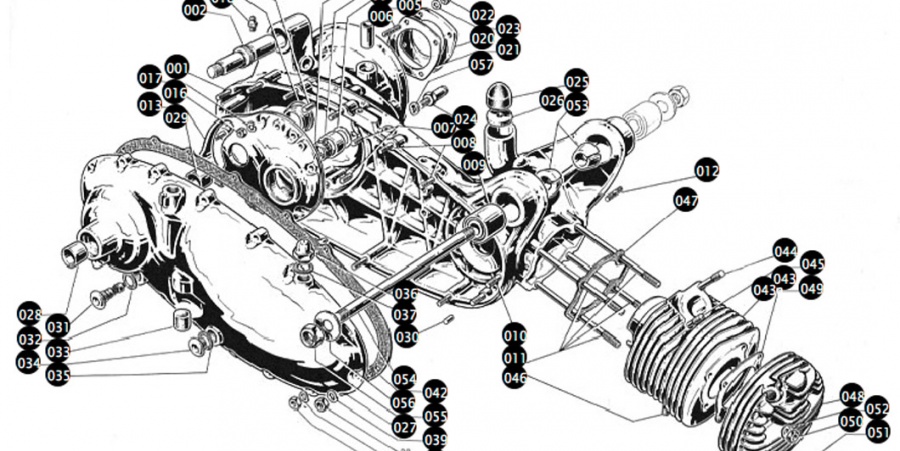
Simple search for spare parts with the help of exploded views

Our spare part finder makes it even easier: optic part navigation in our exploded views helps you find all the spare parts for your scooter you need.

Try it right away. Choose your scooter model here or check all exploded views out.

Adjust ignition of a Vespa using “the Whale”

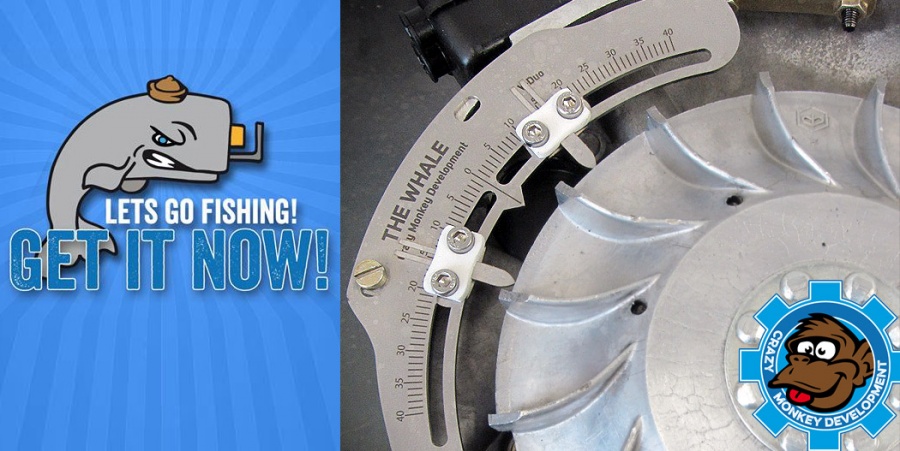
The Whale is a tool, which helps you, to precisely adjust the ignition of your Vespa. “The Whale V-Duo”, a calliper, is suitable for Vespa largeframe and smallframe. A suitable tool for Lambretta is being developed.

The calliper is made of two parts and comes with measuring tips that can freely be moved and an effective measuring range of about 40° each. To easily define the ignition point for static and variable ignition timing.

  • Suitable for existing fixation points at the flywheel cover
  • Set 0°-position to perfectly mark the top death centre
  • Stainless steel with resistant industrial engraving
BUY THE WHALE HERE

Video instructions adjusting Vespa ignition

This is the ultimate tutorial (in German) by Jörg Pien and Kevin Wintergrün (PX Garage Nienburg). They demonstrate three ways of adjusting the ignition of your Vespa with “The Whale”, the new ignition-tool for Vespa.

PDF instructions adjusting Vespa ignition

As an alternative you can download the instructions by Jörg Pien here:

CMD_Anleitung_The_Whale_V-Duo_DE (in German)

BUY THE WHALE HERE
Thank you CMD, Jörg Pien and Kevin Wintergrün (PX Garage Nienburg)

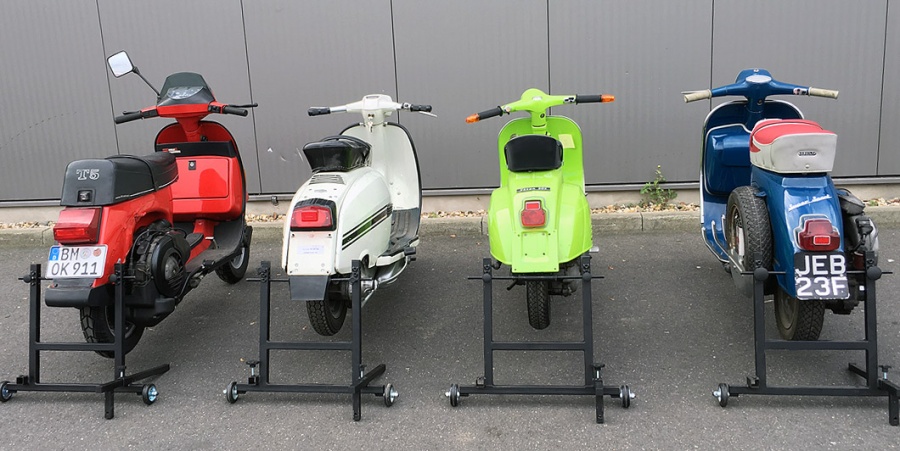
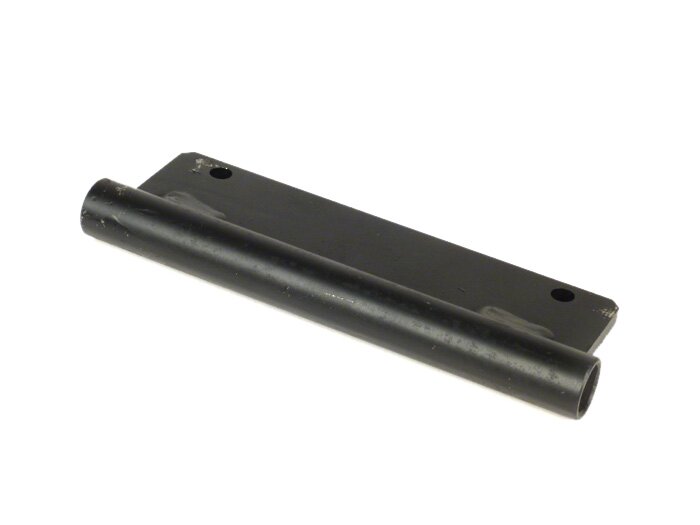
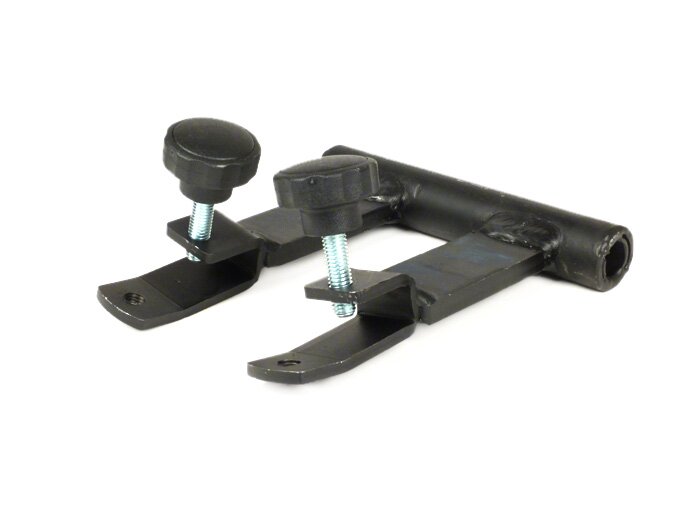
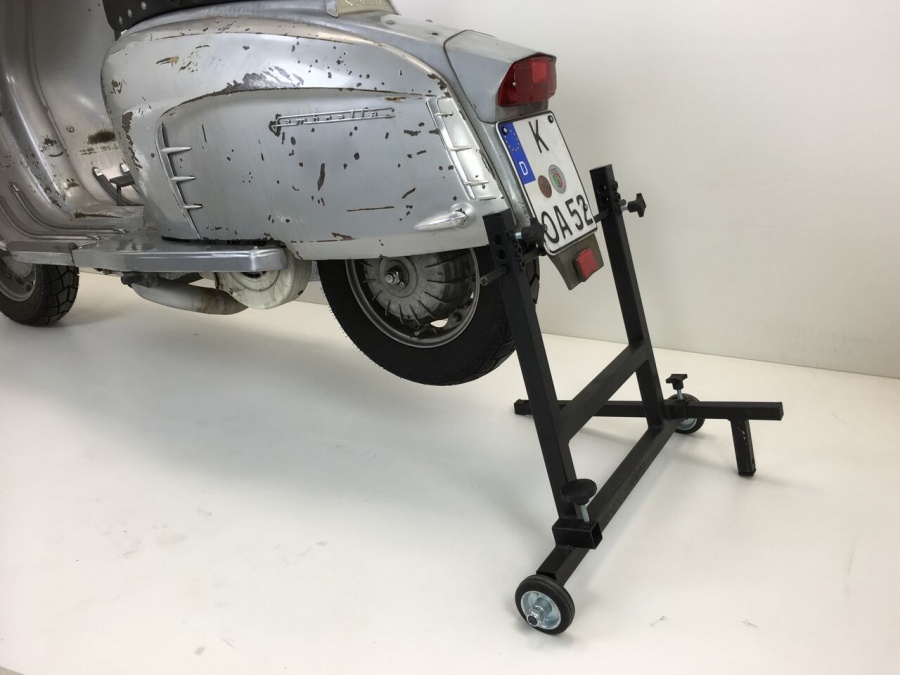
Scooter auxiliary stand Affordable adaptors individually available for Lambretta and Vespa Smallframe

Additional brackets for the auxiliary stand for Vespa V2 -PX GARAGE Nienburg- are now available for Vespa Smallframe (V50 / PV / ET3) and Lambretta (S3).

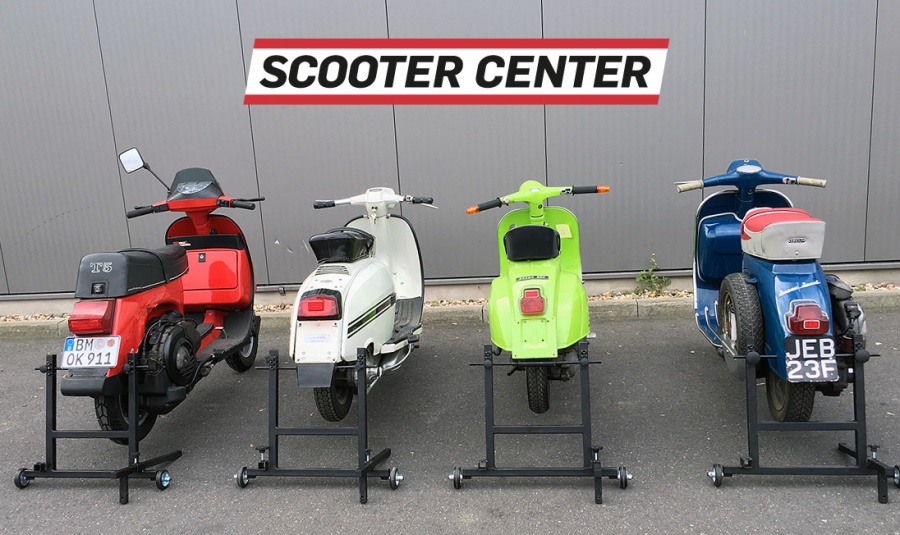
Scooter auxiliary stand for Vespa Largefame, Smallframe and Lambretta
Offering reliable stability and flexible working at your scooter. You need the following:

Quick and easy assembly – reliable stability

The additional brackets for the auxiliary stand are affordable and assembled easily, quickly and safely. Adapter MOntageständer Lambretta 3331044LS3 Halter Montageständer Vespa Smallframe 3331044VSF(

Bracket Vespa V50

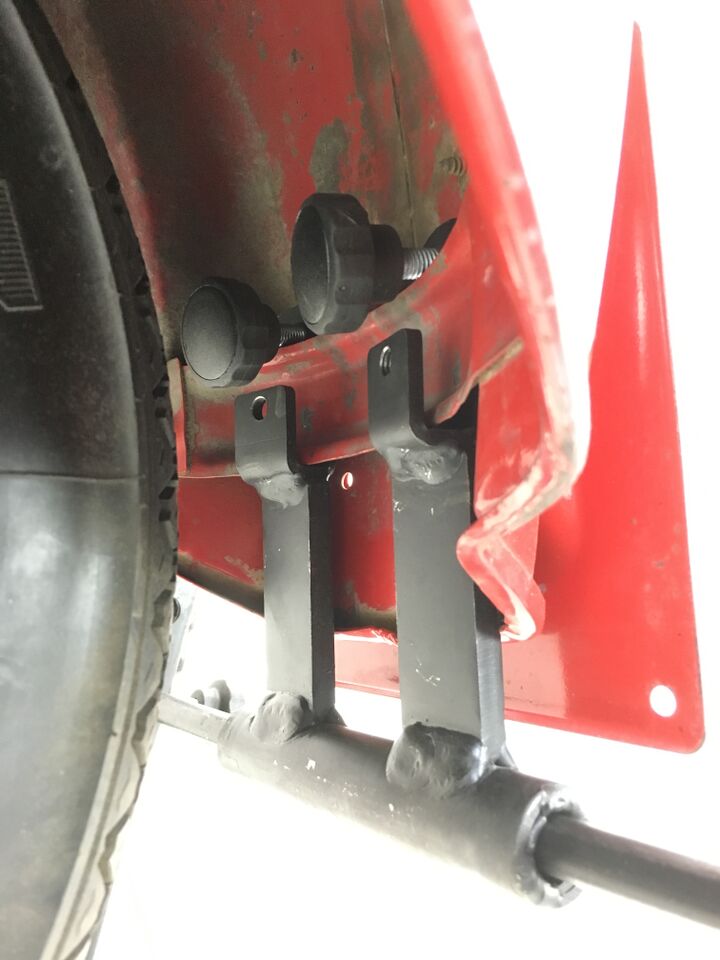
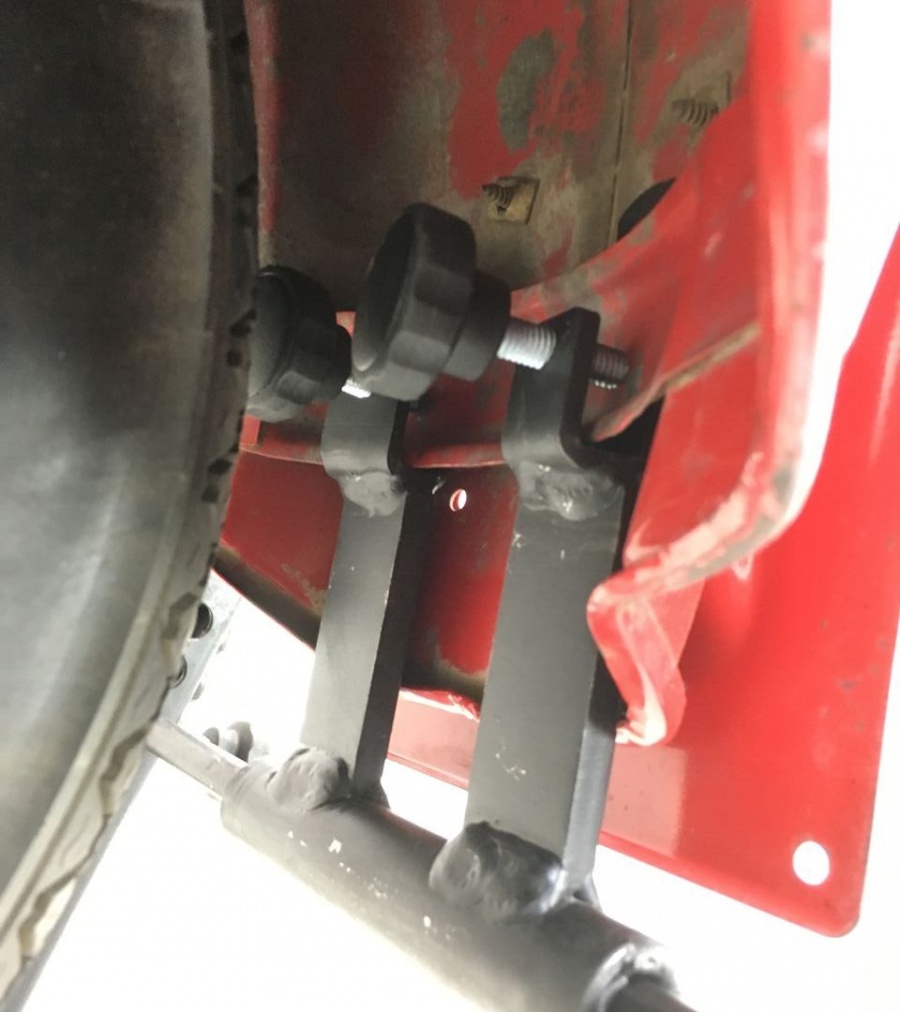
The bracket is easy to use for Vespa Smallframe V50 / Primavera / ET3 etc. and prevents your scooter from tipping over unintended. Halter V50_2

Another option is to fasten the bracket to the frame strut. This probably is the best choice for works that demand more force. Halter V50klemmung

Adaptor for Lambretta series 3

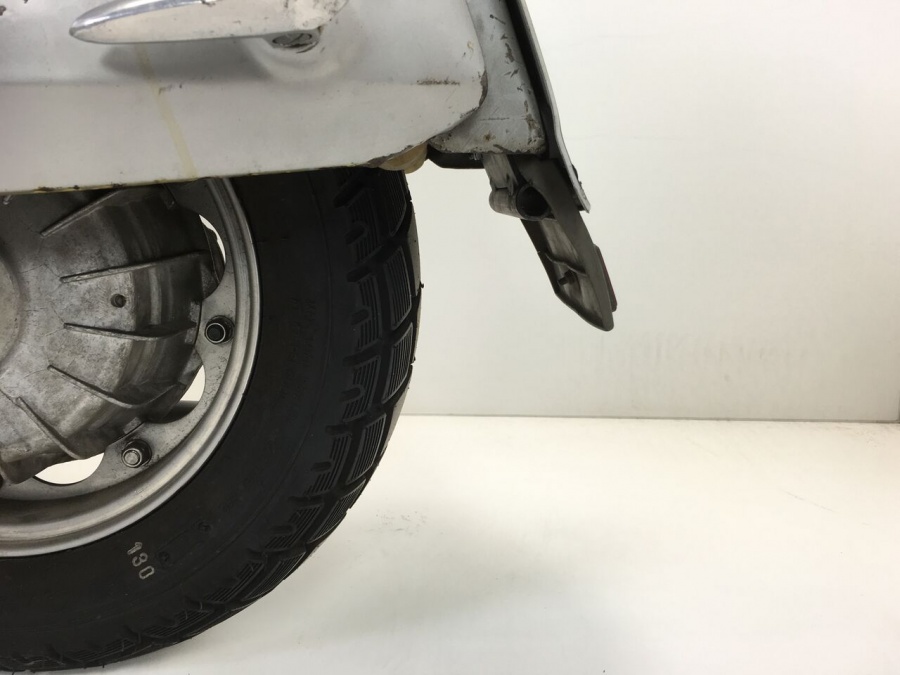
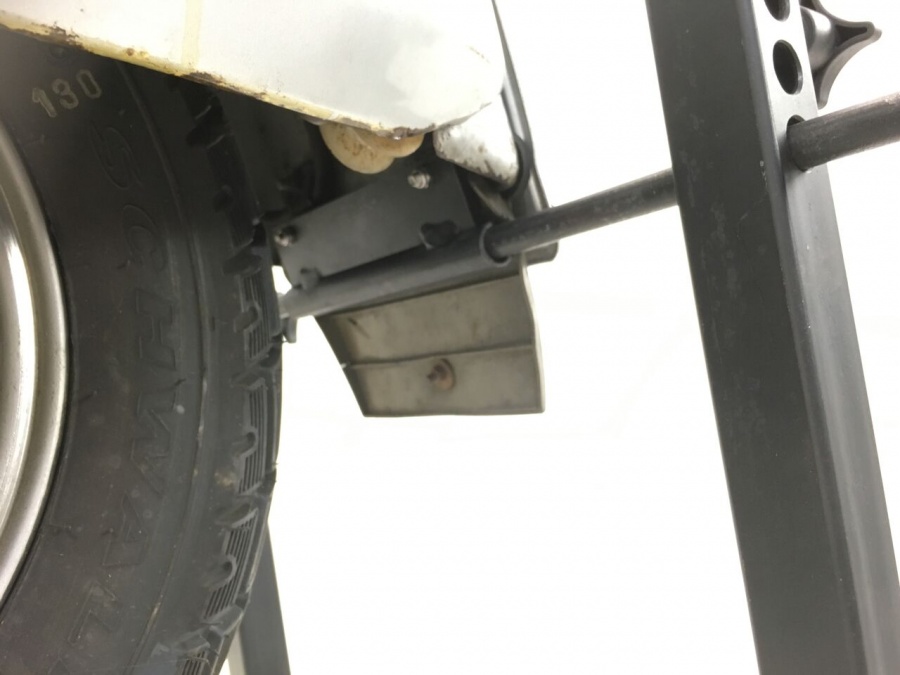
The bracket for the rear end of the Lambretta is rather small, which means that the bracket can remain attached to the vehicle. Halter Lambretta

The frame hides the bracket well.

Halter Lambretta_3

The auxiliary stand and a tight screwing guarantee reliable stability for your Lambretta.

Due to a lifted rear, even works on foot board or exhaust turn out to be easier. Halter Lambretta_2

Thanks to the additional bracket for Vespa Smallframe and Lambretta, you do not need to modify the auxiliary stand and you can still use it for almost any classic scooter at any time. Günstiger Montagständer für Motoroller

New tool for ignition adjustments of a Vespa

The calliper by CMD allows adjusting the ignition of your Vespa in only a few steps. Messschieber für Zündungseinstellung -CMD The Whale V-Duo- Vespa Largeframe und Smallframe

We closely cooperate with CMD. Therefore we suggested to design the current version of the Whale with adjustable tips, because it always took a little while to exchange the tips of the calliper.

Now you can adjust this great tool to almost any possible combination of engine casing and flywheel. Der Wal CMDTW0010 010

Adjustable tips of the calliper for any Vespa engine

Due to adjustable tips it is now possible, to quickly adapt the calliper to various conditions.

BUY HERE

Suitable for Vespa smallframe (PK, V50, Primavera) and largeframe, (PX, Rally, Sprint, VNB,…)

Be it an e-start flywheel of a PX

Der Wal CMDTW0010 002

or the other extreme; a milled flywheel of a PK with an e-start engine casing – Der Wal CMDTW0010 006

The new, adjustable tips of the calliper perfectly suit this cause. Der Wal CMDTW0010 011

BUY HERE

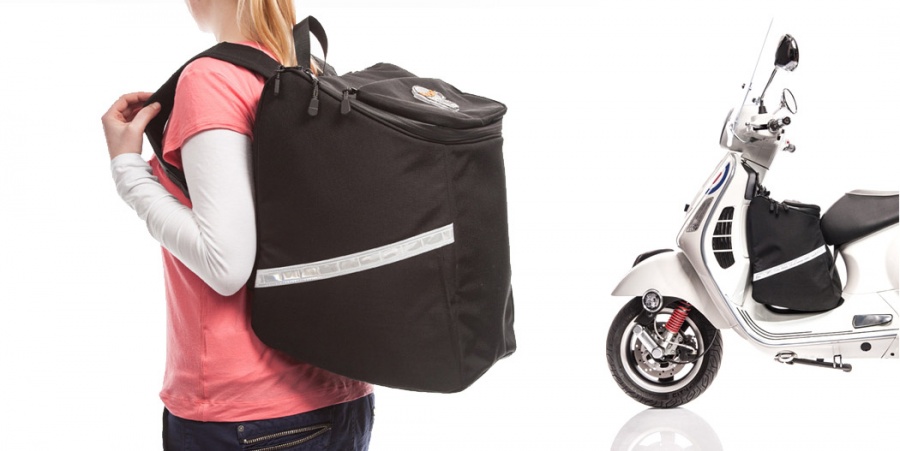
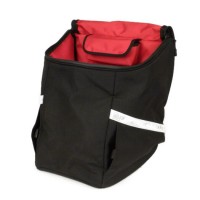
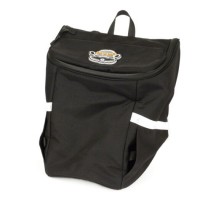
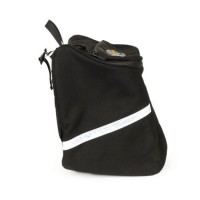
Leg shield bag -SEA’N’SAND T-Bag-

Storage space for long tours!

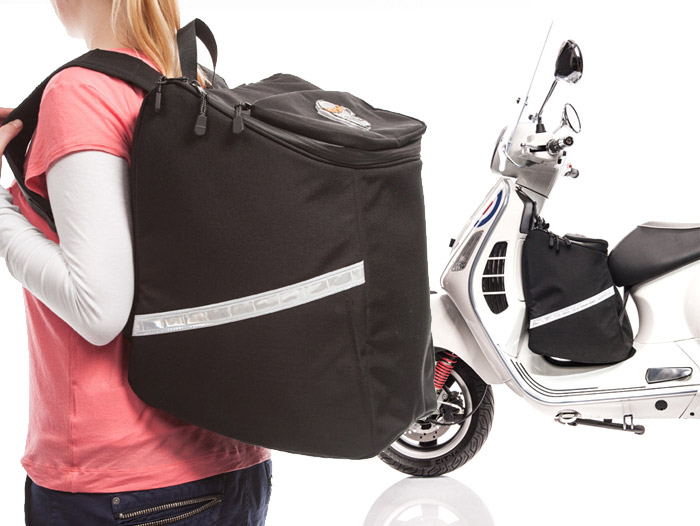
The foot well bag by Sea’n’Sand, a German company, offers exactly that. The travel bag for Vespa GT, GTL, GTV, GTS is available in black.

Handy bag for Vespa

The bag is attached to the leg shield and sits on the foot board of the Vespa. The handy bag can also be used as backpack. praktische Vespa Tasche

Video of the bag for Vespa GTS

For Sea’n’Sand it all started with a bag for modern Vespa GTS and Co. A made-to-measure foot well bag for current Vespa GTS, GT, GTV etc.

In the meantime the bag is also available for classic Vespa models Vespa PX. Functionality and quality remain the same, measures vary. Watch the video of the Vespa leg shield bag here:

ORDER Vespa bag HERE

Pictures Vespa bag

MADE-TO-MEASURE

The bag for GTS models and its variants GT/GTL was made-to-measure using high quality Cordura nylon. Vast 28 litres of storage volume mean a large luggage compartment, which can be perfectly used from the top.

WEATHER-PROOF & STURDY

The patented Cordura nylon is extremely wear resistant and sturdy. It is water-repellent and dries quickly. Zips are watertight and offer an overall protection of weather.

MULTI FUNCTIONAL

The bag can also be used as bag pack. This means that you can easily take valuable objects with you.

SAFE

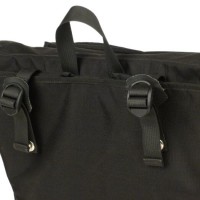
There are four attach points, which grant a tight attachment of the bag to the vehicle at high speed, too. A standard luggage hook and the seat nose, as well as the supplied LOXX screws are used to attach the bag. These replace the screws of the inspection cover. Their spherical head is also part of the smart attaching system..

HANDY

You can still easily open the seat with the bag attached. Filling up the gas tank is possible with the bag attached. A width of 39cm is also no problem. There is sufficient space for your feet, also on a long tour.

Beste Vespa Tasche

STORAGE SPACE

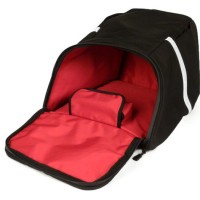
The luggage compartment has a volume of 28 litres and is equipped with nice lining, which makes packing quick and easy without objects being caught. An additional compartment for odds and ends is perfect for mobile phones, a separate glasses case with Velcro keeps sunglasses easy at hand.

ATTACHING

The bag is easily attached. You only need a so-called torx screwdriver size T25 (often part of a car toolbox) and a fork-wrench spanner or a ring wrench in wrench size 9.

QUALITY

The bag is made of Cordura, which is in terms of outdoor quality beyond all doubt. Combined with fine and neat processing this bag offers a real added value, since it can be used for years.

CONCLUSION

First choice for tourers and others. The Sea’n’Sand foot well bag will most certainly be the reason to do the next shopping with your scooter and not the car!

ORDER Vespa bag HERE

A somewhat different calendar for scooterists

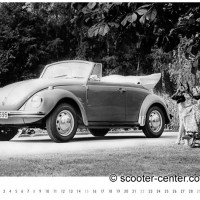
Today we are ready to broaden our horizon – but not too much: Many scooterists had one themselves and if not, parents, uncles, aunts or brothers owned one: a VW Beetle and the VW Bulli, the handiest car worldwide.

The dream of mobility and independence turned the VW Beetle into a post war symbol. But this is not the only feature it shares with classic scooters like Vespa and Lambretta.

So this is a wonderful gift idea for scooterists and every fan of VW Beetle and VW Bulli: two beautiful calendars are now part of our product range:

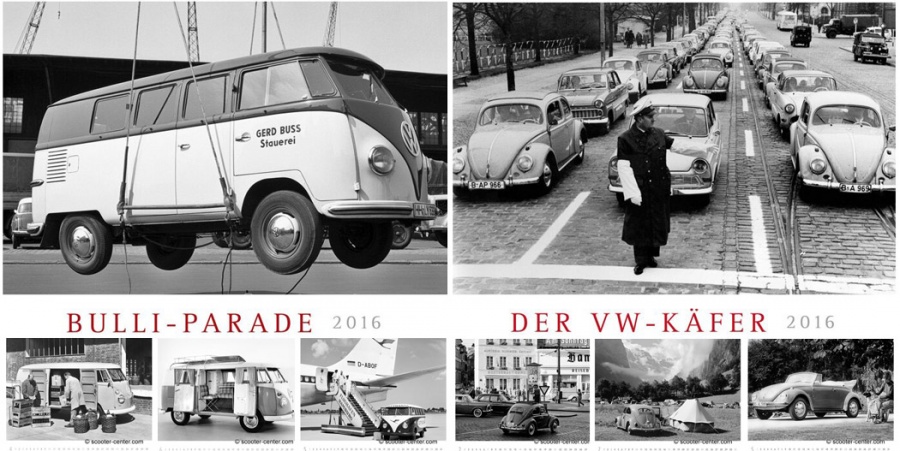
Calendar -Der VW Käfer 2016-

1st edition, 13 sheets with B/W-photos, explanations, size 56 x 46.2 cm, spiral binding, Delius Klasing

No road too long or too steep, its opposed cylinder type engine beneath the tailgate did hard work, almost without complaints. It is no surprise that it turned into a marathon machine and had a great reputation.

This car was developed by Ferdinand Porsche, built in Germany and developed into the first real global car. And the Beetle always cut a fine figure. Those who didn’t own one themselves, loved to be a passenger.

Buy VW Beetle calendar here

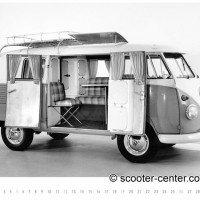
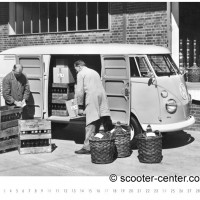
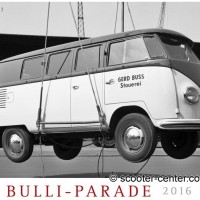
Calendar -Bulli-Parade 2016-

1st edition, 13 sheets with B/W-photos, explanations, size 56 x 46.2 cm, spiral binding, Delius Klasing

This calendar celebrates a classic style icon: the VW Bulli. Until today this van and transporter legend has a large fan community. Its universal concept and wide range of types turned this transporter for people and goods into some kind of “family member” of their owners. Being used by mail services, police, fire brigade or as ambulance are best examples to demonstrate that almost anything was possible, just depending on its equipment.

The large fan community of the VW van wouldn’t want to miss their Bulli in automotive day to day live. This calendar is for them and depicts an extraordinary parade of this classic: vehicles of the first generation and its drivers on and next to the street, in free time or while working.

Buy VW Bulli calendar her

Of course we also offer scooter calendars.

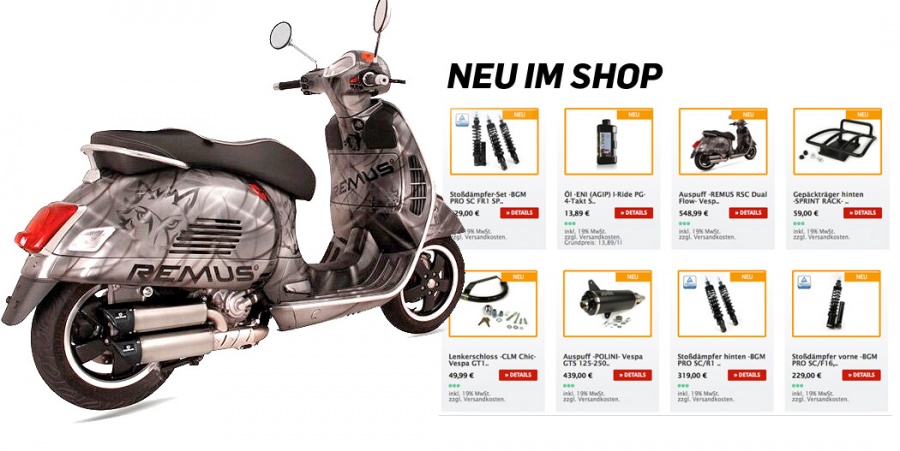
New products for new Modern Vespa GTS and Co

The following modern Vespa tuning products are brand new in our Scooter Center Scootershop:

new products 1

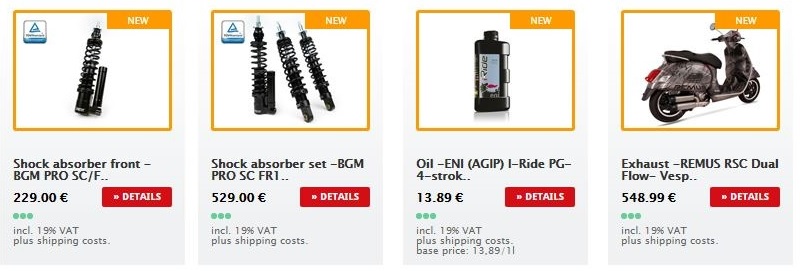
new products 2

The highlights are:

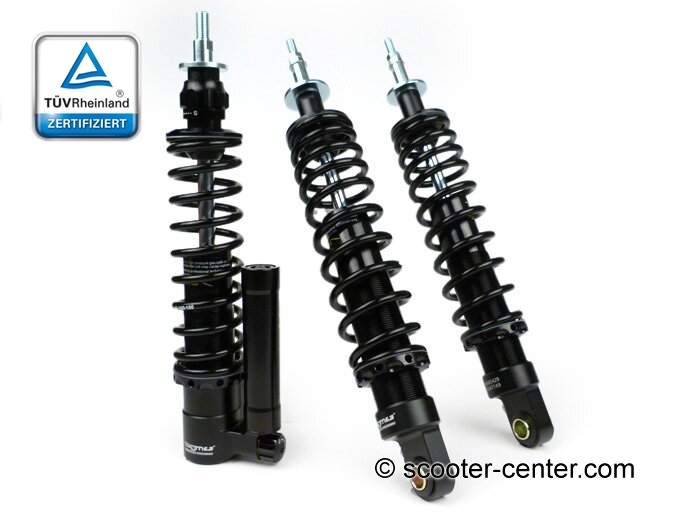
Modern Vespa shock absorber with TÜV registration

Modern Vespa Fahrwerk Tuning BGM7788BKTS

HighEnd Vespa suspension by BGM with TÜV registration / e-pass for Vespa GTS and Co. Available individually or as an affordable set:

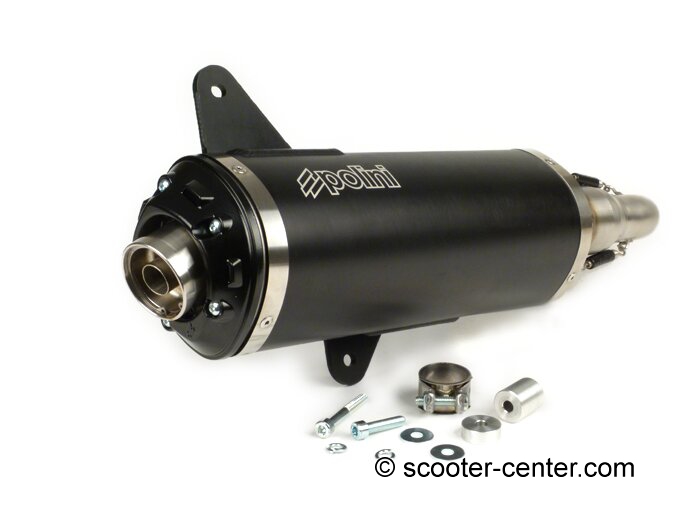
Polini exhaust Vespa GTS & GTV with registration

Polini Auspuff Modern Vespa P1900041

Polini offers a new sports exhaust for Vespa, which is a great alternative to well known candidates.
The RX racing exhaust for Vespa by Malossi is produced by Arrow. And so is the exhaust by Polini, which is a guarantee for solid and fine processing. The outer shell of the exhaust is made of alloy with a matte and brushed surface and interior and manifold made of stainless steel.

When we visited Polini we were able to convince ourselves by the throaty sound and awesome looks of the new Vespa exhaust by Polini prior to delivery.

The DB-Killer insert is quickly (diss)assembled and only fastened by a locking ring.

Like almost any exhaust for GTS/GTV models, this exhaust is produced as so-called slip-on version, which means that the included manifold is easily fastened to the original outlet nozzle of the vehicle. The lambda sensor remains at its position and does not need to be touched in order to assemble the exhaust: easy and quick assembly

The exhaust by Polini for new Vespa models features an E(9) homologation for sound for the following vehicles:

  1. VESPA 125 GTS – M45 var.3 ver.0/1
  2. VESPA 250 GTS – M45 var.1 ver.0/1
  3. VESPA 250 GTV – M45 var.1 ver.2
  4. VESPA 300 GTS/GTV – M45 var.2 ver.0/2

Double exhaust for Vespa GTS and Co

Spectacular twin tube exhaust with twin muffler for Vespa GTS: Vespa exhaust Remus RSC Dual Flow.
This muffler for Vespa has an EC registration. However it is illegal to use it on public roads without a plug-in catalytic converter. Remus Vespa Auspuff Doppelauspuff 7674943RD1

Eni – high performance oil 4 stroke modern Vespa

modern-Vespa -4t Vespa Öl 3331359

Eni i-Ride PG 5W-40 is a 4 stroke engine oil with top synthetic technology by Eni. It was developed for 4 stroke high performance engines and may also be used in racing.

Quality feature:

Outstanding shear stability is one feature of this stay-ingrade oil, even after a long ride in tough conditions. The thermally stable synthetic base oil features an extremely low evaporation rate, which leads to a low consumption of oil.

The Eni Research & Development labs developed this special formula to grant highest performance in terms of detergents and dispersants, corrosion prevention, prevention of foam formation, oxidation stability and wear protection.

Areas of use:

Eni i-Ride PG 5W-40 is recommended, if you want high engine performance and a reliable lubricant film.

Specifications:

  • ACEA A3
  • API SL
  • Jaso MA
  • Jaso MA2
  • Piaggio-group

Replacement for Agip Formula Moto City Hi Tec 4T 5W-40 and Racing 4T 5W-40


Vespa Cylinder Pinasco 135cc

We would like to present two new Pinasco Zuera cylinders for Vespa V50, PK, Primavera, etc.

There are some novelties in the largeframe sector, such as:

And Pinasco is also offering two new cylinders for 125cc smallframe models.Pinasco Vespa-Zylinder Zuera

Both cylinders have been thoroughly tested, for instance on the very popular 24h of Zuera (Spain), which is why both cylinders have been named Zuera.

Reed valve direct intake and reed intake cylinders

The model with reed valve direct intake has the byname SRV 135, while the version with reed intake cylinder was named Zuera SS 135.

Today we will take a closer look at Pinasco SS135 .

21.09.2015 054

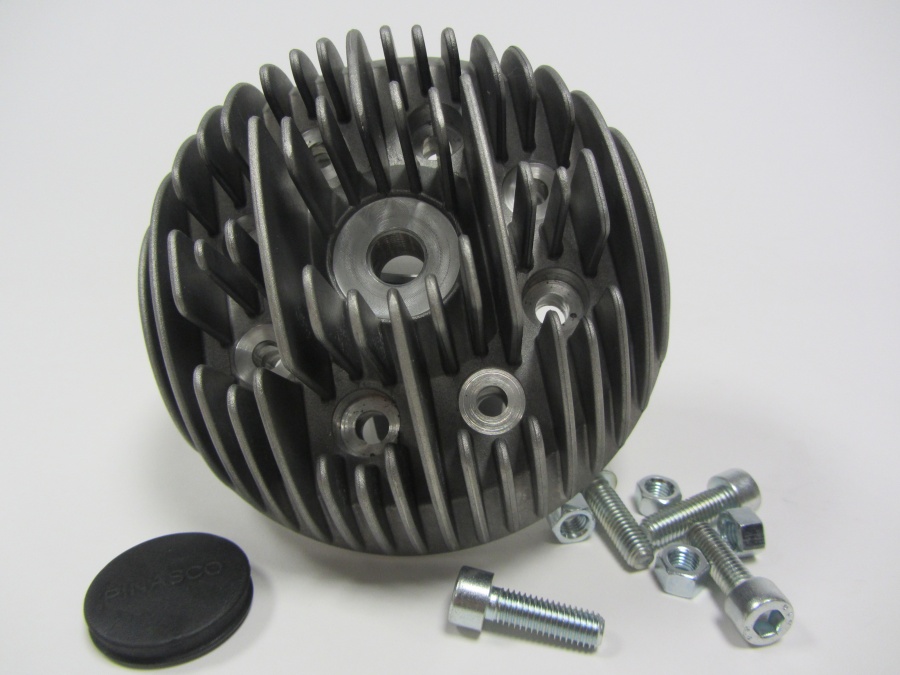
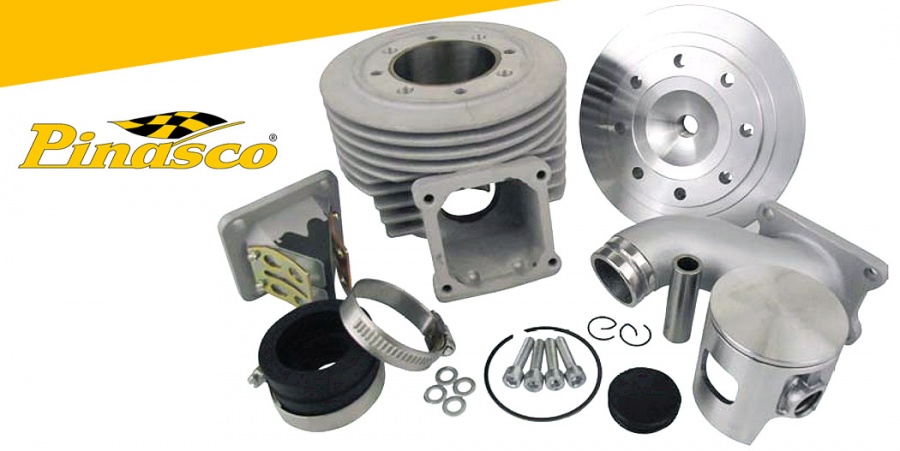
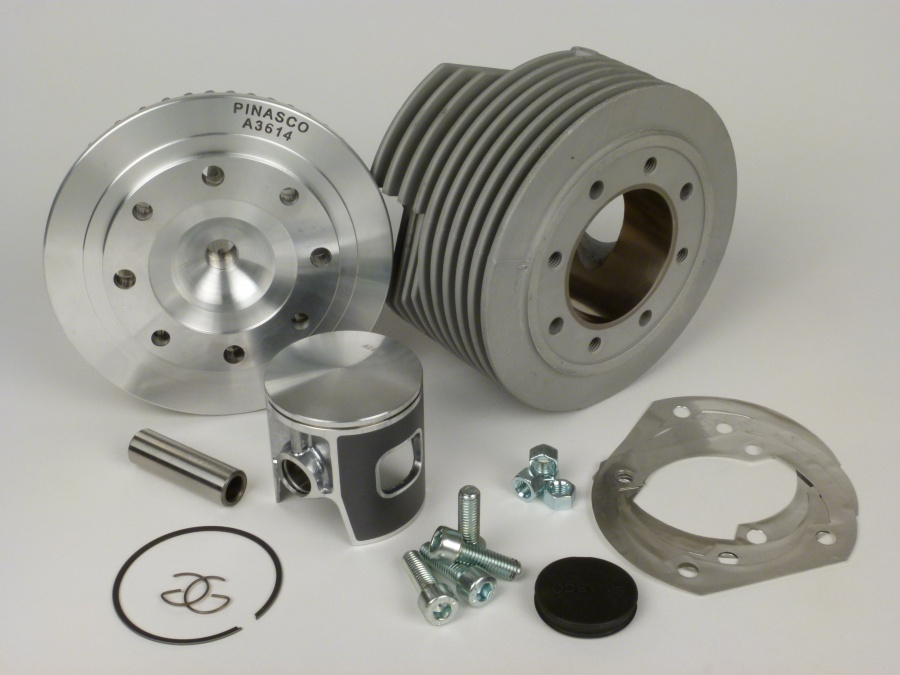
Delivered with

  • Cylinder and cylinder head
  • Piston, incl. gudgeon pin, piston ring and locks
  • Material to fasten cylinder head
  • Gasket set for cylinder base
  • Plug for cylinder cowling
Pinasco sports cylinder for Vespa smallframe
Cylinder -PINASCO Zuera SS 135cc- Vespa V50, PV125, ET3, PK50, PK80, PK125

  • Hole 57,5mm
  • Stroke 51mm
  • Cubic capacity 135cc
  • 5 transfers

Cylinder head

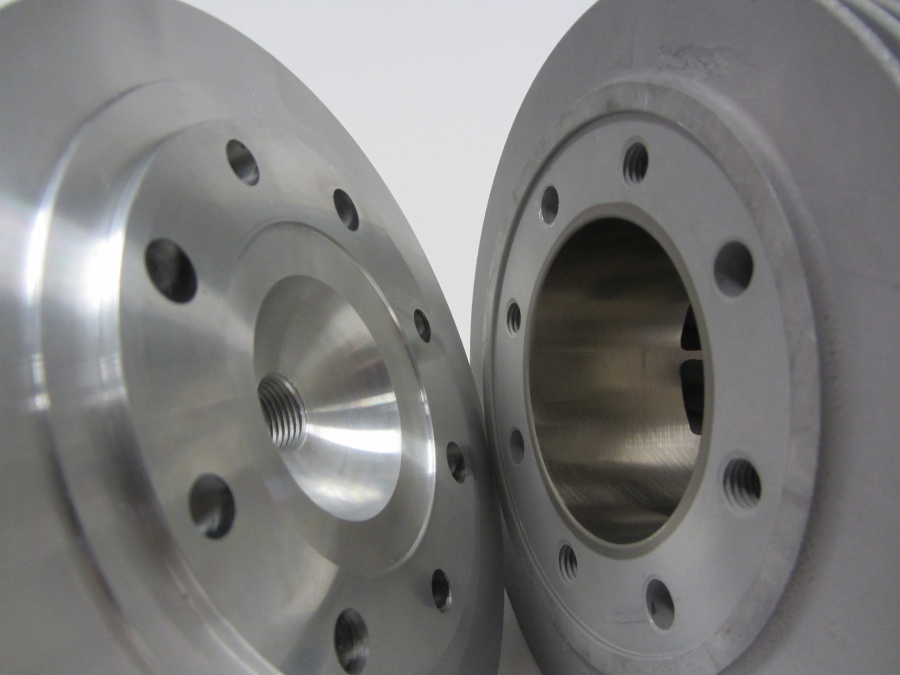
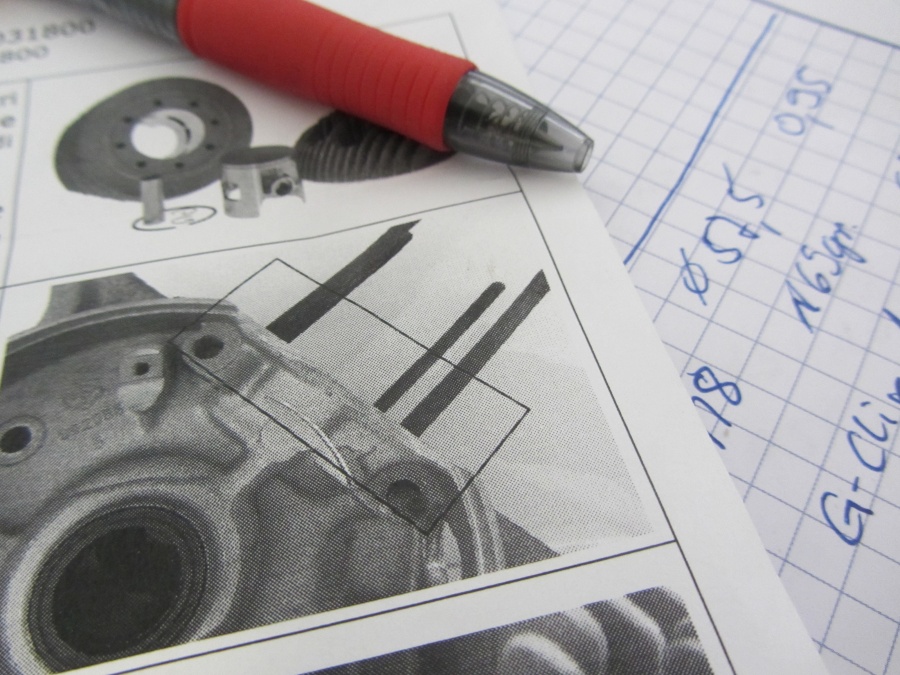
The cast cylinder head is rather massive. Your eyes first hit the processed bottom side. The combustion chamber in the centre of the ignition plug is about 1mm withdrawn. Following the sealing surface’s outer contour, the cylinder head is centred. A cylinder gasket is not planned. Because the cylinder head is screwed 8 times and the sealing surface is rather large, a reliable sealing should also be guaranteed without any additional sealing elements. Pinasco recommends a torque of 12Nm for cylinder studs and the additional M8x25 screws of the cylinder head.

Zuera 135SS (5)

Due to the central ignition plug, the original opening in the cylinder covering needs to be closed. Pinasco paid attention to this small detail and also supplies a fitting plug. You will need an ignition plug with long thread. You are using a NGK ignition plug? We recommend a B9ES. You want to use a Zuera 135SS and are an ambitious racer? We recommend a B10EG.

Zuera 135SS

Piston

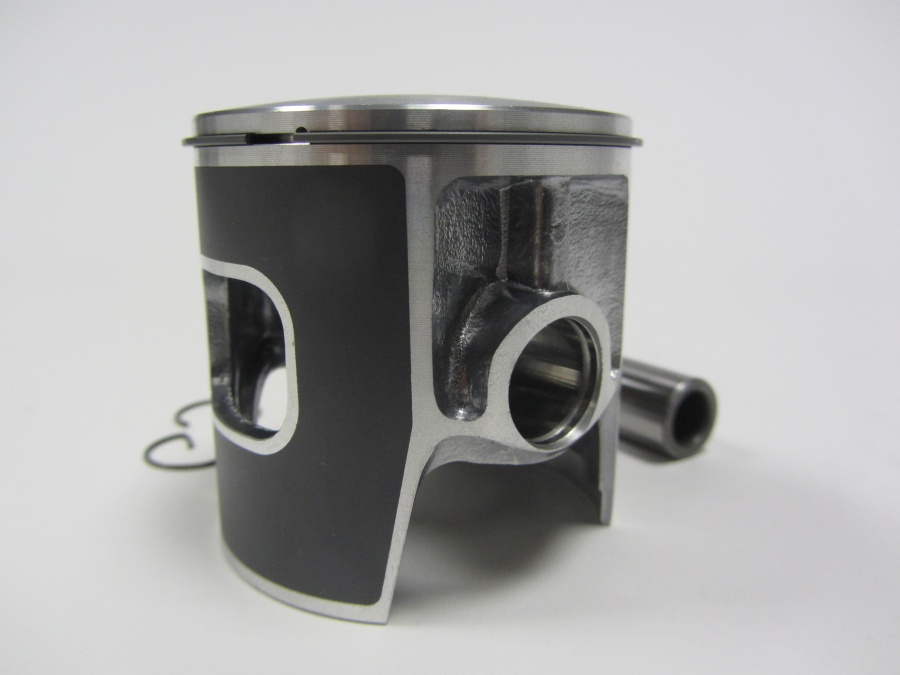
The forged piston is 169 g light. Pinasco equipped the piston with a 1mm rectangular piston ring and 1mm G-shaped locks.
The hint of a gas flow guide in the shape of a small, bevelled edge beneath the gudgeon pin is very cute.
Before it was modern to have an open contour at the sides, this little trick was often used for pistons with a long piston skirt.
The Zuera 135SS piston has an additional sliding coating, just like many modern cylinders.
Pinasco does not fool around with gudgeon pins. The thin walls of the bolt were meant to reduce its weight.

Zuera 135SS (1)

Cylinder

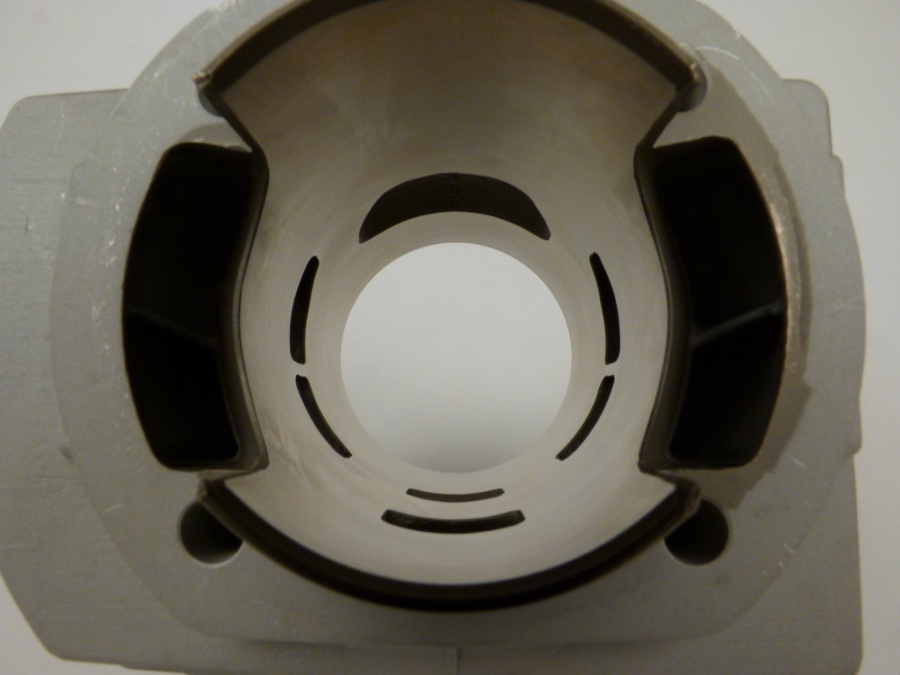
At first glance the design of the transfers in the cylinder highly resemble those of Polini Evolution. You will see the difference though, when taking a closer look. The angles of the entry surface are clearly different from one another.

The height of the outlet and transfers and an assumed deck height of 0mm lead to a sporty trigger delay angle of 125°/185°.

The openings of the transfers in the cylinder base are already open, which is a variation to other cylinders.
The cylinder base has a diameter of 61.33mm. Therefore enlarging the hole in the engine casing is not necessary.

21.09.2015 060

Just like for almost all the other performance oriented cylinders, the open transfers in the cylinder base demand you to adapt the cooling port of the stator housing.

Zuera 135SS 004

The one-piece outlet with a width of about 66% was made to endure. We would assume that the Zuera 135SS with its really sporty outlet design has a higher performance than Polini Evolution I.
The angle between the outlet and the transfers lead to the assumption that the Zuera 135SS also supports those exhausts with high revs.

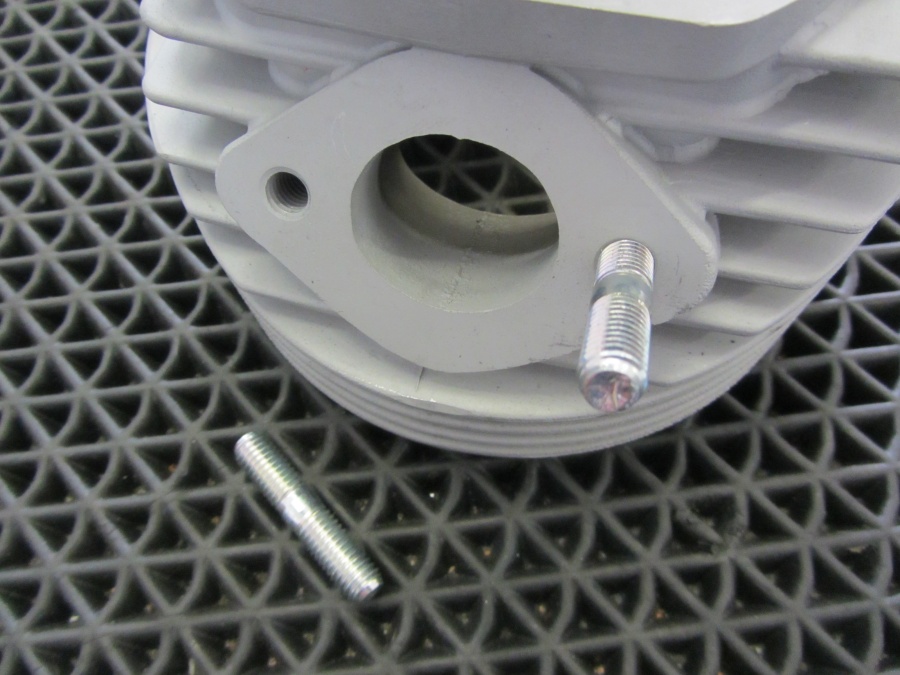
Pinasco recommends a squish gap of 1.0 – 1.1mm. You may adjust it with 3 cylinder base gaskets, which are also supplied. When it comes to cylinder gaskets or sealing and links to the exhaust, Pinasco is reserved. No fitting exhaust gasket or outlet stud is delivered with the Zuera SS135.

You may well use material by Piaggio as a fitting outlet stud.

25.09.2015 008

A combination of M8 outlet studs and the distance between them limits the variety of possible exhaust gaskets.
Sadly Pinasco does not supply fitting gaskets.
PK125 exhaust gasket by Piaggio fits the flange. However, the outlet of the SS135 measures 31 x 27mm, not making the PK125 exhaust gasket
with a smaller diameter the perfect fit.
The BGM exhaust gasket is an alternative, in which case you need to enlarge the bolt pitch in the gasket by a few millimetres.

Technical details of the Zuera SS135 cylinder

  • Hole 57,5mm
  • Stroke 51mm
  • Cubic capacity 135cc
  • 5 transfers
  • One-piece outlet, trapezoidal, chord 38.5mm ? 66%
  • Outlet stud M8 (not included, we recommend Piaggio)
  • Bolt pitch exhaust flange 52mm (we recommend a BGM exhaust gasket)
  • Three cylinder base gaskets 0.1mm each
  • Cylinder base Ø=61.3mm (suitable for Piaggio)
  • Forged piston 169g, one piston ring 1mm
  • Piston pin retainer type G, 1mm
  • Cylinder head, screwed 8 times (stud + 4 pieces M8x25mm)
  • Ignition plug 14mm, long thread, recommendation B9ES, B10ES
  • Position of ignition plug, central
  • Ignition point 17° (recommended by Pinasco)
  • Trigger delay angle 125°/185° with a gap dimension of 1.0mm and 51mm stroke


Conclusion new Pinasco Vespa cylinder smallframe

In total Pinasco has put together a sporty cylinder, which offers positive performance at little effort.

Be it in combination with SHB19, CP carburetors by Polini and Piaggio or Polini banana or in combination with a Keihin 28 and a Franz – in combination with a suitable carburetor and exhaust, Pinasco SS135 offers a performance range from moderate to sporty.

Pinasco sports cylinder for Vespa smallframe
Cylinder -PINASCO Zuera SS 135cc- Vespa V50, PV125, ET3, PK50, PK80, PK125

  • Hole 57,5mm
  • Stroke 51mm
  • Cubic capacity 135ccm
  • 5 transfers

Women have a crush on scooterists

Here comes proof:

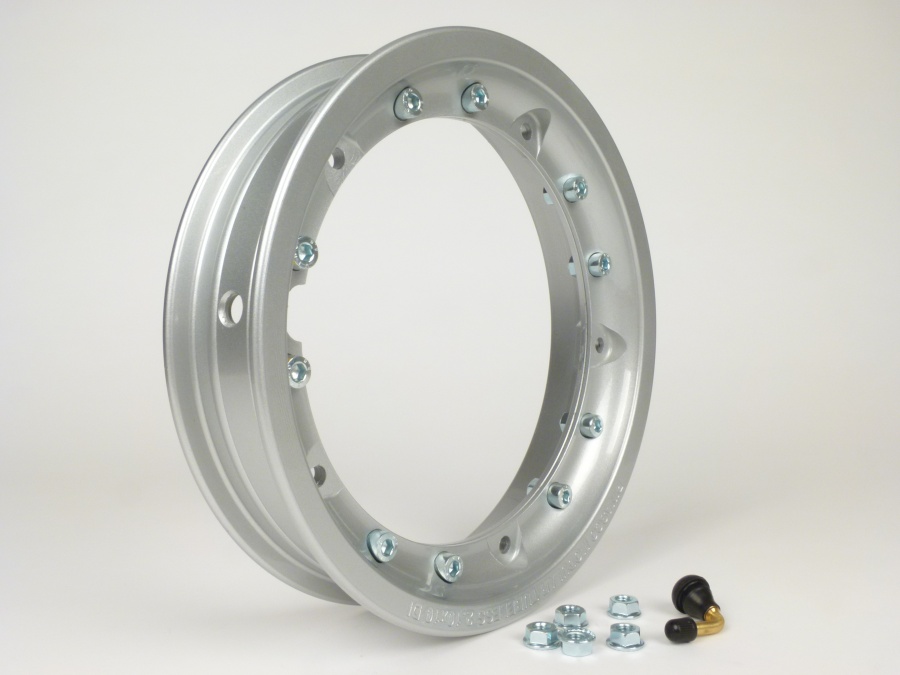
Pinasco Vespa tube tubeless

Tubeless Vespa rims

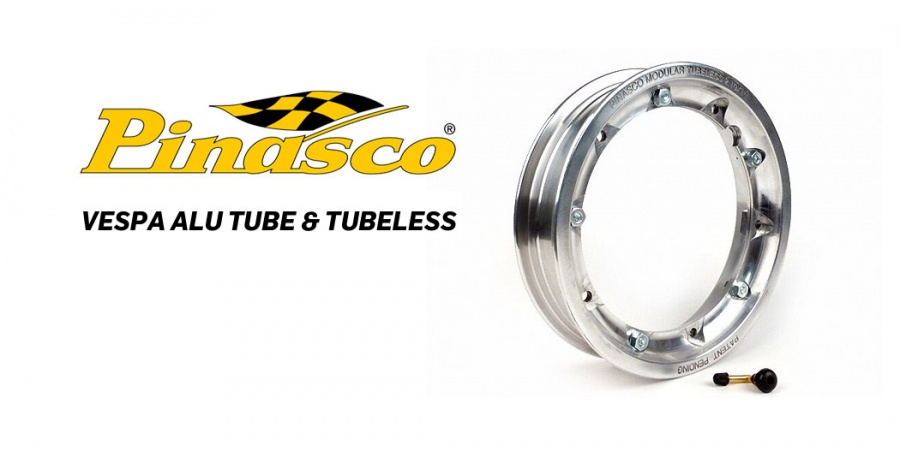
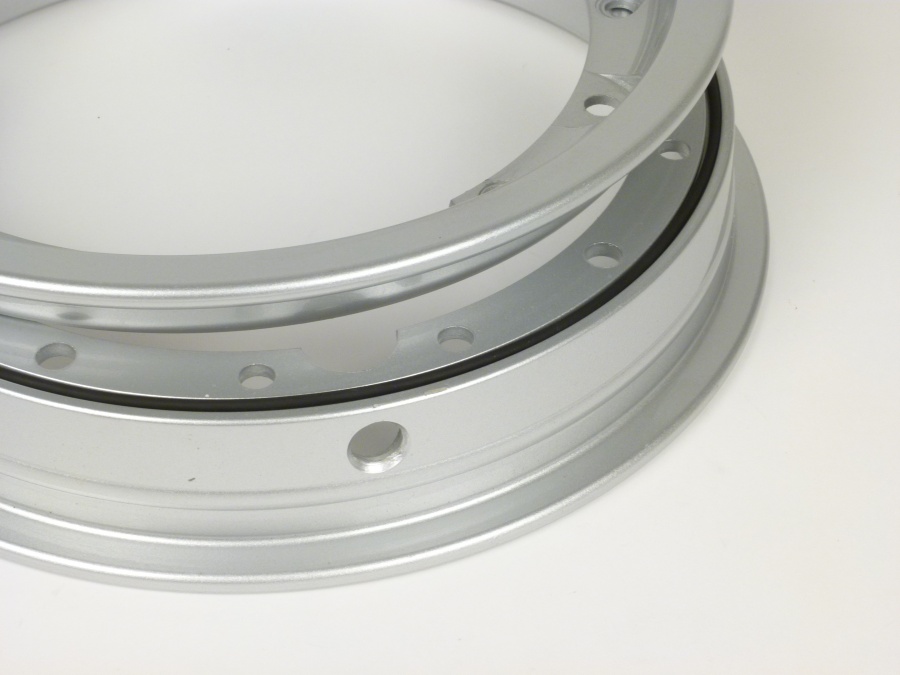
For some time you can now find more examples of Vespa rims for tubeless tyres on the market. Pinasco Vespa Tube Tubeless

Pinasco alloy rim for Vespa

Pinasco is now offering a version including laboratory report by TüV.

However, the report is no guarantee for the e-pass remaining valid. So please check with the registration office responsible for restrictions on admission.

Felge Pinasco KBA 264

Which are the advantages of tubeless tyres?

  • in case you damaged the tread, air can only escape slowly. The tyre remains solid for a longer period of time.
  • no tube, which could burst or be jammed while assembling.
  • in case the tread punches on the rim, there is no tube that might be damaged.
  • if there is an increase in stress on your tyre or low pressure making the tyre move on the rim, the air valve won’t rip off.
  • no tube that might ream by the tyre


VESPA ALOY RIM
  • Split rim
  • O-ring to seal the two halves of the rim
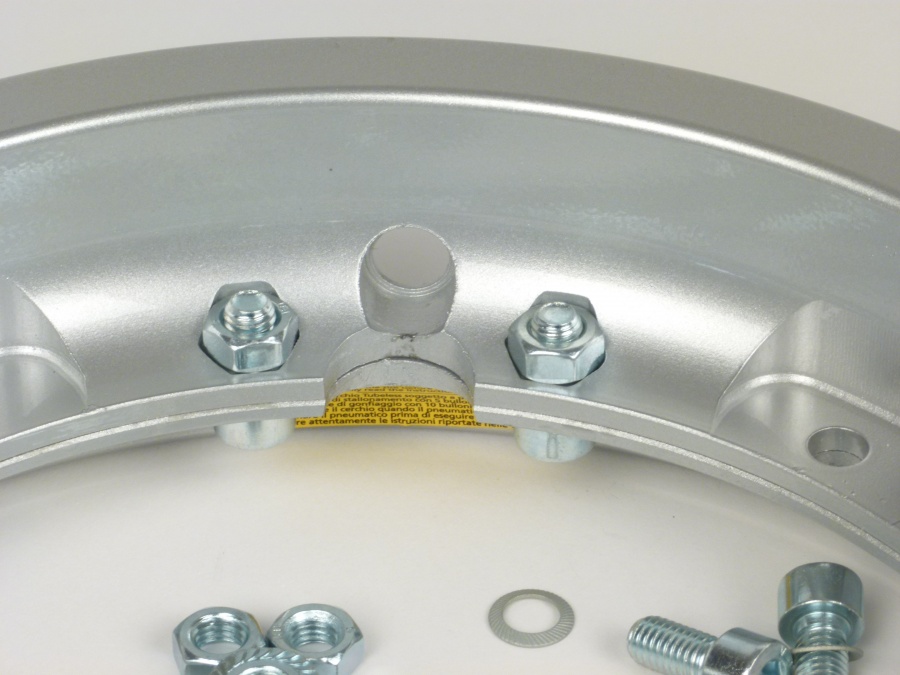
  • Set of screws to link the two halves of the rim
  • Air valve
  • Nuts with flansh to fasten the rim to the brake drum
  • How to install
  • Laboratory report by TüV


Split rim – easy assembly

So far, all rims for tubeless tyres on the market have been one-piece rims, as for cars or motorbikes.
For classic scooters however, necessary brake drums have limited the design of rims immensely.
This limitation meant that mounting tyres on a one-piece rim was hard work and in some cases you even had to damage the tyre.

Split rims have always been a strong selling point of Vespas, because this led to quick mountings of tyres.

For mounting tyres on a one-piece rim, you need suitable equipment, which you will only find in a garage. There is no way to do it at the side of the road.

Pinasco dealt with this deficiency and finally launched a tubeless split rim onto the market, which rejuvenates the advantages of a quick change of tyres.

We took a closer look at the new Pinasco rim for you.

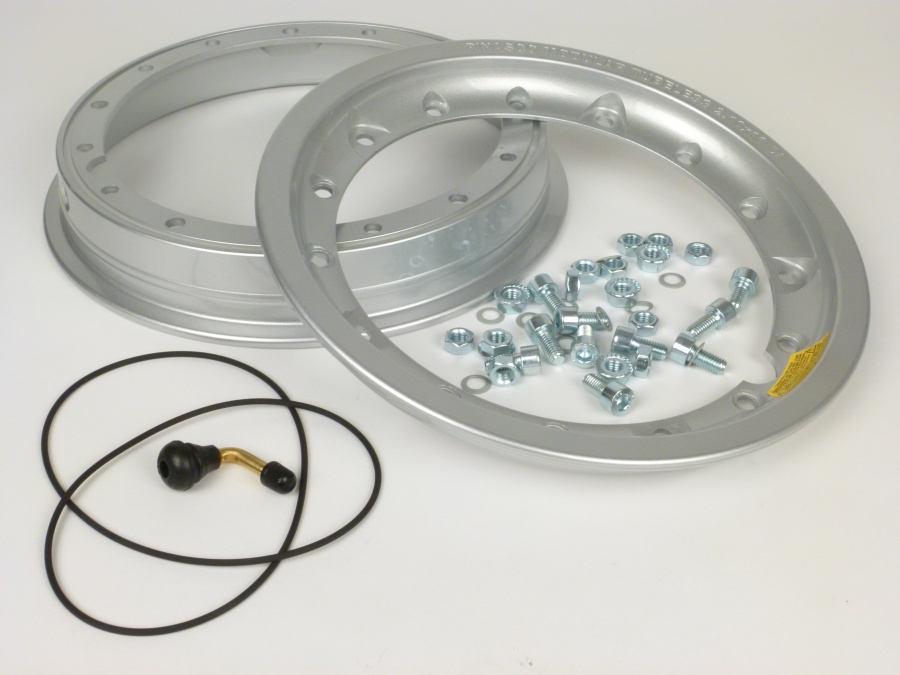
Delivered with

  • Split rim
  • O-ring to seal the two halves of the rim
  • Set of screws to link the two halves of the rim
  • Air valve
  • Nuts with flansh to fasten the rim to the brake drum
  • How to install
  • Laboratory report by TüV


Felge Pinasco KBA 254

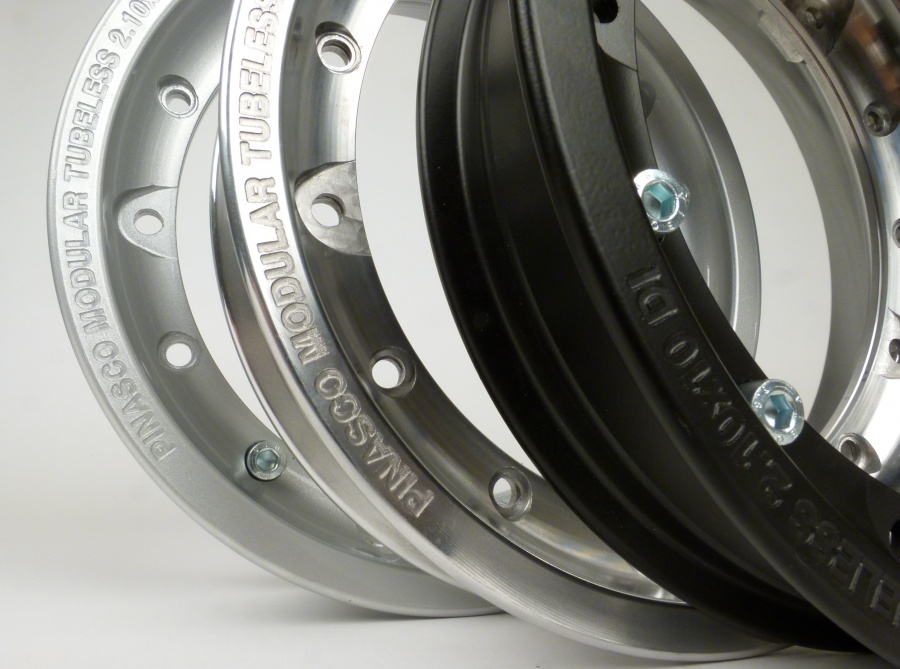
Colours Vespa alloy rims

Pinasco offers a traditional range of colours. You can buy rims in black, polished alloy and traditionally in silver.

Pinasco Rim 001

Wheel rim -PINASCO, V2.0, tubeless 2.10-10 alloy, split rims- Vespa (type PX) – silver

Wheel rim -PINASCO, V2.0, tubeless 2.10-10 alloy, split rims- Vespa (type PX) – black

Wheel rim -PINASCO, V2.0, tubeless 2.10-10 alloy, split rims- Vespa (type PX) – alloy polished

Assembling the Vespa rim

First step should be to assemble the air valve. It’s easily done with the help of tyre mounting paste.

Secondly you should prepare the wider half of the rim with tyre mounting paste and put on the tyre, starting at the valve.

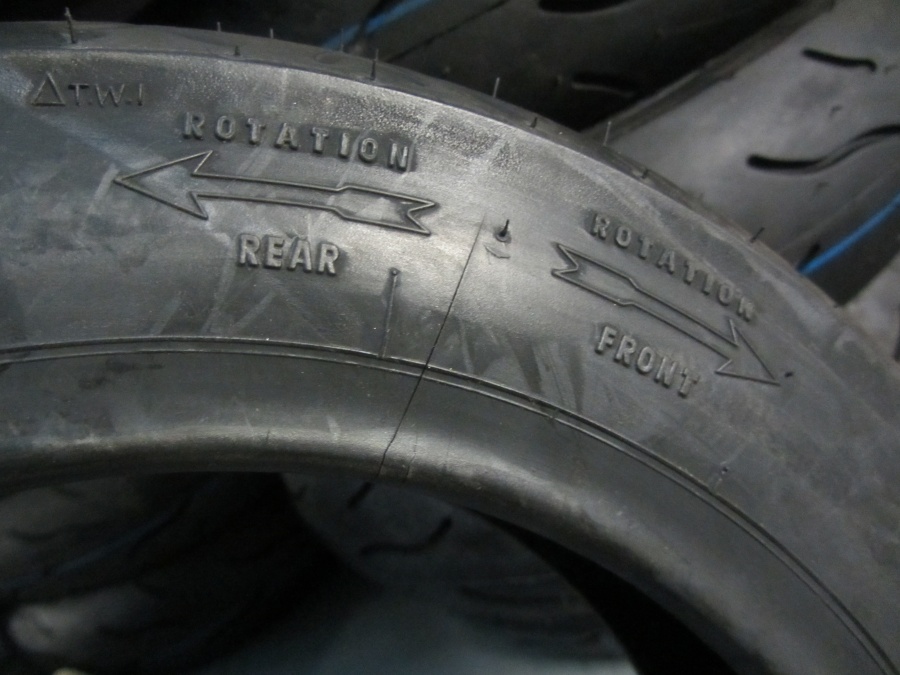
Please note: your tyre may have a profile that is bound to a running direction. This may vary for front and rear tyres.

Felge Pinasco KBA 294

If the tyre is well placed, the o-ring will find its way to the groove.

Felge Pinasco KBA 262

Once the o-ring is well placed, you may put on the second half of the rim.

Now, both halves have to be linked with 10 screws. Pinasco sets a maximum torque of 18Nm.

Nuts are interlocked in the larger half of the rim. The head of the allen screw is being secured with a schnorr washer, so that it won’t open without someone’s ado.

Felge Pinasco KBA 260

Fastened by 10 screws, you can now inflate the tyre to a maximum of 1.8bar. You used mounting paste, but the tyre won’t lie nicely in the rim base? If the entire wheel is fastened to the brake drum you may fit the tyre by inflating to a maximum of 3bar. Without the five additional fixation points of the brake drum, it might happen that the two halves of the rim spread, causing pressure to escape. After fastening to the brake drum, this won’t happen and pressure is kept reliably.

Pinasco recommends nuts with flansh to fasten the rim to the brake drum. When using snap rings for steel rims, the rim was being damaged when unfastening the screws. This won’t happen here.

Trace offset

Due to their design, there is trace offset with some one-piece tubeless rims. Due to the two-piece design of the rim, Pinasco managed to stick to the original rim offset.

Spare wheel

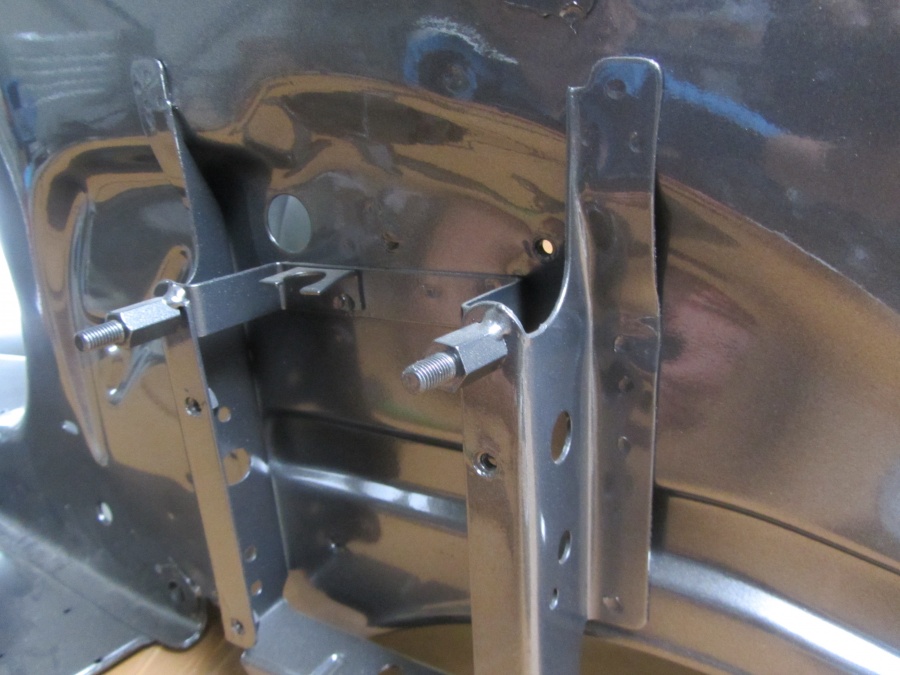
Due to its design and with a small trick you may fasten the Pinasco rim as spare wheel to your PX. You adapt the bracket for the spare wheel with spacer nuts in a way, that you fasten the wheel “upside down” – valve facing side panel.
This is an example of a LML frame. Having adapted the bracket also makes it easier to get to the valve of a standard wheel.

LML Rahmen

Which wheels fit?

As mentioned before, all common wheels of the sizes 90/90-10, 3.00-10 and 3.50-10 fit the Pinasco rim.
In case of one-piece rims it usually used to be luck to find a wheel that wouldn’t be damaged during assembly.
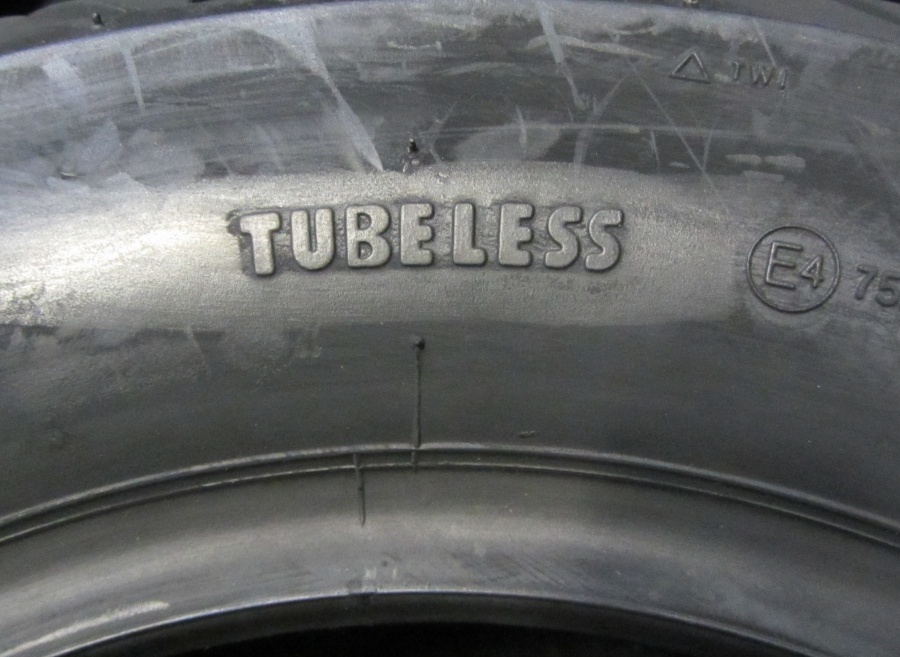
You should still pay attention to one small but crucial detail when buying wheels. Your new tyre should have the important “TL” or “tubeless” label.
A tyre labelled “TT”, meaning tube type, is not necessarily gas-proof.
So please only use “TL” labelled tyres with your tubeless rim.


Felge Pinasco KBA 302

You will find further information on your new tyres in our online manual and on Vespa-Reifen.de

Disc brake

The Pinasco rim also fits vehicles with disc brake. However, you should check clearance. We installed a PM brake caliper for test reasons. But sadly it didn’t fit the Pinasco rim. Standard brake calipers by Grimeca, LML und HengTong (Piaggio) fit the radius of the Pinasco rim without problems.

In case of damage to your tyres, you should have the following with you

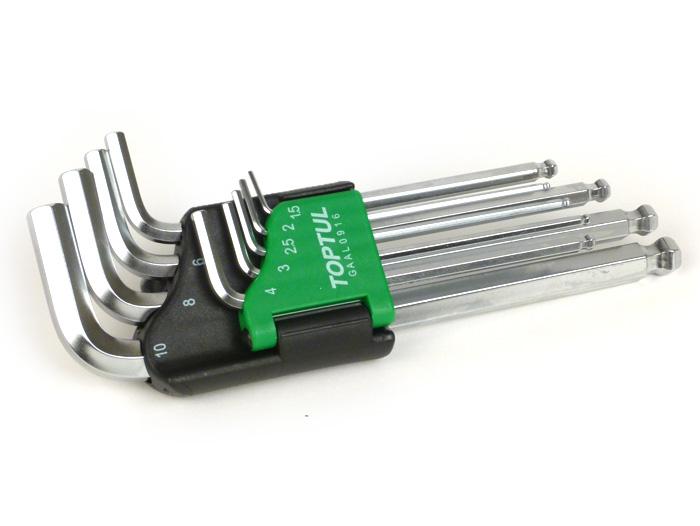
Your Pinasco rim is fastened by allen screws. Should you get embarrassed on the way and need to unfasten your rim, you should have a fitting allen key on board. The key set by Toptul includes all common sizes from 1.5mm – 10mm and the handy box makes it easy to transport the allen keys in the glove compartment without causing noise.

Toptul Inbus

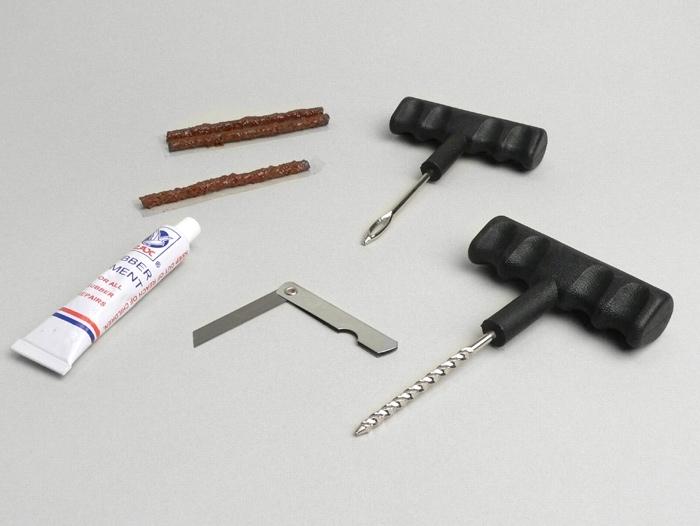
We recommend a repair set for tubeless tyres, so that you are able to continue your journey even without a spare wheel.

BGM8803


After removing the air valve you could even install a tube to the Pinasco rim.

VESPA ALOY RIM
  • Split rim
  • O-ring to seal the two halves of the rim
  • Set of screws to link the two halves of the rim
  • Air valve
  • Nuts with flansh to fasten the rim to the brake drum
  • How to install
  • Laboratory report by TüV


Only giving a new paint to your scooter or rather buy already painted new sheet metal parts

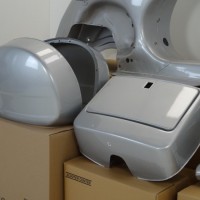
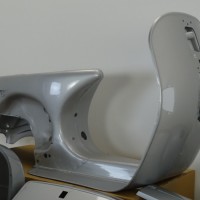
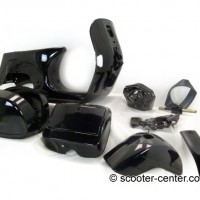
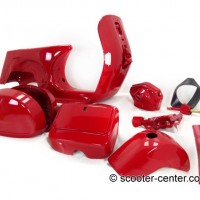
Getting an old scooter freshly painted is rather expensive now. Many painters have already miscalculated the number of parts that need to be painted. There is the malice of the bent style of many frames and preparations often take many hours. This is why a fair paint at € 500, if you are lucky, usually is a unique offer. Do you currently need to decide whether or not to freshly paint your scooter? Then this will be of interest to you: new, fully painted frame by LML.

Exceptional LML scooter parts

Vespa LML Rahmen frame NEW

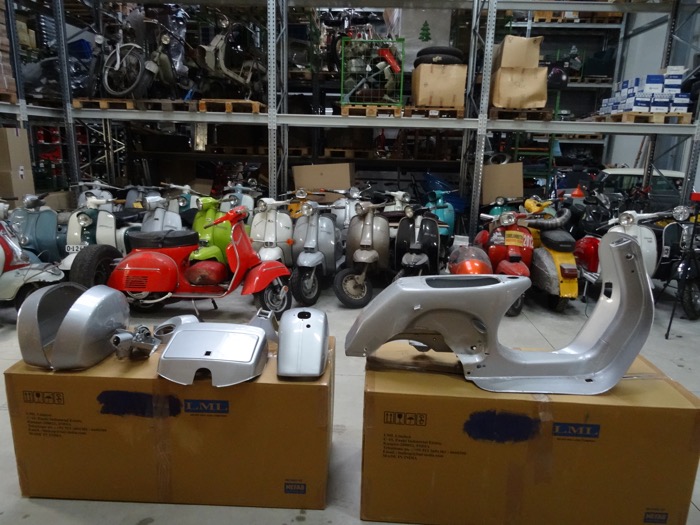
When we were offered exceptional LML parts, we remained sceptical. It was supposed to be a LML Star and NV 150. In individual parts, which were meant to be assembled in the country of its final destination.

We did some research and took a closer look at its part numbers. Which was exciting. We didn’t only discover many small parts but also interesting connections. Some parts seemed to be painted in the same colour. We started to get nervous – a very interesting story.

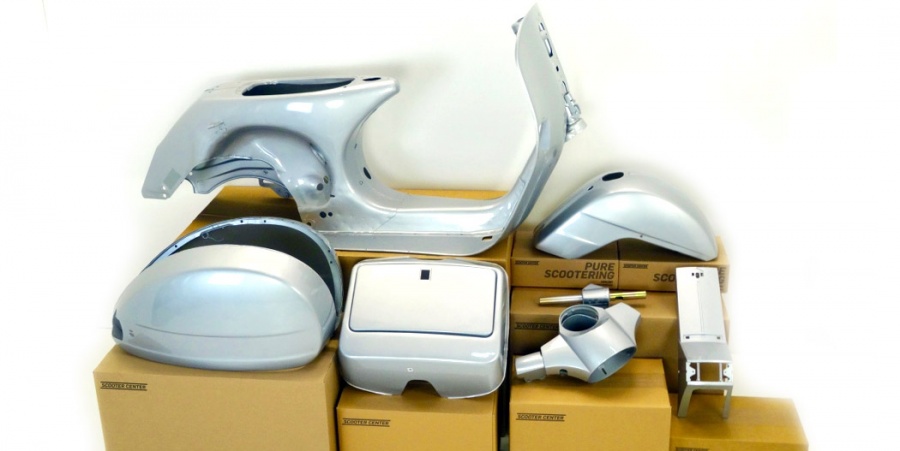
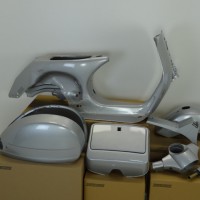
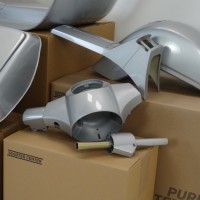
We found out that not only some of the sheet metal parts had been painted in the same colour number, but entire sets! All painted parts you need to fully assemble a scooter were packed in an export box: COMPLETE SUCCESS

We agreed terms. Even though we had to take a deep breath first. So many small parts were included in the set. Some of which we will probably never sell.

The LML “NV150”, also called “Select”, and the “Star” have a good quality. The finish is a little rough sometimes, but they have been produced for the toughest conditions imaginable: the streets of India.

lml-frame-21

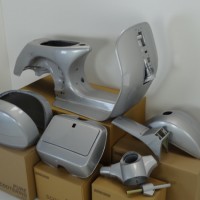
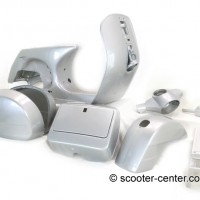
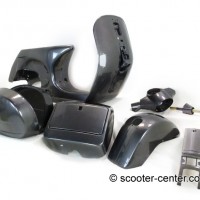
Entire set of fully parts of the LML frame

Why should you have your scooter freshly painted, when you can buy already painted sheet metal parts as a set with us?

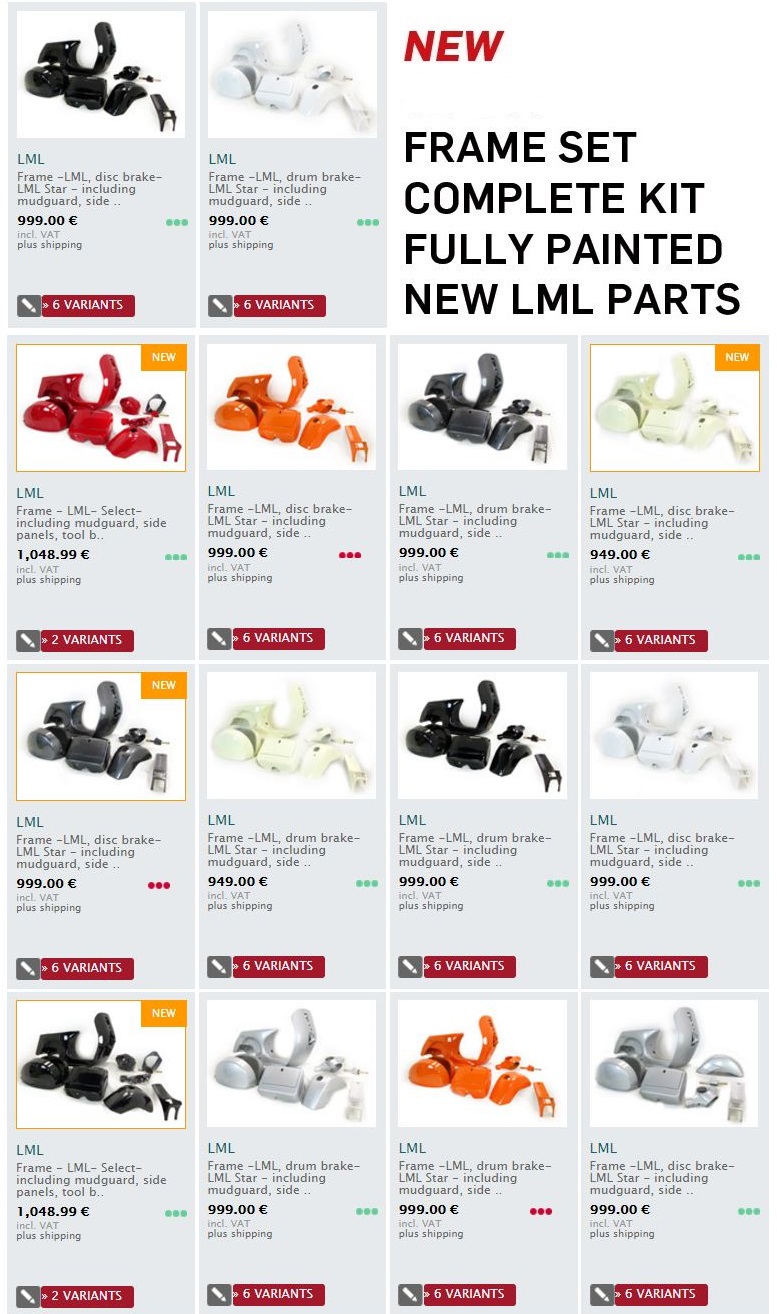
We offer entire, new Select and Star frames, already fully painted, so that there is no need to expensively paint your old scooter:

Frame set LML Star

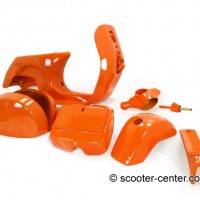
We offer the Star frames for disc brake or drum brake. Star frames consist of:

  1. Frame (with internal fastener)
  2. Two side panels (internal fastener)
  3. Rear fender
  4. Toolbox with flap
  5. Horn cover
  6. Lower part of the handlebar cover (with support either for drum brake or for disc brake)
  7. Upper part of the handlebar cover
  8. Gear change grip

The side panels do not have holes for lables, there are holes in the frame for stips and there are no holes in the tool box for a tray for odds and ends. Head sets have a hole in the support for the e-start button.

Colours:
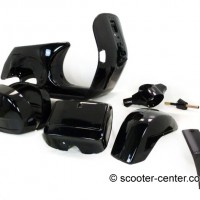
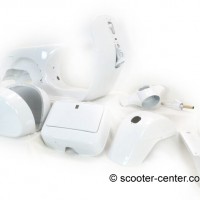
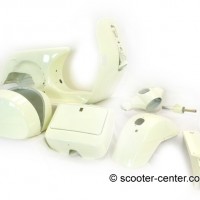
We currently have the following colours on offer: pure white, ivory, graphite metallic, orange, silver and black

Frame set LML Select

The Select frames have a Star rear fender and there is a hole in the lower handlebar cover for the handlebar clamp. Select frames consist of:

  1. Frame
  2. Two side panels
  3. Rear fender (Star)
  4. Tool box with lid
  5. Horn cover
  6. Lower part of the handlebar cover
  7. Upper part of the handlebar cover
  8. Speedo bezel (not painted)
  9. Handlebar
  10. Gear change grip

And again no holes in tool box or side panels. But rectangular holes in the leg shield for floor mats.

Colours:
We supply entire kits in red and black for the LML Select.

Only new parts with new paint

There are NO VINs or prefixes. Please check with your responsible registration office whether it is possible to use the VIN of the damaged vehicle for the new frame. You lost the old sheet metal, but you still have the registration documents? Think about alternatives as discussed in various fora online (e.g. www.Germanscooterforum.de). Vespa lml Frame Rahmen Set Kit

Limited availability

We bought a large amount of parts. However stocks are limited.

Quality

The quality of paint is usually OK but not perfect: small scratches or mini dents will be found on every set.

But the price is all the better: 999 € for the Star and 1,048.99€ ex warehouse, Bergheim-Glessen for the Select. This should help in deciding between a new paint or a new frame.

Better gear ratio with a short 4th gear

Kurzer vierter Gang Vespa PX

Why should your Vespa have a short 4th gear installed?

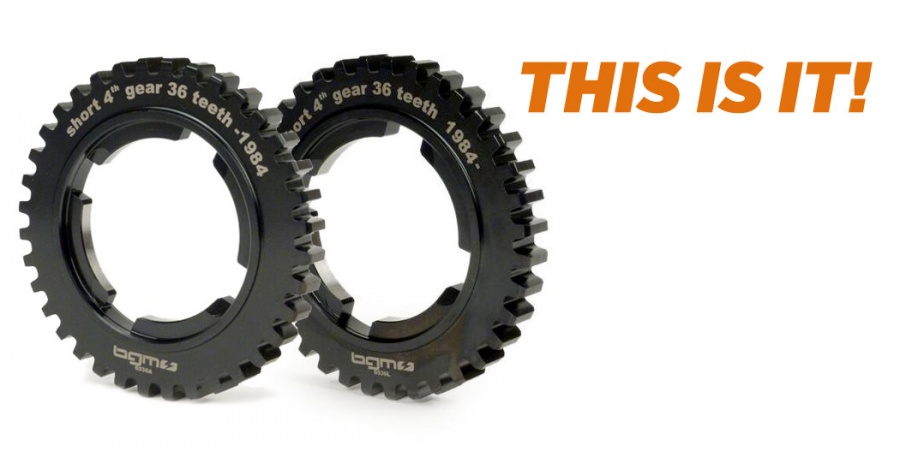
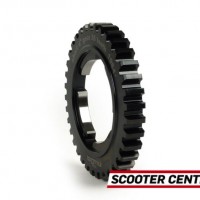
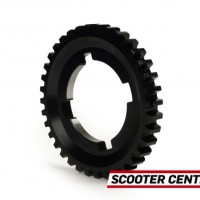
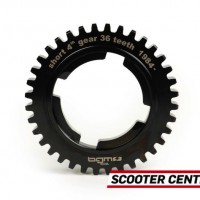
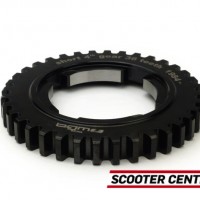
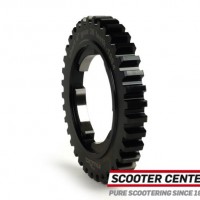
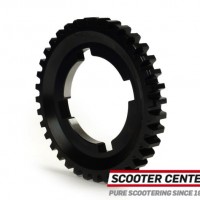
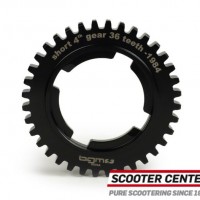
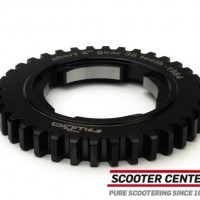
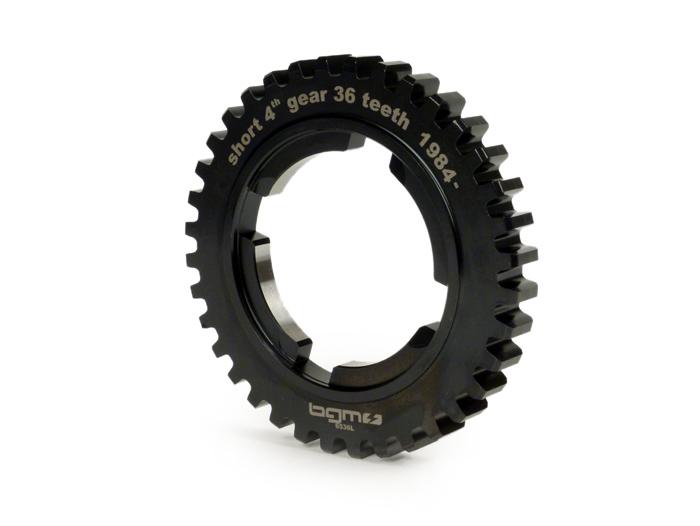
You install a short fourth gear to improve the gear ratio from third to fourth, which works perfectly fine with a short fourth gear with 36 teeth.
A short fourth gear makes sense for all Vespa PX engines, no matter if you are a daily, tour or race driver.
This drive wheel has 36 teeth, which is one more than the original fourth gear cog of a Vespa PX200.

BGM PRO – Premium Tuning Parts

The material used for BGM PRO gear boxes are extremely solid. The gear cogs are made from high alloyed Ni-Cr-Mo case hardened steel (20NiCrMo2-2/ AISI8620) to suit highest load levels.
The base material is of very high quality and suitable for highest levels of engine performance. Surface hardening is precisely defined to HRC 58-60 making the sprockets extremely wear resistant. Always high quality. No compromises.

BGM PRO short fourth gear
Advantages of a short fourth gear:

  • more relaxed driving
  • closer gear step
  • higher gear ratio and optimisation of the gear box

Gear wheel 4 -BGM PRO- Vespa PX EFL T5 125cc, PX200 EFL (short) – 36 teeth

Short fourth gear Vespa PX EFL Suitable for all gearboxes with flat cruciform. How to recognise these gearboxes? The driveshaft has a locking ring fitted in front of the gear cogs.

Gear wheel 4 -BGM PRO- Vespa PX (-1984), PX200 (short) – 36 teeth

Short fourth gear Vespa PX (-1984) Suitable for all gearboxes with bended cruciform. How to recognise these gearboxes? The driveshaft has a locking ring fitted in front of and behind the gear cogs.

The middle part lies on the cruciform. Measures:

  • PX old type (until 1984, bended cruciform): 5mm
  • EFL (since 1984, flat cruciform): 6,5mm

Middle parts of BGM gear cogs are larger (approx. 1/10mm) and therefore the contact surface for the cruciform is larger.

Scooter Center technology TIP:

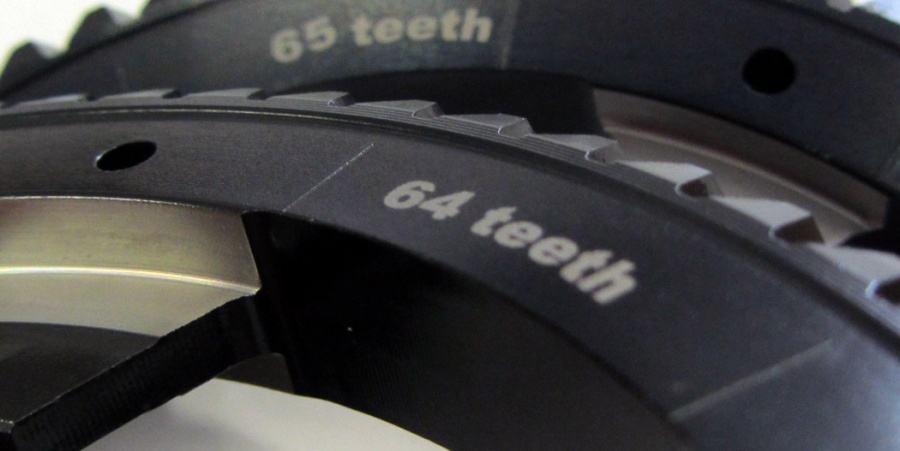
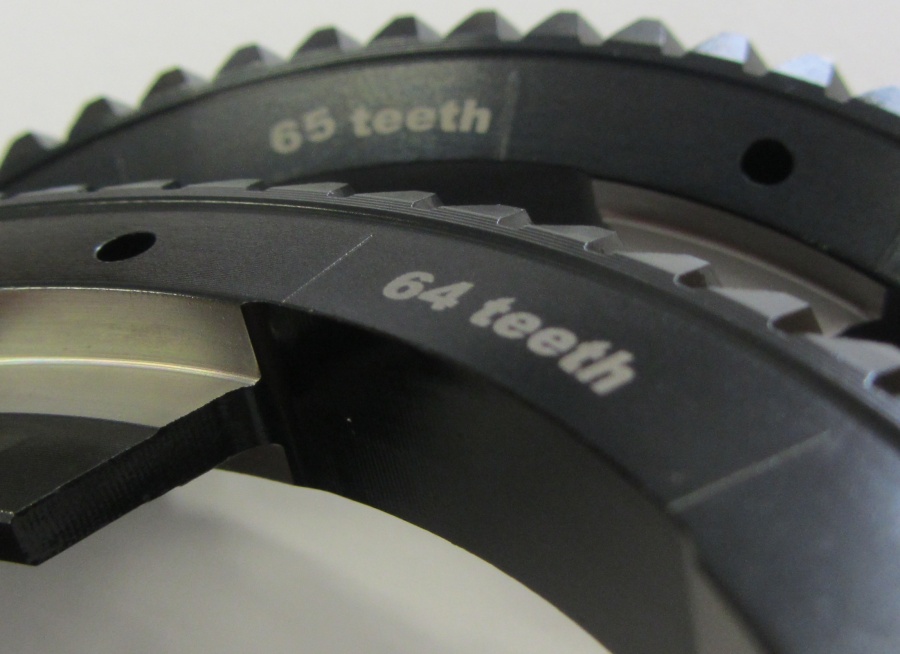
A short fourth gear can be perfectly combined with the 64 teeth primary drive wheel by BGM Pro, which has a longer reduction. Using a 24 teeth clutch sprocket significantly increases the total gear ratio, but decreases the gear step from third to fourth, turning the entire engine performance into top speed.
BGM PRO short fourth gear
Advantages of a short fourth gear:

  • more relaxed driving
  • closer gear step
  • higher gear ratio and optimisation of the gear box

When working on a gearbox, don’t forget:

Especially interesting

So far, Malossi sports and Polini 221 engines, which are high in torque, have proven their quality in combination with a 24/64 gear ratio and a short fourth gear. BGM6536L

A short fourth gear reduces the gear step between third and fourth, in order to grant a sufficient torque and smooth gear ratio and nice acceleration when changing to fourth.

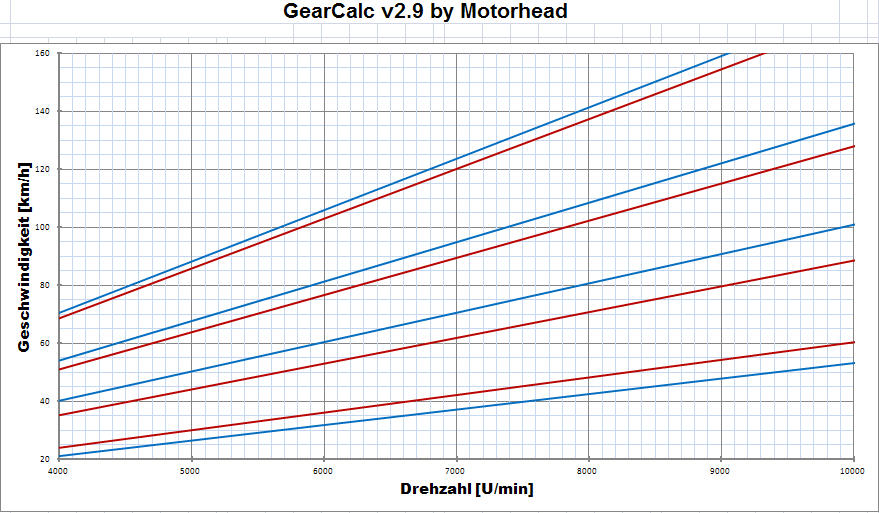
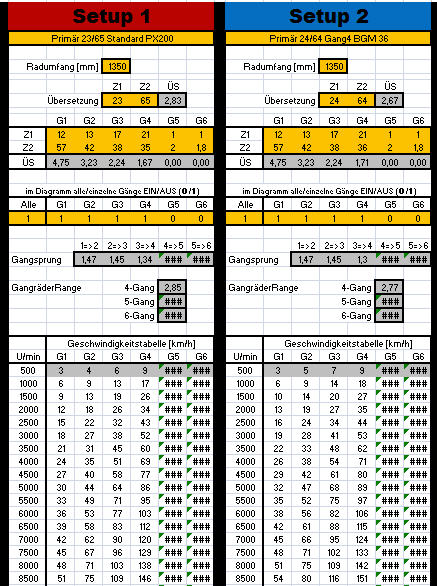
The table and graphs** below show the difference. Higher reduction leads to nice cruising speed in towns and on large roads at lower gears with very low revs. This combinations offers rather quick driving and a higher top speed with lower revs when driving in fourth. 24_64 graph

24_64 tab

**(We would like to take this opportunity to thank GSF member Motorhead for the Gear Calc!)

Higher primary reduction for a higher performance of Vespa engines

New concepts for performance and torque oriented engines in the Vespa Largeframe segment almost demand the use of a higher primary reduction.

A higher primary reduction increases the torque available in your engine, increasing effective use of the available torque curve. This means, you will cruise at constant speed at lower revs, which in turn means that there is an increase in top speed.

BGM PRO primary drive wheels
Advantages of BGM PRO higher primary reduction for your tuned engine

  • more relaxed driving
  • less gearbox noise
  • less fuel consumption
  • higher top speed
  • a short forth gear even increases acceleration at higher speed
  • a larger coverage of tooth flanks leads to higher resilience
  • lower revs
Up until now you could only purchase spur-geared primary reduction gears. Resulting in immense driving noises, less coverage of tooth flanks and the fact, that a later change of gear reduction will demand time, money and material. This decreases day to day efficiency.

NEW: Smoother operation and symmetrical power transmission by BGM PRO

BGM PRO primary drive wheels are helically geared. Compared to spur gearing, helical gearing leads to a drastic increase in smooth operation and an increase in smooth power transmission at tooth flanks.

BGM6565 (2)

Certified quality by BGM PRO

Each batch of primary drive wheels is checked for its dimensional accuracy, quality of material and workmanship, just like our clutch sprockets and gear cogs.

Wide range of combinations possible

We are currently the only manufacturer offering helical gearing reductions, which can be used in combination with various clutch sprockets.

The following combinations are possible:

Primary drive wheel BGM BGM6564 Primary drive wheel BGM BGM6565*
Number of teeth 64 65
Clutch sprocket BGM Cosa BGM6522S 22 2,91 2,95
Clutch sprocket BGM Cosa BGM6523S 23 2,78 2,83
Clutch sprocket BGM Cosa BGM6524S 24 2,67 2,71
* or Piaggio original


Vespa clutch sprocket BGM PRO with 22 teeth

Vespa clutch sprocket BGM PRO with 22 teeth is a special sprocket though. Base circle and tooth flanks were optimised for primary drive wheels with 65 and 64 teeth. So, in combination 22/65 the BGM PRO clutch sprocket offers a more stable and better coverage of tooth flanks than sprockets by Piaggio or Newfren for instance.

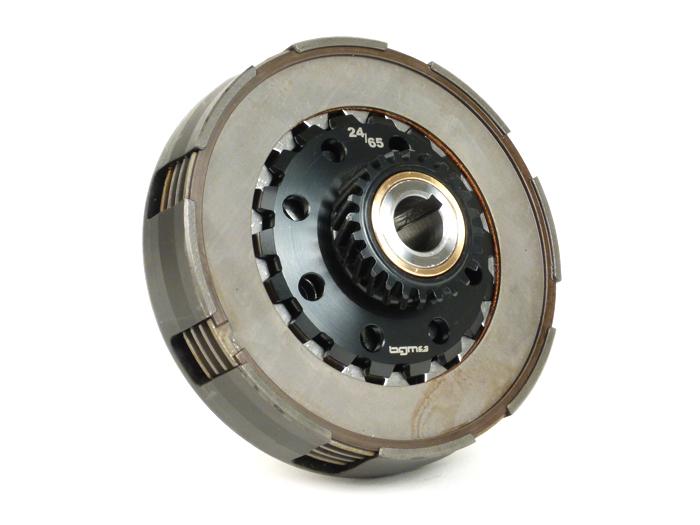
Perfect fit: BGM SUPERSTRONG clutch

Our BGM Superstrong Vespa clutch has the fitting sprockets and is easily fitted to BGM primary drive wheels. BGM8099D

The table shows the various combinations and their effects on the reduction ratio. It helps to choose the perfect gearbox for any event. A combination of a long distance primary drive wheel with 64 teeth and a clutch sprocket with 22 teeth will lead to an overall reduction that is lower than in an original PX200. Meaning: You can choose freely between various exhausts. Either high revs or a lot of torque.

Vespa primary drive repair kit

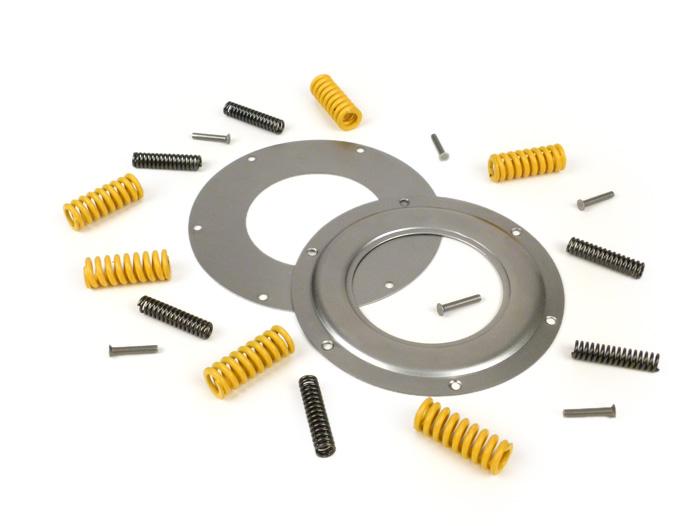
We recommend to use our reinforced primary drive repair kit to fit primary drive wheels to the layshaft.BGM0195F44

Its reinforced springs also work perfectly with a drastically increased torque.

Short fourth gear for Vespa

So far, Malossi sports and Polini 221 engines, which are high in torque, have proven their quality in combination with a 24/64 and a short fourth gear.BGM6536L

A short fourth gear reduces the gear step between third and fourth, in order to grant a sufficient torque and smooth gear ratio and nice acceleration when changing to fourth.

The table and graphs** below show the difference. Higher reduction leads to nice cruising speed in towns and on large roads at lower gears with very low revs. This combinations offers rather quick driving and a higher top speed with lower revs when driving in fourth. 24_64 graph

24_64 tab

**(We would like to take this opportunity to thank GSF member Motorhead for the Gear Calc!)

Conclusion

A higher primary reduction offers

  • more relaxed driving
  • higher top speed and
  • a short forth gear even increases acceleration at higher speed.


The most beautiful Vespa at Lake Garda

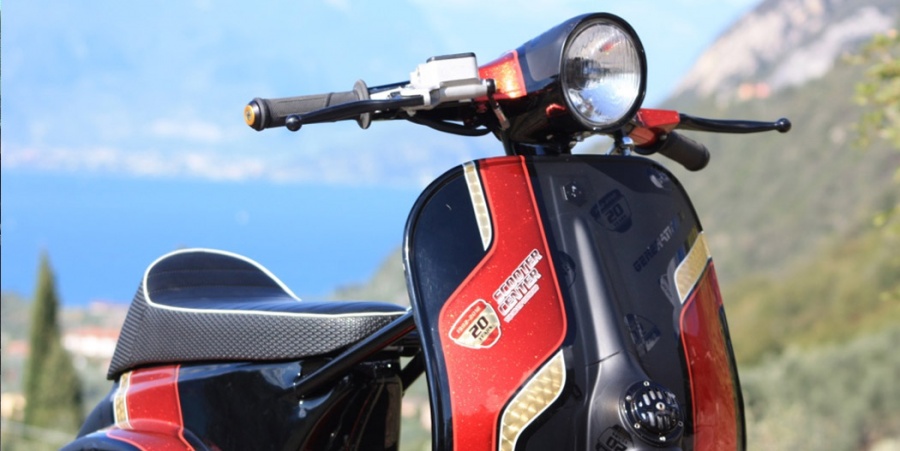
The most beautiful Vespa is our Scooter Center Demonstrator, Generation XI. It is a Primavera ET3, which is a Vespa of highest quality, both in technology and looks. The latter thanks to Pfeil-Design from Austria. This Vespa has already been awarded with many prices by various international customshows. Awesome work of our old friend Pfeili.

“The most beautiful Vespa on earth“. This also is a quote by Dean Orton. If he as the very model of Lambrettistas says so, we won’t disagree. But we’ll say thank you.
Mission two of our trip to Italy:

The guys at Kerresinhios are well known for their happy families games, which are lovingly designed and depict classic scooters. The first edition already turned into a sought-after collectors item.

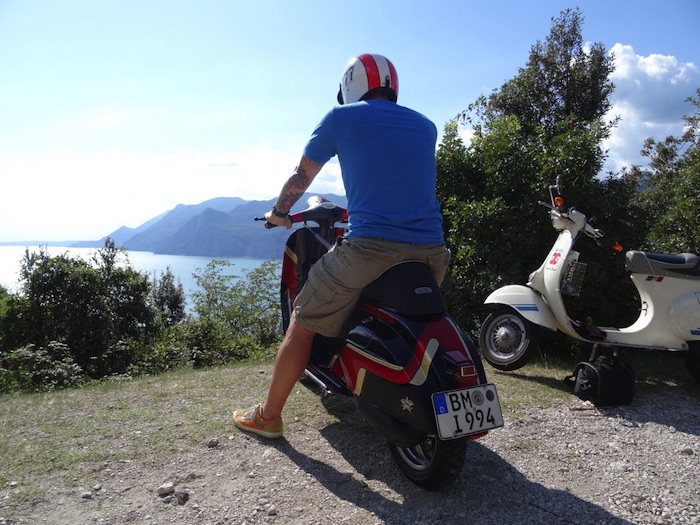
We wanted to find an awesome location for a photo of our Demonstrator “Generation XI” at Lake Garda that could be part of the new Kerresinhios happy families “Scooter scenes”.

DSC00709-imp

DSC00745-imp

IMG_9397-imp

DSC00757-vespa-lambretta-italien-sc

Scooter Center and Lake Garda

Lake Garda. But why? Lake Garda plays an important role in the history of Scooter Center. Plus, Generation XI is a very special scooter by Scooter Center. We have put our heart and soul, sweat, brains and love for technical and optic details in it.

Therefore we considered a photo of this custom Primavera ET3 in front of our shop or the Cologne Cathedral to simple and unimaginative. And we were around Lake Garda for another mission anyway. So it seemed the right thing to have a photo shooting 1,000 km from home at Lago di Garda. You will see the result soon in the most current Kerresinhio happy families game.

Best wishes from Lago di Garda :-)

IMG_3568-vespa-lambretta-italien-sc