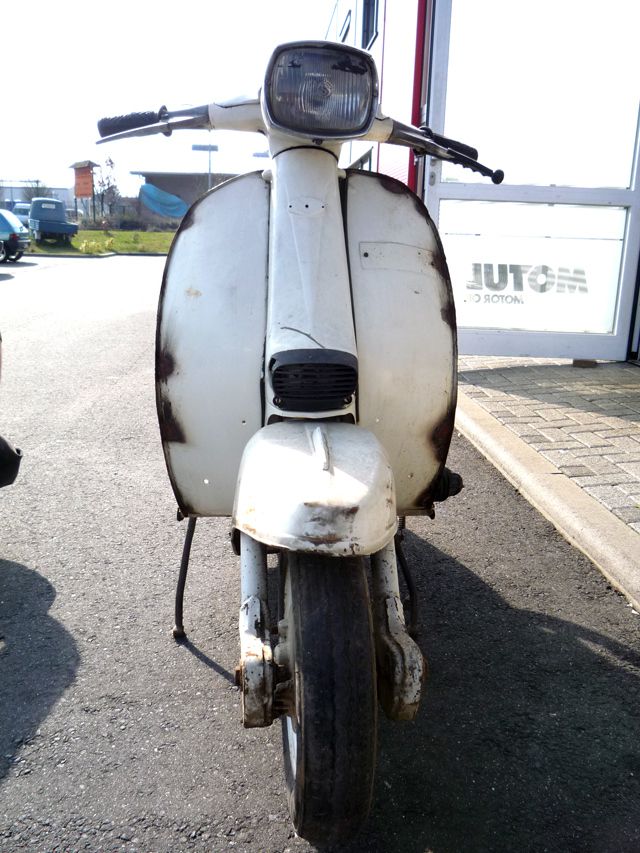
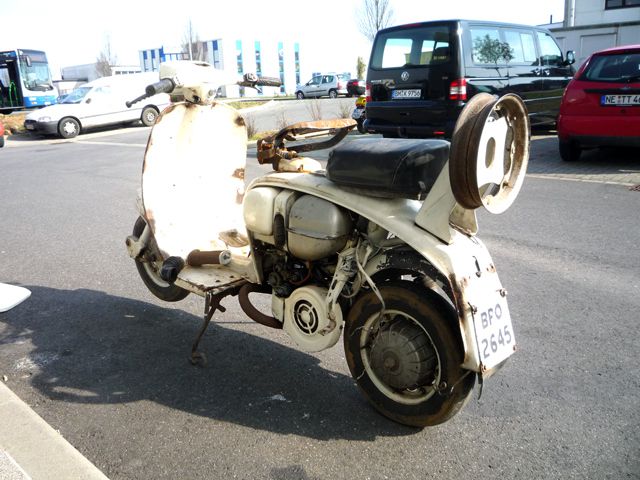
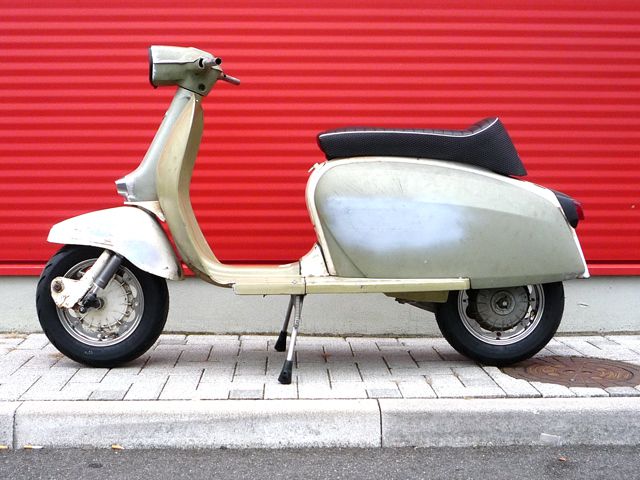
Our bgm test bike. This project will be restored with our bgm parts in order to show it on the EuroLambretta.
After the initial work steps we got an overview of what we needed.
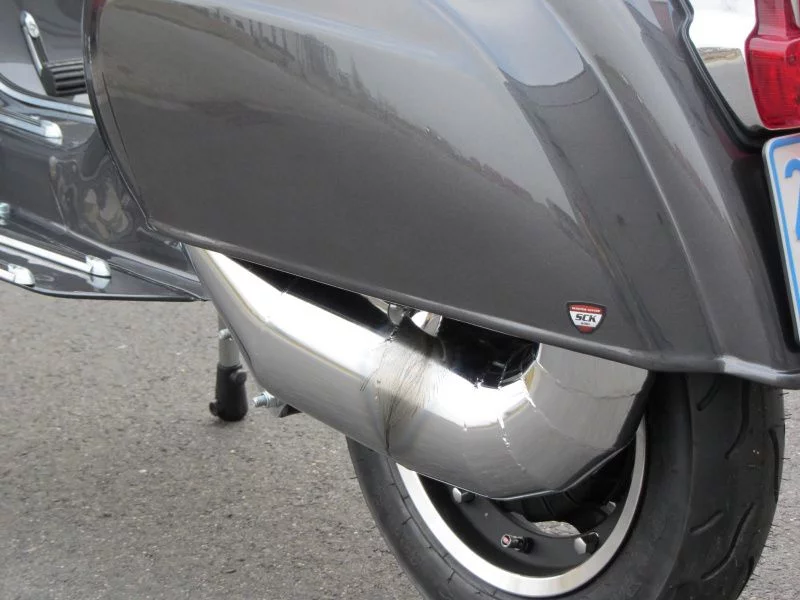
We decided to use a new floor board and side panels as well. With some effort they have perfect clearance between horn cast and leg shield and as well between bridge piece and floor board. Luckily nearly all Lambretta body parts are still available. Our Scooter Center stickers can be seen in the pictures.
The mudguard shape is slightly altered. The shape is a bit more sportive. The brackets for fixing the mudguard to the fork have been welded to the opposite side in order to make room for the weld-on damper brackets.
Now we just need to decide on the colour scheme.
Some bodyparts needed some TLC so therefore we decided to let the body parts being sand blasted.
The engine was checked and ripped apart in order to exchange all necessary parts. The casings were prepared for sand blasting as well.
To be continued…
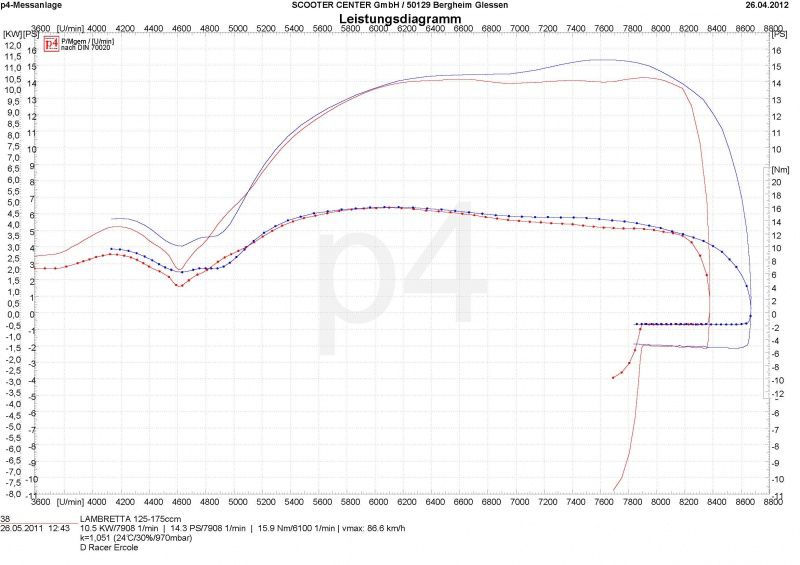
Yesterday our friend Ercole was here again in order to get his Lambretta D Racer ready for the Cologne run on the Nurburgring. His first visit can be found here.

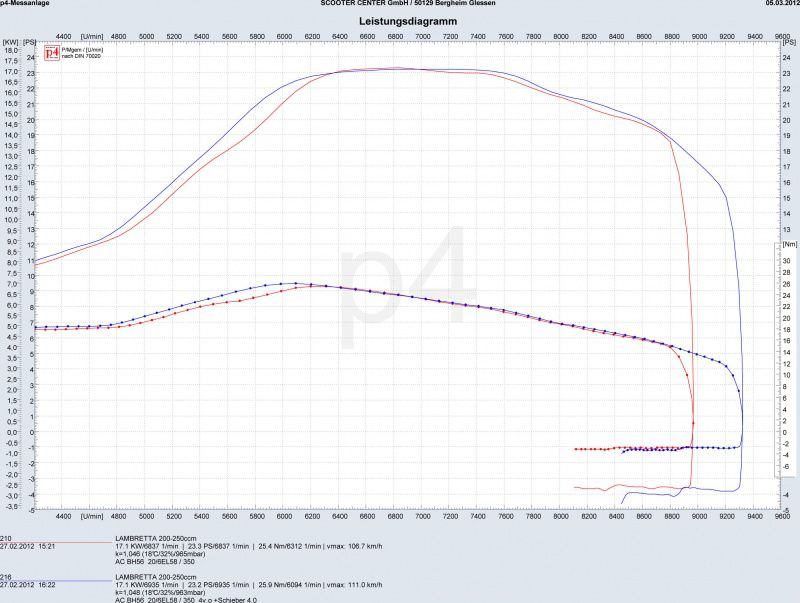
This time he changed the carburator from 25mm to a VHS 30mm carburator.
The blue line shows the test rig from yesterday and the red one his first visit. 1hp more power and a better acceleration was the resut. The Scooter Center Team wishes him all the best for his upcoming run.
Some of our old beauties like the Vespa Sprint or GT 125 or even some Bajaj models have not many options for cylinders due to the small spigot sealing surface.
Our engine casings have not enough space at the side of the sealing surface so big cylinders like the Parmakit 177 or Polini 177cc won’t fit here. The result would be a dripping cylinder.
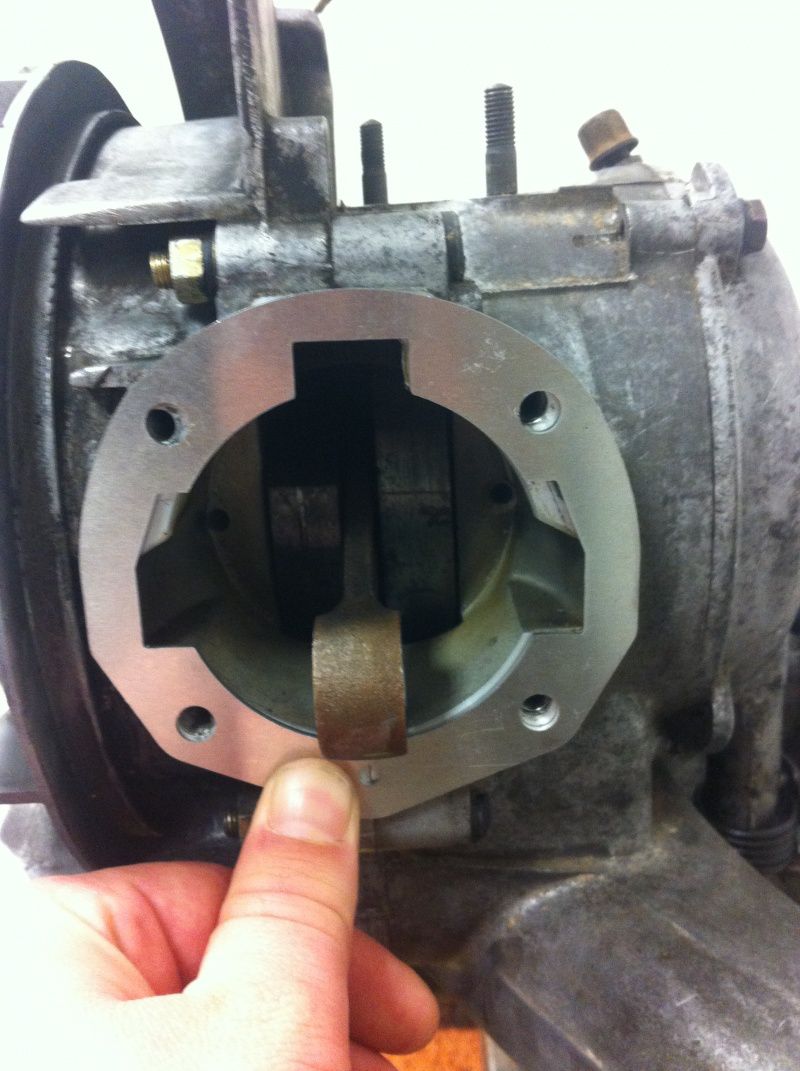
This picture shows a spacer for the 177cc Polini cylinder. You can tell that the ports are not matching at all and that the casings are just too small.
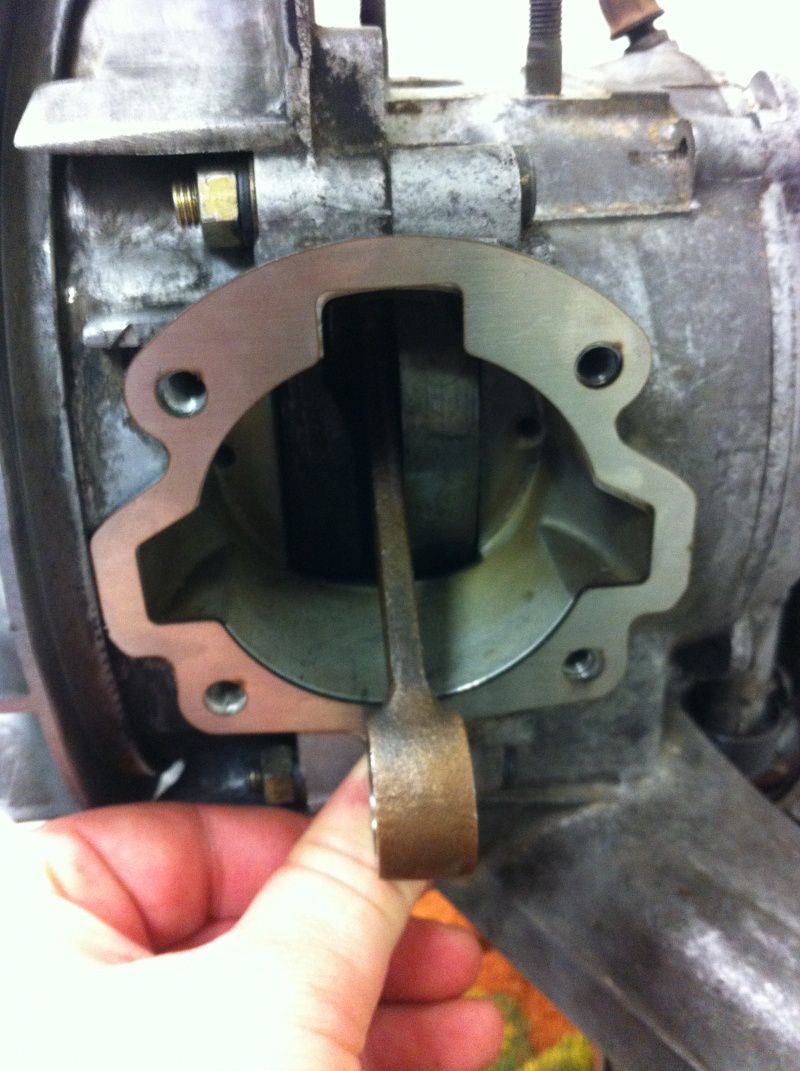
In the picture above you cann see a spacer for the Pinasco 177cc alloy cylinder made for engines with 3 ports. Pinasco cylinders are known for their quality and reliability. The spacer looks like it would fit but there would be less than 1mm sealing surface at the sides which is again way too less for proper use.
This upper picture shows the Pinasco 177cc alloy cylinder made for 2 port engines. The spigot has been reduced by the size of the spacer. The spacer itself covers the 3rd port and parts of the 2 side ones in order to make it usable for 2 port engines. This option would kill 2 birds with one stone. You could use the reliable Pinasco alloy cylinder and you could also cut out the 3rd port for our casings.
The best matching alternative is the DR 177cc cylinder. As you can see the sealing surface fits perfectly as the DR is close to the original one. This cylinder is also the cheapest one out of the 177cc cylinders.
There is of course also an alternative for the Vespa freaks. It would be possible to use a crankshaft of the PX200 which has a rod of 110mm (5mm longer than the original one). A spacer with a height of 5mm would adjust it again and you could port the spacer instead of the casings and then all variants of the 177cc range would be possible to use. But keep in mind that the flywheel and the stator plate need to be exchanged in this case as well.
Heute startete das Kölner Anrollern 2012 von unserem Scooter Center Shop in Bergheim Glessen.
Trotz trüben Wetters und nur 8° Grad fanden sich einige Vespisti zur gemeinsamen Ausfahrt zusammen. Vorab gab es für alle Rollerfahrer Heißgetränke und Verstärkung.
Hoffen wir dass die Saison erfolgreich wird und wir noch viele gemeinsame Ausfahrten sehen werden. Allzeit gute Fahrt wünscht das SCK Team.
Yesterday we received the new GP ONE cnc milled engine casings for all Vespa Smallframes.
We already used it for our 20 year anniversary shop demonstrator. See a video of the the first test run here.
The casings are made for direct intake cylinders like the Parmakit 130cc.
There will be 2 designs available. One with 57mm standard bore for 51mm and 54mm crankshafts and one for the Falc 153cc cylinder with 60mm bore and 54mm crankshafts.
The selling price will be 1799€ incl. VAT.
More information and details will follow next week.
Here are our winners from the custom show in Cologne:
Best Racer
1st: Jens B., Nr. 187, Yamaha Neos
2nd: Luca Z., Nr. 219, Yamaha Aerox
3rd: Michael S., Nr. 352, Yamaha Aerox
Best Sprinter
1st: Damien D., Nr. 229, Dio Af18
2nd: Patrick B., Nr. 195, Selfmade Sprinter
3rd: Sascha R., Nr. 293, Carbon Sprinter
Best Streetsleeper
1st: Tobias E., Nr. 314, Gilera Runner
2nd: Julian H., Nr. 296, Speedfight 100
3rd: Artjom K., Nr. 304, Yamaha Spy
Best Display
1st: Friedhelm V., Nr. 240, Yamaha Stunt
2nd: André H., Nr. 212, Gilera Runner
3rd: Daniel H., Nr. 196, Yamaha Aerox
Best Idea
1st: Krzysztof K., Nr. 313, Aprilla Gulliver
2nd: Timo S., Nr. 286, Aprilla SR50
3rd: Alexander R., Nr. 350, Selfmade
Best Light & Sound
1st: Sebastian S., Nr. 297, Speedfight/Aerox
2nd: Ralf B., Nr. 288, MBK Nitro
3rd: Dennis S., Nr. 299, MBK Booster
Best Oddity
1st: Thomas S., Nr. 228, Selfmade
2nd: Alexander R., Nr. 276, Yamaha Aerox
3rd: Jacob V., Nr. 209, Honda Wallaroo
Best Bodywork
1st: Michael H., Nr. 270, Aprilla SR50
2nd: Dennis M., Nr. 223, Peugeot Speedfight1
3rd: Daniel H., Nr. 256, Yamaha Stunt
Best Paint
1st: Klaus M., Nr. 206, Yamaha Aerox
2nd: Ivan K., Nr. 192, Aprilla SR50
3rd: Nicolas T., Nr. 282, Peugeot Ludix
Best Plating
1st: Sebastian R., Nr. 251, Yamaha Aerox
2nd: Pascal W. & Fabian P., Nr. 268, Peugeot Jetforce
3rd: Marcel H., Nr. 197, Malaguti F12
Best Overall
– Marc D., Nr. 189, Aprilla SR50R
Best Engineering
– Rene R., Nr. 215, Peugeot Speedfight2
Our journey took us to the scooter world of India this time. There are still many Vespa PX style scooters on the road which had been produced by LML. In the past many scooters similar to the European Vespa and Lambretta models were manufactured by Bajaj and Priya. This is because Piaggio sold assembly belts and licenses to India. Scooters over there are used as an everyday vehicle, and due to the poor road conditions they need to fulfill different standards than they do in Europe. However, you can clearly see that even in India the classic metal style scooter is slowly disappearing from the big cities. They are replaced by modern Bajaj 125 – 150cc motorcycles and scooters. Many scooters are simply left in a corner and are no longer used. Here is an example of a Bajaj which has been placed in a front yard and is not used any more:
The typical Indian cityscape is coined by the auto rickshaws which look like the Piaggio Ape models.
A big surprise was to see that a modification was made because metro cities like Delhi, Mumbai or Calcutta now require that all public transport must be converted to gas power. This significantly reduced the smog caused by exhaust fumes in recent years, and even 2-stroke engines now have only a small footprint.
This picture shows the CNG connection to the carburetor of the rickshaw engine. A really incredible invention for an emerging country like India.
More blog post to come about India.
The assembly of the Vespatronic needs a lot of TLC and improved interpretation.
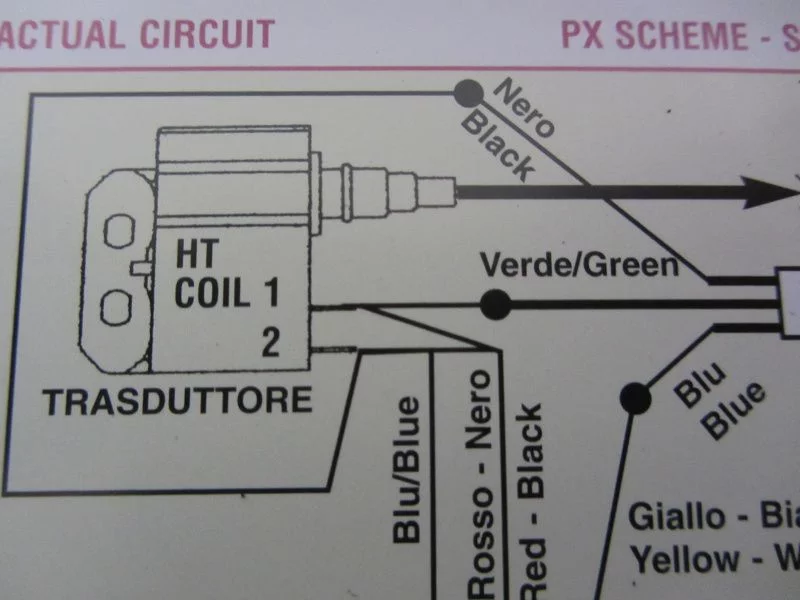
A further complication is the fact that the attached wiring diagram is not correct.
According to the wiring diagram, the mass and excitation voltage would be simply put together and distributed again to the ports 1 and 2 of the CDI.
It is of course only right to wire red/black from the stator plate to -1 – (the wider slot) which is connected with green on the wiring loom and blue to -2 – to connect (the narrow slot), which is connected with black on the wiring loom.
Likelihood of confusion exists with the cable box; here different colours need to be combined. All cables with dissolved connectors and which are energised during running engine have been provided with plug-in sleeves. The earth connection is not as potentially dangerous and can be equipped with a plug.
In order not to confuse the exciting voltage and the on-board vehicle electrical system which are both connected with a plug-in sleeve, you can use the following memory hook: „blue sea under the yellow sun“ – in practice this works really well…
For test purposes we will adjust the stator plate to the later mark of the 2 marks available.
Once we have placed all the glory in the cable box and the flywheel is mounted again, we can start the engine to control the ignition timing.
The marks for the TDC of 25 ° have been previously determined and marked by reversal measurement.
A quick check with the strobe light…
The ignition is set to 25 ° at 2000rpm. This is a satisfactory starting point for a run on the test rig.
The goal was a 25 hp engine but have a look at the diagram yourself.
Without air filter was the 148 main jet was still OK but with filter we had to use a 145 main jet and in addition to that we had to move the NAPE needle a clip on the 2nd Position from the top.
19hp and 25Nm at 6.000rpm speaks for itself. Even at 8.600rpm there are 25hp and 20Nm on the rear wheel. In this power range there will be no power loss when changing gears. It is incredibly awesome…
To get an idea of how fast this baby can get in the end, we will make another test run – HP vs. Km/h
At a speed of 140 km/h there are still 24hp left…
What do you think? Mission accomplished?
Only thing left now is to place the remaining parts again and then we are ready for a practical test on the road…
Last week our friend Harald from Aachen came to play around on our dyno.He was not 100% happy with the carb setting and wanted to test the slow running and improve throttle response.
These are the parts that are fitted to his engine:
Cylinder: Monza 70mm bore
Crankshaft:BGM 60/110mm
Carb: Mikuni TMX 30
Exhaust: JL-KRP3
Port timings : 186°/126°
Squish: 1,7mm
Easy to spot that there was room to improve the jetting. The blue curve shows the difference.
Thanks to a different slide (richer) and to a altered needle position power and torque low down have been increased further. And the over rev potential is much better too.
Our good customer Sven came ob saturday to show his new Vespa Spezial.
A real stunner. And the clours work together pretty well, especially with the nice bgm PRO SC shockers!
At the dyno we checked the engine and its power output! There is no porting work done to the barrel. It went to the casings completeley Plug & Play!
The port timings are transfers 128° and exhaust 190°. This gives a blow down timing of 31°. With slightly more blow down timing the exhaust Big Bertha would work even better. Maybe we will see Sven reworking the port timings in the future!?
These are the selected engine parts:
Cylinder kit: Parmakit SP09
Crankshaft: BGM 51/105
Carb:Keihin PWK 33
Intake system: Polin reeds with Strohspeed manifold
Ignition: Vespatronic
Exhaust: Big Bertha
Friday Dennis one of the guys from our Raceteam came to test his high speed circuit racing engine.
The engine is finished with these parts and the results on our P4 dyno were very impressing.
Cylinder: Parmakit 144cc, 60mm bore
Crankshaft: BGM 51/105
Carb: Keihin PWM 38
Exhaust:Big Bertha
This was the first dyno run and the jetting was: idle jet 52, main jet 160, needle DEG. For a first dyno run with probably some room for improvements smiles were all over. With 2.46er primary drive by DRT thisshould be a nice ride on fast tracks like the Nürburgring or Bilster Berg race track.


