Posts

Individual gift ideas for scooterists by the Scooter Center team

Name: Philipp

philipp-lambretta-teile

How long have you been working for Scooter Center:

Since 2005

What is your task at Scooter Center:

Basically anything connected to Lambretta. From purchasing to product development and support of our own brand BGM to sales and customer service.

What’s your relation to scooters:

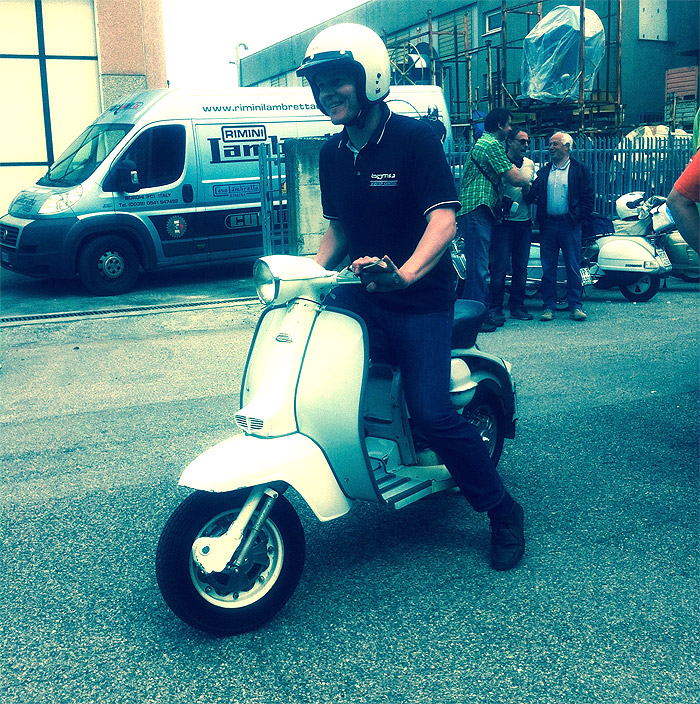
From the moment I made my hobby my profession, scooters play a central role in my day. I currently ride a GT 200 for daily commuting. And I only ride Lambretta. My only Vespa never runs, maybe sporadically, in which case this great battery-powered ignition is on strike or there is fuel boiling in the carburetor. And then I am boiling with rage.

By now I ride scooters for 23 years and it all started with a PX 80 in weathered red… I bought my first Lambretta in 1994 at Scooter Center (then in Rosengarten, another street). It was a SX 200 with original paint, German documents and new MOT. The original paint was soon part of the past and so was the battery tray, which had to give way to the TS1.

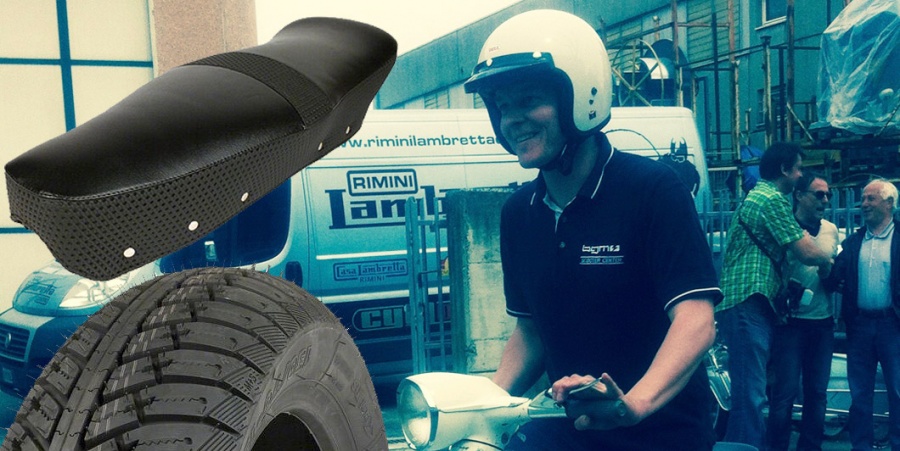
There are many greatest experiences with and related to a scooter. This year’s highlight has definitely been riding the original 2 cylinder prototype at the Open Day at the Rimini Lambretta Centre.

Gift idea for scooterists

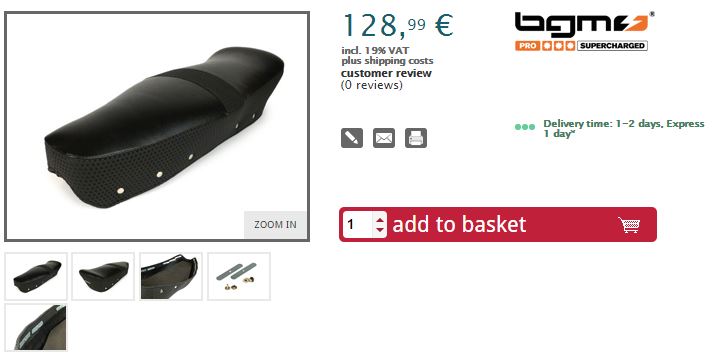
Seat cover -BGM PRO Alfatex- Lambretta LI, LI S, SX, TV – black

Part no. BGM2700

seat cover lambretta

Why:

A great opportunity to give a seat cover away, which was installed in the 2 cylinder prototype with 12” by Innocenti. During one of our many visits of Vittorio Tessera at the museum we had the idea to produce such a seat cover. Either on our yearly trip to Novegro or while collecting parts at Casa Lambretta. The seat cover has a great look with Alfatex at the sides and is nicely lined to guarantee good comfort on long rides.

Seat cover -BGM PRO Alfatex

Seat cover for standard Lambretta seat frames. The sides and the top of the centre part are covered with Alfatex. The seat was handmade in Italy. Its inlay is made of foam. This guarantees high comfort on long trips.

One of the two two-cylinder prototypes by Innocenti has been equipped with a seat like this.

The idea of using Alfatex at the sides turned to be a standard with GP Electronics by Innocenti.

  • Fits almost every Lambretta seat frame
  • Comfortable, thanks to foam inlay
  • Made In Italy
  • Subtle sporty looks for a Lambretta connoisseur

Supplied with additional metal clips and fastening material for a coherent design of the rivets. The seat strap 8040110 is a suitable alternative.

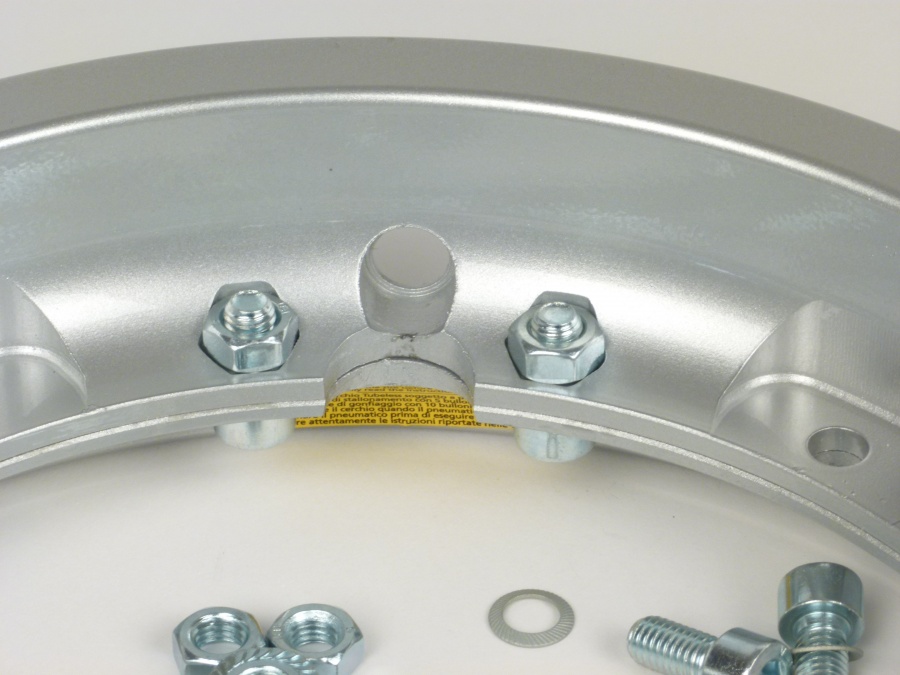
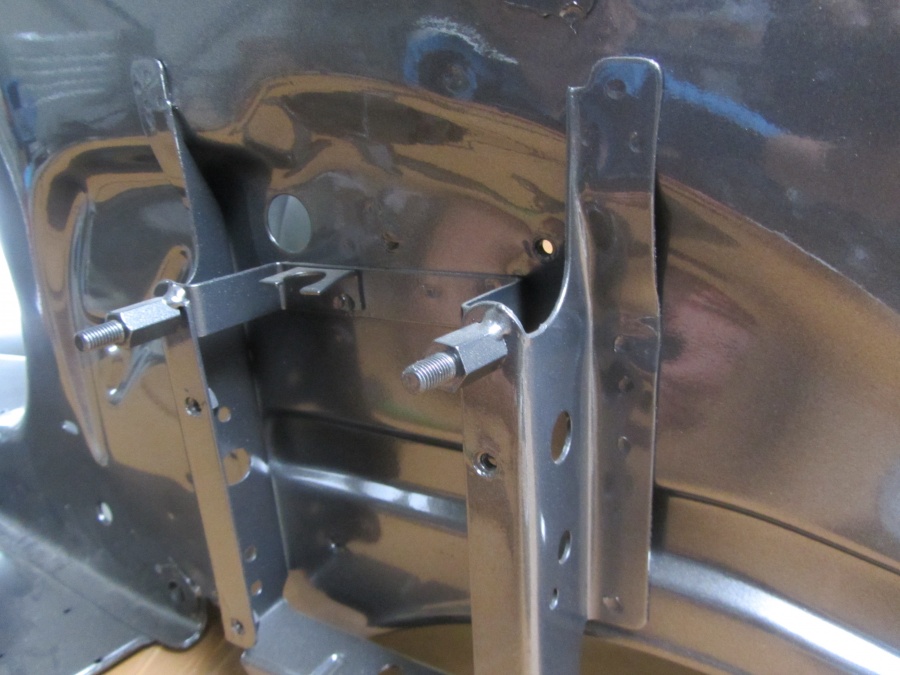
Toolbox set -RLC Twin Cylinder SX200- Lambretta LI (series 3), LIS, SX, TV (series 3) – GRP – primered

partnumber 3331560


Why:

Another chance to give away (or buy for yourself) another part that was specificially made for the 2-cylinder prototypes. This time for the scooter that retained 10″ wheels. The toolbox that you are used from your Lambretta was abandoned, probably to make space for an oil tank to be used with an autolube system. This seems to be the reason for the neat toolbox that is fitted inside the legshield on this twin. From the side is as good as invisible and fits like a glove to the design of the Lambretta. Well, nothing else we would have expected from an Innocenti designed part. The mounting below is done to two of the horncast fixings and for the top fixing you need to drill a M5 hole to the legshield. Sdaly there is a limited production run of these only.

Lambretta Toolbox Set RLC
This toolbox is a superb copy of that designed and fitted to the Innocenti produced Twin Cylinder SX200 Prototype (as restored by the lads at Rimini Lambretta Centre and part of Vittorio Tessera s Lambretta Museum in Milan).

The toolbox is amazing in that when viewed side-on, it’s completely invisible and is VERY sleek in appearance. The lower mounting bolts fit the bottom horncasting retaining bolts. At the top, you will need to drill a small 5mm hole for the single, top mounting bolt. This will be totally invisible though once the toolbox has been mounted. The toolbox is made of fibreglass, comes complete with a grey outer rubber beading and lock (+ 2 keys).

It fits any Lambretta Series 3 LI, SX. TV, GT, Special or Serveta model. Please note that these toolboxes are a LIMITED EDITION item and are served on a ‘first come, first served’ basis.

geschenk-lambretta-teile

Pinasco Vespa tube tubeless

Tubeless Vespa rims

For some time you can now find more examples of Vespa rims for tubeless tyres on the market. Pinasco Vespa Tube Tubeless

Pinasco alloy rim for Vespa

Pinasco is now offering a version including laboratory report by TüV.

However, the report is no guarantee for the e-pass remaining valid. So please check with the registration office responsible for restrictions on admission.

Felge Pinasco KBA 264

Which are the advantages of tubeless tyres?

  • in case you damaged the tread, air can only escape slowly. The tyre remains solid for a longer period of time.
  • no tube, which could burst or be jammed while assembling.
  • in case the tread punches on the rim, there is no tube that might be damaged.
  • if there is an increase in stress on your tyre or low pressure making the tyre move on the rim, the air valve won’t rip off.
  • no tube that might ream by the tyre


VESPA ALOY RIM
  • Split rim
  • O-ring to seal the two halves of the rim
  • Set of screws to link the two halves of the rim
  • Air valve
  • Nuts with flansh to fasten the rim to the brake drum
  • How to install
  • Laboratory report by TüV


Split rim – easy assembly

So far, all rims for tubeless tyres on the market have been one-piece rims, as for cars or motorbikes.
For classic scooters however, necessary brake drums have limited the design of rims immensely.
This limitation meant that mounting tyres on a one-piece rim was hard work and in some cases you even had to damage the tyre.

Split rims have always been a strong selling point of Vespas, because this led to quick mountings of tyres.

For mounting tyres on a one-piece rim, you need suitable equipment, which you will only find in a garage. There is no way to do it at the side of the road.

Pinasco dealt with this deficiency and finally launched a tubeless split rim onto the market, which rejuvenates the advantages of a quick change of tyres.

We took a closer look at the new Pinasco rim for you.

Delivered with

  • Split rim
  • O-ring to seal the two halves of the rim
  • Set of screws to link the two halves of the rim
  • Air valve
  • Nuts with flansh to fasten the rim to the brake drum
  • How to install
  • Laboratory report by TüV


Felge Pinasco KBA 254

Colours Vespa alloy rims

Pinasco offers a traditional range of colours. You can buy rims in black, polished alloy and traditionally in silver.

Pinasco Rim 001

Wheel rim -PINASCO, V2.0, tubeless 2.10-10 alloy, split rims- Vespa (type PX) – silver

Wheel rim -PINASCO, V2.0, tubeless 2.10-10 alloy, split rims- Vespa (type PX) – black

Wheel rim -PINASCO, V2.0, tubeless 2.10-10 alloy, split rims- Vespa (type PX) – alloy polished

Assembling the Vespa rim

First step should be to assemble the air valve. It’s easily done with the help of tyre mounting paste.

Secondly you should prepare the wider half of the rim with tyre mounting paste and put on the tyre, starting at the valve.

Please note: your tyre may have a profile that is bound to a running direction. This may vary for front and rear tyres.

Felge Pinasco KBA 294

If the tyre is well placed, the o-ring will find its way to the groove.

Felge Pinasco KBA 262

Once the o-ring is well placed, you may put on the second half of the rim.

Now, both halves have to be linked with 10 screws. Pinasco sets a maximum torque of 18Nm.

Nuts are interlocked in the larger half of the rim. The head of the allen screw is being secured with a schnorr washer, so that it won’t open without someone’s ado.

Felge Pinasco KBA 260

Fastened by 10 screws, you can now inflate the tyre to a maximum of 1.8bar. You used mounting paste, but the tyre won’t lie nicely in the rim base? If the entire wheel is fastened to the brake drum you may fit the tyre by inflating to a maximum of 3bar. Without the five additional fixation points of the brake drum, it might happen that the two halves of the rim spread, causing pressure to escape. After fastening to the brake drum, this won’t happen and pressure is kept reliably.

Pinasco recommends nuts with flansh to fasten the rim to the brake drum. When using snap rings for steel rims, the rim was being damaged when unfastening the screws. This won’t happen here.

Trace offset

Due to their design, there is trace offset with some one-piece tubeless rims. Due to the two-piece design of the rim, Pinasco managed to stick to the original rim offset.

Spare wheel

Due to its design and with a small trick you may fasten the Pinasco rim as spare wheel to your PX. You adapt the bracket for the spare wheel with spacer nuts in a way, that you fasten the wheel “upside down” – valve facing side panel.
This is an example of a LML frame. Having adapted the bracket also makes it easier to get to the valve of a standard wheel.

LML Rahmen

Which wheels fit?

As mentioned before, all common wheels of the sizes 90/90-10, 3.00-10 and 3.50-10 fit the Pinasco rim.
In case of one-piece rims it usually used to be luck to find a wheel that wouldn’t be damaged during assembly.
You should still pay attention to one small but crucial detail when buying wheels. Your new tyre should have the important “TL” or “tubeless” label.
A tyre labelled “TT”, meaning tube type, is not necessarily gas-proof.
So please only use “TL” labelled tyres with your tubeless rim.


Felge Pinasco KBA 302

You will find further information on your new tyres in our online manual and on Vespa-Reifen.de

Disc brake

The Pinasco rim also fits vehicles with disc brake. However, you should check clearance. We installed a PM brake caliper for test reasons. But sadly it didn’t fit the Pinasco rim. Standard brake calipers by Grimeca, LML und HengTong (Piaggio) fit the radius of the Pinasco rim without problems.

In case of damage to your tyres, you should have the following with you

Your Pinasco rim is fastened by allen screws. Should you get embarrassed on the way and need to unfasten your rim, you should have a fitting allen key on board. The key set by Toptul includes all common sizes from 1.5mm – 10mm and the handy box makes it easy to transport the allen keys in the glove compartment without causing noise.

Toptul Inbus

We recommend a repair set for tubeless tyres, so that you are able to continue your journey even without a spare wheel.

BGM8803


After removing the air valve you could even install a tube to the Pinasco rim.

VESPA ALOY RIM
  • Split rim
  • O-ring to seal the two halves of the rim
  • Set of screws to link the two halves of the rim
  • Air valve
  • Nuts with flansh to fasten the rim to the brake drum
  • How to install
  • Laboratory report by TüV