
Sports – shock absorber with MOT for Vespa GT, GTV, GTS installation guide
Shock absorber set -BGM PRO SC FR1 SPORT – Vespa GT, GTV, GTS (-2013) 125-300 – black
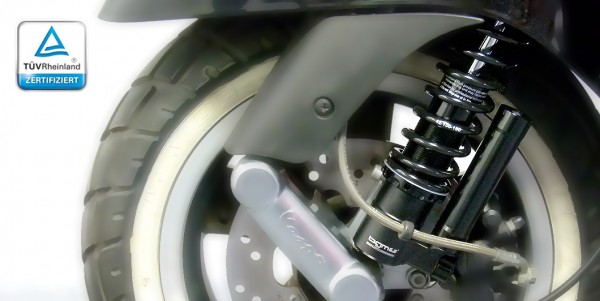
Shock absorber Vespa GT GTS Super Sport with MOT
Buy the new BGM shock absorbers here Fine tune the suspension of your GTS with the new shock absorbers BGM PRO SC/F16 and SC/R1: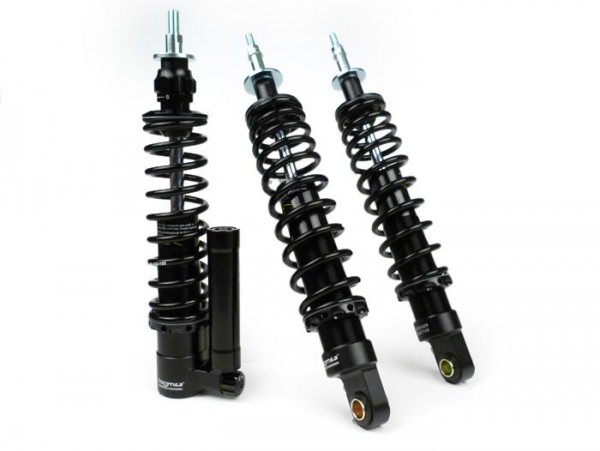
Suspension tuning by adjusting pressure, rebound damping and spring preload
Individually adjust the front shock absorber of your Vespa to your riding habits by adjusting pressure, rebound damping and spring preload.
The back SC/R1 shock absorbers offer stepless adjustment of the spring preload and are easily adapted to varying loads. 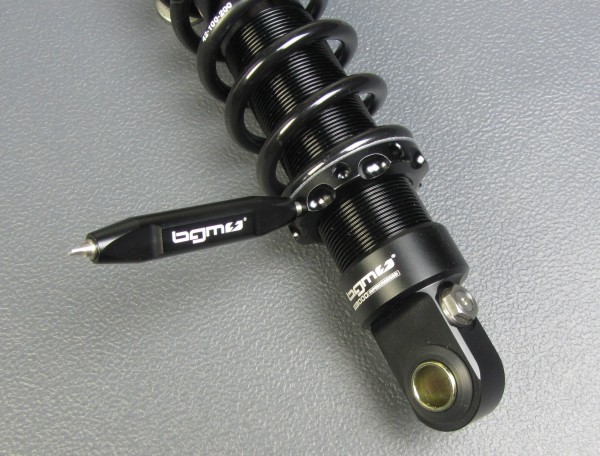
Do you prefer soft cruising or sporty tours in the mountains? A BGM PRO suspension is perfect for any kind of situation.
Of course you will get a MOT certificate for your BGM PRO suspension in order to add the changes to the registration papers of your Vespa without stress. 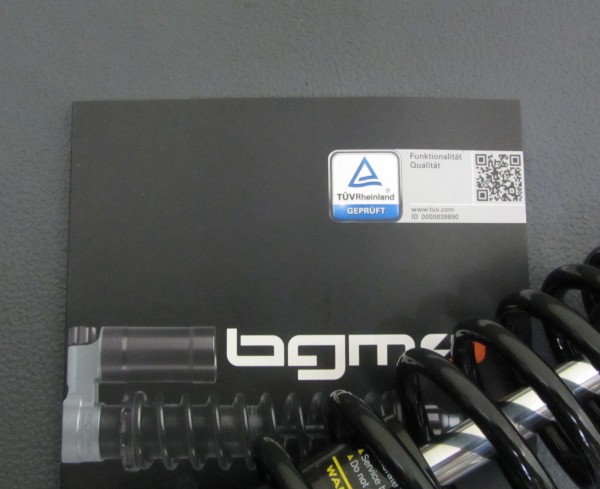
HARMONIOUS
The harmonious basic tuning of the BGM PRO SC SPORT suspension is convincing. The basic tuning of shock absorbers and spring constant were adjusted to a sporty driving style on roads, perfectly balancing sporty and daily riding styles. The front absorber even is an improved copy of the BGM PRO SC COMPETITION series. Rebound damping can be adjusted 16-fold.
DIRECT
The BGM PRO SC SPORT suspension reduces diving while braking, which usually is characteristic for scooters. It also reduces horizontal shaking when accelerating. This results in unadulterated directness, which, in combination with a sportier handling, leads to more safety and enjoyment.
SIMPLE
The slim line of the front absorber’s compensation container is intentional. It makes a quick and easy assembly possible without the need to take off brake hoses.
E-PASS
The BGM PRO SC SPORT shock absorbers come with a KBA (German Federal Powered Vehicle Agency) approval and e-pass to grant pure relish without regrets. These approvals allow you to directly ride your scooter after assembling the shock absorbers according to the requirements in the e-pass. No need to register, you have to carry the e-pass along.
- with KBA (German Federal Powered Vehicle Agency) approval / e-pass (no registration needed!)
- high strength alloy, CNC machined
- hard-anonized surfaces for perfect protection
- already perfectly adjusted
- front rebound damping adjustable 16-fold
- sporty-harmonious damping technology
- high-quality parts for a long life
- massive 12.5 mm piston rod
- stepless adjustable spring preload
- set ready to install
TECHNOLOGY
The SPORT series inherited its technologic features from its big brother BGM PRO SC COMPETITION shock absorbers. The SPORT is also made of the same massive 12.5 mm piston rod and high strength and anti corrosion alloy body, which was additionally hard-anonized and is supplied in stylish mat black.
Conclusion:
Sporty comfortable shock absorber with approval and unrivalled cost-benefit ratio!
Installation guide Vespa shock absorbers
Easy installation of the new suspension
Installing these shock absorbers is relatively easy. We have summed some hints and the most important steps of installation up for you:
In order to guarantee a well and safe installation you should place your Vespa on a level and firm ground.

In order to exchange the front shock absorber, the front wheel should be freely accessible. It would be easiest to either shim your Vespa under the frame or to use a jack to lift the front wheel. By doing so you can jack up your Vespa without someone to help.
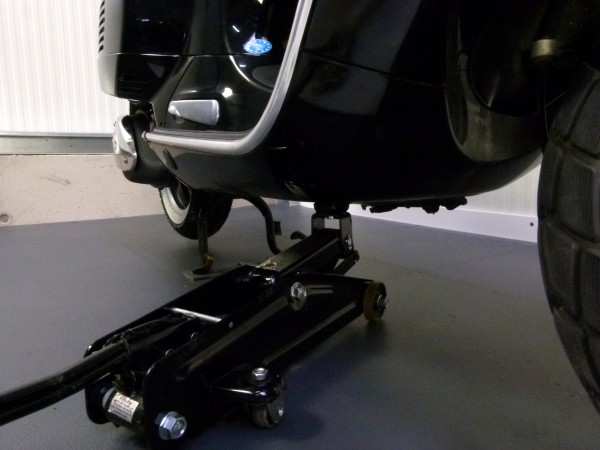
Unscrewing the five screws of the front wheel rim is easiest when the front wheel is blocked.
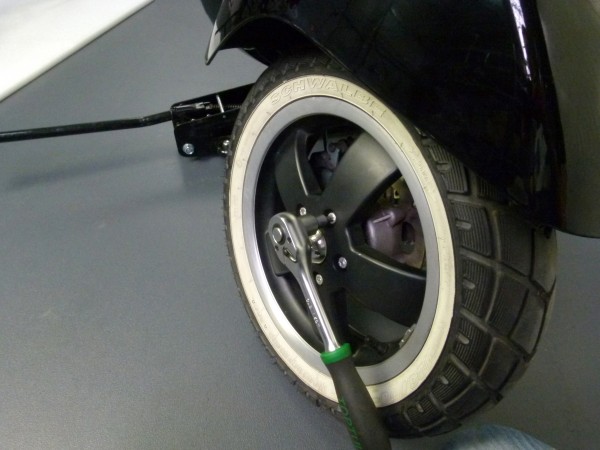
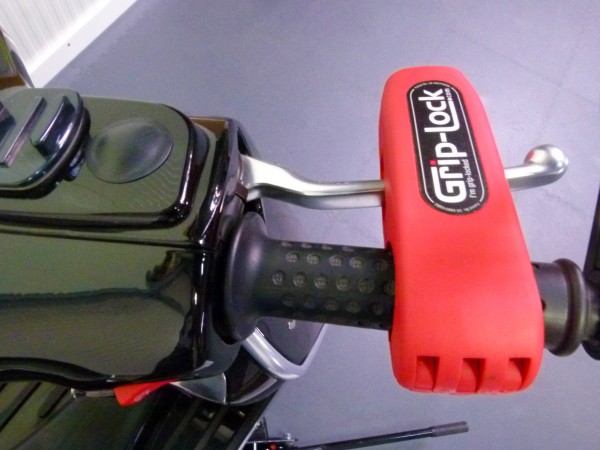
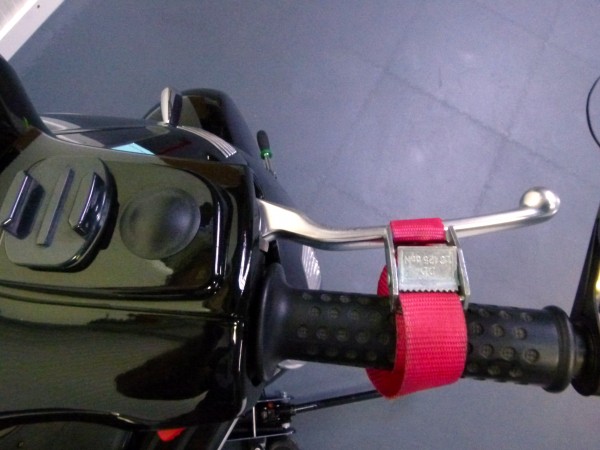
Do you have a lock for the brake lever? In that case this security lock could be the substitute for a third hand. This task can also be accomplished by cargo lashing or, if you don’t have anything else, by cable straps. A blocked front wheel will also come in handy when working at the rear. Your scooter won’t roll away.
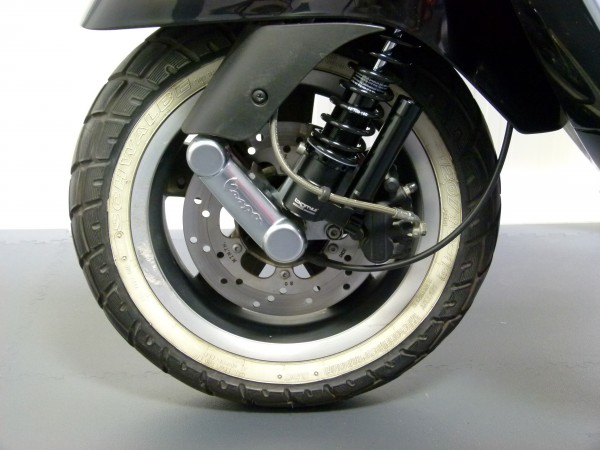
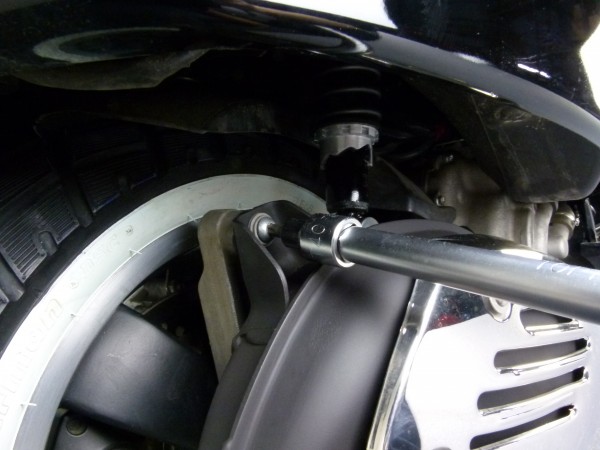
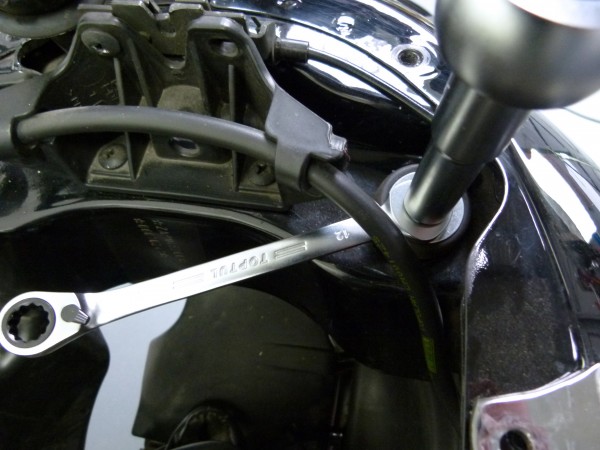
First use an angled hex wrench to unscrew the lower two mounting screws.
Next are the two nuts of the upper shock mount. Once you took these off, you can easily remove the shock absorber in direction of the front wheel.

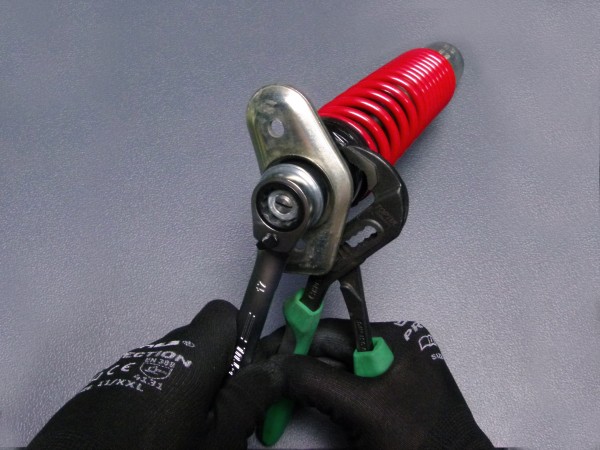
To loosen the upper nut, you may hold the shock absorber at the dome top cap.
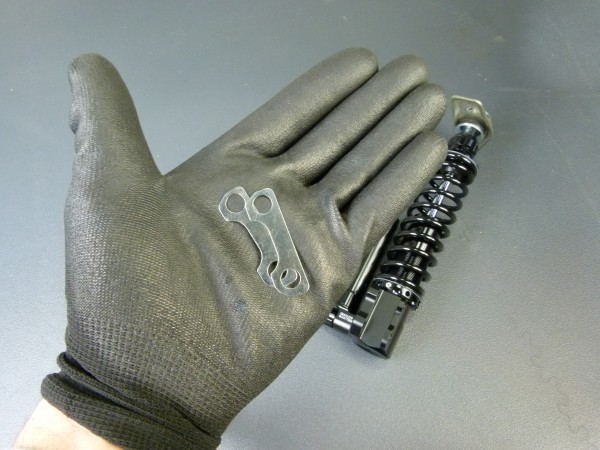
Once you removed the upper mount, quickly check the silent rubbers. The rubbers are hard or brittle? It would be best to replace them. 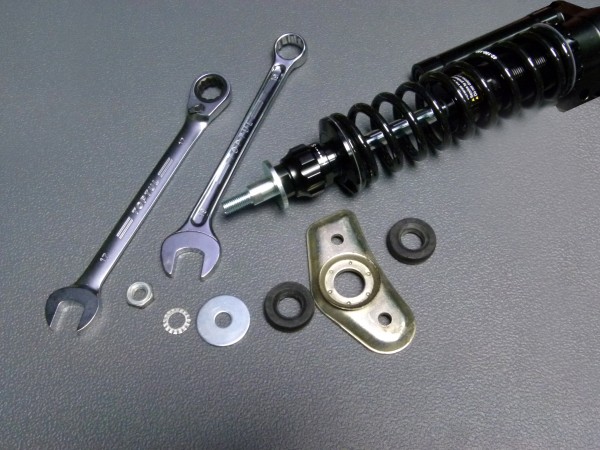
The BGM shock absorber also has two assembly aids, which can be used to hold the absorber during installation. 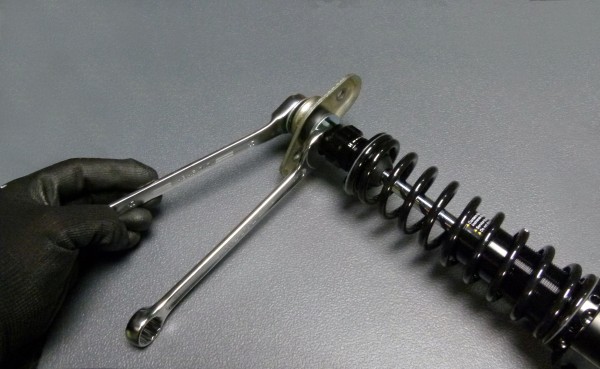
You must not hold the absorber’s piston rod with pliers or any similar tool. Marks on the surface of the piston rod caused by a tool, would immediately lead the shock absorber to leak when snapping in.
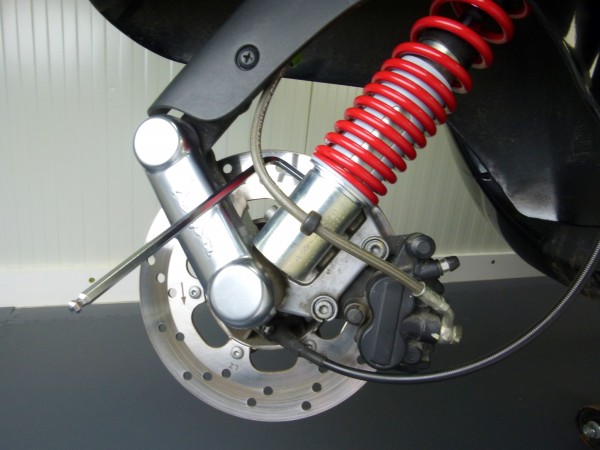
Once the mount is installed, you may place the absorber from the side of the wheel. BGM shock absorbers are supplied with spacer shims to make up for gaps between shock absorber and brake caliper.
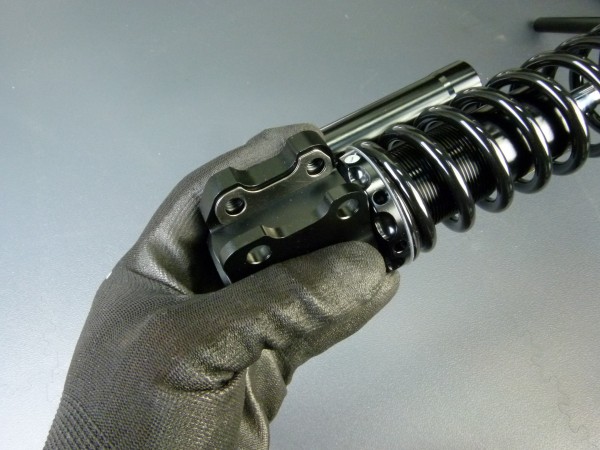
Should you need the spacer, you may first fix it with a screw through the lower hole and then place the absorber on top of the mount of the brake caliper and the spacer shim.
Once the screw in the upper hole and the spacer shim fixes the shock absorber, you may correctly position and fix the absorber. 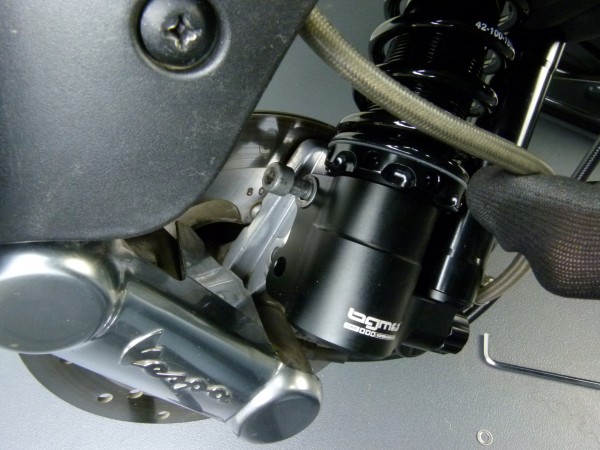
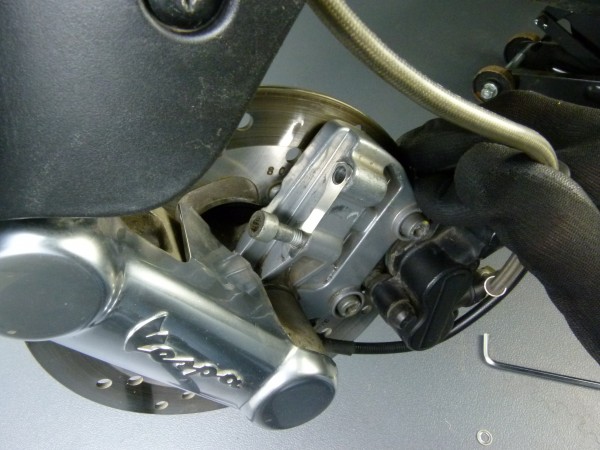
The steering tube secures the screws of the upper mount.
Simply secure the mounts of the shock absorber with nuts from below.
Once you reinstalled the front wheel with the five hex socket screws, you may now address the rear shock absorbers.
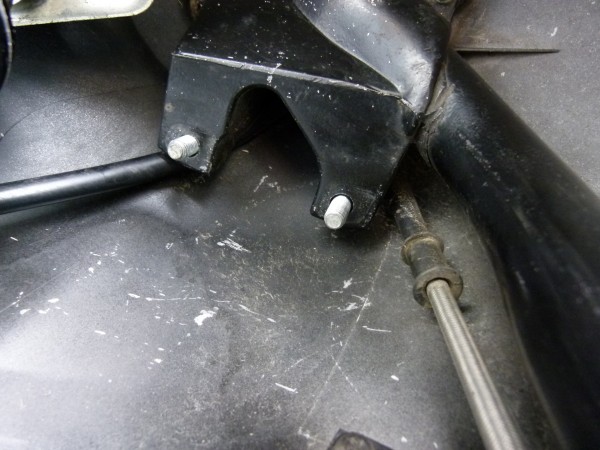
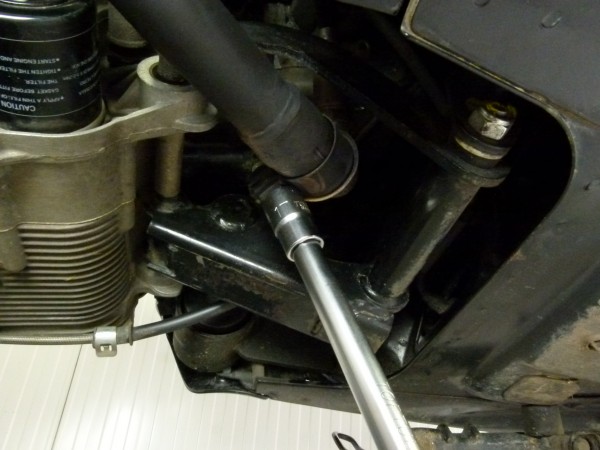
The lower mount of the shock absorber is hidden on the left hand side of the vehicle behind the air filter box.
You have to lift the air filter box to access the mount.
To lift the air filter box you need to unscrew the two back screws and loosen the front screw. You don’t need to fully remove the air filter box.
The exhaust on the right hand side of the Vespa blocks access to the lower shock mount.
Beware: Did you just go for a ride on your Vespa? It would be better to postpone your work until exhaust and engine have cooled down.
The exhaust is fixed with three screws and the clamp of the manifold. Wires of the lambda sensor or cooling hoses might be close to the clamp. Please watch out and don’t damage these parts.
It would be handy to loosen the clamp of the manifold first, before unscrewing the screws of the rear swing arm, which fix the exhaust body.
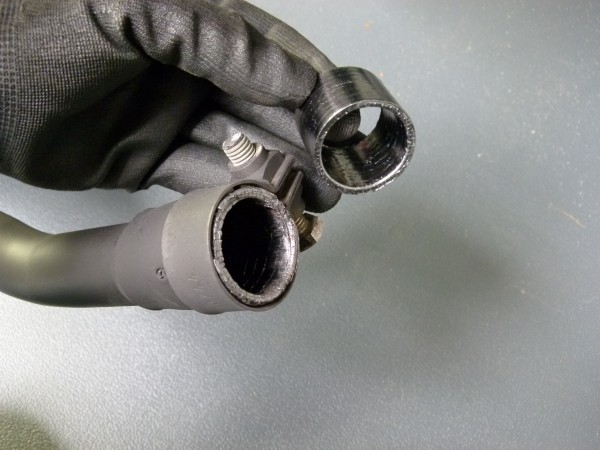
Please watch out: when unscrewing the last screw, the exhaust might fall down. You can now pull the exhaust from the manifold.
Original Piaggio exhausts have a graphite gasket between exhaust and manifold. This gasket is sensitive to mechanic strains and should be replaced in case of visible damage.
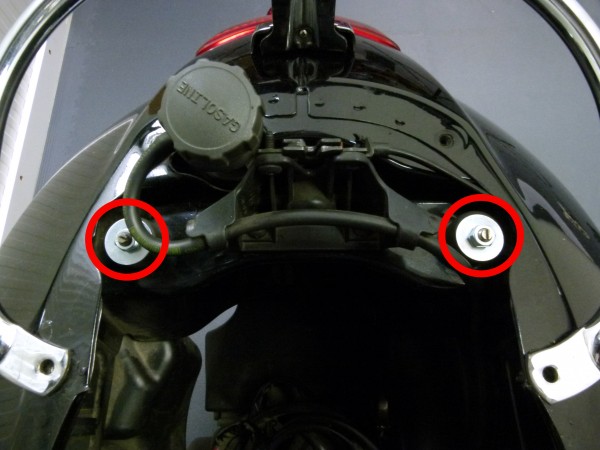
In order to remove the shock absorber from the frame, you have to remove the helmet box and the cover of the seat lock.
You can simply lift the helmet box.
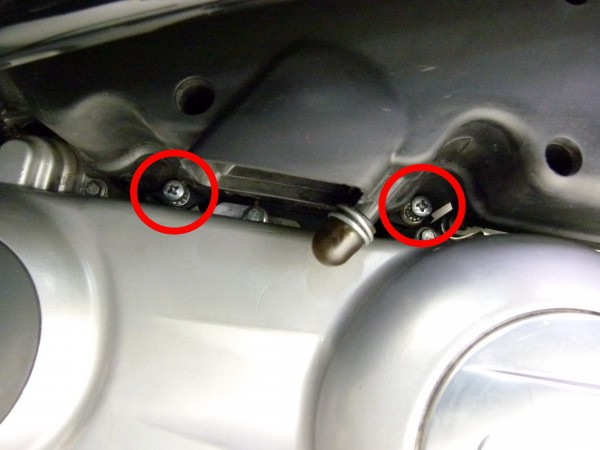
Four screws fix the back cover to the vehicle.
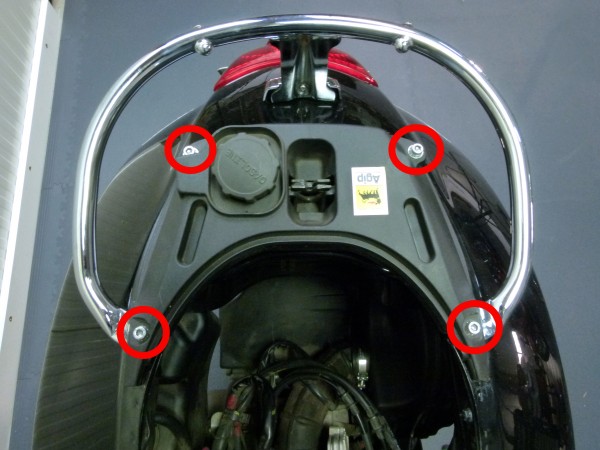
Once you removed the screws, you only need to take off the cover of the tank cap.
Just in case, put the cover immediately back on the fuel filler.
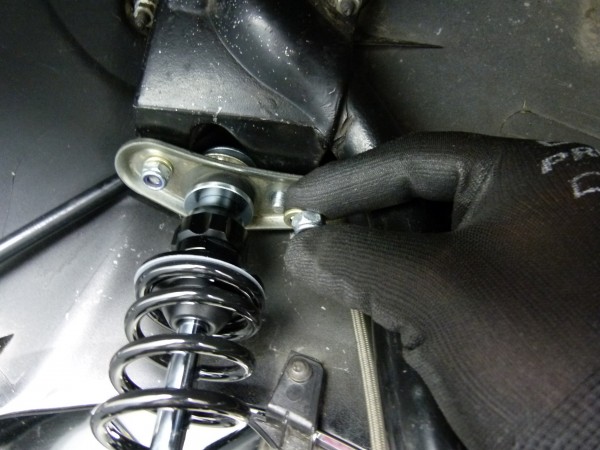
You will find the upper fixation points of the two shock absorbers on the right and on the left of the seat lock. Please check the secure stand of your Vespa, before removing them. The front wheel should be blocked and should touch the ground.
Loosening the two upper fix points of the shock absorber will cause the engine to lower down. So please watch the shims and silent rubbers.
After removing the nut you can simply pull the shock absorber from the bolt of the swing arm. Pull downwards out of the frame.
You will find another silent rubber on the shock absorber. After a short -positive- check, it can be reused. 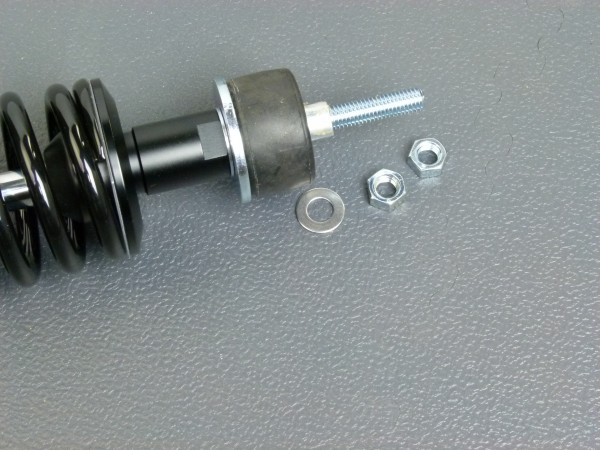
When removing the left shock absorber you have to watch out for the two bushes of the lower mount.
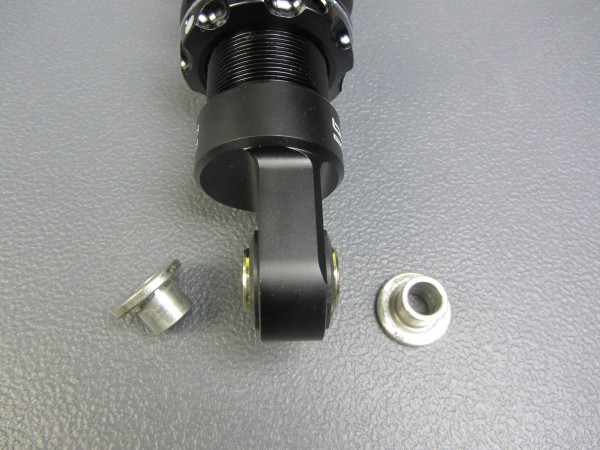
Place these two bushes in the eye of the BGM shock absorber. These two bushes are obligatory for a safe installation of the left shock absorber.
Watch out for the correct alignment of the lower mounts.
When watching from behind in direction of travel, the mounts are placed to the right at both absorbers. 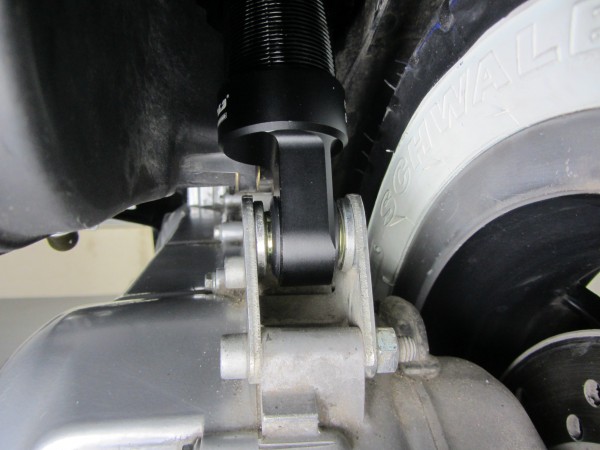
The sequence of installation remains the same for the upper mount. The silent rubber is followed by the large shim. Now secure the absorber with the two included nuts.
Once you reassembled the cover of the seat lock, helmet box, exhaust and air filter box, you may start with test rides for your suspension.


Hinterlasse einen Kommentar
An der Diskussion beteiligen?Hinterlasse uns deinen Kommentar!