Posts

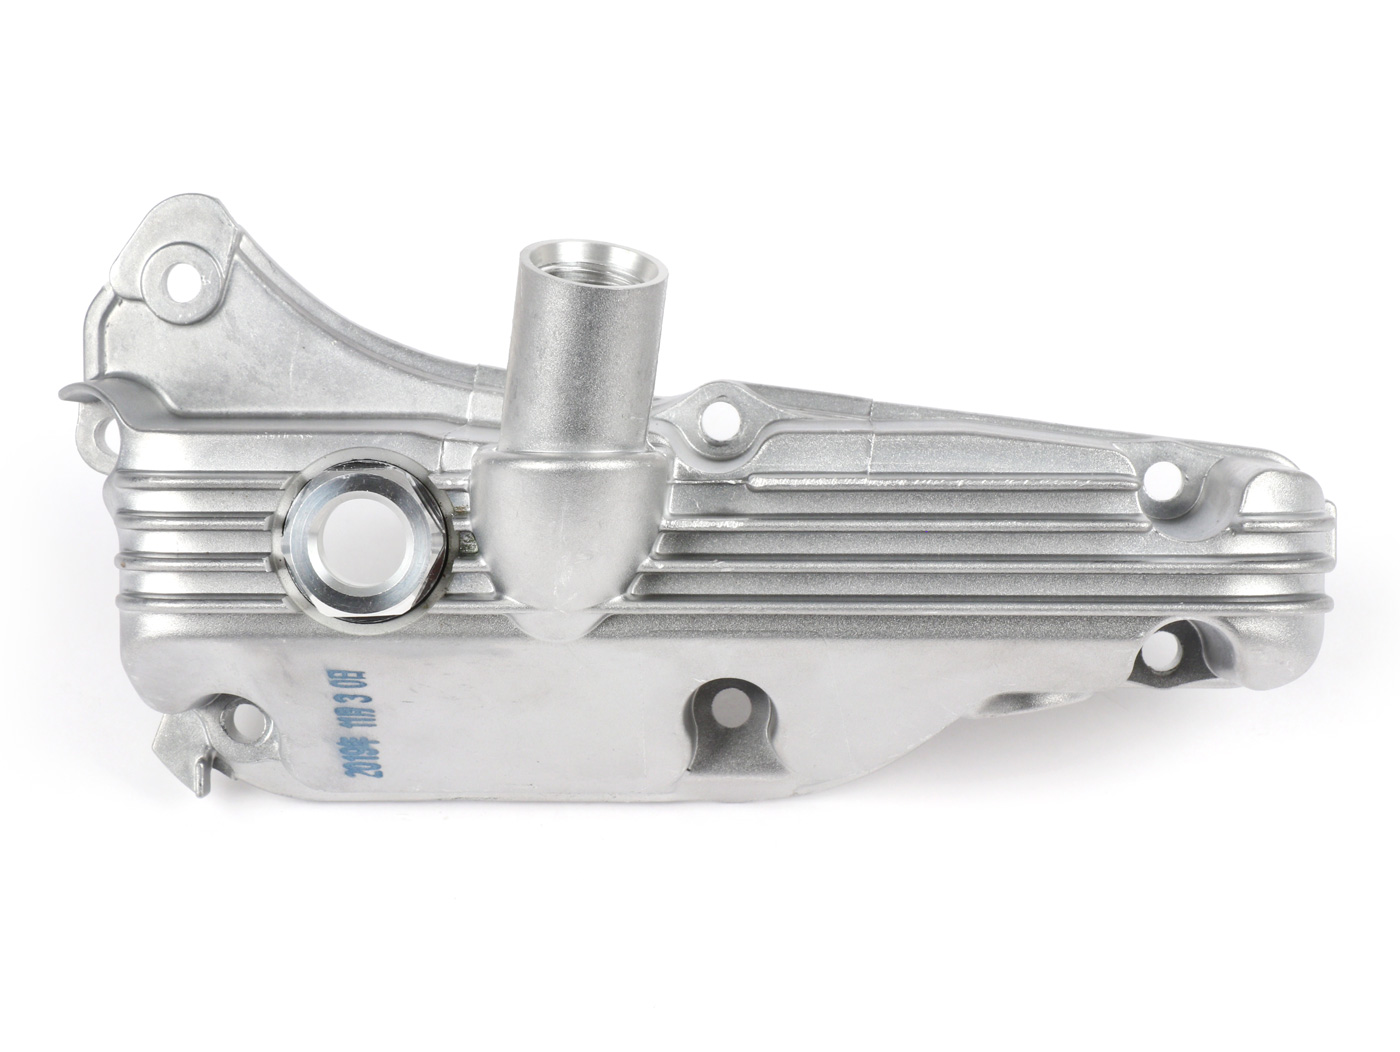
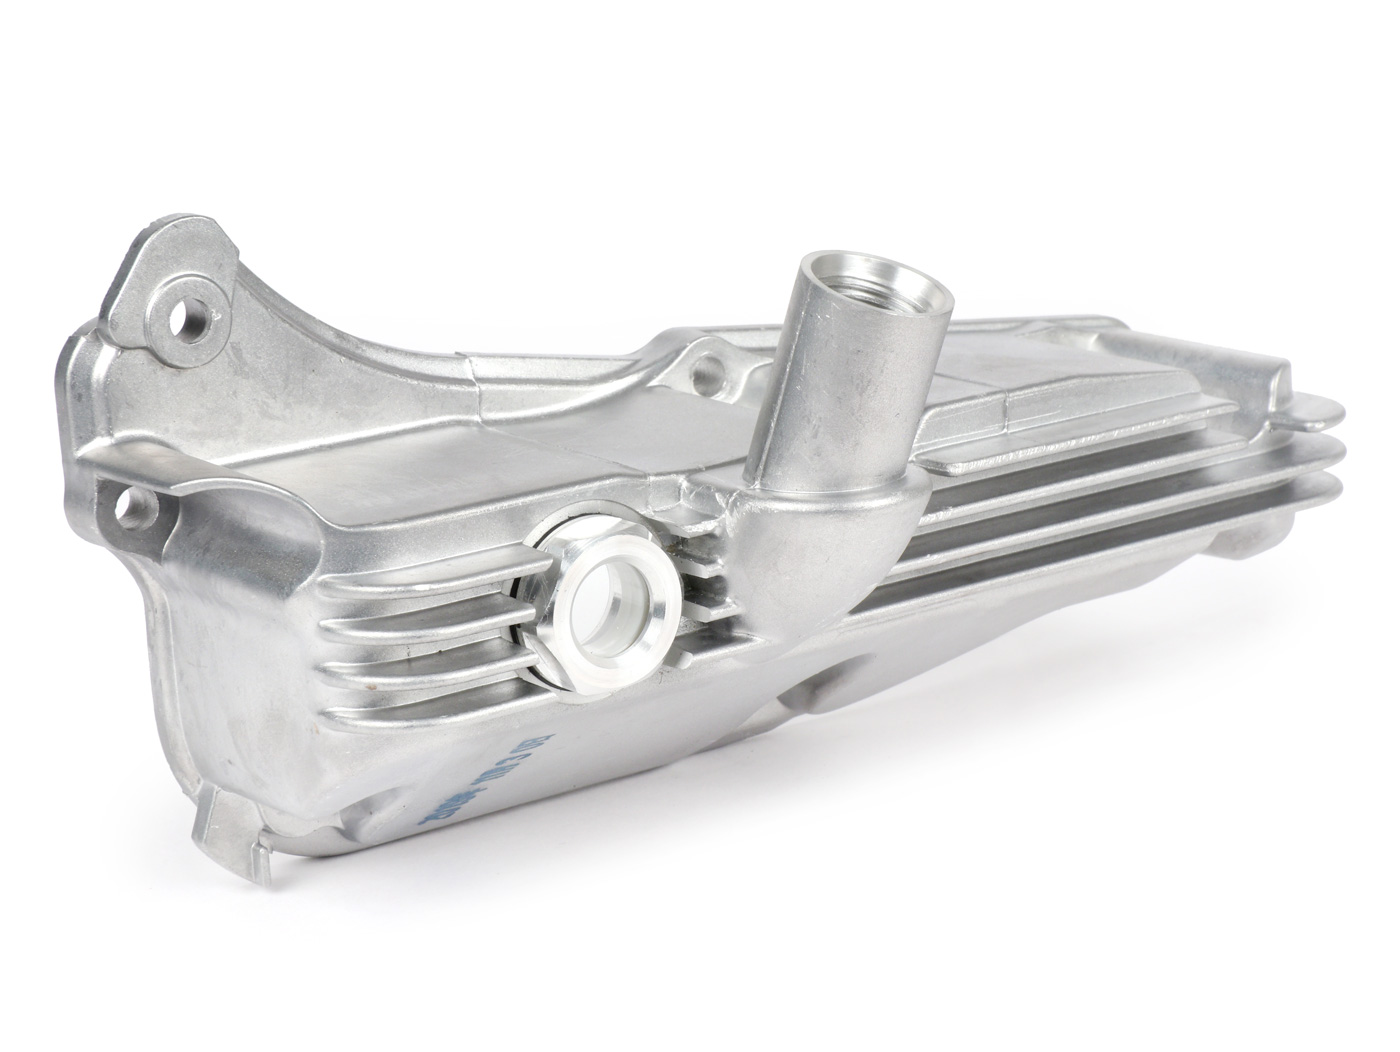
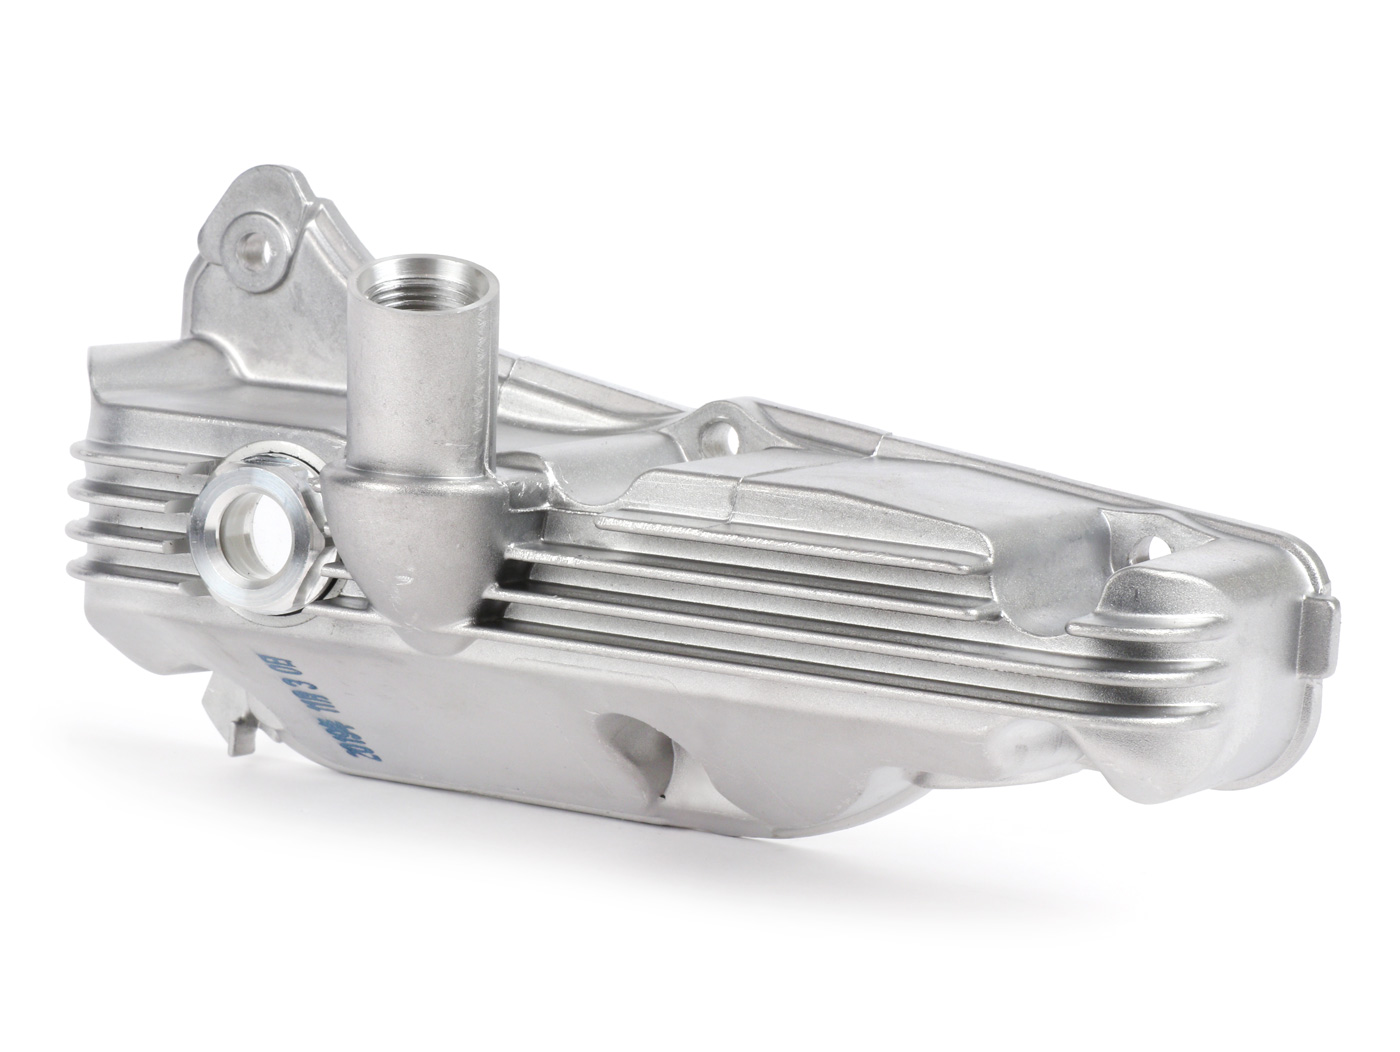
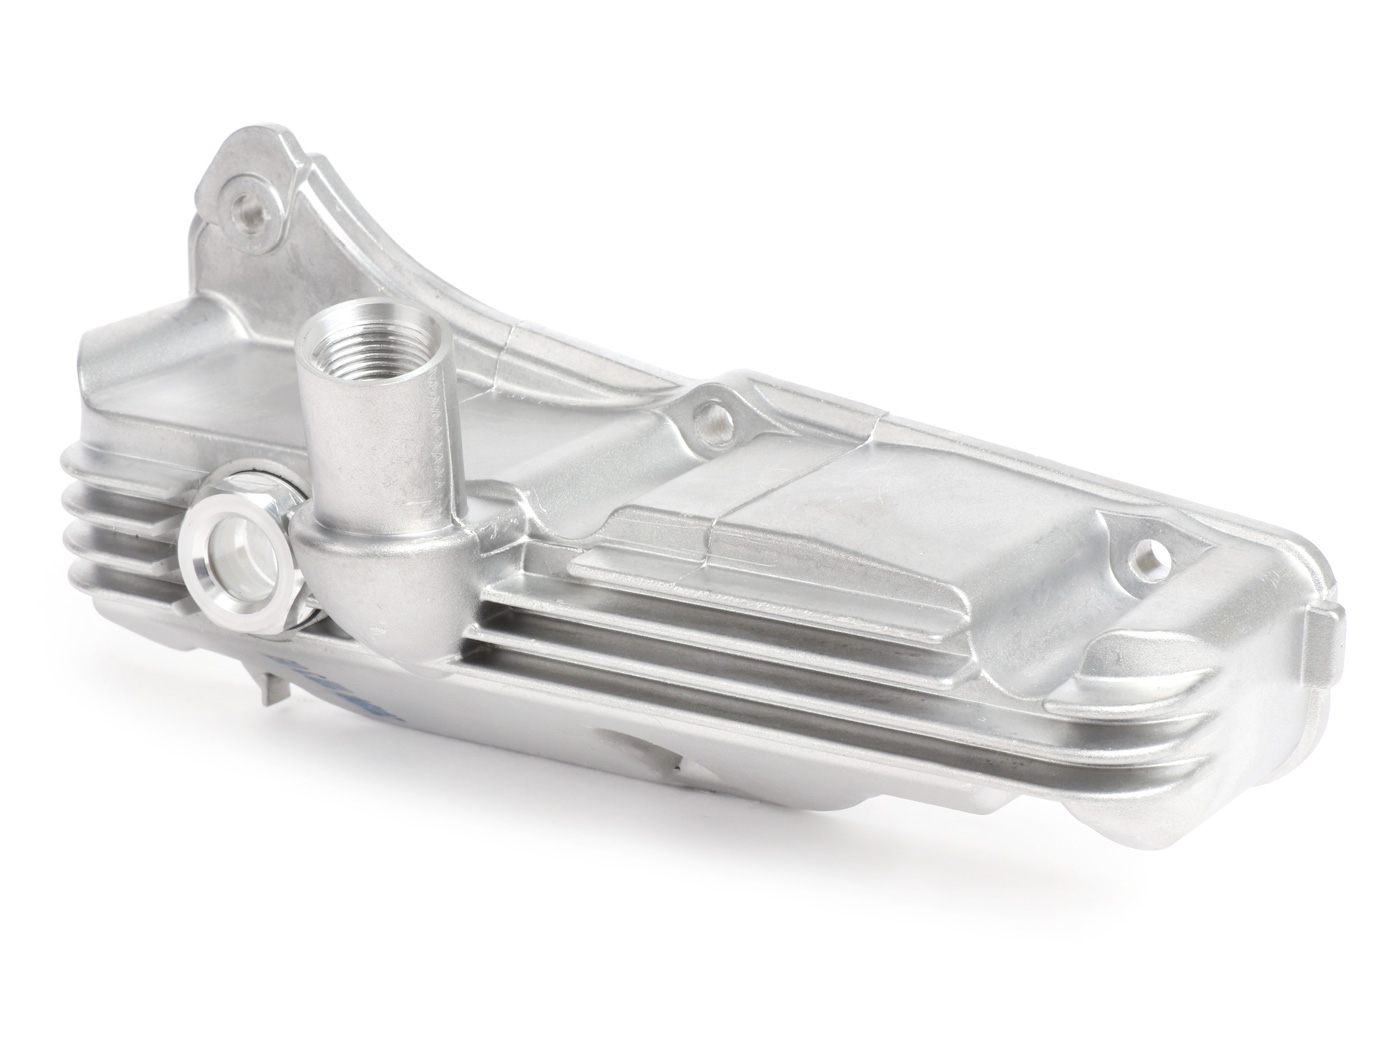
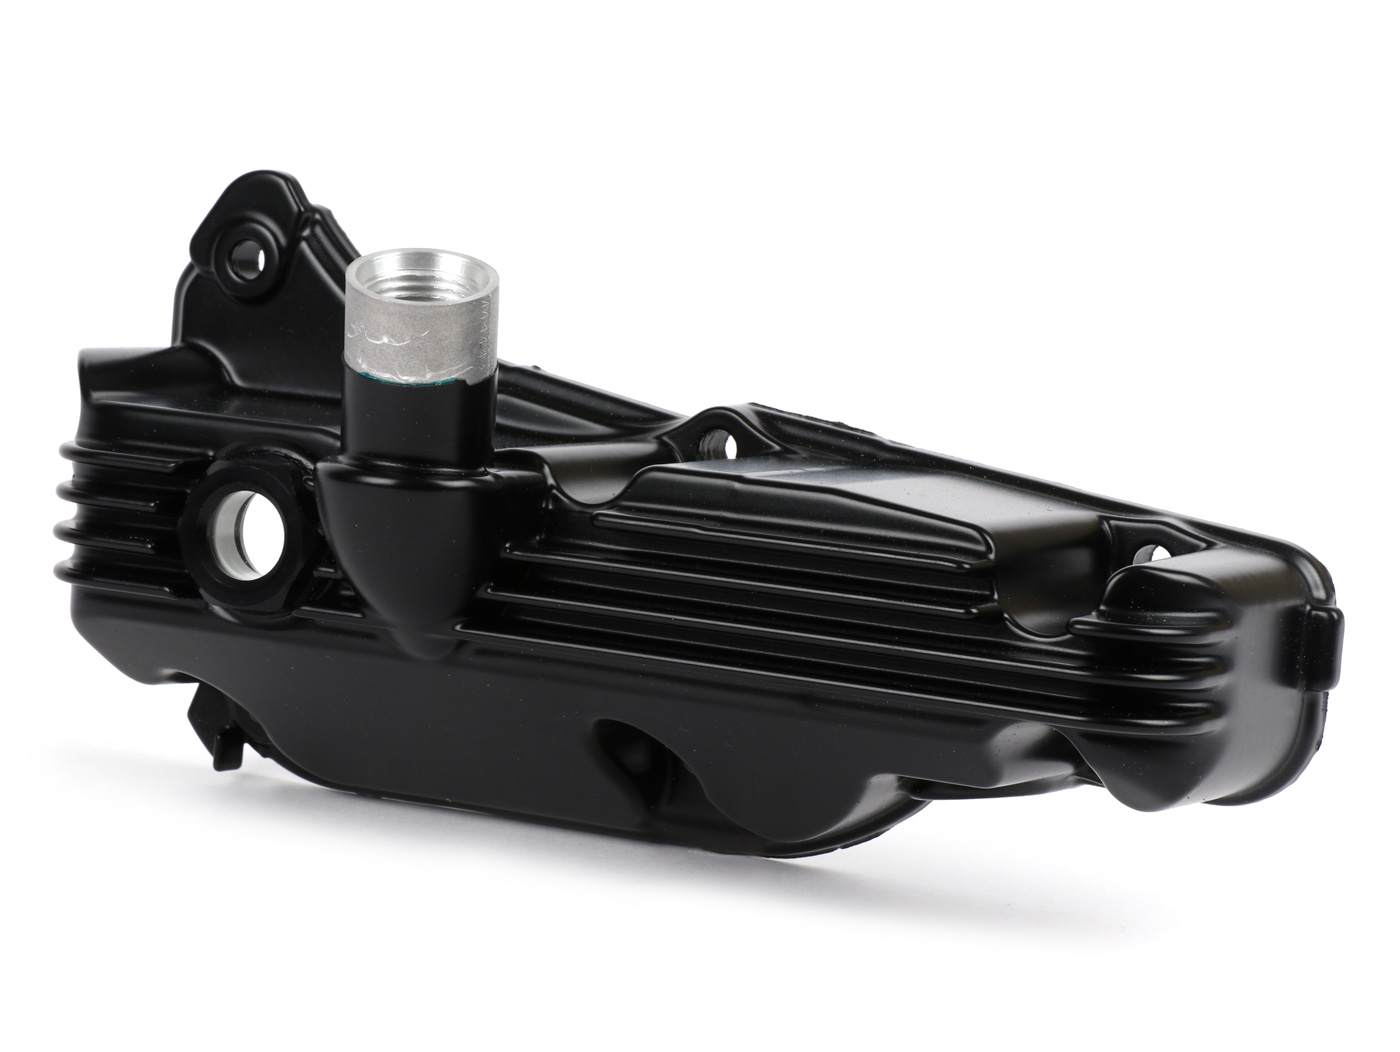
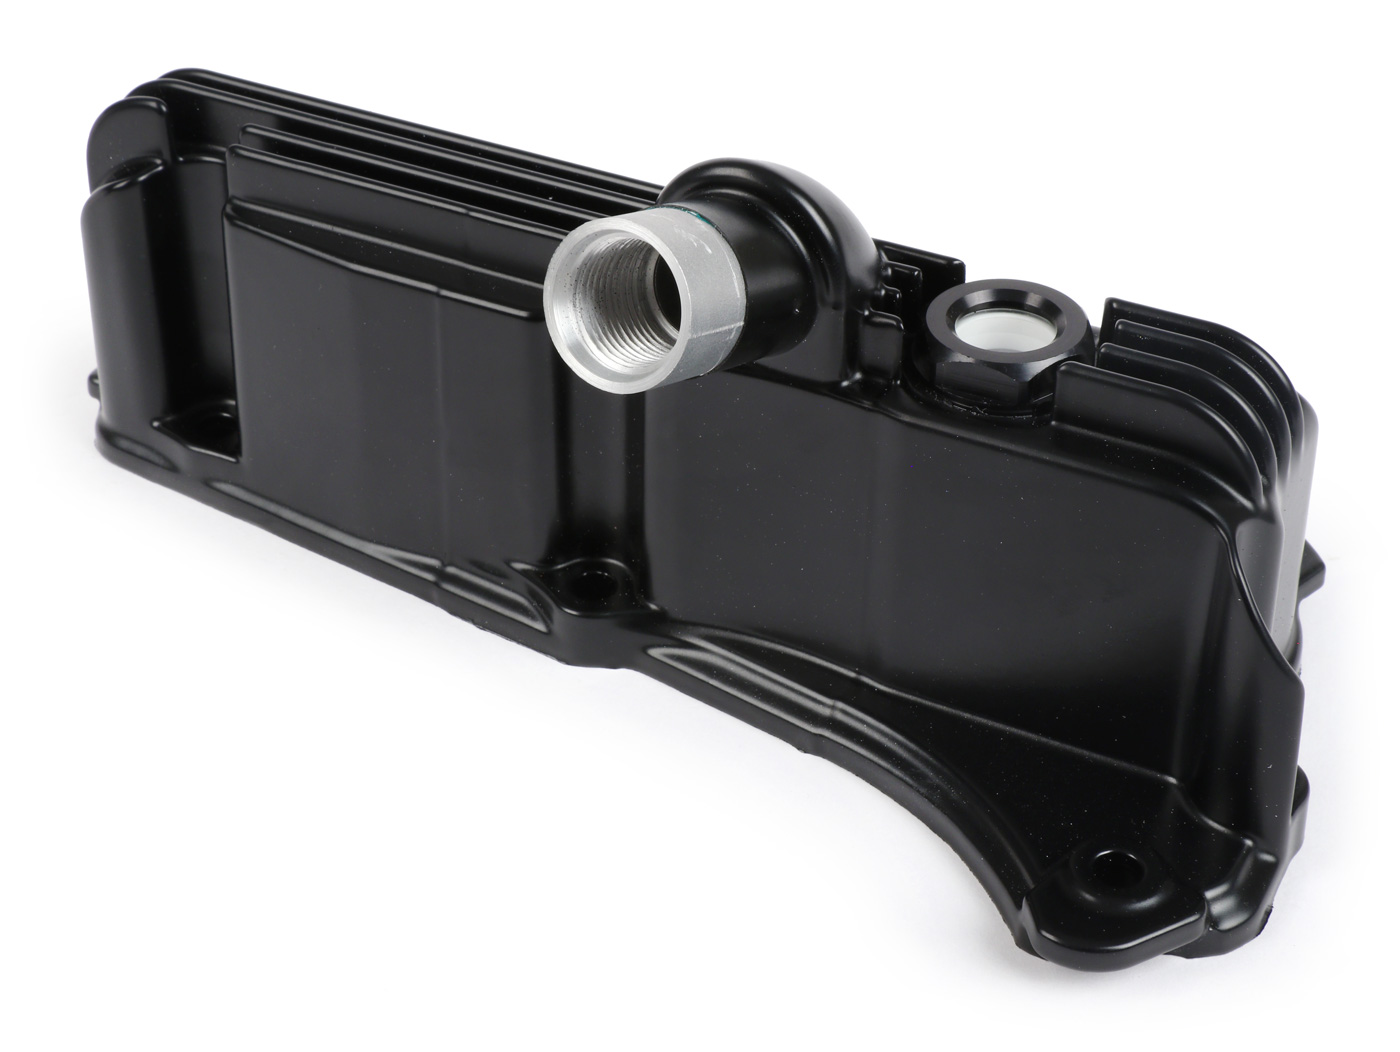
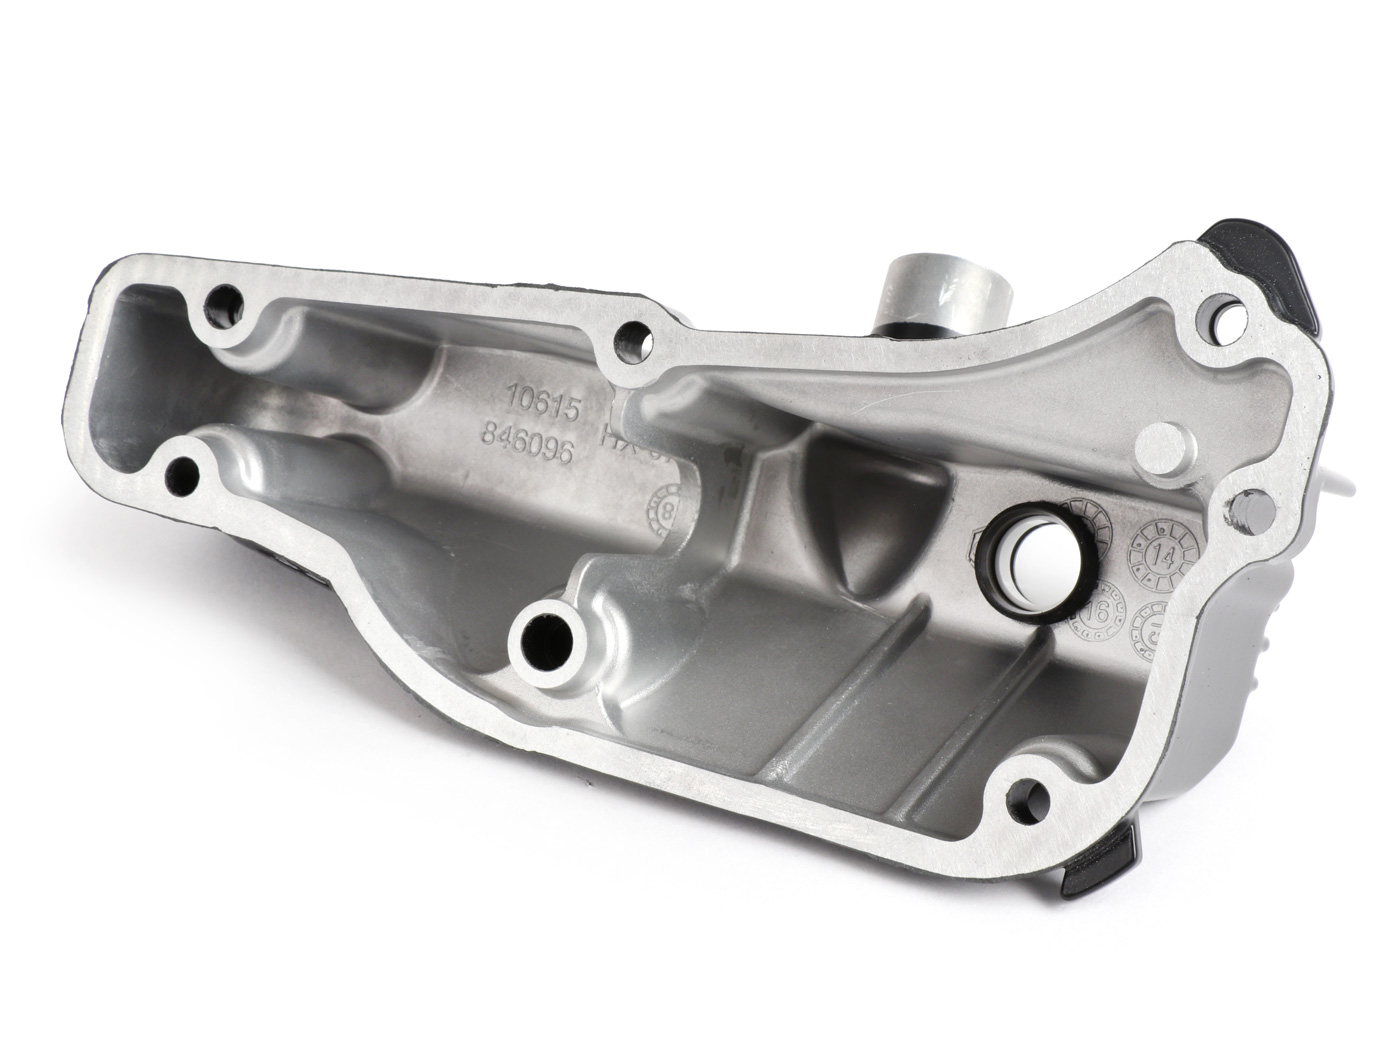
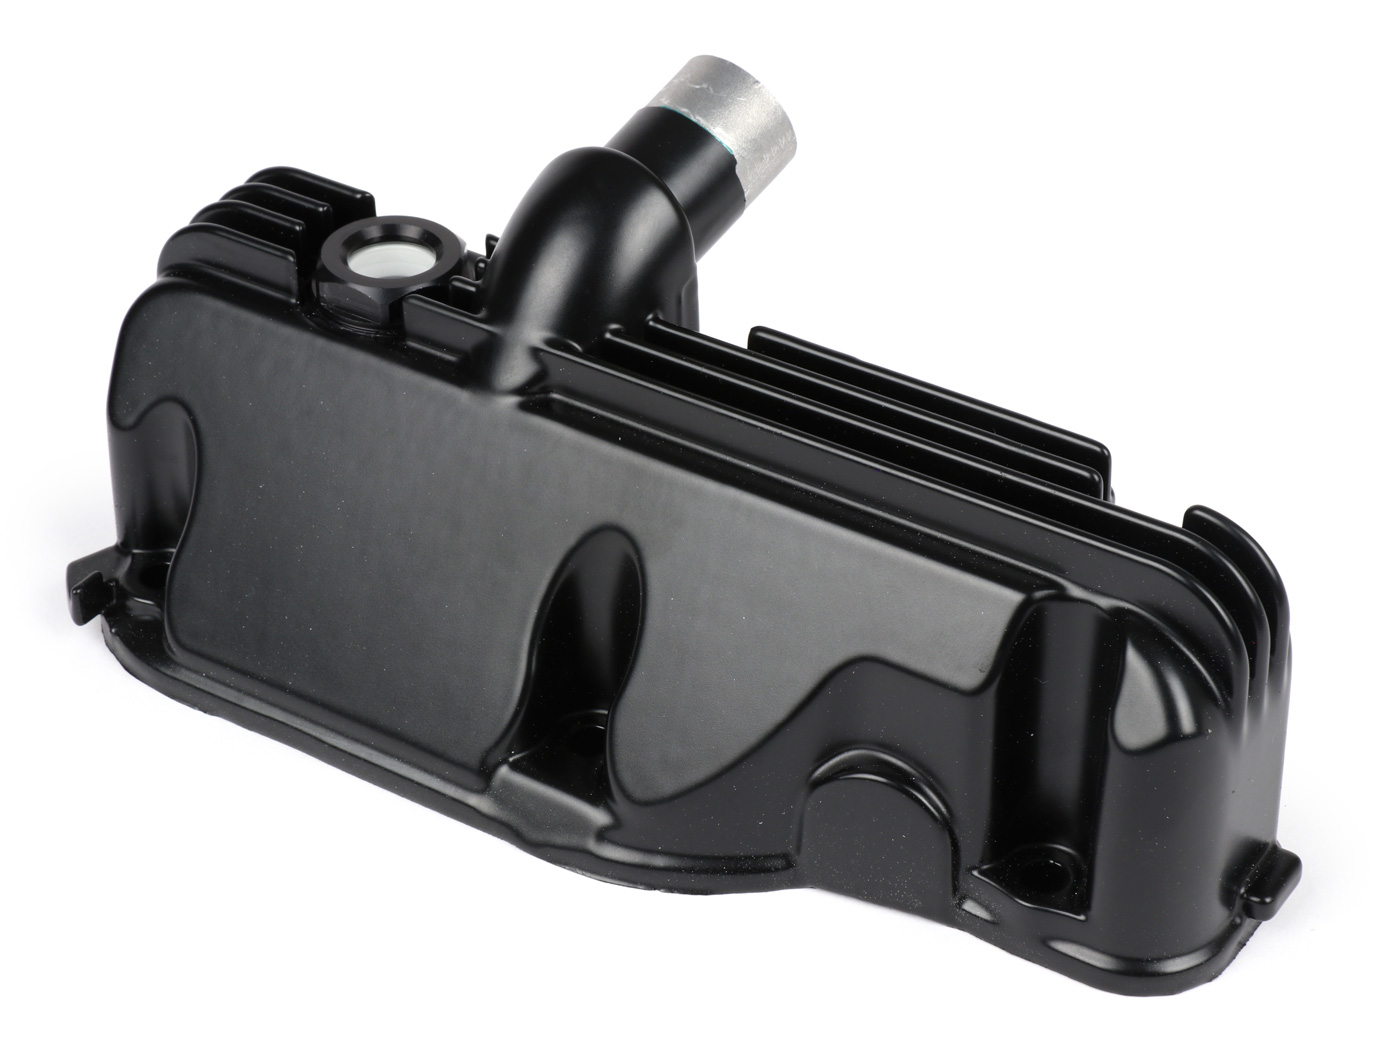
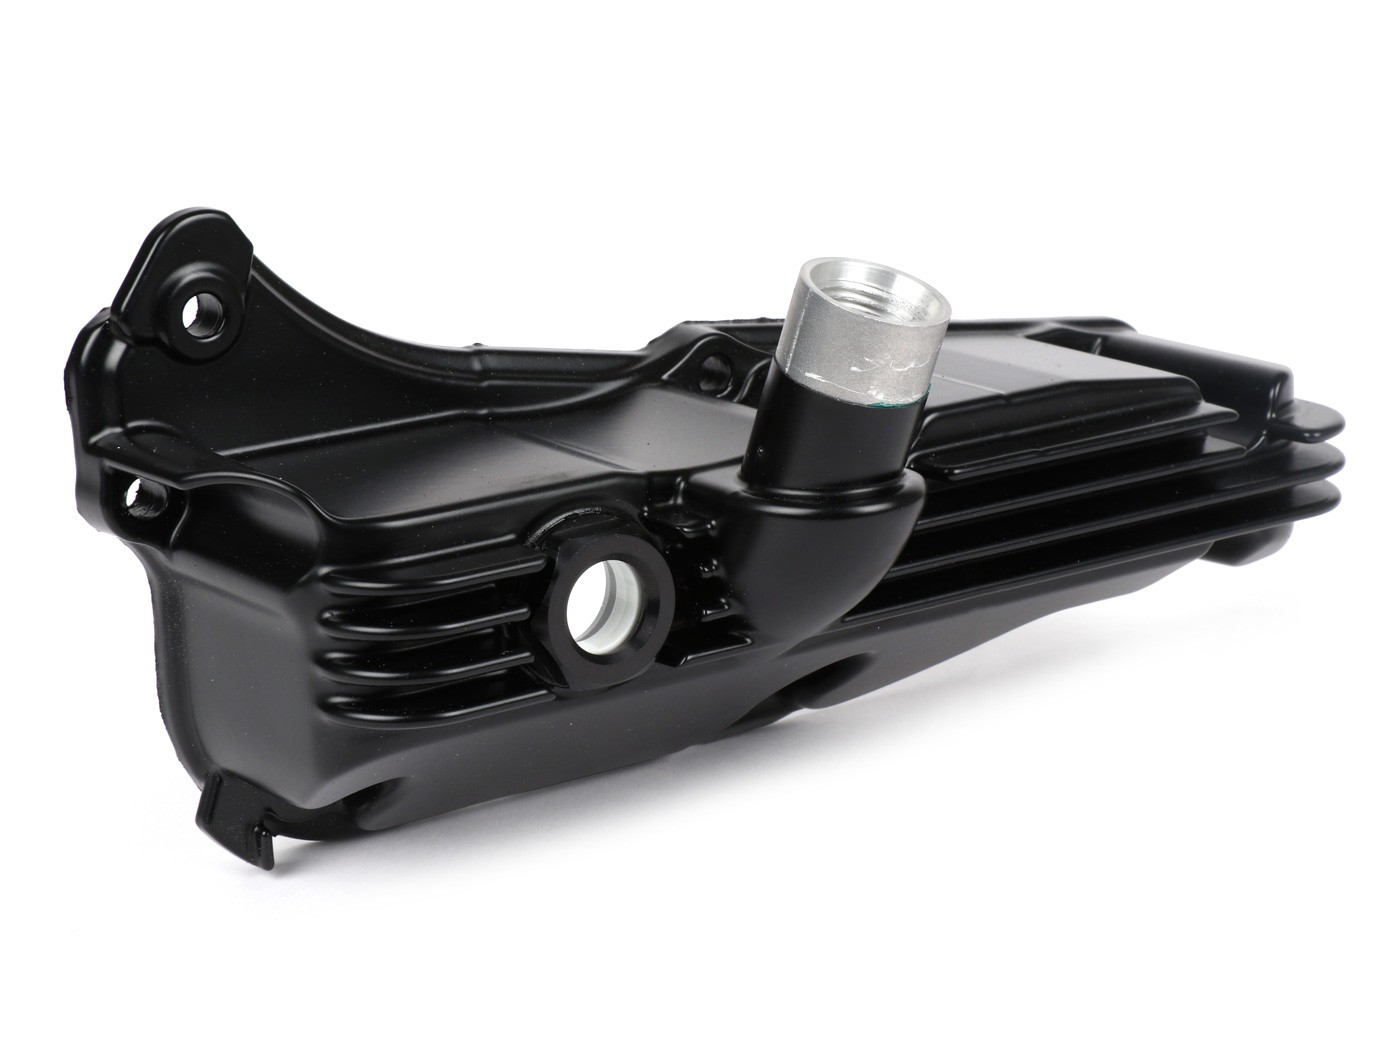
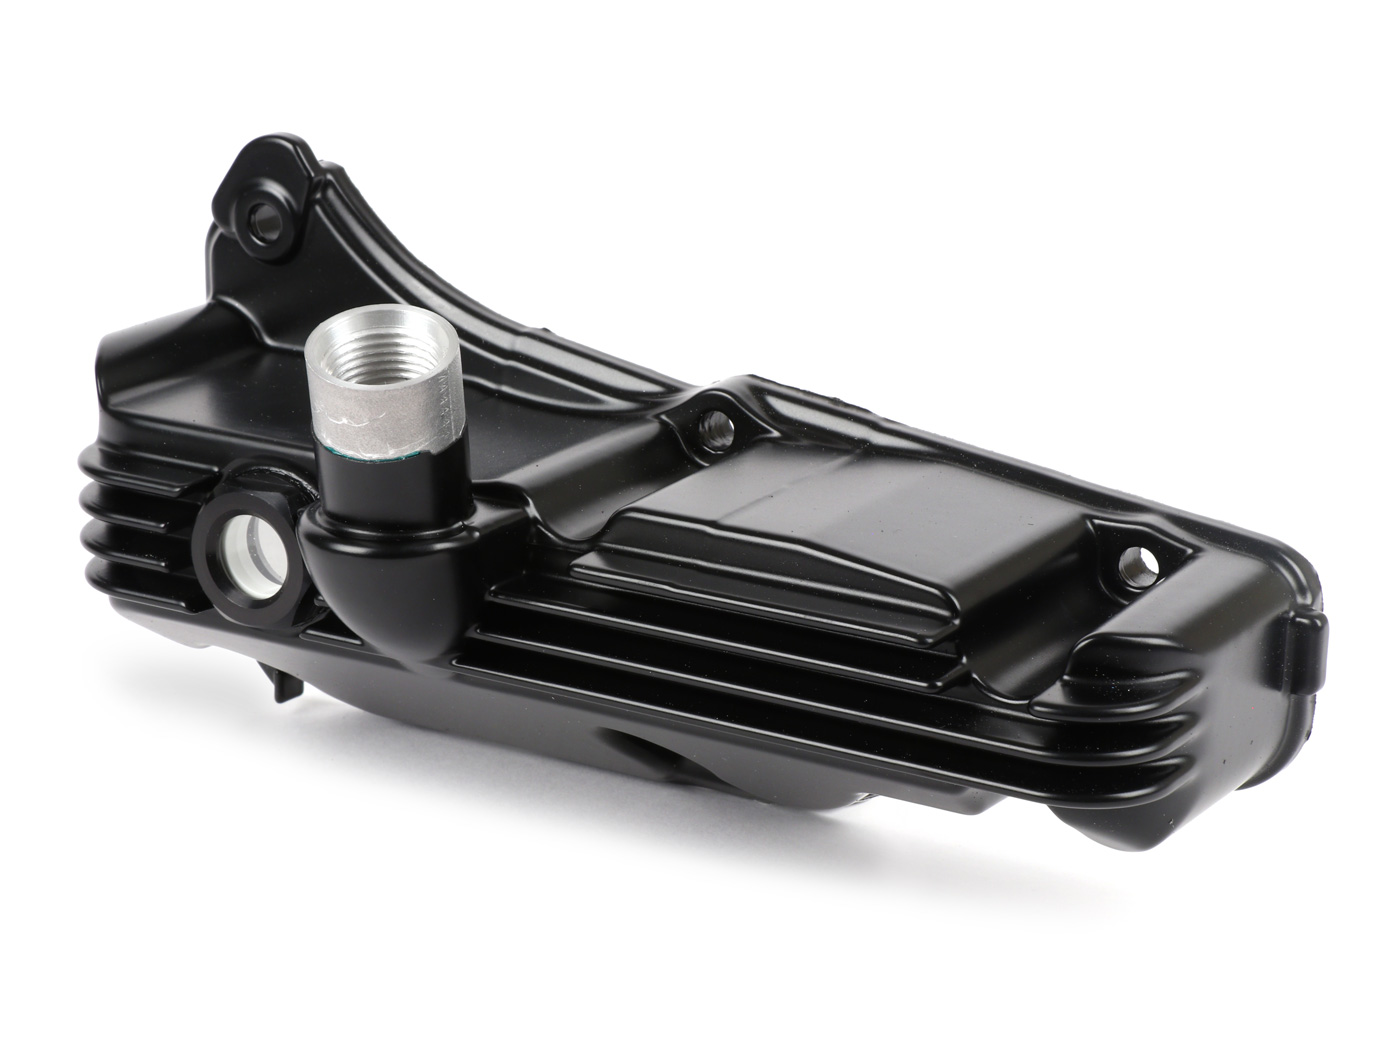
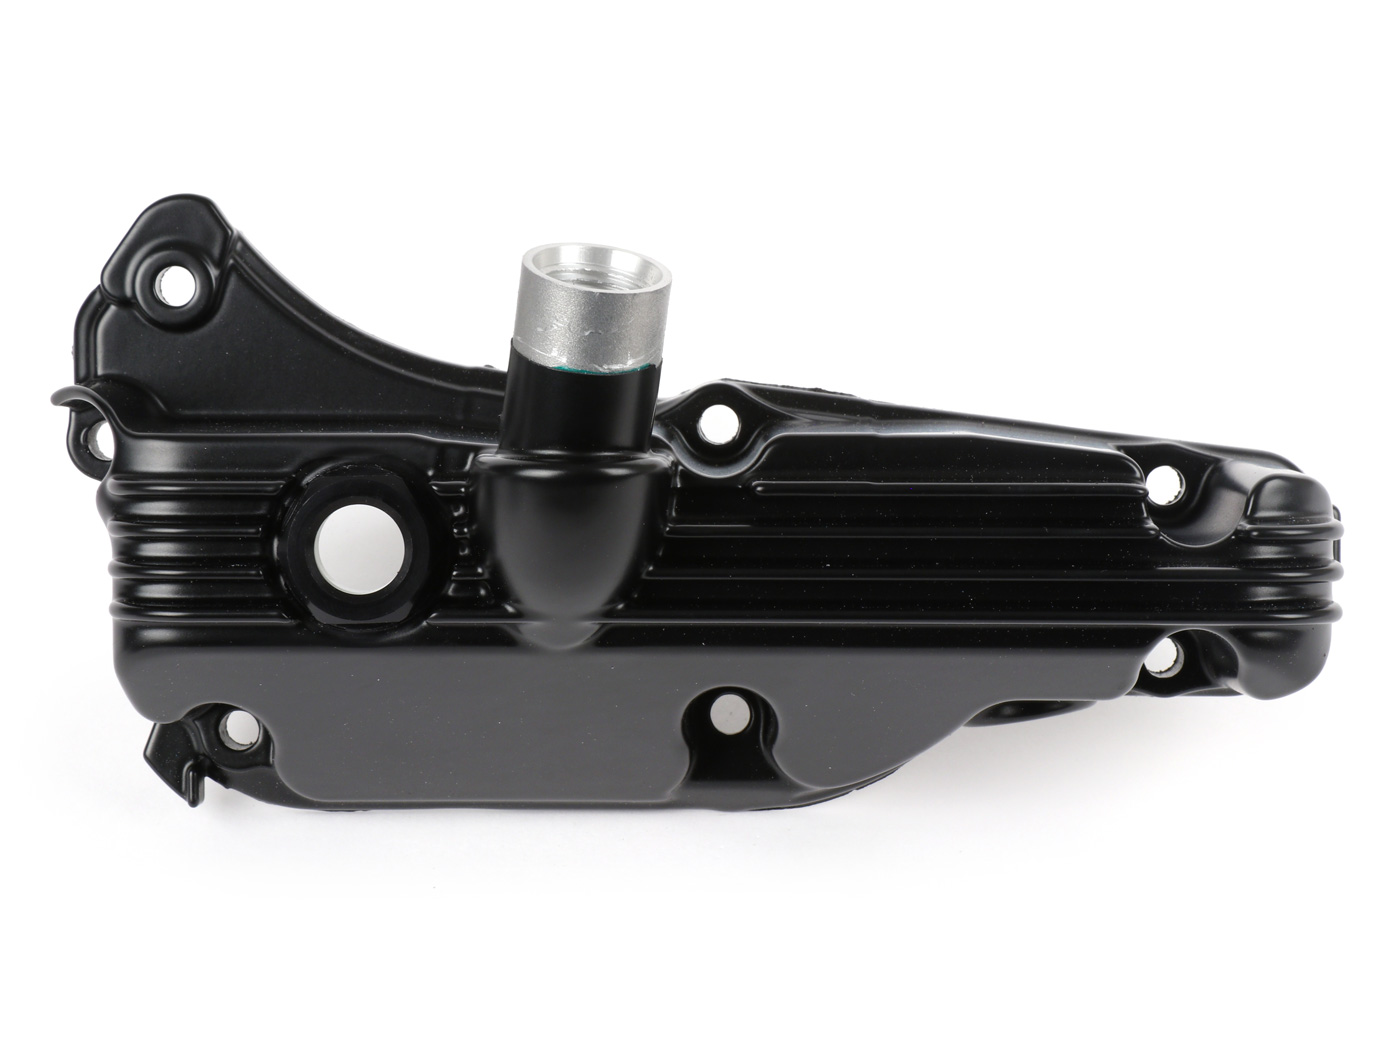
VESPA GTS 300 OIL PAN WITH SIGHT GLASS VESPA GTS BEFORE 2019 WITH FILLER CONNECTOR

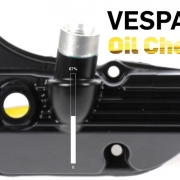
Vespa GTS oil pan with sight glass GTS up to 2019 socket fox


These are the Jack fox Oil pans with sight glass for the older Vespa GTS models until around 2019, recognizable by the filler neck directly on the oil pan.

For the newer GTS models we also have oil pans with sight glass: Vespa GTS 300 HPE oil pans with sight glass

Vespa GTS oil pan with sight glass GTS up to 2019 socket fox

Never run out of oil again

If you follow the forums, you have probably already noticed one or the other engine failure as a result of a lack of oil.

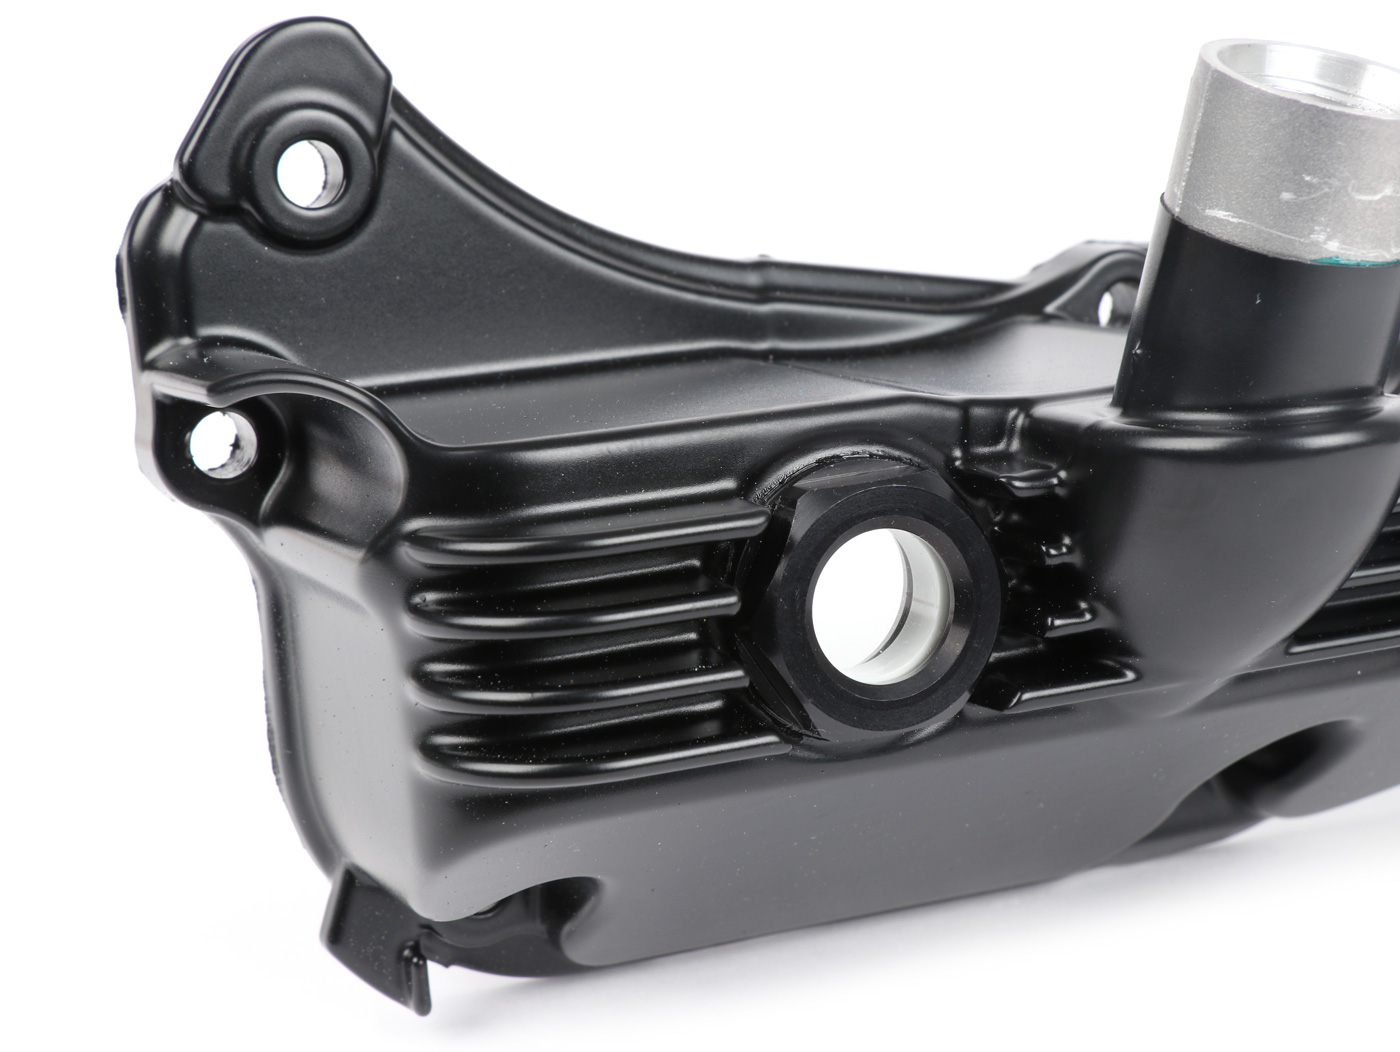
This practical oil pan is a must for every GTS because it has several advantages. In addition to the spectacular look, the oil pan with sight glass is above all very functional:

  • It enables the oil level to be read off quickly through the oil window
  • With the level of the oil you also have the control whether the engine is horizontal when reading the dipstick, 6mm inclination already make a big difference between MAXIMUM and MINIMAL oil level!
  • In addition to these features, which give you a significant plus in safety, the oil pan is a visual highlight and a bit more individualization on your Vespa GTS!

We get the oil pans directly from Jack foxwho only Original Piaggio oil pans used for the renovation. Quality craftsmanship made in Germany!

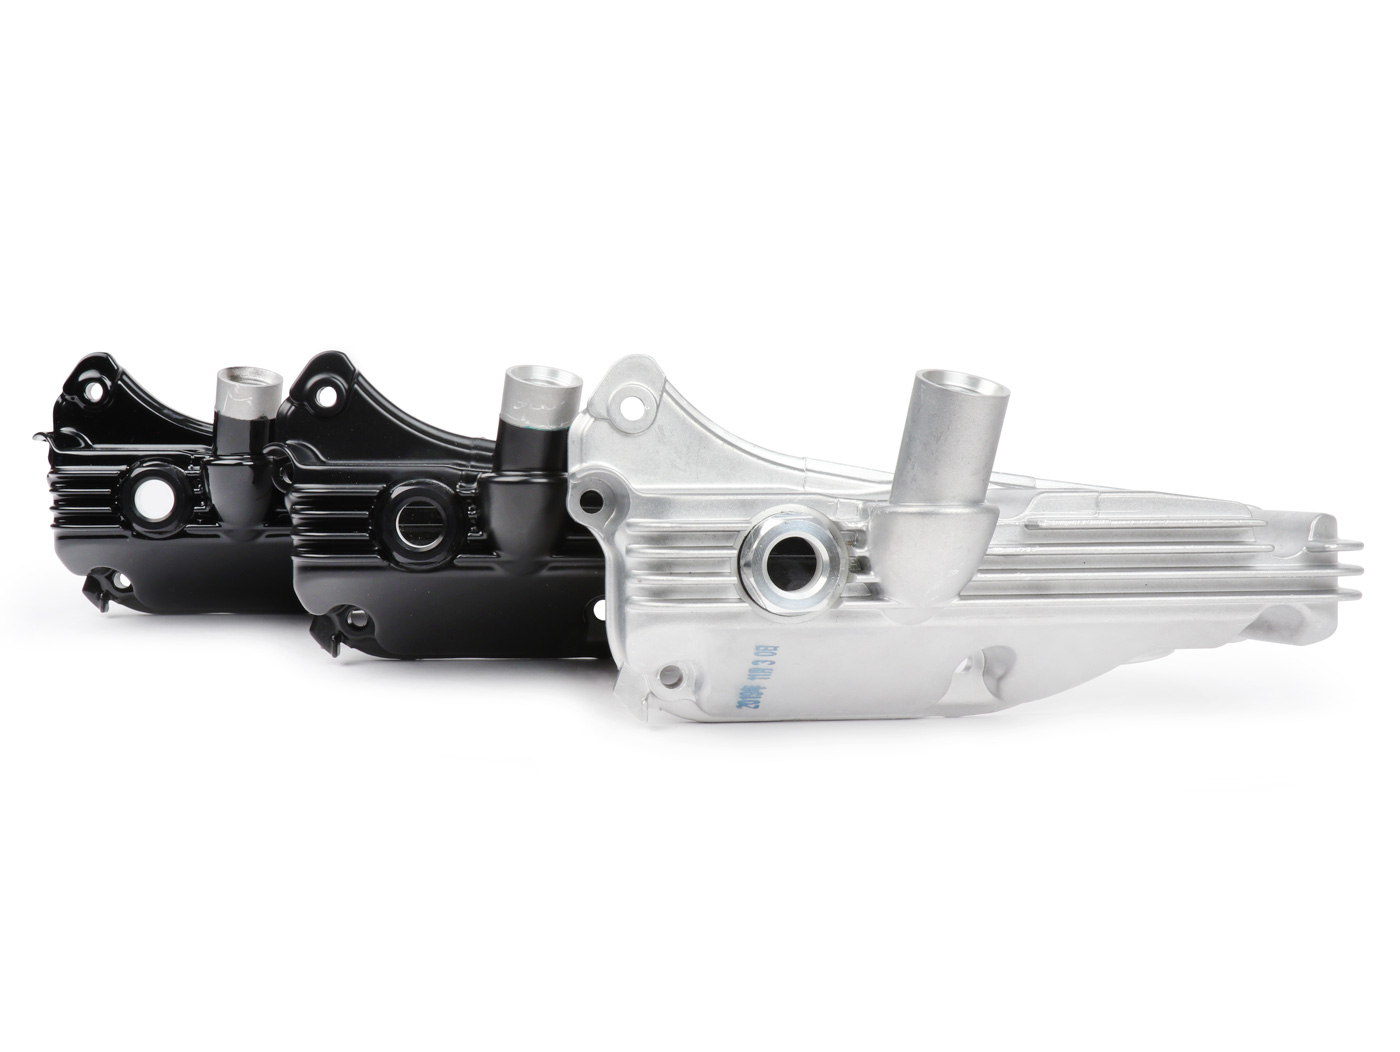
We can offer you the oil pans in 3 colors:

  • Silver / unpainted like original
  • Black MATT powder coated
  • GLOSSY black powder coated

TIP:

Compare the oil level on the oil sight glass with the oil level on the dipstick, then you will have a feeling for it and can quickly and reliably read off whether you should refill some more oil.

Optical engine oil check through a sight glass instead of the dipstick!

This eliminates the annoying and sometimes complicated and imprecise checking of the oil level using the dipstick. A simple look at the oil sight glass before every trip and you know whether you can start or, better still, add a sip of oil.
It is also noticeable here how important it is that the Vespa is absolutely horizontal when checking the oil level – 6mm inclination make the difference between MAX and MIN.
With this oil pan you are on the safe side!
Only NEW ORIGINAL PIAGGIO oil pans are used for the production, which are laboriously reworked on the CNC milling machine for the installation of the oil sight glass.

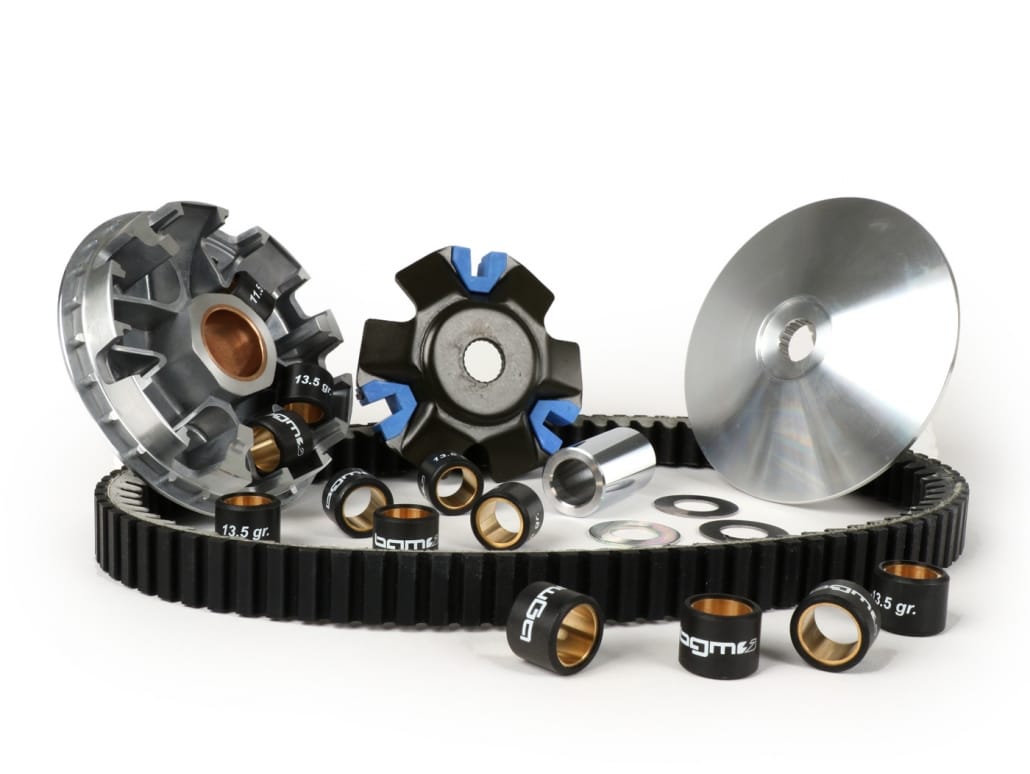
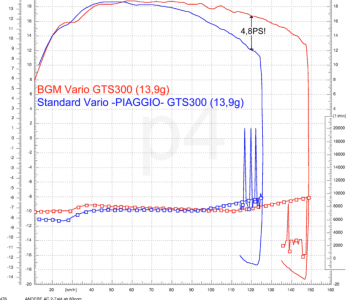
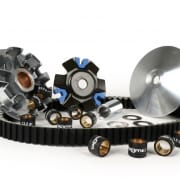
bgm PRO variator for Piaggio Quasar engines, e.g. Vespa GTS

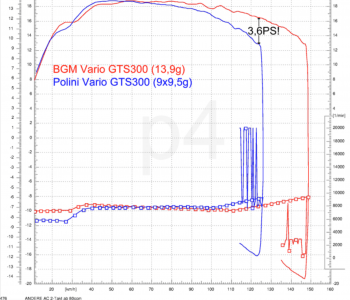
The bgm PRO V2 variator for Vespa GTS in test

Our bgm PRO Vario for the Vespa GTS models is very popular. In this nice video, Marc from Scooteria Tests the bgm PRO V2 variator on his Vespa GTS.

“A cheap and effective tuning measure for all Vespa Gts 300 riders. I compare it with the performance of the standard variator on the Vespa Gts 300 in the city, on the country road and motorway. ”Marc, Scooteria

Conclusion of the test

  • Sportier: faster and higher in the rev range
  • Much higher revs
  • Much improved acceleration
  • Much more aggressive driving performance
  • Without annoying noise
  • +5 km / h top speed 125 km / h according to GPS with 13 ″ rims without discs
Buy bgm PRO vario kit here

Video variator test

https://www.youtube.com/watch?v=wuVfCunEuWA BGM2311V2 variator

BGM2311V2 variator

How do I install the bgm PRO variator on a Vespa GTS?

Installation of the bgm PRO V2 vari ator in the Vespa Gts 300 hpe Supertech. Marc from Scooteria is at Cafe Racer 69 and Micha from the Cafe Racer 69 team explains in 25 minutes in a very sympathetic and detailed way what has to be considered when installing a Vario. There are also tips, such as the fact that with the bgm Vario on your new GTS you can ride the old one GTS Vario cover, which many people find more attractive.

buy bgm PRO Vario kit here

Variomatic test

Are you not sure yet? In this video Marc tests the variator in detail and shows the effect of the bgm PRO Sportvario during a riding test.

Video installation instruction Varioamtik Vespa GTS bgm PRO

BGM Pro Variomatic Vespa Gts 300 - installation

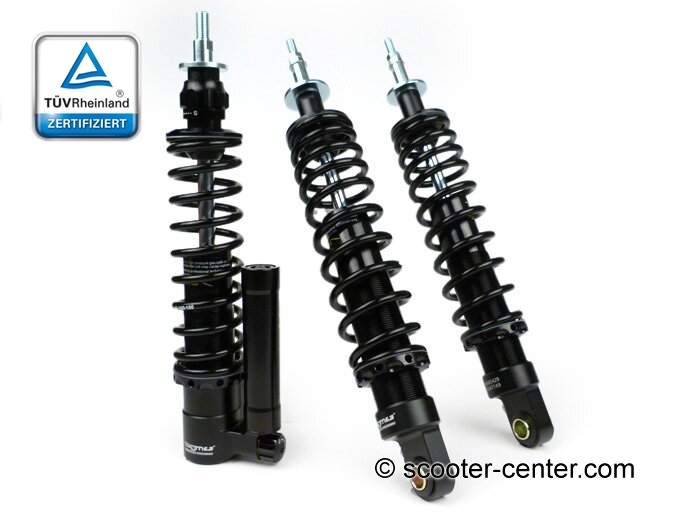
Shock absorber set -BGM PRO SC FR1 SPORT - Vespa GT, GTV, GTS (-2013) 125-300 - black

Shock absorber Vespa GT GTS Super Sport with MOT

Buy the new BGM shock absorbers here
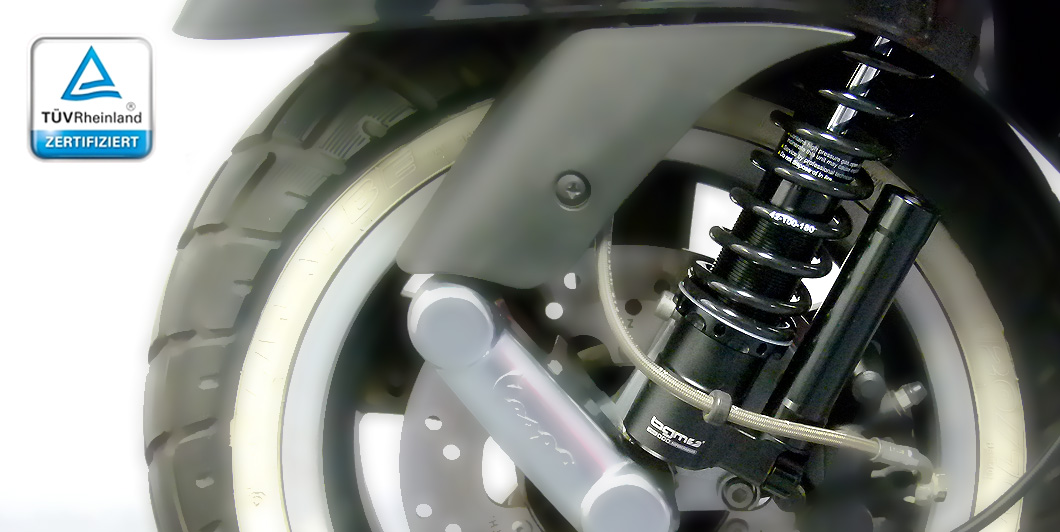
Fine tune the suspension of your GTS with the new shock absorbers BGM PRO SC / F16 and SC / R1: BGM7788BKTS
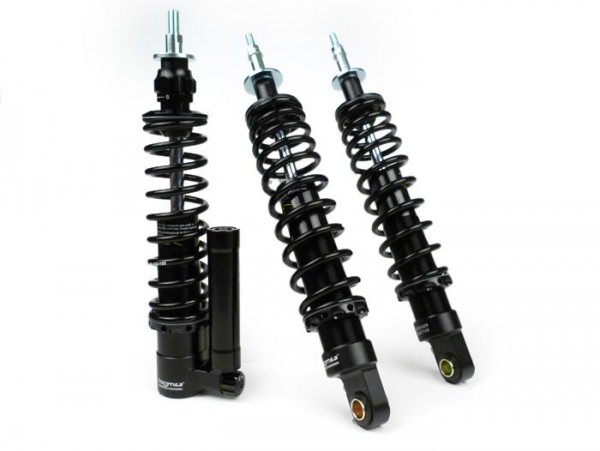
Suspension tuning by adjusting pressure, rebound damping and spring preload

Individually adjust the Front shock absorber of your Vespa to your riding habits by adjusting pressure, rebound damping and spring preload.

The back SC / R1 shock absorbers offer stepless adjustment of the spring preload and are easily adapted to varying loads. Light switch 567
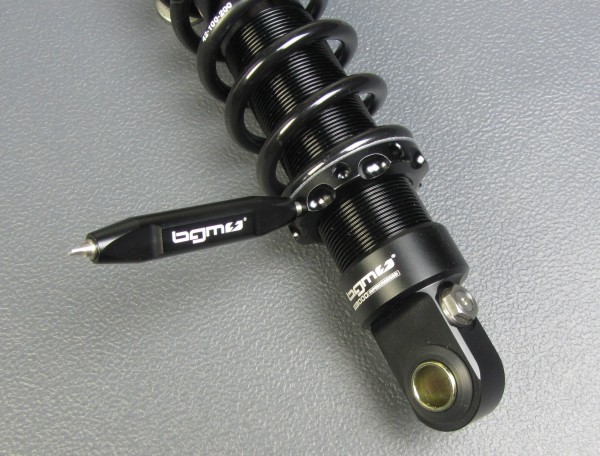
Do you prefer soft cruising or sporty tours in the mountains? A BGM PRO suspension is perfect for any kind of situation.
Of course you will get a MOT certificate for your BGM PRO suspension in order to add the changes to the registration papers of your Vespa without stress. Light switch 559
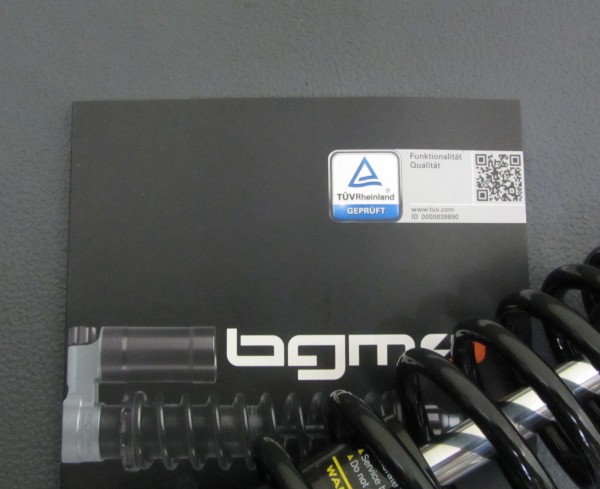
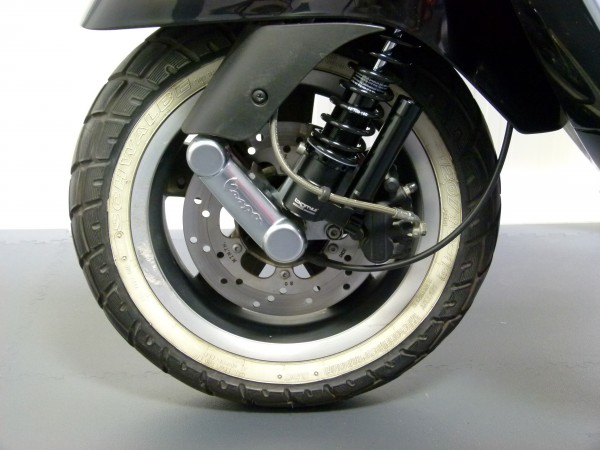
BGM PRO SC SPORT shock absorbers -sporty- comfortable-adjustable-with MOT-
08.01.2016 404

HARMONIOUS
The harmonious basic tuning of the BGM PRO SC SPORT suspension is convincing. The basic tuning of shock absorbers and constant spring were adjusted to a sporty driving style on roads, perfectly balancing sporty and daily riding styles. The front absorber even is an improved copy of the BGM PRO SC COMPETITION series. Rebound damping can be adjusted 16-fold.

DIRECT
The BGM PRO SC SPORT suspension reduces diving while braking, which is usually characteristic for scooters. It also reduces horizontal shaking when accelerating. This results in unadulterated directness, which, in combination with a sportier handling, leads to more safety and enjoyment.

SIMPLE
The slim line of the front absorber's compensation container is intentional. It makes a quick and easy assembly possible without the need to take off brake hoses.

EPASS
The BGM PRO SC SPORT shock absorbers come with a KBA (German Federal Powered Vehicle Agency) approval and e-pass to grant pure relish without regrets. These approvals allow you to directly ride your scooter after assembling the shock absorbers according to the requirements in the e-pass. No need to register, you have to carry the e-pass along.

  • with KBA (German Federal Powered Vehicle Agency) approval / e-pass (no registration needed!)
  • high strength alloy, CNC machined
  • hard-anonized surfaces for perfect protection
  • already perfectly adjusted
  • Front rebound damping adjustable 16-fold
  • sporty-harmonious damping technology
  • high quality parts for a long life
  • Massive 12.5mm piston rod
  • stepless adjustable spring preload
  • set ready to install

TECHNOLOGY
The SPORT series inherited its technological features from its big brother BGM PRO SC COMPETITION shock absorbers. The SPORT is also made of the same massive 12.5 mm piston rod and high strength and anti corrosion alloy body, which was additionally hard-anonized and is supplied in stylish mat black.

Conclusion:
Sporty comfortable shock absorber with approval and unrivaled cost-benefit ratio!

Installation guide Vespa shock absorbers

Easy installation of the new suspension

Installing these shock absorbers is relatively easy. We have summed up some hints and the most important steps of installation up for you:

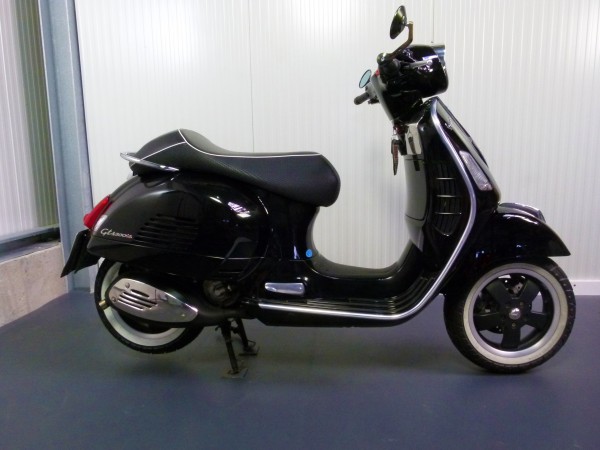
In order to guarantee a well and safe installation you should place your Vespa on a level and firm ground.
08.01.2016 182

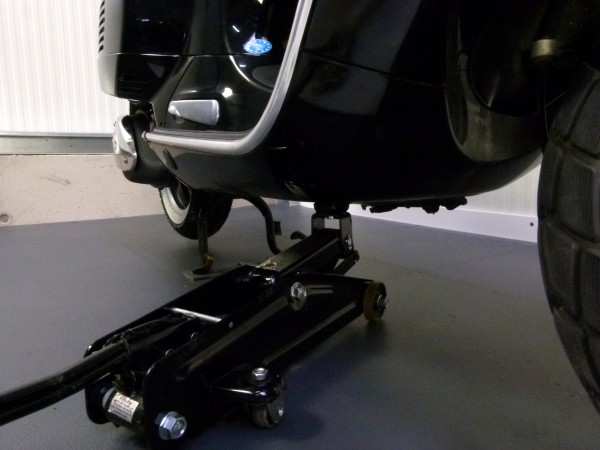
In order to exchange the front shock absorber, the front wheel should be accessible. It would be easiest to either shim your Vespa under the frame or to use a jack to lift the front wheel. By doing so you can jack up your Vespa without someone to help.
08.01.2016 185

Unscrewing the five screws of the front wheel rim is easiest when the front wheel is blocked.
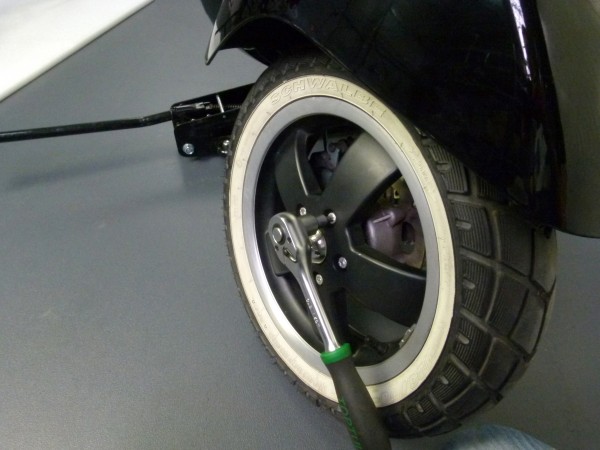
08.01.2016 208

Do you have a lock for the brake lever? In that case this security lock could be the substitute for a third hand. This task can also be accomplished by cargo lashing or, if you don't have anything else, by cable strap. A blocked front wheel will also come in handy when working at the rear. Your scooter won't roll away.
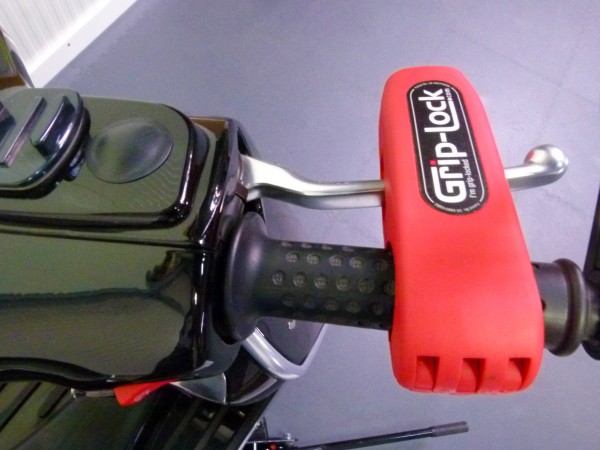
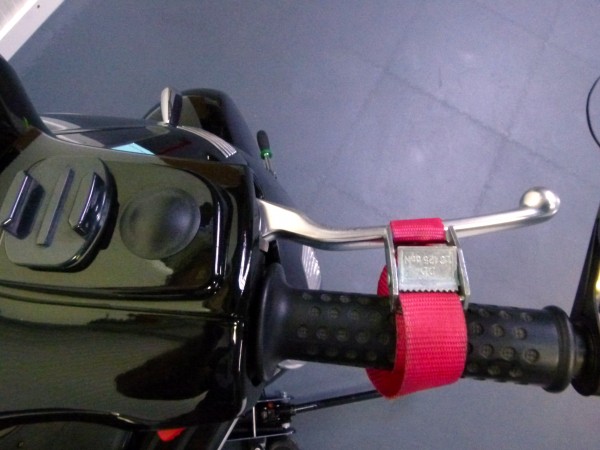
08.01.2016 220

08.01.2016 221

First use an angled hex wrench to unscrew the lower two mounting screws.
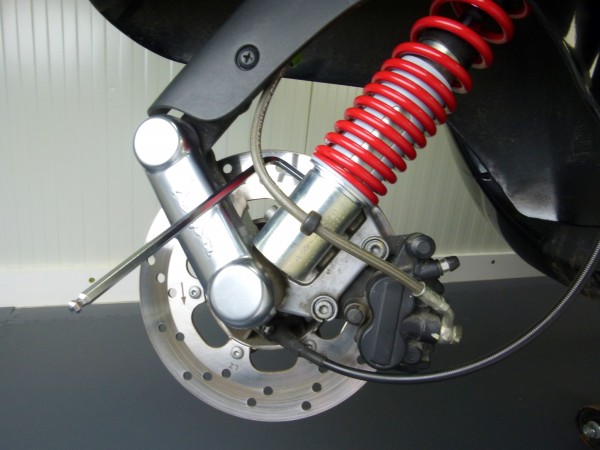
08.01.2016 289

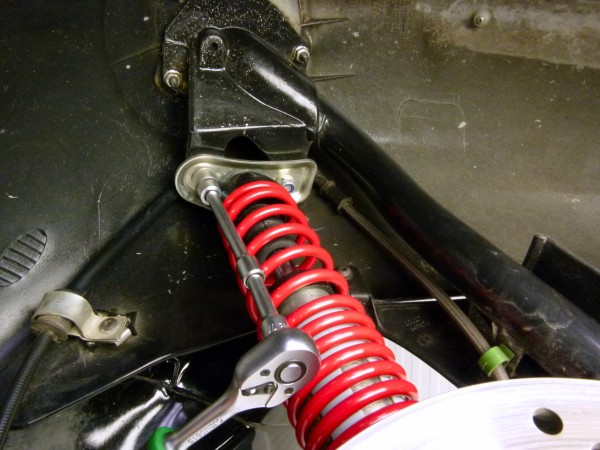
Next are the two nuts of the upper shock mount. Once you took these off, you can easily remove the shock absorber in the direction of the front wheel.
08.01.2016 286

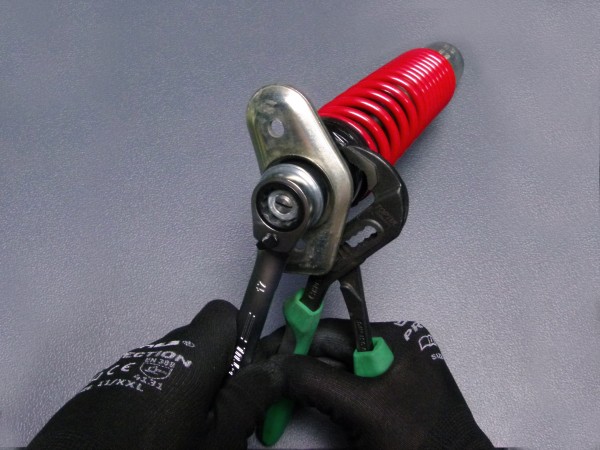
To loosen the upper groove, you can hold the shock absorber at the dome top cap.
08.01.2016 163

Once you removed the upper mount, quickly check it silent rubbers. Are the rubbers hard or brittle? It would be best to replace them. 08.01.2016 167
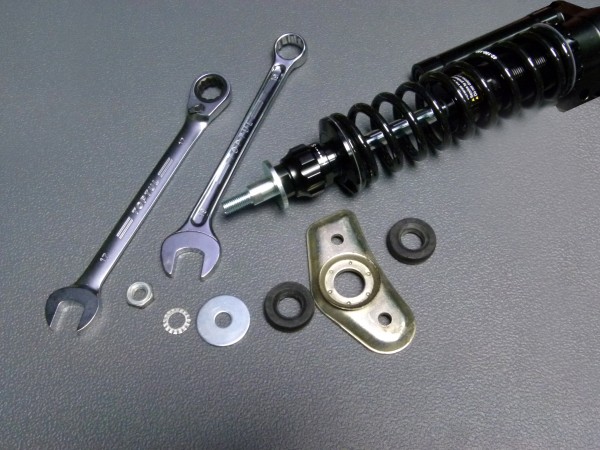
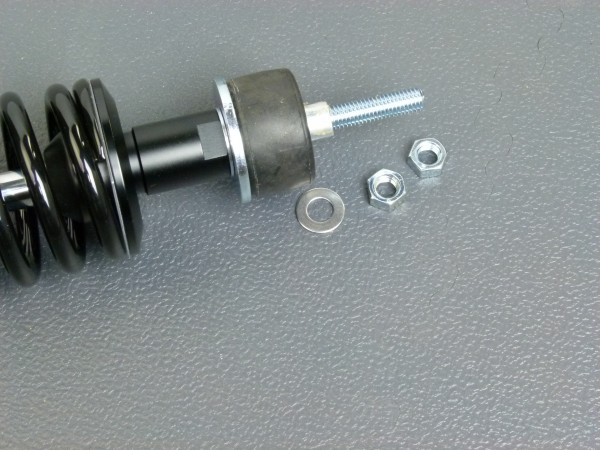
The BGM shock absorber also has two assembly aids, which can be used to hold the absorber during installation. 08.01.2016 172
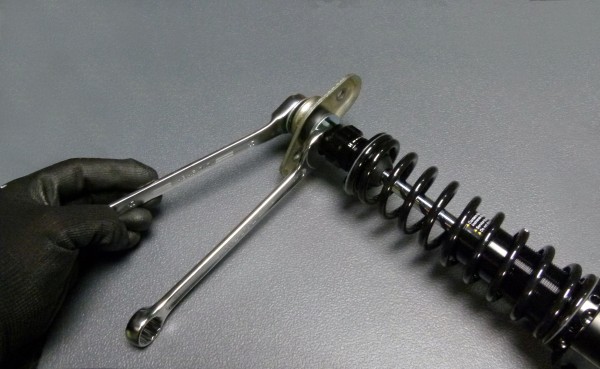
You must not hold the absorber's piston rod with pliers or any similar tool. Marks on the surface of the piston rod caused by a tool, would immediately lead the shock absorber to leak when snapping in.

Once the mount is installed, you can place the absorber from the side of the wheel. BGM shock absorbers are supplied with spacer shims to make up for gaps between shock absorber and brake caliper.
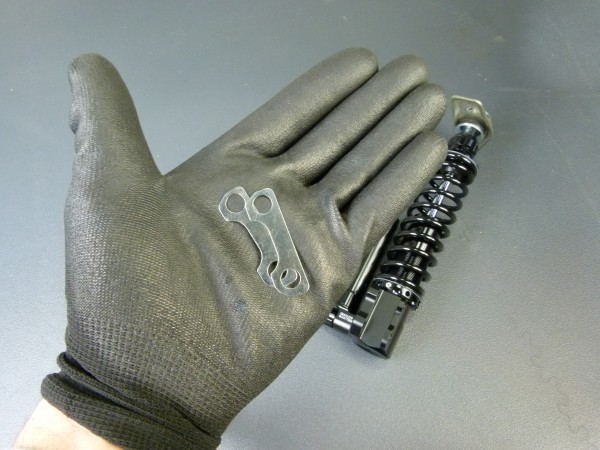
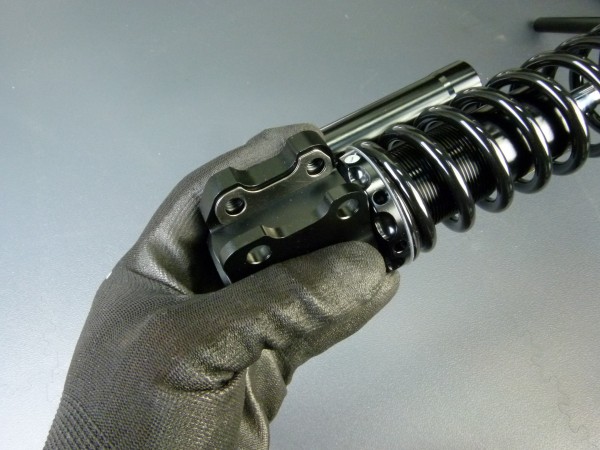
08.01.2016 296

08.01.2016 298

Should you need the spacer, you may first fix it with a screw through the lower hole and then place the absorber on top of the mount of the brake caliper and the spacer shim.
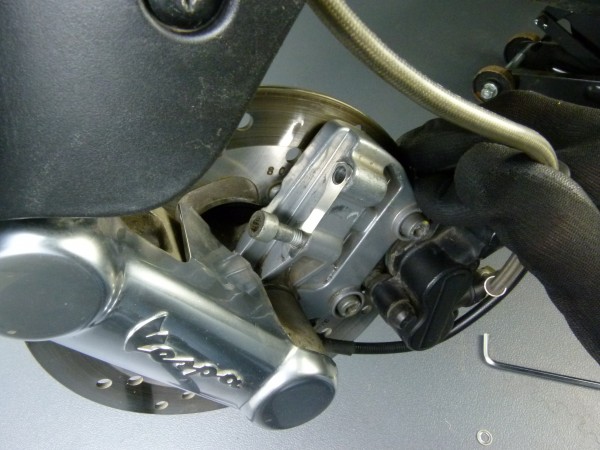
08.01.2016 307

Once the screw in the upper hole and the spacer shim fixes the shock absorber, you can correctly position and fix the absorber. 08.01.2016 308
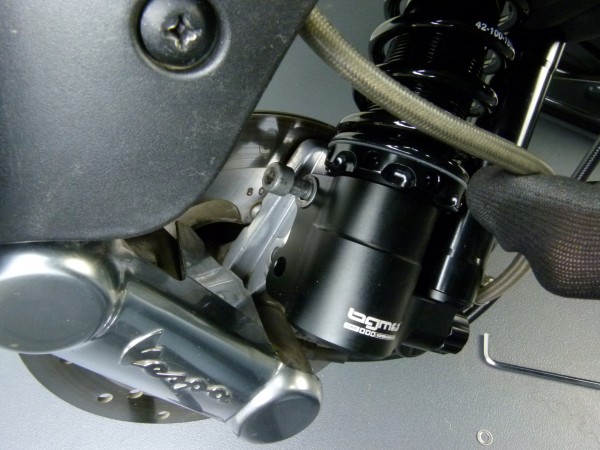
The steering tube secures the screws of the upper mount.
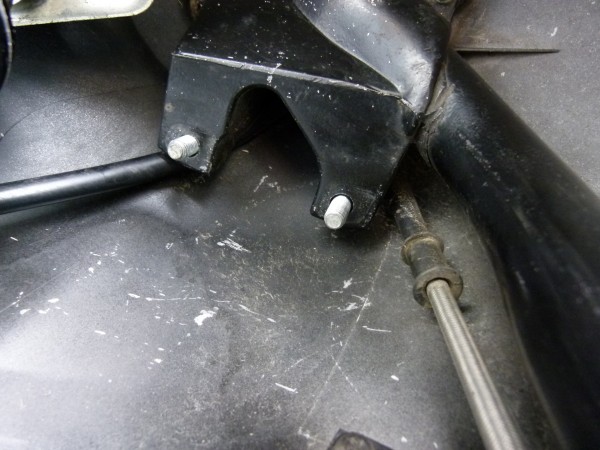
08.01.2016 310

Simply secure the mounts of the shock absorber with nuts from below.
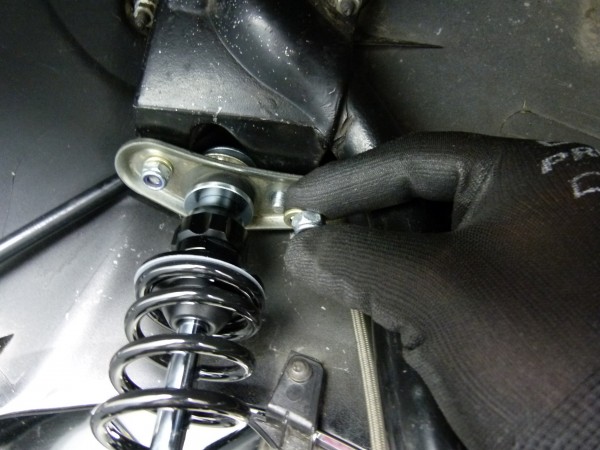
08.01.2016 312

Once you have reinstalled the front wheel with the five hex socket screws, you may now address the rear shock absorbers.

The lower mount of the shock absorber is hidden on the left hand side of the vehicle behind the air filter box.
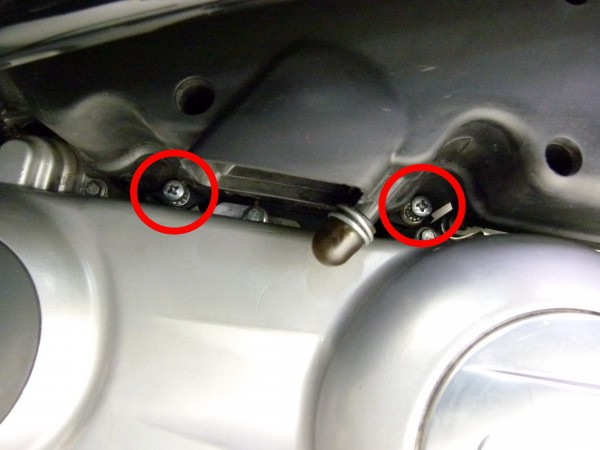
08.01.2016 314

You have to lift the air filter box to access the mount.

To lift the air filter box you need to unscrew the two back screws and loosen the front screw. You don't need to fully remove the air filter box.

The exhaust on the right hand side of the Vespa blocks access to the lower shock mount.
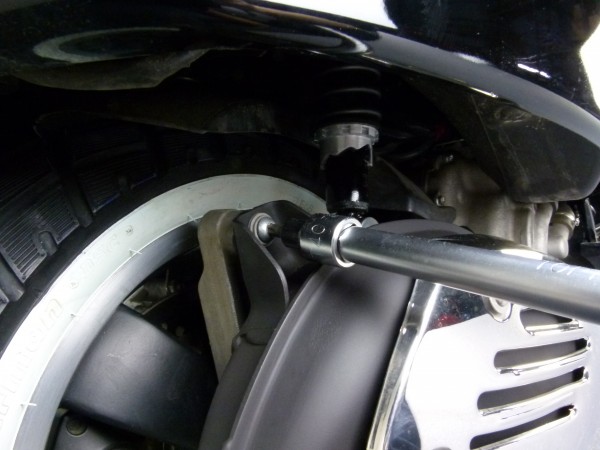
08.01.2016 242

Beware: Did you just go for a ride on your Vespa? It would be better to postpone your work until exhaust and engine have cooled down.

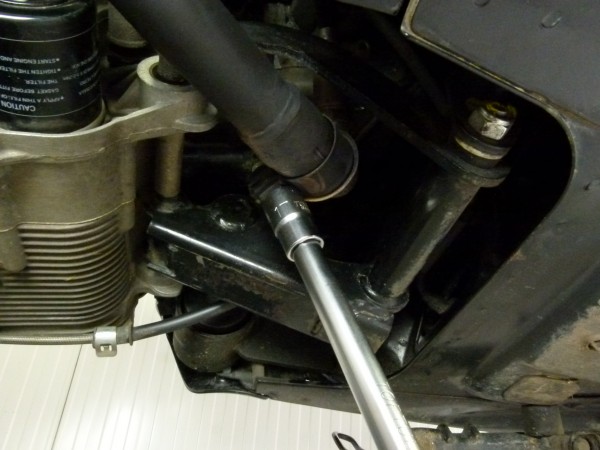
The exhaust is fixed with three screws and the clamp of the manifold. Wires of the lambda sensor or cooling hoses might be close to the clamp. Please watch out and don't damage these parts.

It would be handy to loosen the clamp of the manifold first, before unscrewing the screws of the rear swing arm, which fix the exhaust body.

Please watch out: when unscrewing the last screw, the exhaust might fall down. You can now pull the exhaust from the manifold.
GTS shock35

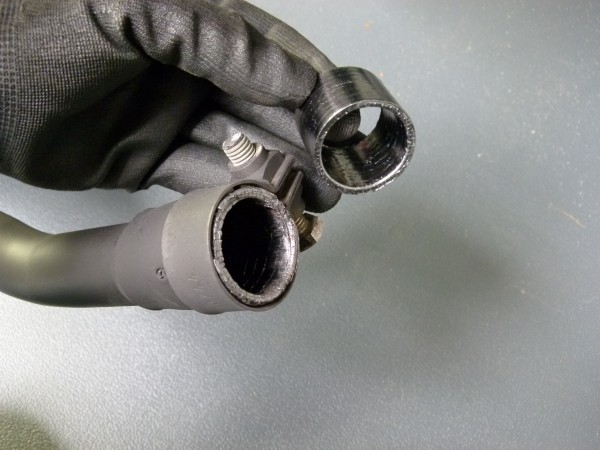
Original Piaggio exhausts have a graphite gasket between exhaust and manifold. This gasket is sensitive to mechanical strains and should be replaced in case of visible damage.
08.01.2016 402

In order to remove the shock absorber from the frame, you have to remove the helmet box and the cover of the seat lock.

You can simply lift the helmet box.

Four screws fix the back cover to the vehicle.
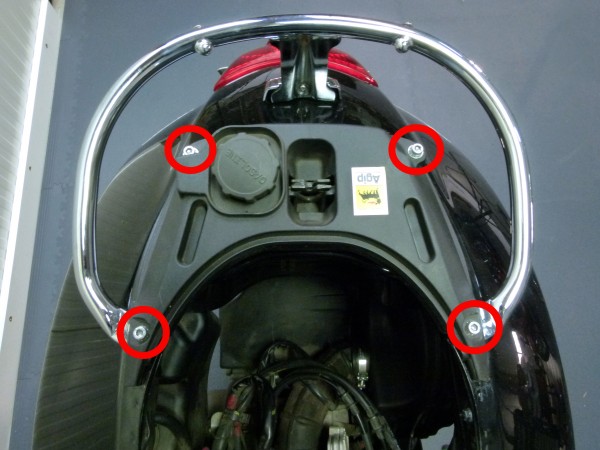
08.01.2016 328

Once you removed the screws, you only need to take off the cover of the tank cap.

Just in case, put the cover immediately back on the fuel filler.

You will find the upper fixation points of the two shock absorbers on the right and on the left of the seat lock. Please check the secure stand of your Vespa before removing them. The front wheel should be blocked and should touch the ground.
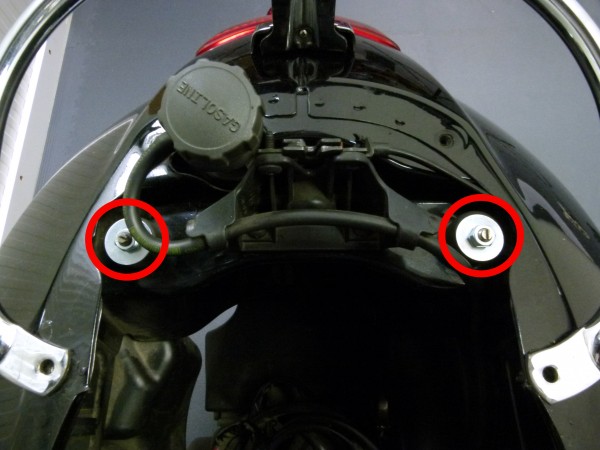
08.01.2016 336

Loosening the two upper fix points of the shock absorber will cause the engine to lower down. So please watch the shims and silent rubbers.

After removing the nut you can simply pull the shock absorber from the bolt of the swing arm. Pull downwards out of the frame.

You will find another silent rubber on the shock absorber. After a short -positive- check, it can be reused. 08.01.2016 367
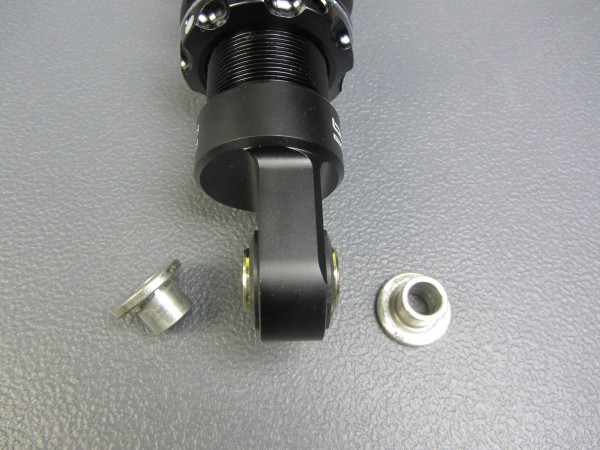
When removing the left shock absorber you have to watch out for the two bushes of the lower mount.
Light switch 564

Place these two bushes in the eye of the BGM shock absorber. These two bushes are mandatory for a safe installation of the left shock absorber.

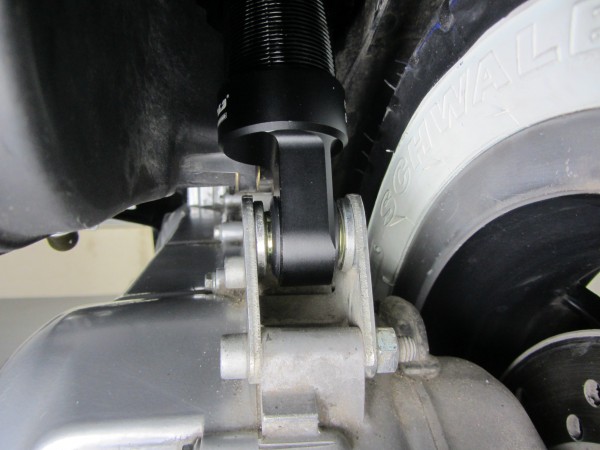
Watch out for the correct alignment of the lower mounts.

When watching from behind in the direction of travel, the mounts are placed to the right at both absorbers. LH shock Vespa GTS
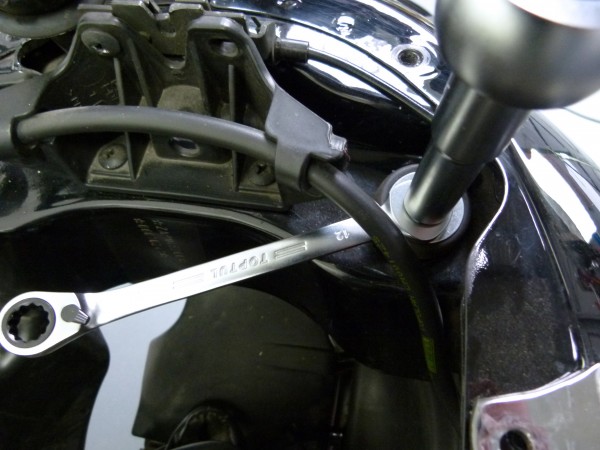
The sequence of installation remains the same for the upper mount. The silent rubber is followed by the large shim. Now secure the absorber with the two nuts included.
08.01.2016 371

Once you have reassembled the cover of the seat lock, helmet box, exhaust and air filter box, you may start with test rides for your suspension.

Leg shield bag -SEA'N'SAND T-Bag-

Storage space for long tours!

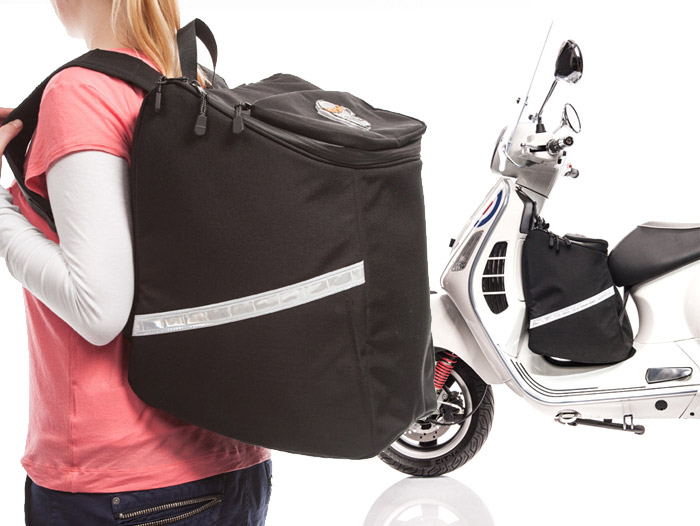
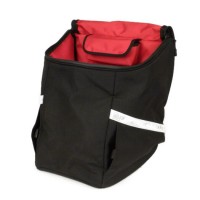
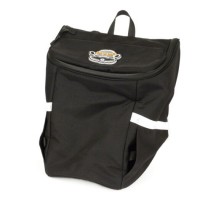
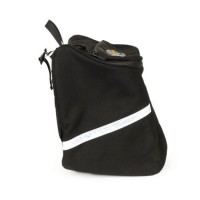
The foot well bag by Sea'n'Sand, a German company, offers exactly that. The travel bag for Vespa GT, GTL, GTV, GTS is available in black.

Cell phone bag for Vespa

The bag is attached to the leg shield and sits on the foot board of the Vespa. The handy bag can also be used as a backpack. practical Vespa bag

Video of the bag for Vespa GTS

For Sea'n'Sand it all started with a bag for modern Vespa GTS and Co. A made-to-measure foot well bag for current Vespa GTS, GT, GTV etc.

In the meantime the bag is also available for classic Vespa models Vespa PX. Functionality and quality remain the same, measures vary. Watch the video of the Vespa leg shield bag here:

ORDER Vespa bag HERE

Pictures Vespa bag

MADE TO MEASURE

The bag for GTS models and its variants GT / GTL was made-to-measure using high quality Cordura nylon. Vast 28 liters of storage volume mean a large luggage compartment, which can be perfectly used from the top.

WEATHER-PROOF & STURDY

The patented Cordura nylon is extremely wear resistant and sturdy. It is water-repellent and dries quickly. Zips are waterproof and offer an overall protection from weather.

MULTIFUNCTIONAL

The bag can also be used as a bag pack. This means that you can easily take valuable objects with you.

SAFE

There are four attach points, which grant a tight attachment of the bag to the vehicle at high speed, too. A standard luggage hook and the seat nose, as well as the supplied LOXX screws are used to attach the bag. These replace the screws of the inspection cover. Their spherical head is also part of the smart attaching system ..

MOBILE

You can still easily open the seat with the bag attached. Filling up the gas tank is possible with the bag attached. A width of 39cm is also no problem. There is sufficient space for your feet, also on a long tour.

Best Vespa bag

STORAGE SPACE

The luggage compartment has a volume of 28 liters and is equipped with nice lining, which makes packing quick and easy without objects being caught. An additional compartment for odds and ends is perfect for mobile phones, a separate glasses case with Velcro keeps sunglasses easy at hand.

ATTACH

The bag is easily attached. You only need a so-called torx screwdriver size T25 (often part of a car toolbox) and a fork-wrench spanner or a ring wrench in wrench size 9.

QUALITY

The bag is made of Cordura, which is in terms of outdoor quality beyond all doubt. Combined with fine and neat processing this bag offers a real added value, since it can be used for years.

CONCLUSION

First choice for tourers and others. The Sea'n'Sand foot well bag will most certainly be the reason to do the next shopping with your scooter and not the car!

ORDER Vespa bag HERE

New products for new Modern Vespa GTS and Co

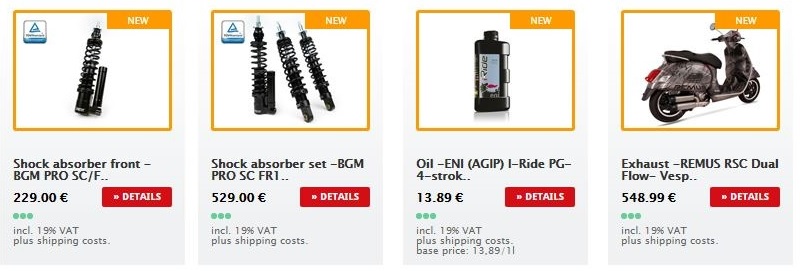
The following modern Vespa tuning products are brand new in our company Scooter Center Scootershop:

new product 1

new product 2

The highlights are:

Modern Vespa shock absorber with TÜV registration

Modern Vespa suspension tuning BGM7788BKTS

HighEnd Vespa suspension by BGM with TÜV registration / e-pass for Vespa GTS and Co. Available individually or as an affordable set:

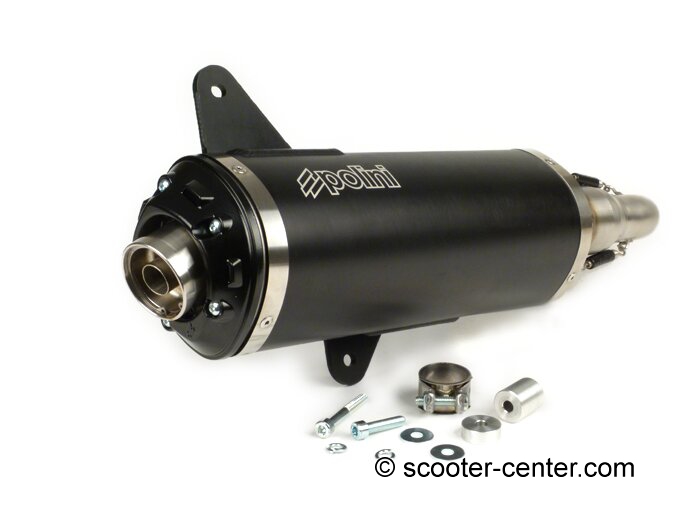
Polini exhaust Vespa GTS & GTV with registration

Polini Exhaust Modern Vespa P1900041

Polini offers a new sports exhaust for Vespa, which is a great alternative to well-known candidates.
The RX racing exhaust for Vespa by Malossi is produced by Arrow. And so is the exhaust by Polini, which is a guarantee for solid and fine processing. The outer shell of the exhaust is made of alloy with a matte and brushed surface and interior and manifold made of stainless steel.

when we visited Polini we were able to convince ourselves by that throaty sound and awesome looks of the new Vespa exhaust by Polini prior to delivery.

The DB killer insert is quickly (diss) assembled and only fastened by a locking ring.

Like almost anything exhaust for GTS / GTV models, this exhaust is produced as so-called slip on version, which means that the included manifold is easily fastened to the original outlet nozzle of the vehicle. The lambda sensor remains at its position and does not need to be touched in order to assemble the exhaust: easy and quick assembly

The Exhaust by Polini for new Vespa models features E (9) homologation for sound for the following vehicles:

  1. VESPA 125 GTS - M45 var. 3 ver. 0/1
  2. VESPA 250 GTS - M45 var. 1 ver. 0/1
  3. VESPA 250 GTV - M45 var.1 ver.2
  4. VESPA 300 GTS / GTV - M45 var.2 ver.0 / 2

Double exhaust for Vespa GTS and Co

Spectacular twin tube exhaust with twin muffler for Vespa GTS: Vespa exhaust Remus RSC Dual Flow.
This muffler for Vespa has an EC registration. However it is illegal to use it on public roads without a plug-in catalytic converter. Remus Vespa exhaust double exhaust 7674943RD1

Eni - high performance oil 4 stroke modern Vespa

modern-Vespa -4t Vespa oil 3331359

Eni i-Ride PG 5W-40 is a 4-stroke engine oil with top synthetic technology by Eni. It was developed for 4 stroke high performance engines and may also be used in racing.

Quality features:

Outstanding shear stability is one feature of this stay-ingrade oil, even after a long ride in tough conditions. The thermally stable synthetic base oil features an extremely low evaporation rate, which leads to a low consumption of oil.

The Eni Research & Development labs developed this special formula to grant highest performance in terms of detergents and dispersants, corrosion prevention, prevention of foam formation, oxidation stability and wear protection.

Areas of use:

Eni i-Ride PG 5W-40 is recommended if you want high engine performance and a reliable lubricant film.

Specifications:

  • THAT A3
  • SL API
  • Jason MA
  • Jason MA2
  • Piaggio group

Replacement for Agip Formula Moto City Hi Tec 4T 5W-40 and Racing 4T 5W-40