Posts

A Vespa Be Giorni?

The Vespa Sei Giorni is among the most sought-after collectors items. A. Vespa Six Days, but what's it all about?

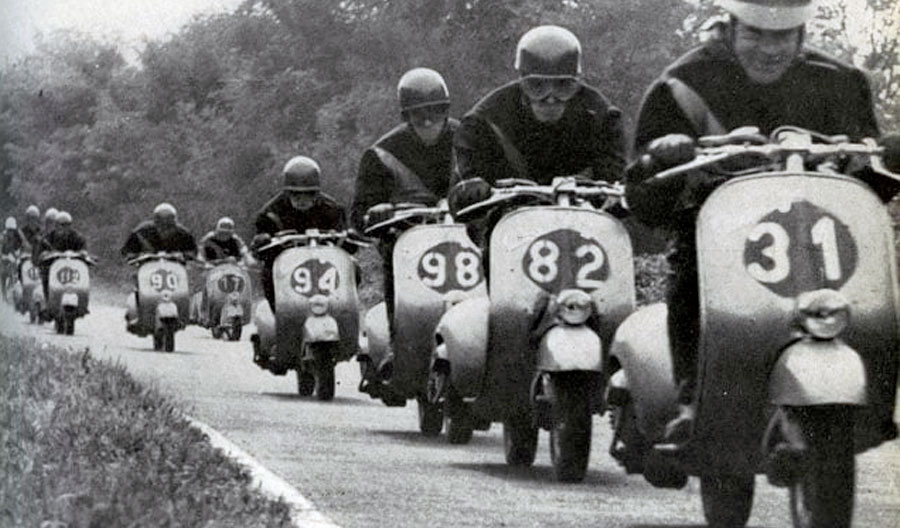
In 1951 the Vespa company's racing team “Piaggio Squadra Corse” gained massive attention during a race. The “Sei Giorni Internationale” took place from the 18th to the 23rd Septemper 1951 in Varese, in the hinterland of Lake Maggiore in Italy. It was one of the hardest and most important competitions of that time: 220 participants riding over several kilometers in an off-road environment.

Race 6 giorni (6 days)

Let Giorni = six days

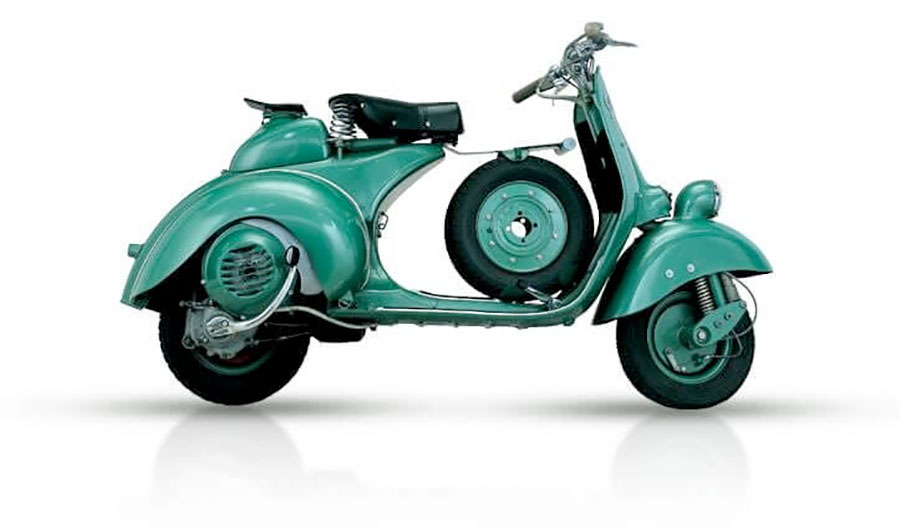
Still today this six days reliability trial is known as “International Six Days Enduro”. The first race took place in England in 1913, a test of the limits of both daring racers and machines. And in 1951 the Vespa was just 5 years old!

For this race Piaggio modified a small part of three hundred 125cc Vespa models. The racing team “Piaggio Squadra Corse” participated with these ten scooters. But how could the small Vespas, specially built for this race, compete against motocross motorbikes?

Surprisingly the Piaggio company's racing team (racers: Biasci, Cau, Crabs, Mazzoncini, Merlo, Nesti, Opesso, Riva, Romano, Vivaldi) won the competition with their Vespas, outdoing the offroad motorbikes: 9 out of 10 racers got a gold medal . In 1951, for this top performance the Vespa 125 “Sei Giorni” also won the prize of the Italian motorcycling federation and with their Italian Vespa models the three racers Giuseppe Cau, Miro Riva and Bruno Romano stole the limelight from all other racers.

Near series racing scooters

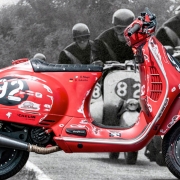
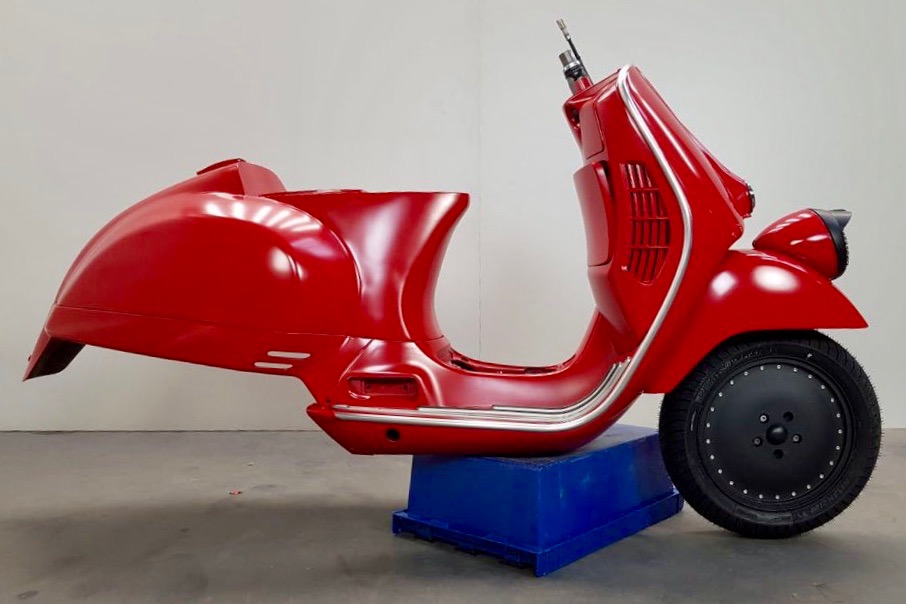
The Vespa "Sei Giorni" was optically very similar to the series model. The main differences which were visible for instance more tank volume, improved aerodynamics of the leg shield and a bigger engine cover.
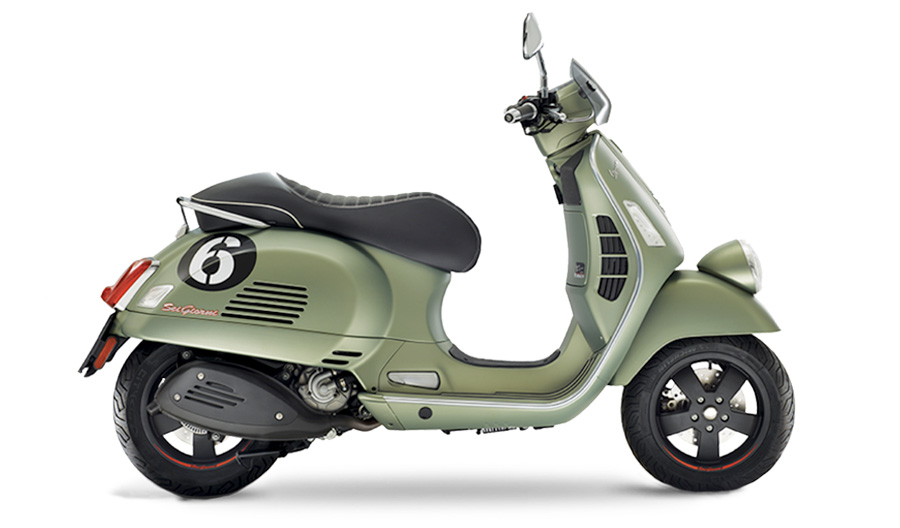
Vespa Sei Giorni racing scooter Vespa 125 from 1951

Vespa Six Days 2017

As we reported from the motorcycle show Eicma in 2016, in memory of this legendary success, Piaggio released a special edition: the Vespa Sei Giorni 300.

Vespa 300 Be Giorni 2017

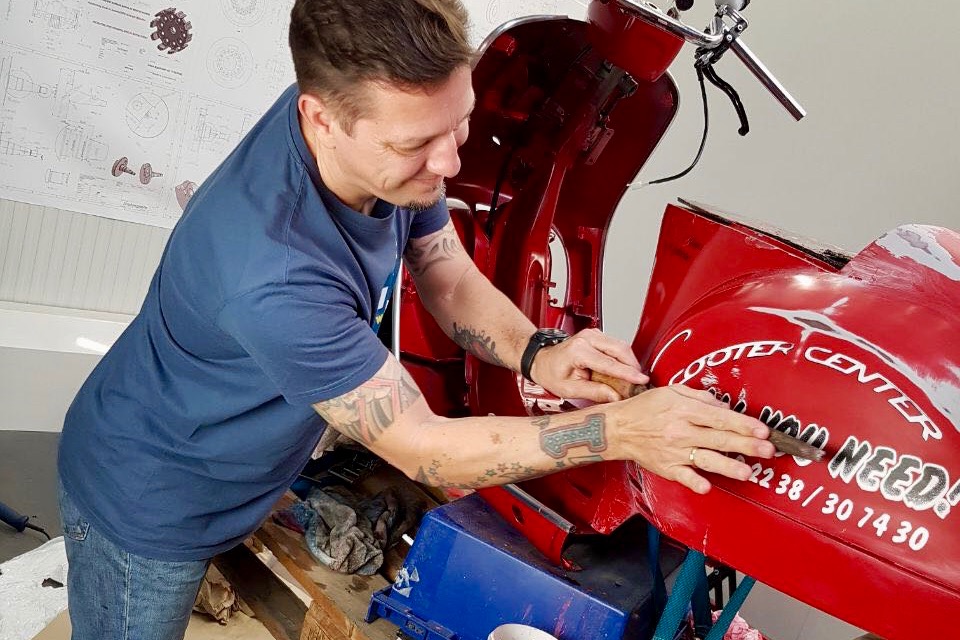
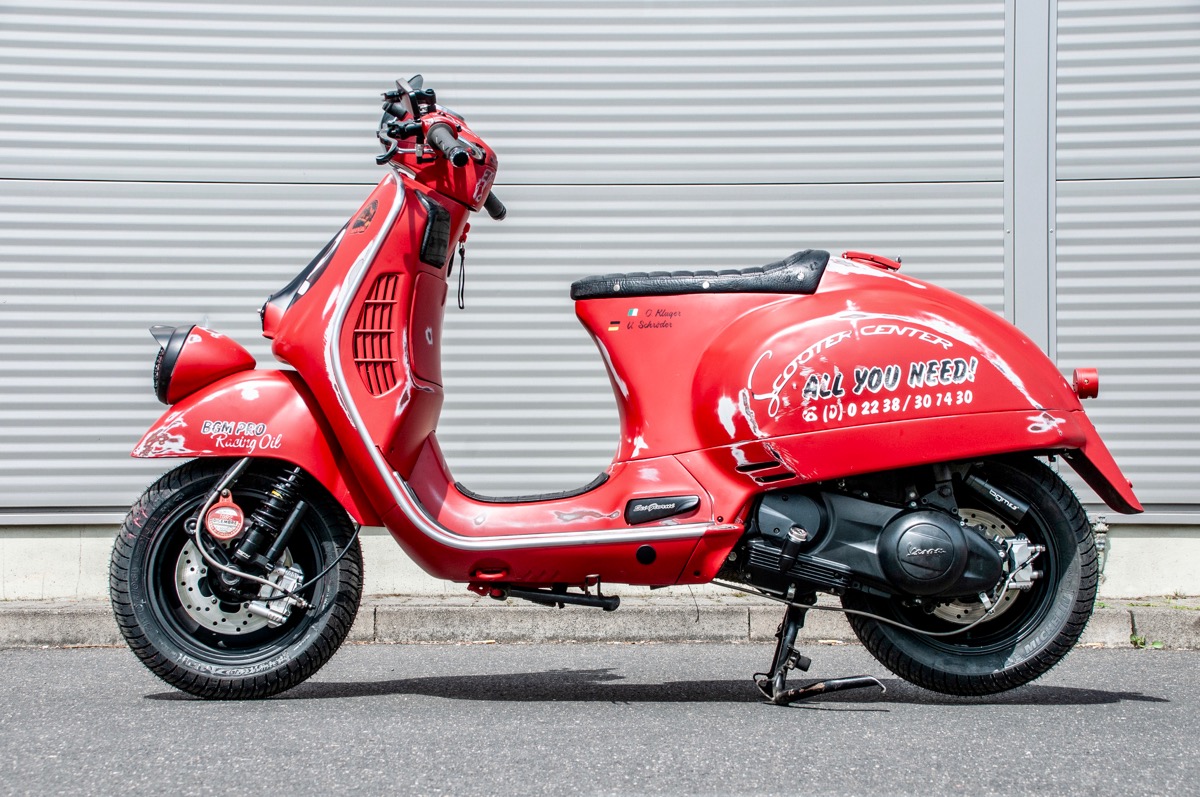
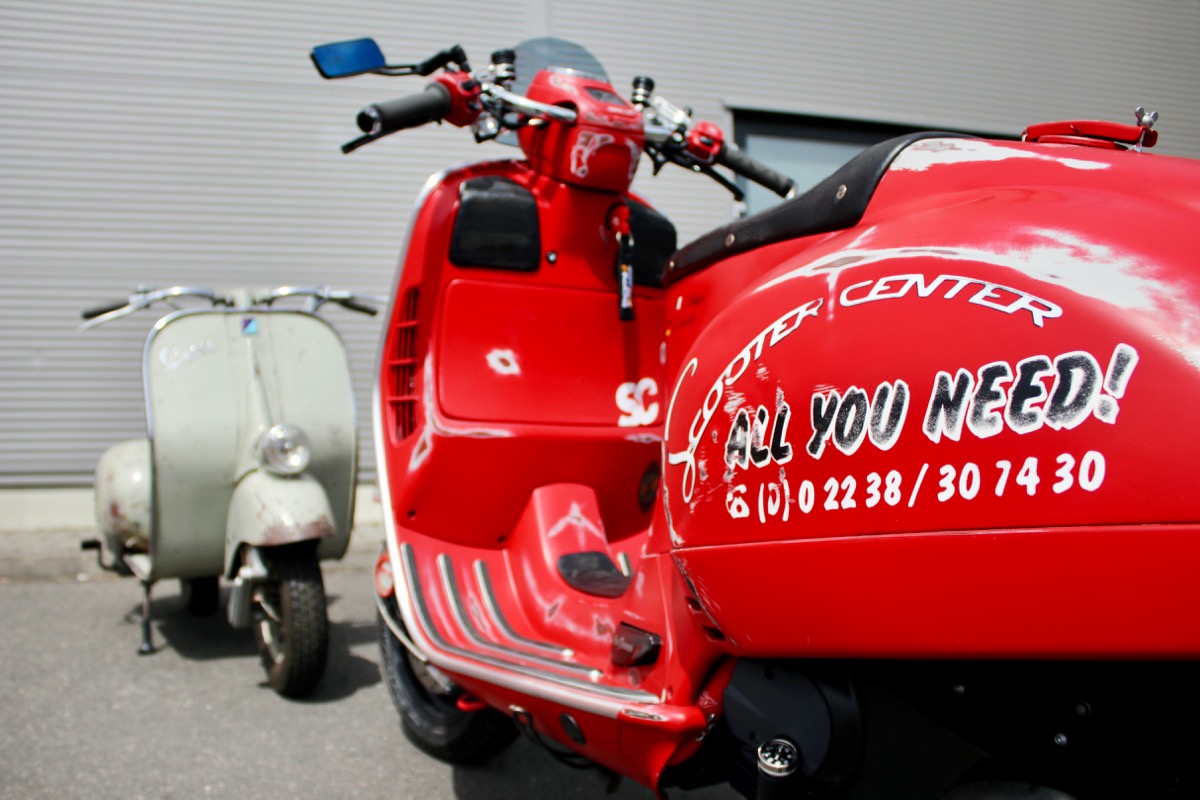
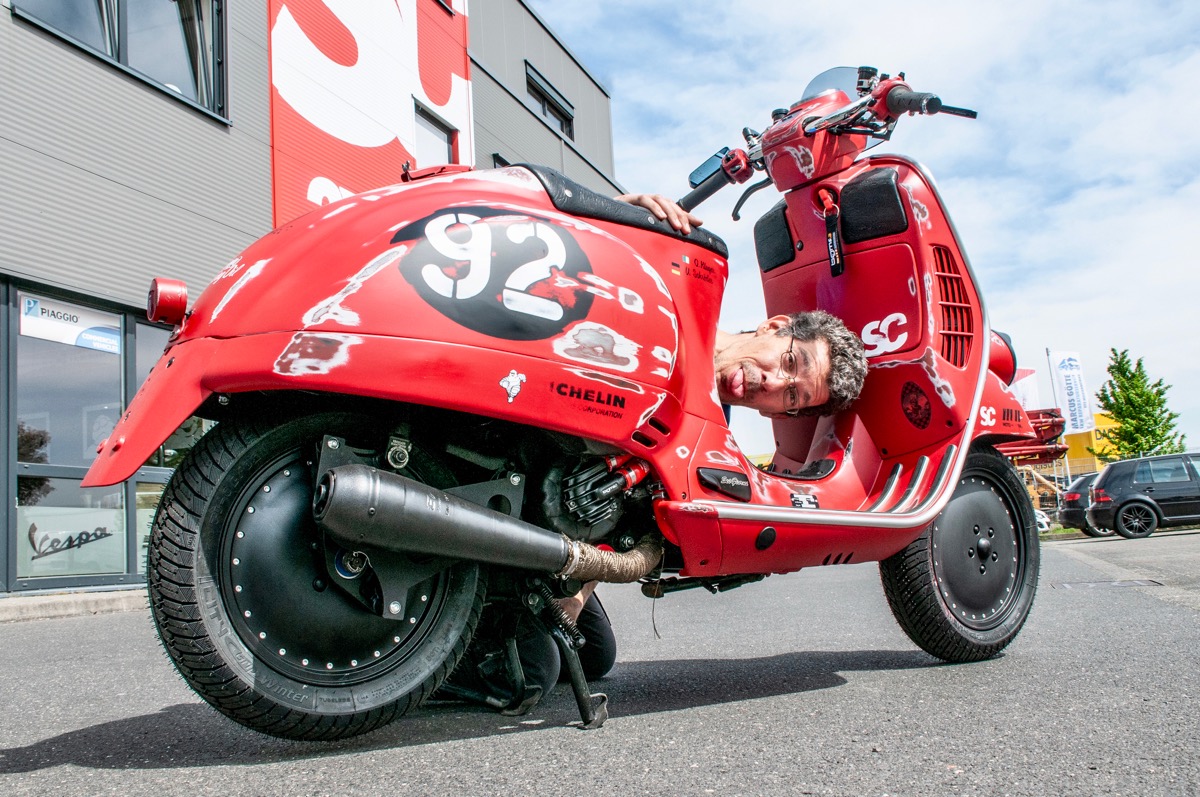
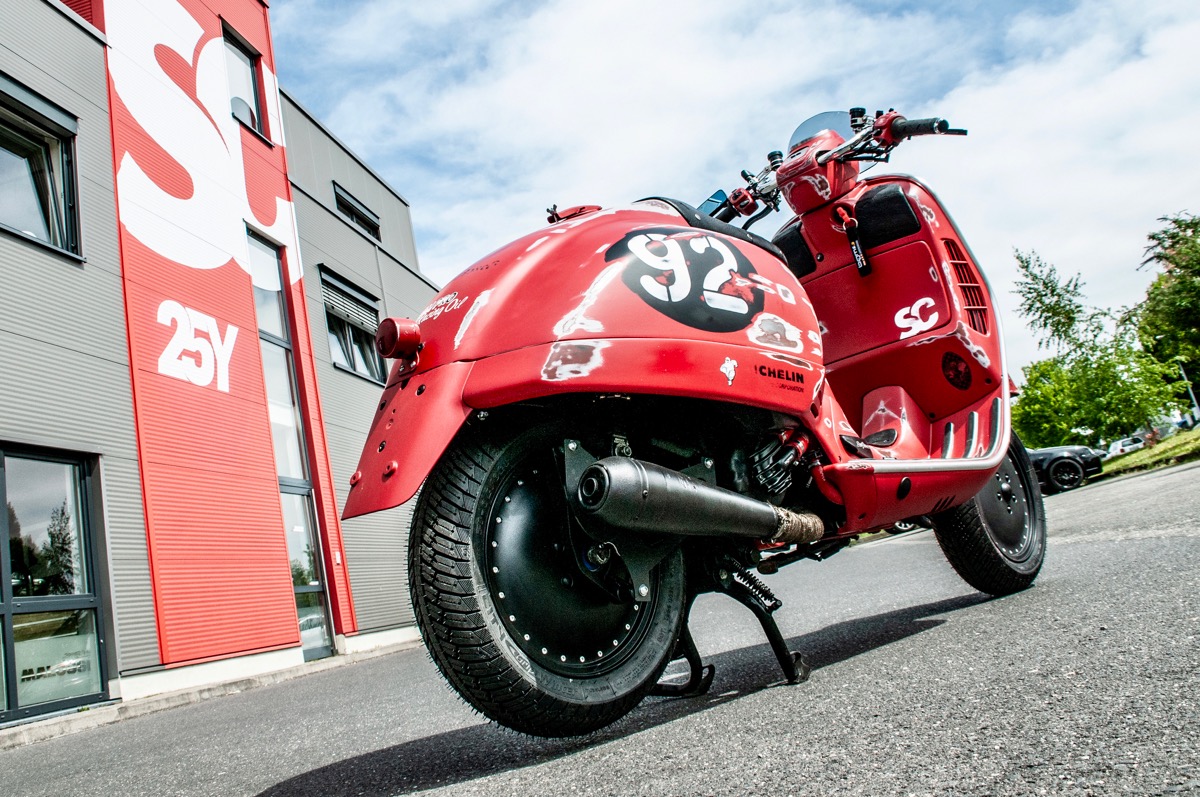
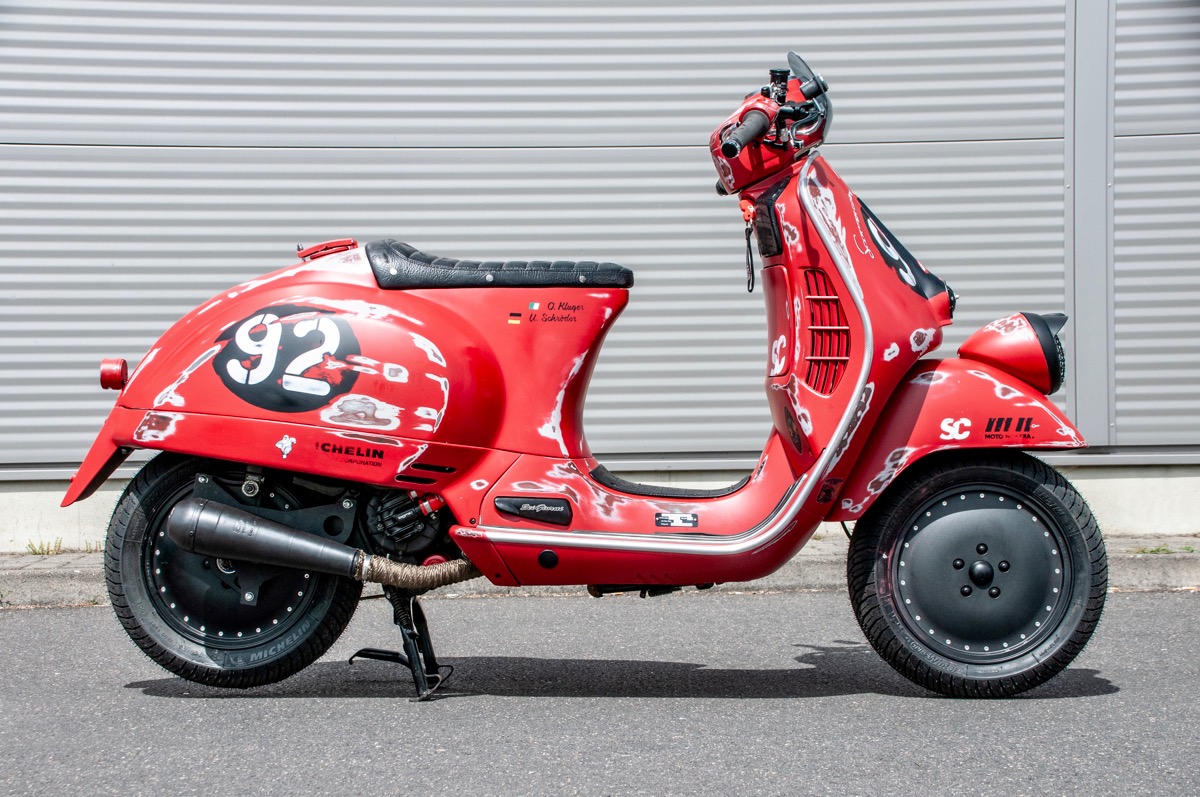
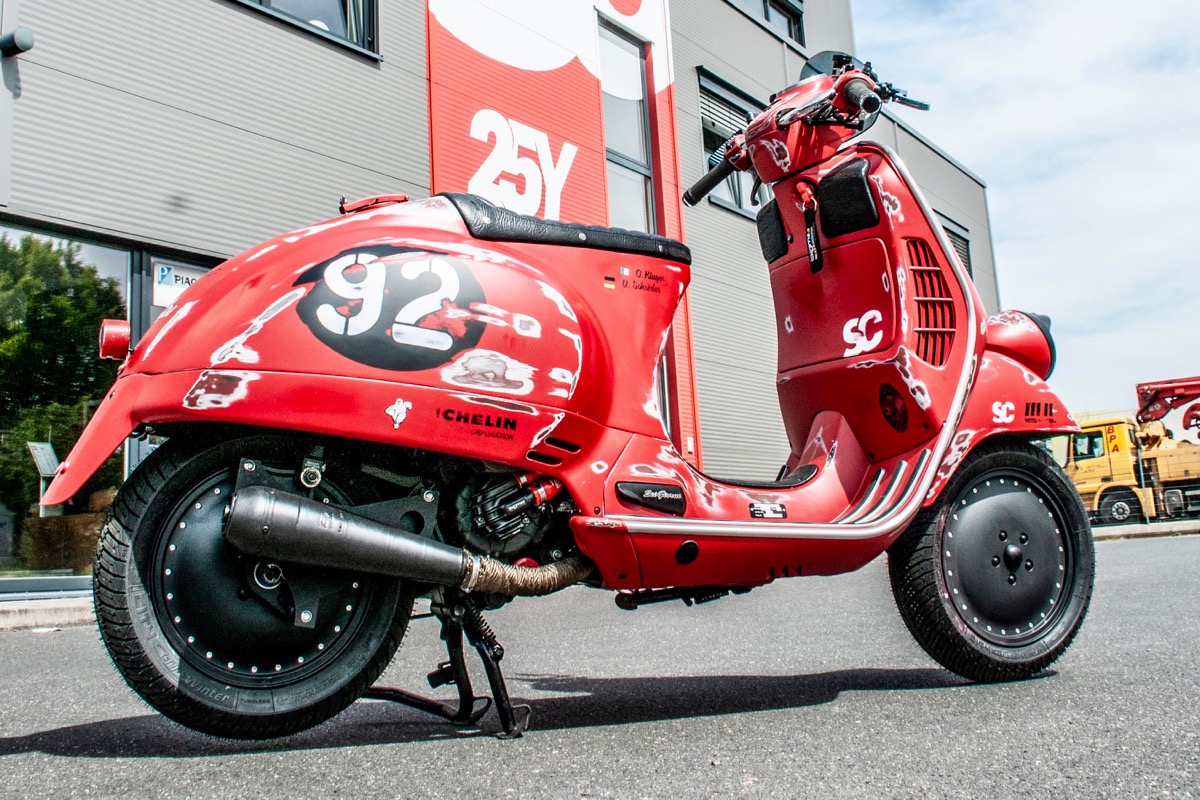
Scooter Center's Vespa Sei Giorni

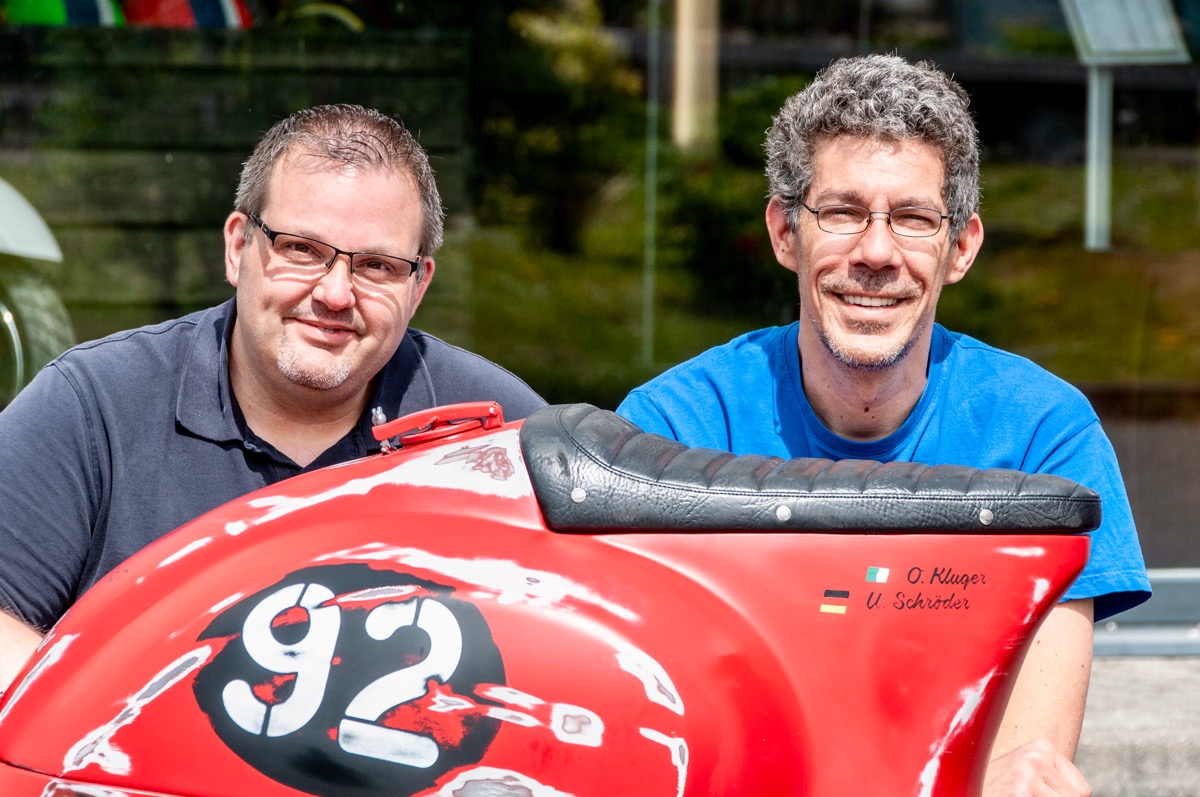
After the Eicma morotcycle show 2016, we got the idea of ​​creating a new Scooter Center demonstrator which represents a fusion of the automatic Vespa and the classic Vespa. Just like us Vespa shop where you can just find everything you need for your modern or vintage Vespa.

We were inspired by this new model and wanted to release our own “modern” Vespa Sei Giorni. Alex Stroh (right) and Frank Winkel (left) worked on the project of our new Scooter Center Vespa Six Days.


The genesis of the SC Sei Giorni          

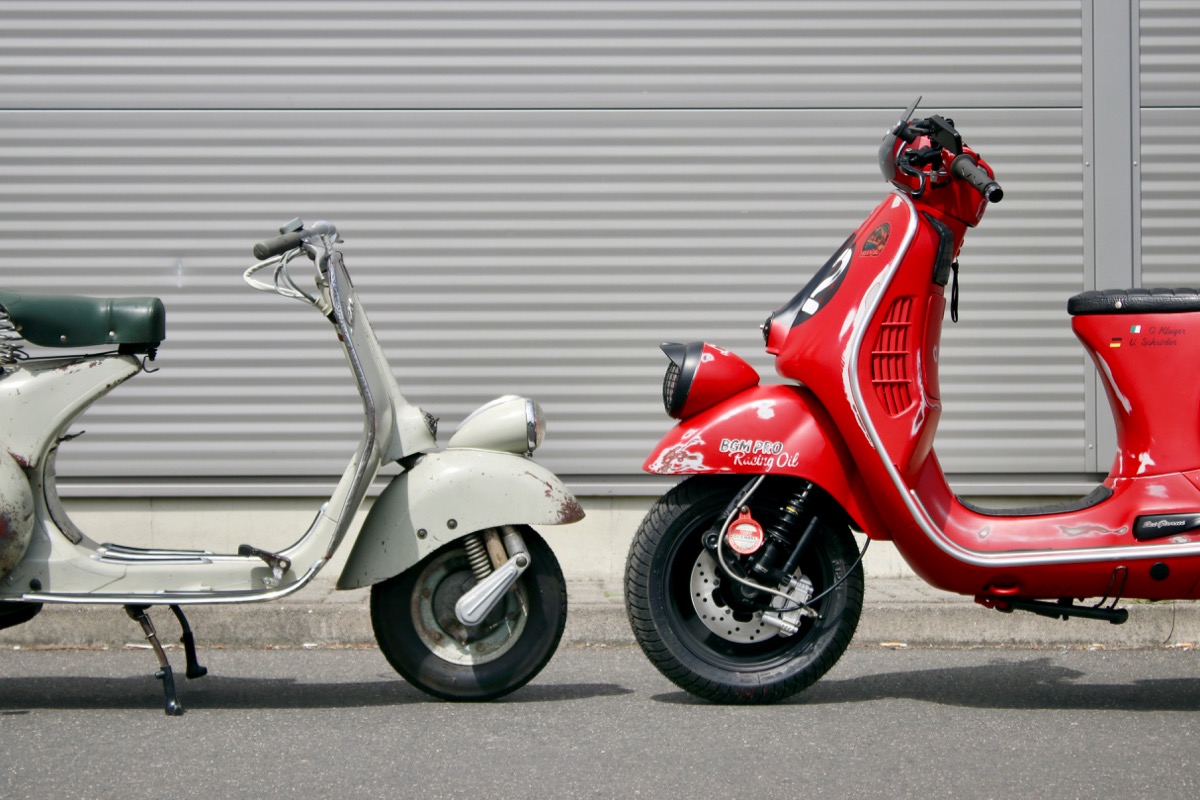
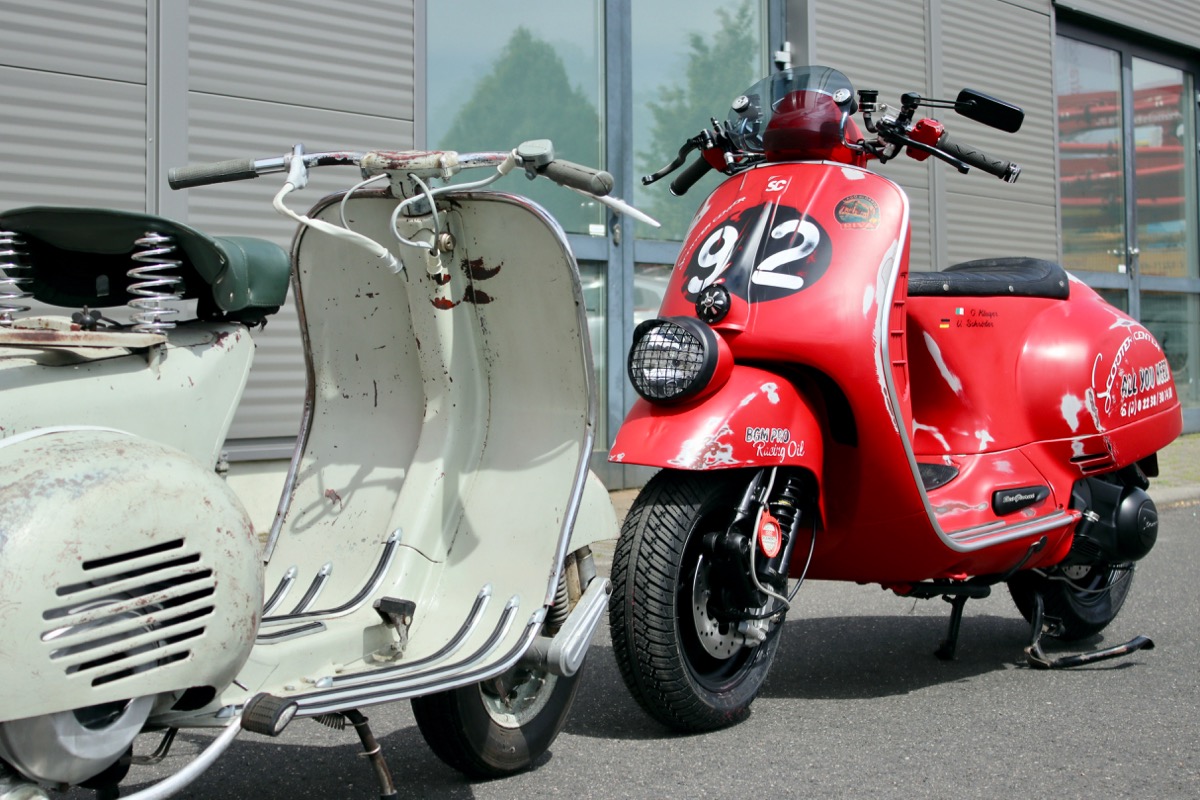
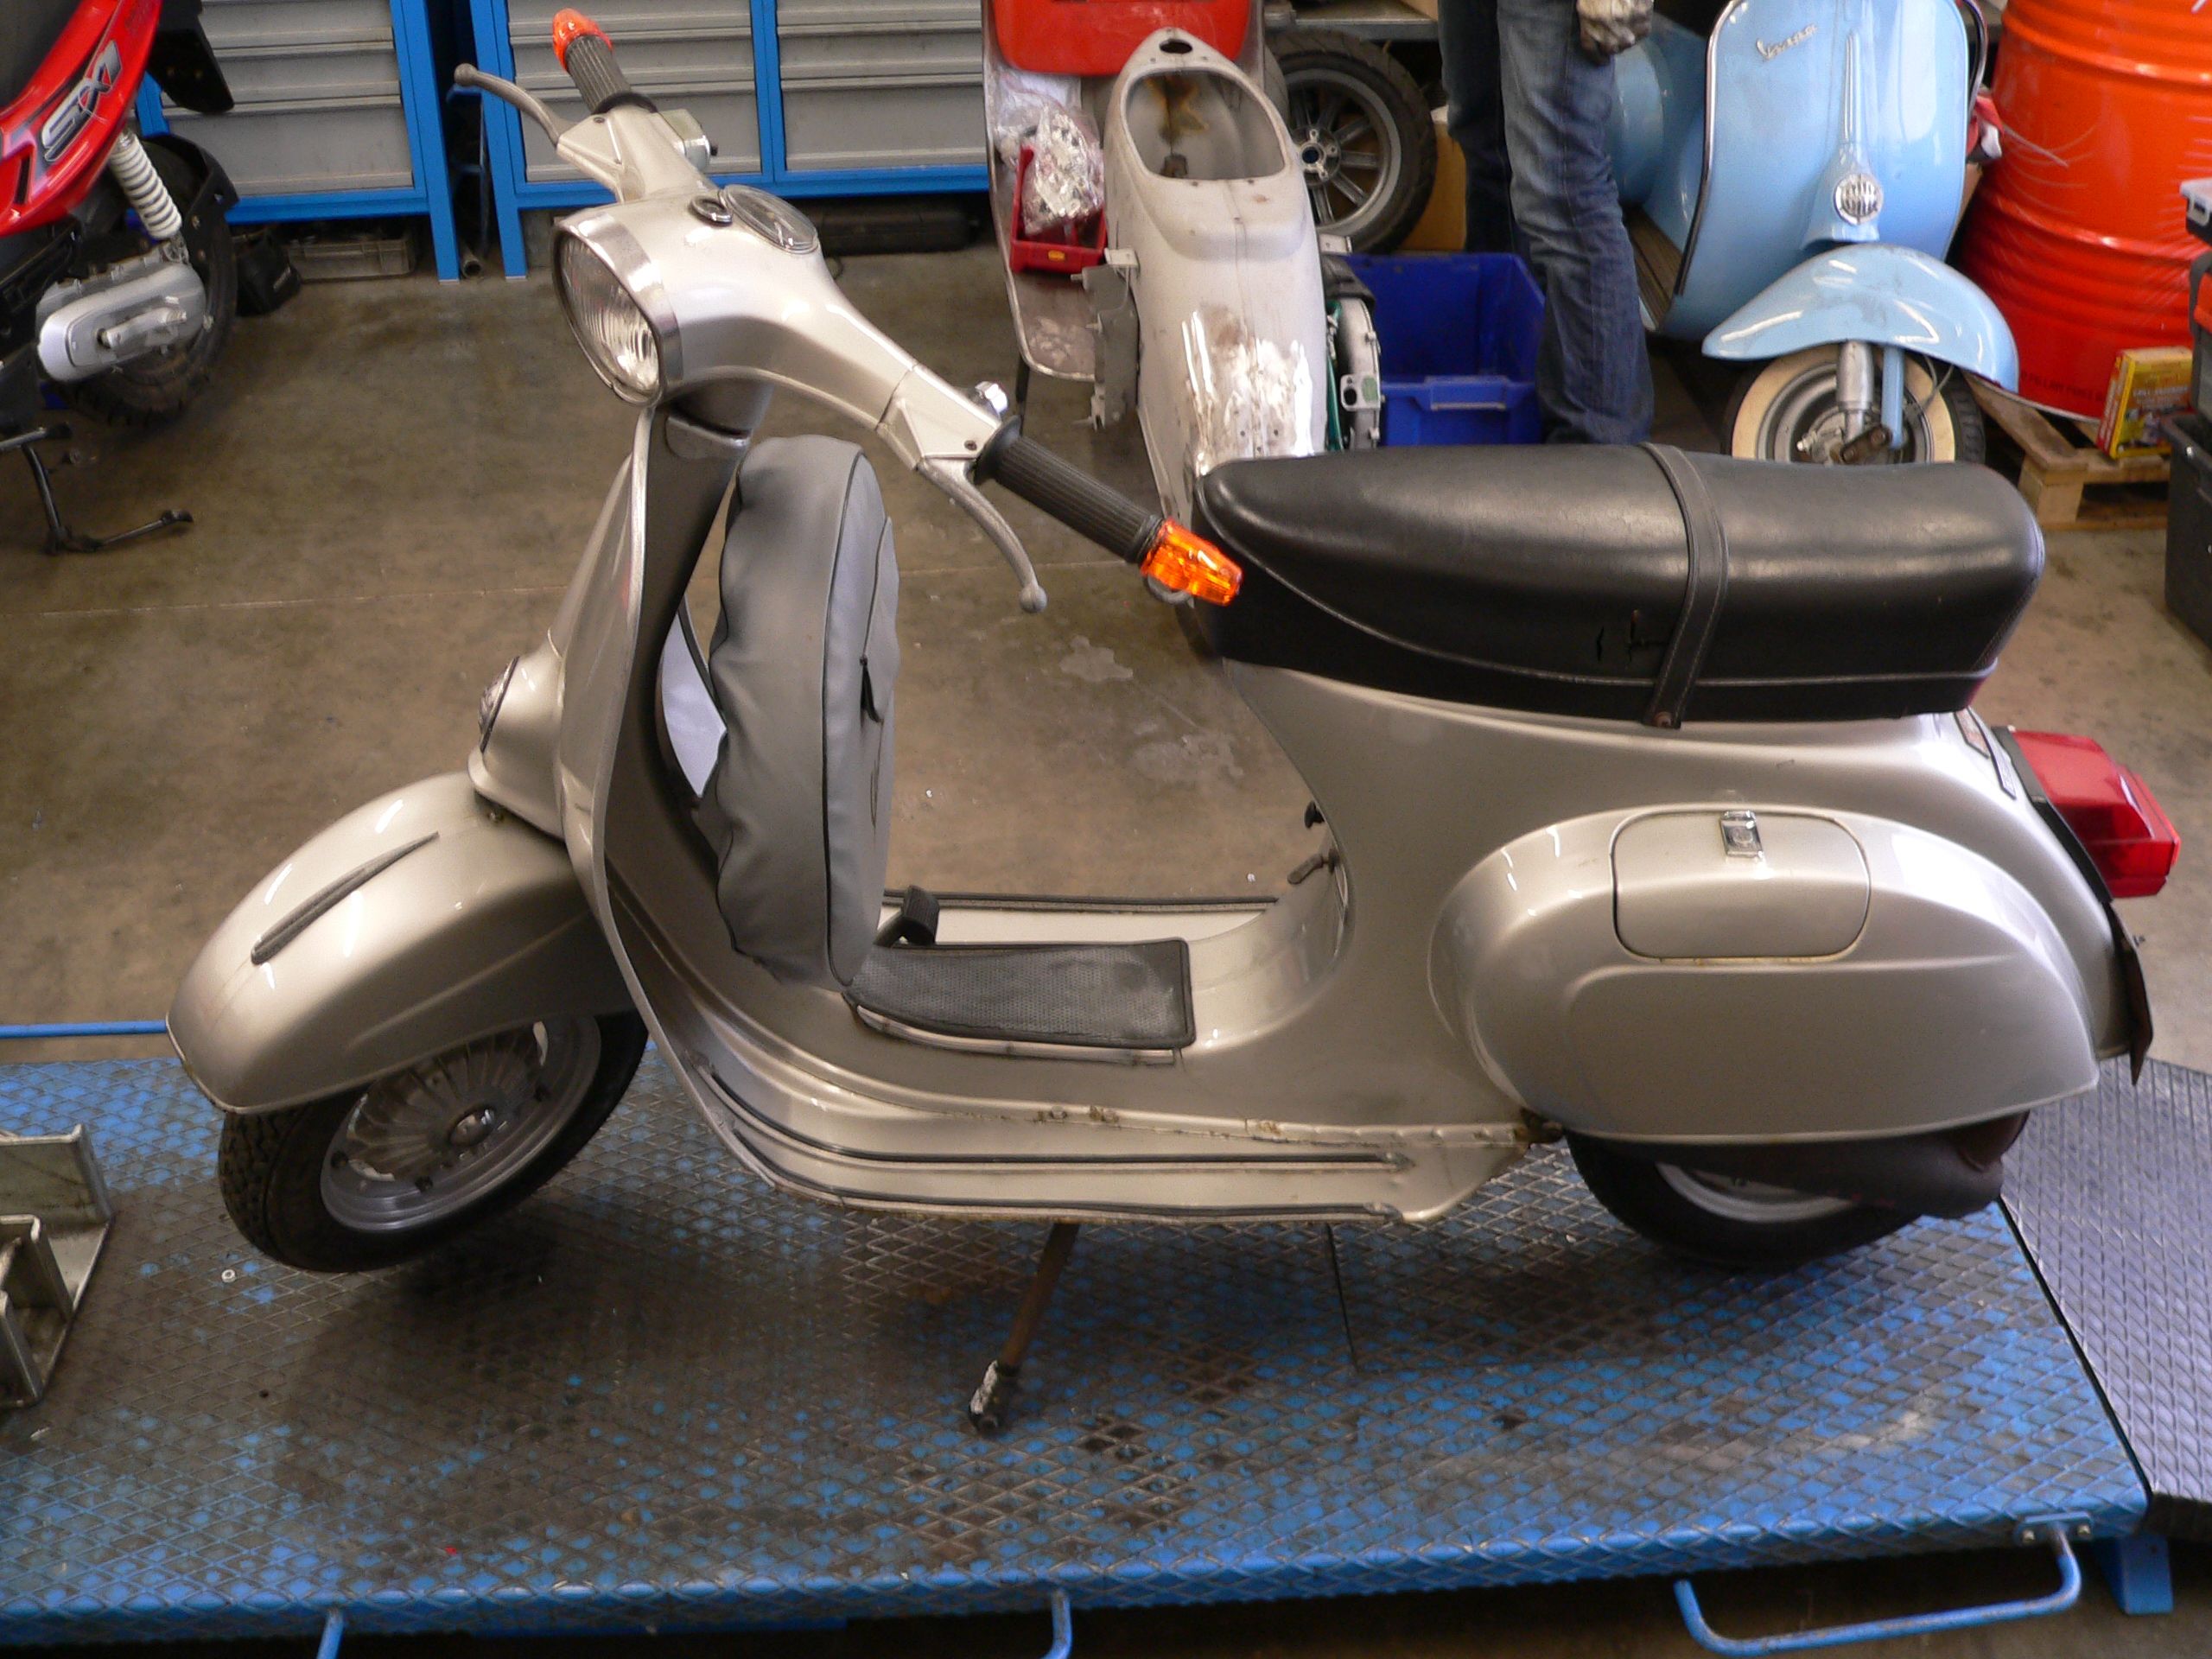
Our new Vespa demonstrator was a normal, slightly accident-damaged Vespa GTV…

Scooter Center Vespa SC Sei GiorniVespa modeling with construction foam

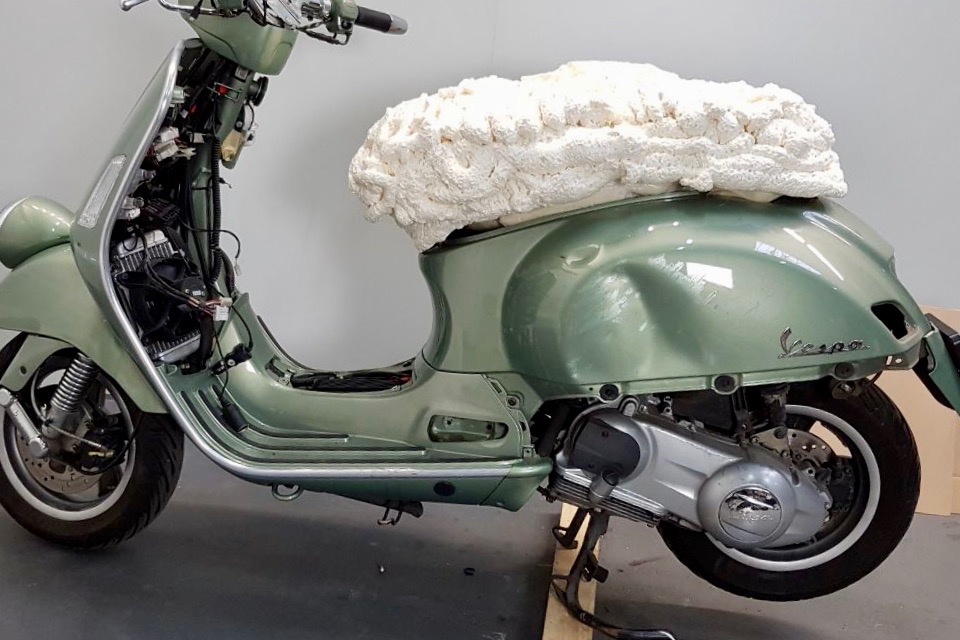
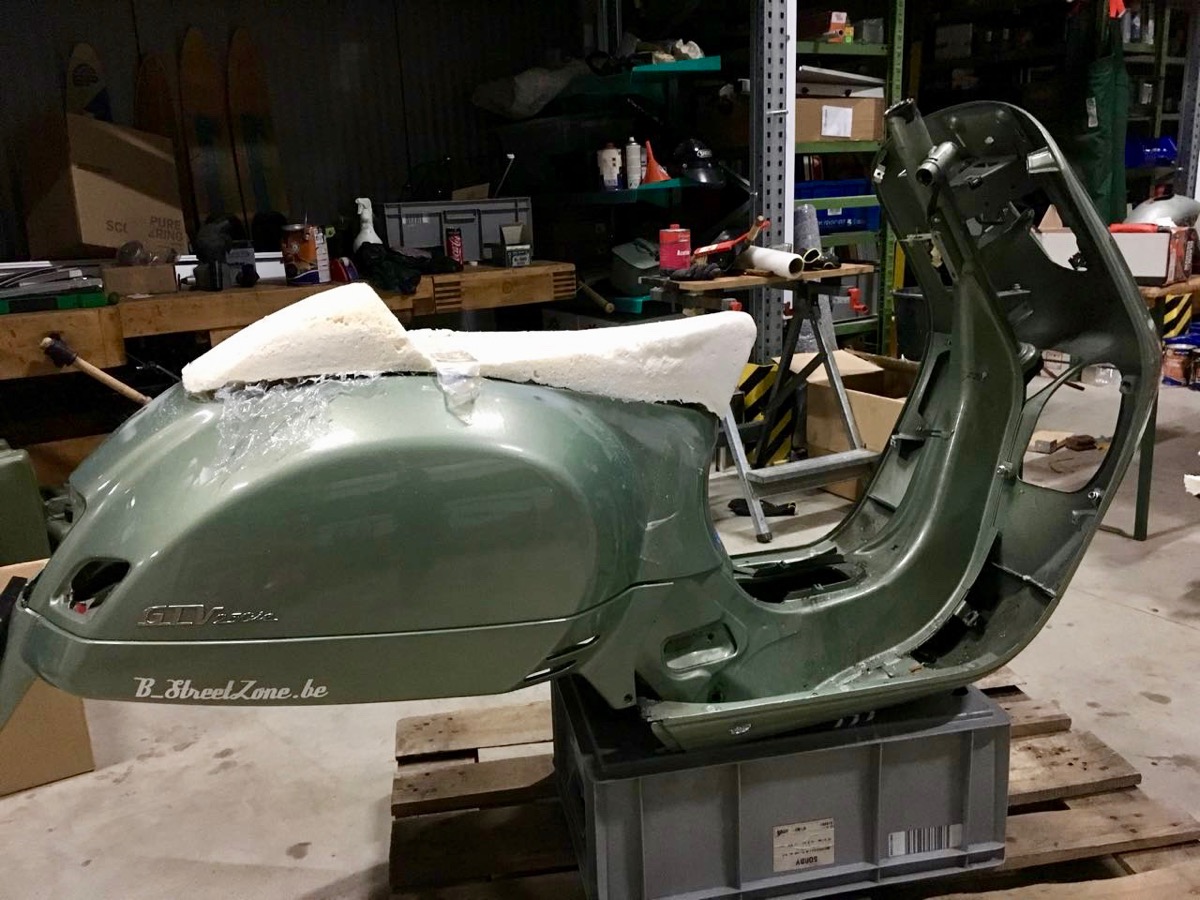
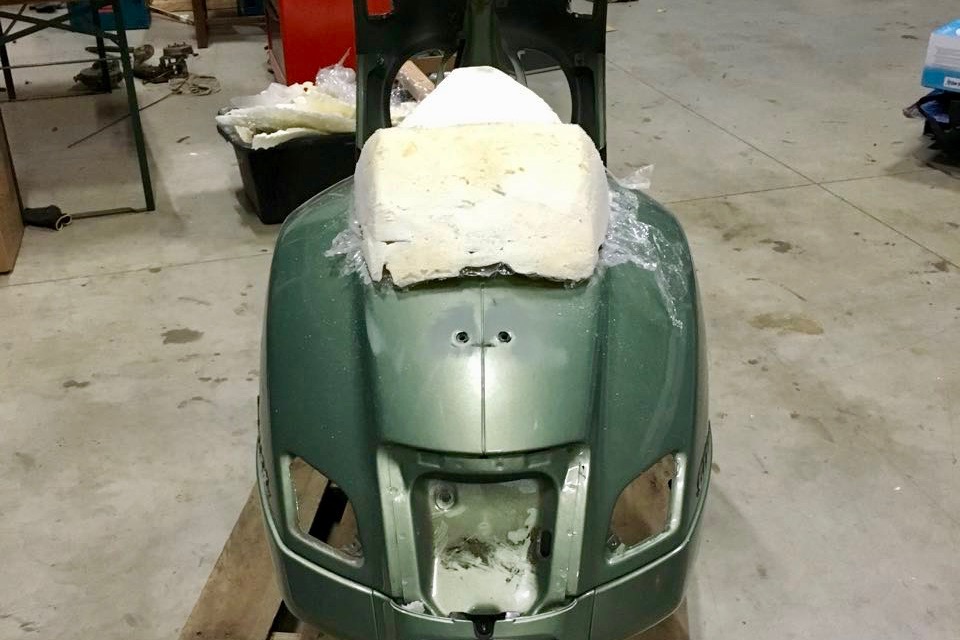
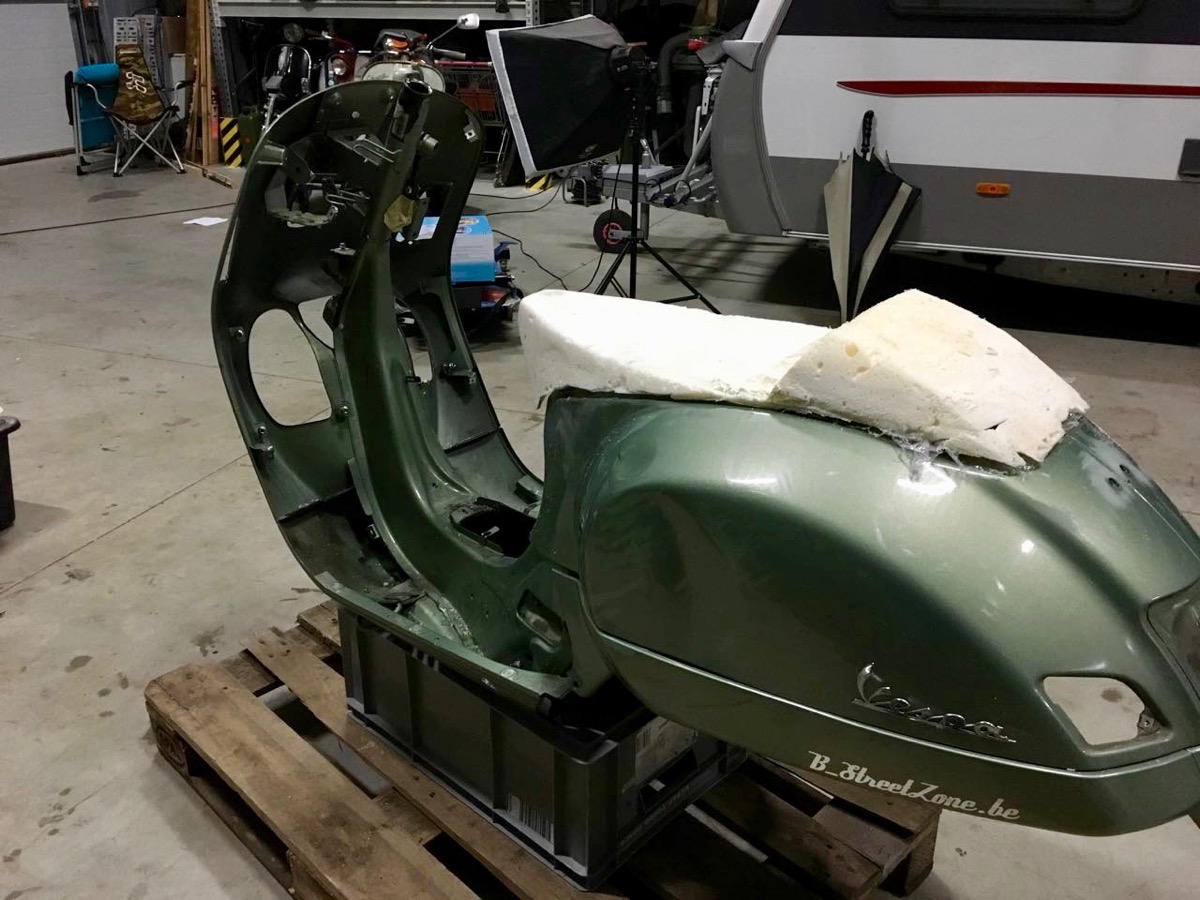
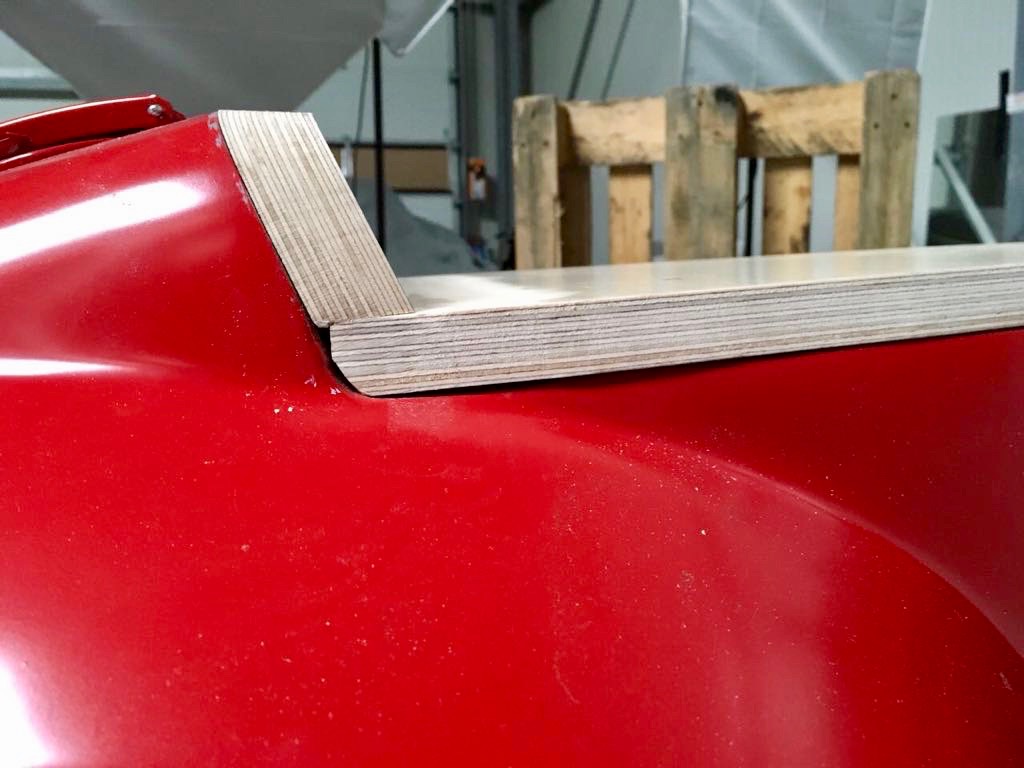
Filled building foam?

The filled building foam was just a model for Mathias Laubsch from Blechwerk in Neuss, http://www.blechwerk.com/, who brilliantly transformed it into metal sheet.


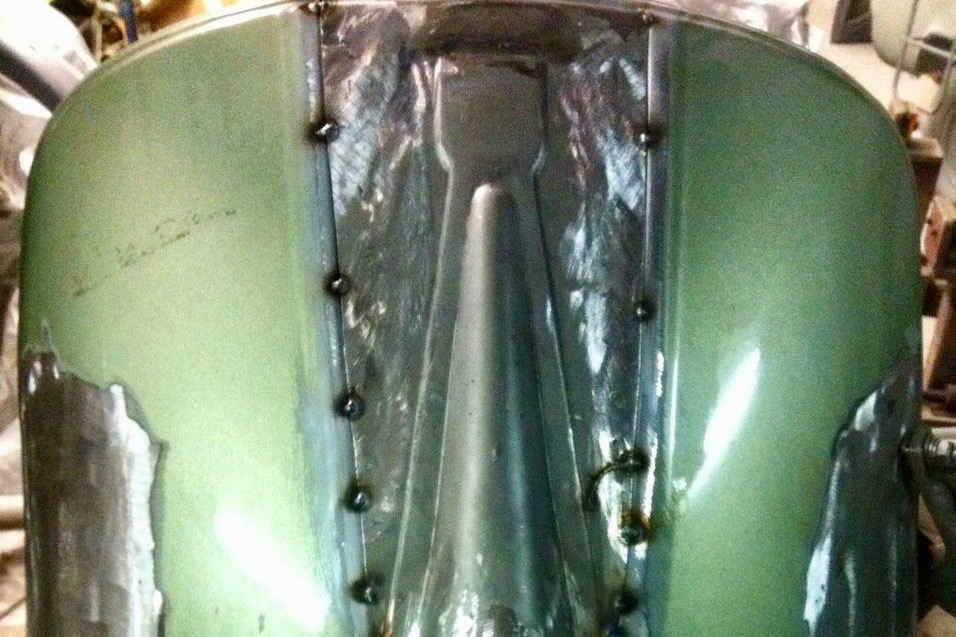
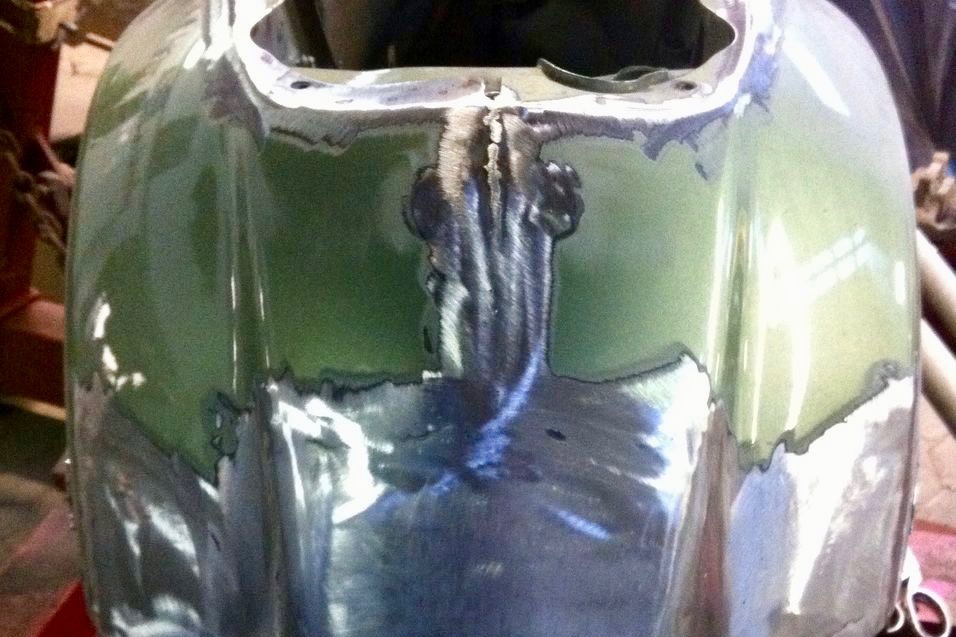
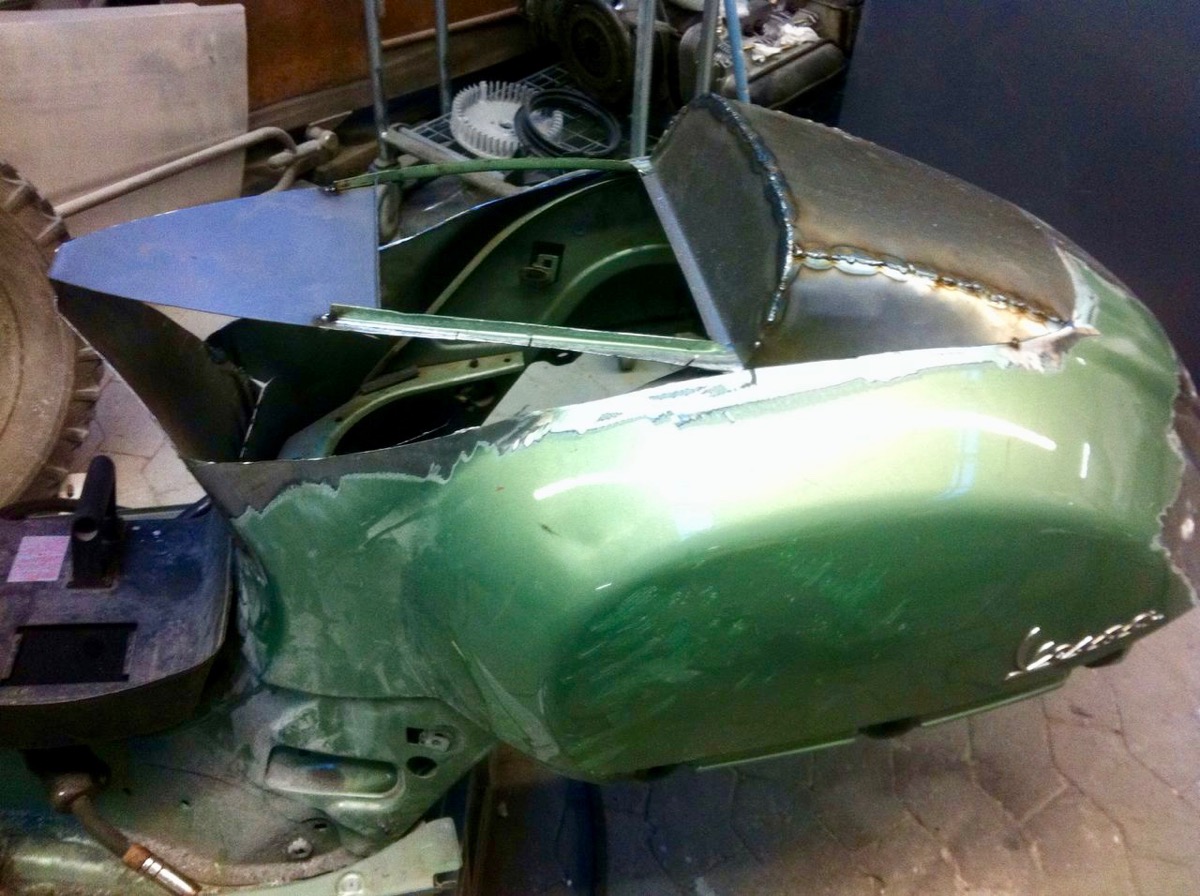
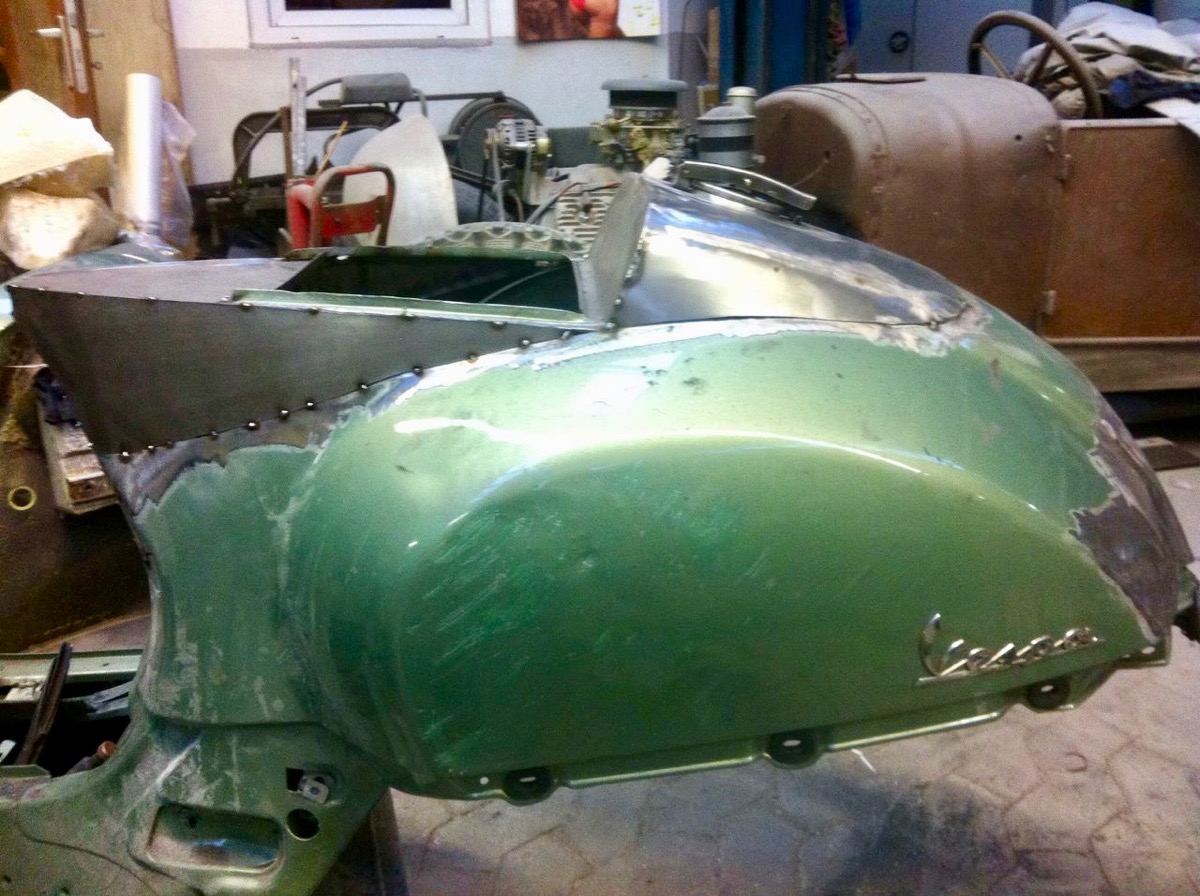
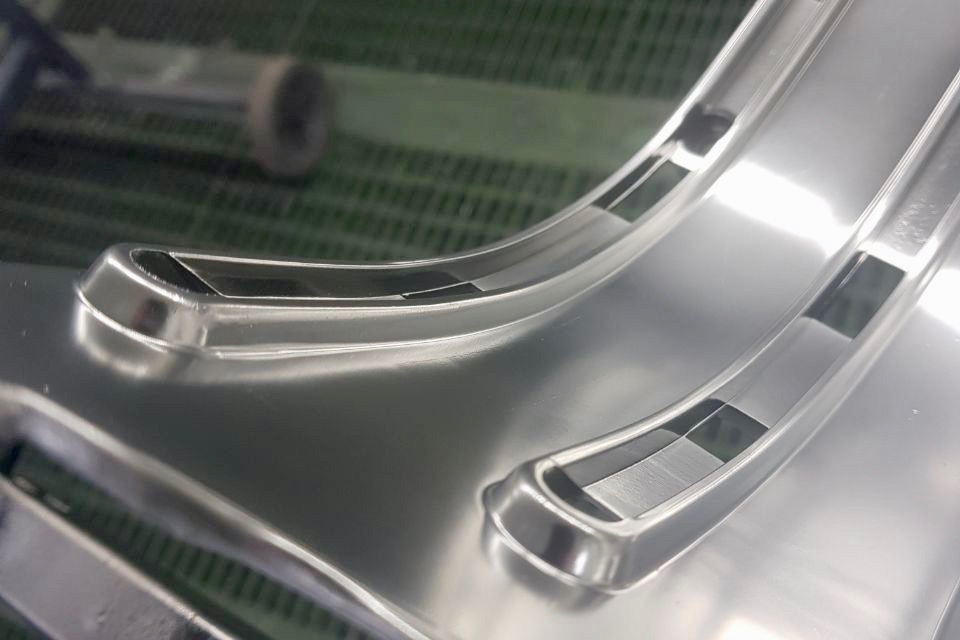
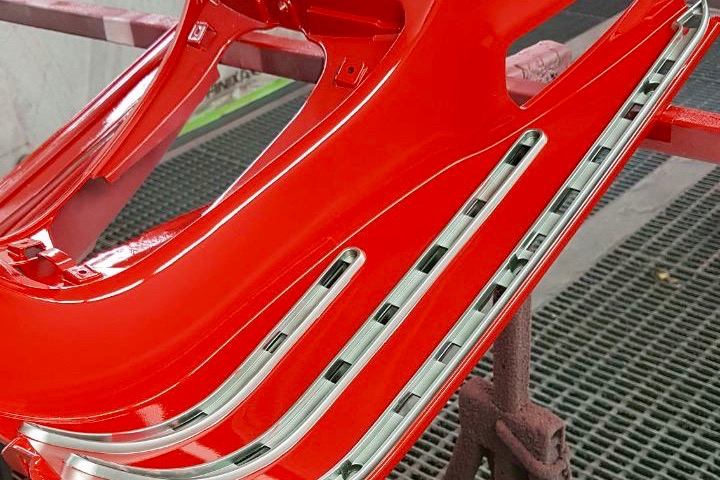
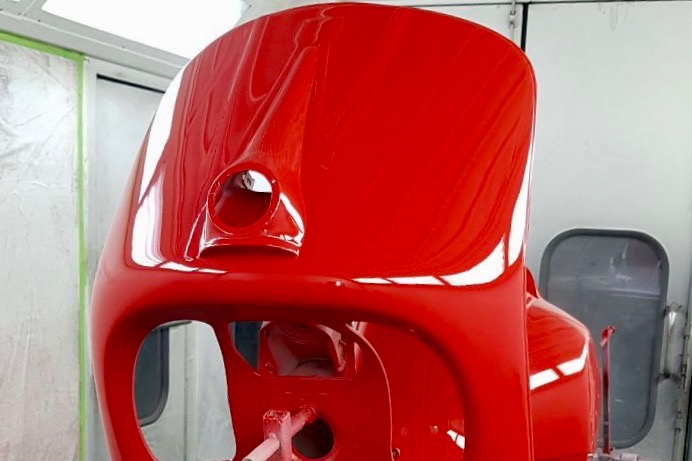
Huge sheet metal and painting work!

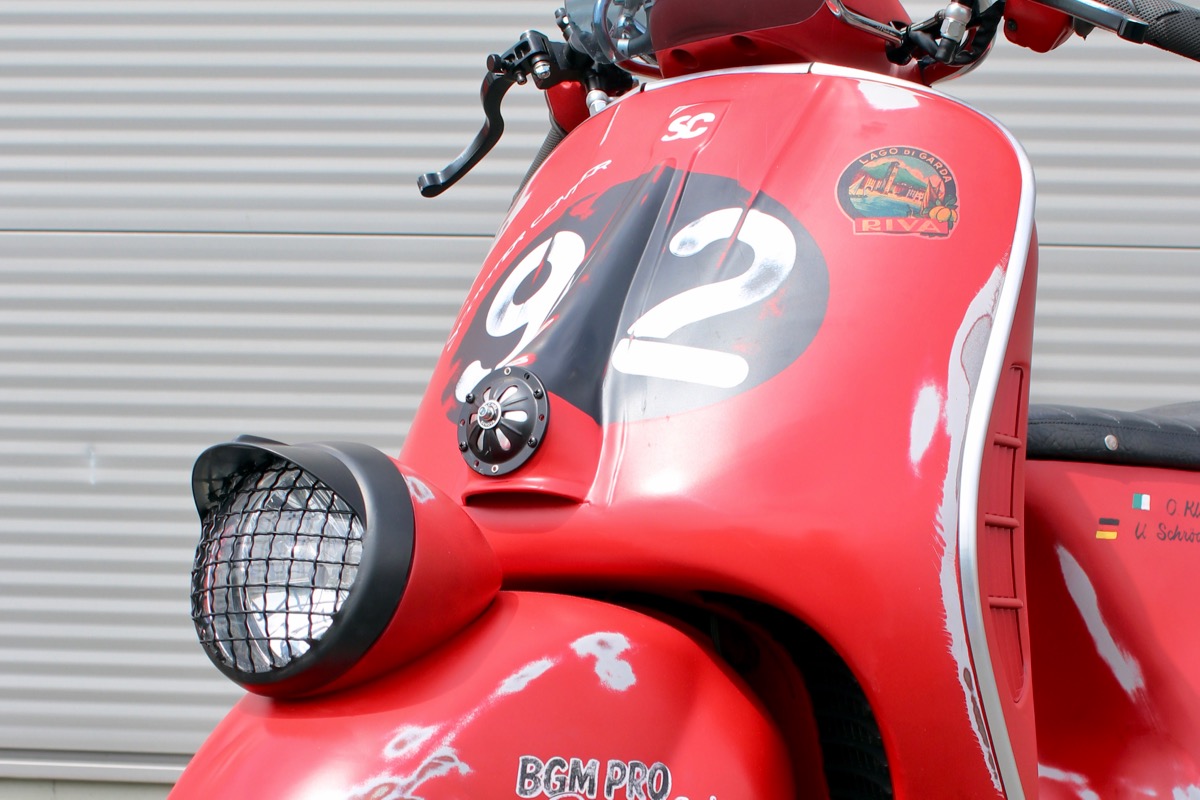
For the typical “nose” we mounted a horn cover which is normally used on a Vespa VNA-VNB. We “just” welded the indicators and the hole under the tail light and Vespa Sei Giorni was brought to the painter ...

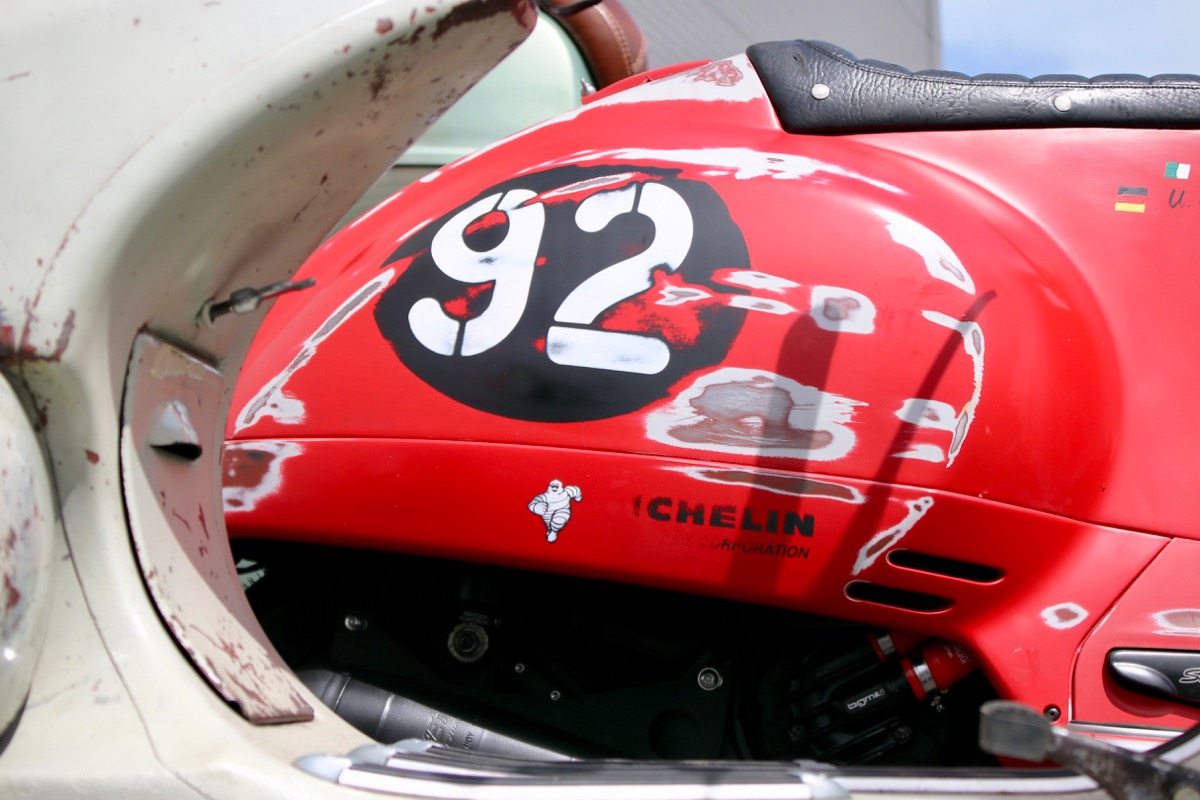
All plastic parts got a silver coating so that patinated could be made on “metal sheet” and not on bare plastic.

Then, all metal and plastic parts were painted with a deep red coating which was used in the 50s and then again with a second coating in gray before being painted eventually with the red varnish which recalls the typical coating of the first Piaggio race models.

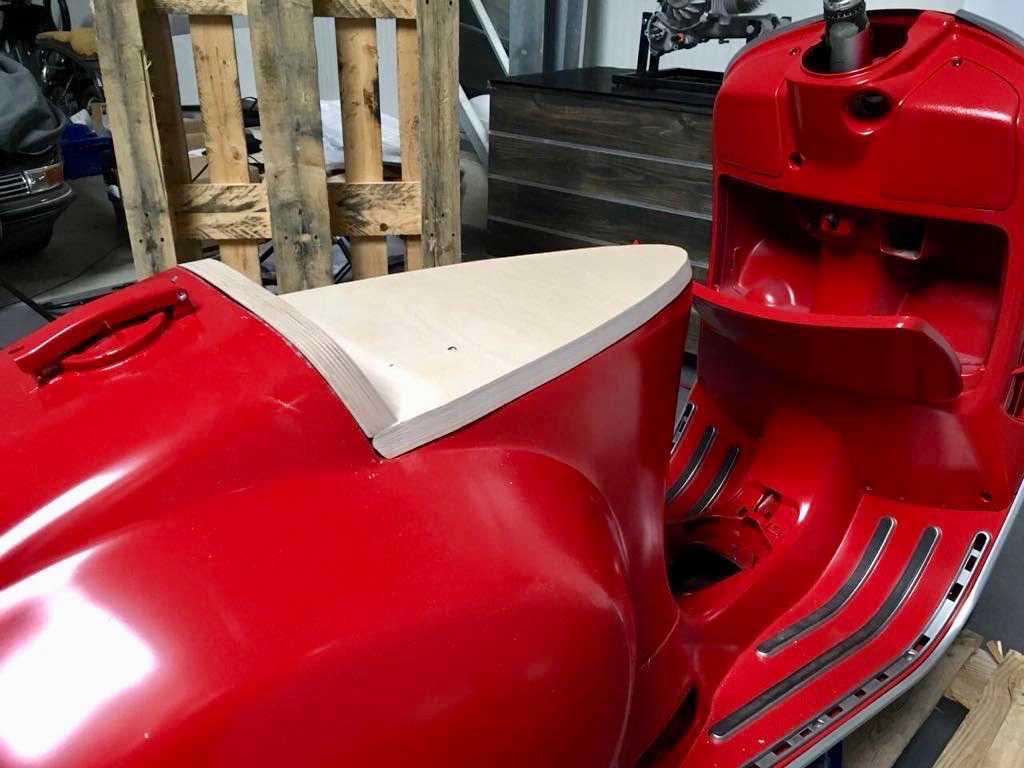
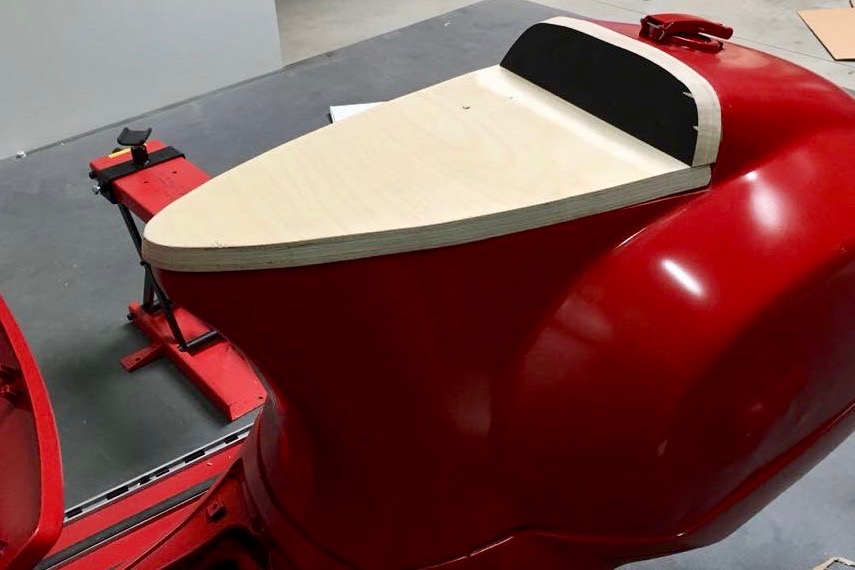
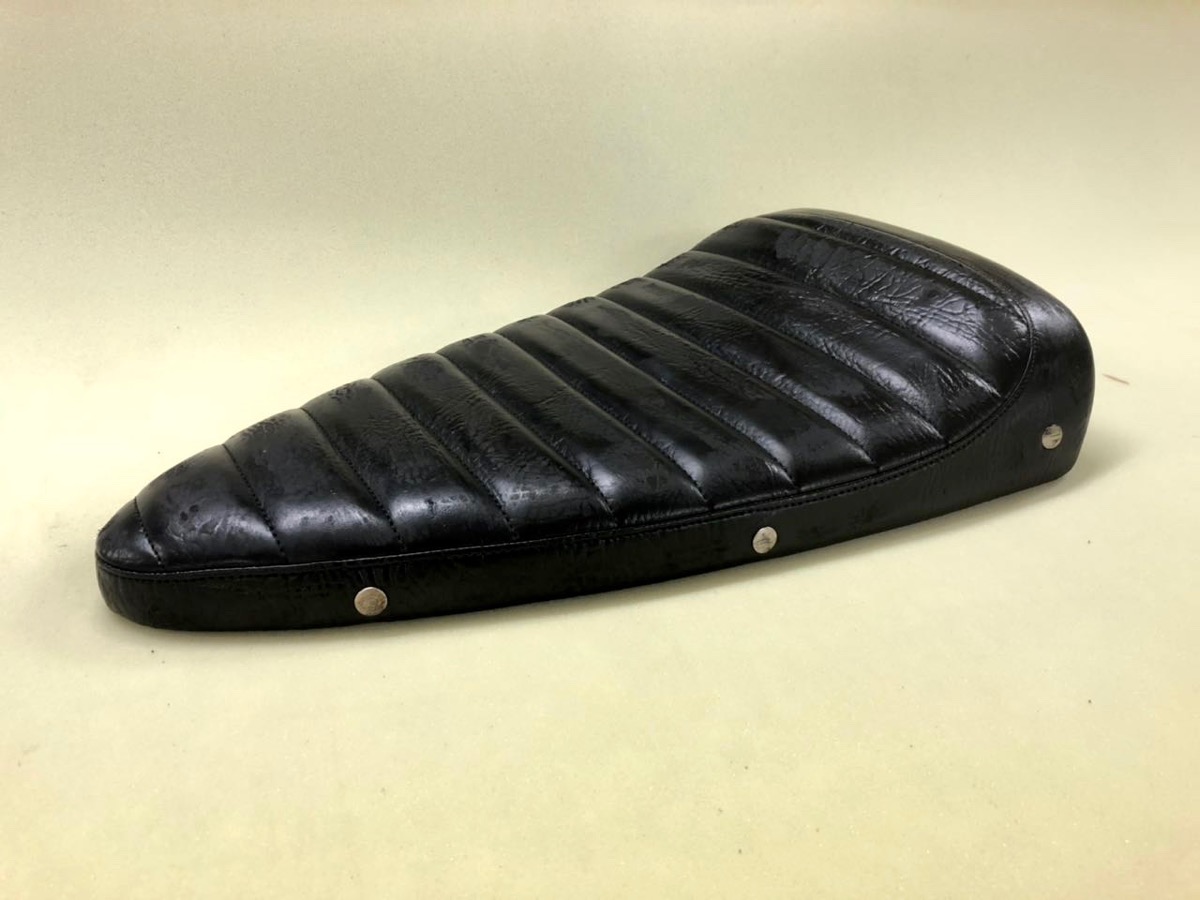
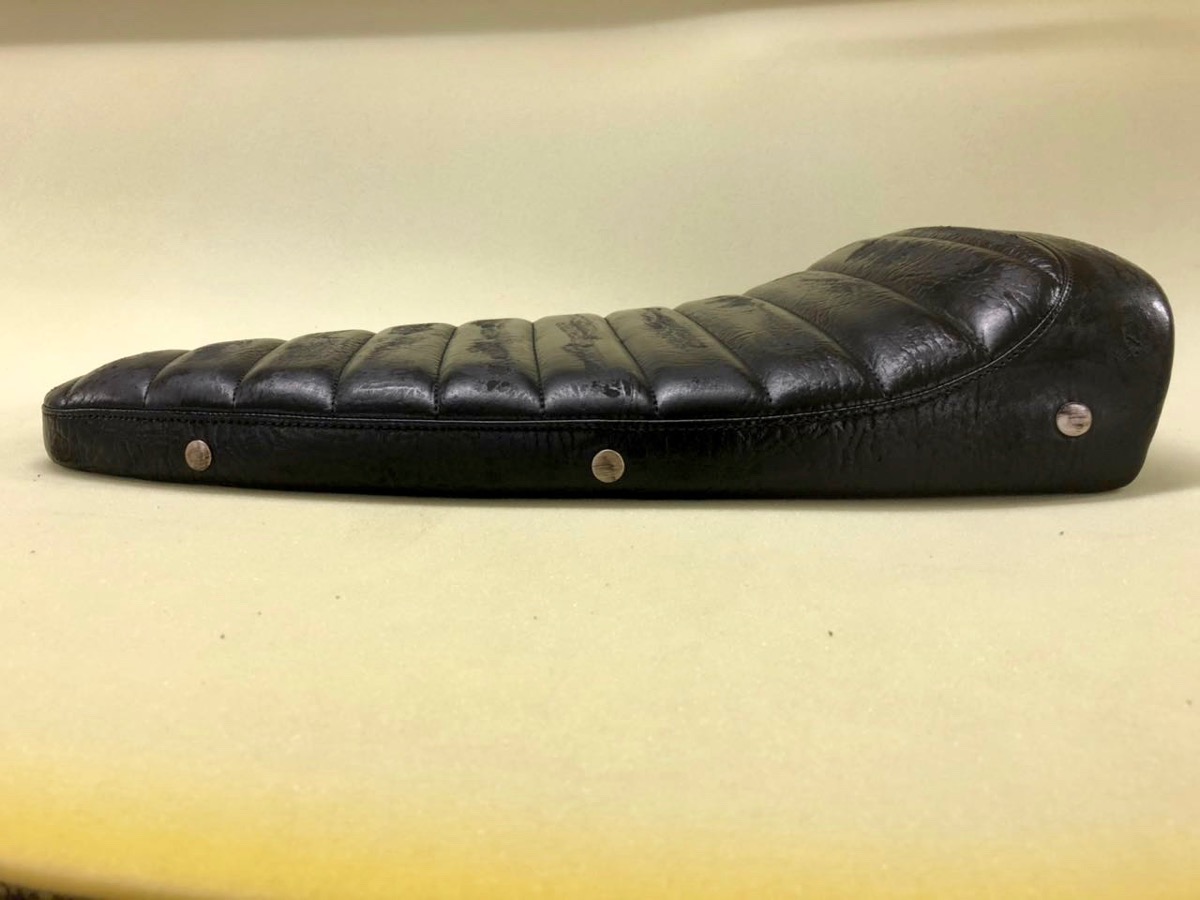
Custom made Vespa seat

The seat frame was made in our workshop and given to the seat specialist Holger http://www.sitzbankdoktor.de/ who sacrificed his old leather jacket and made the perfect seat for the Sei Giorni.
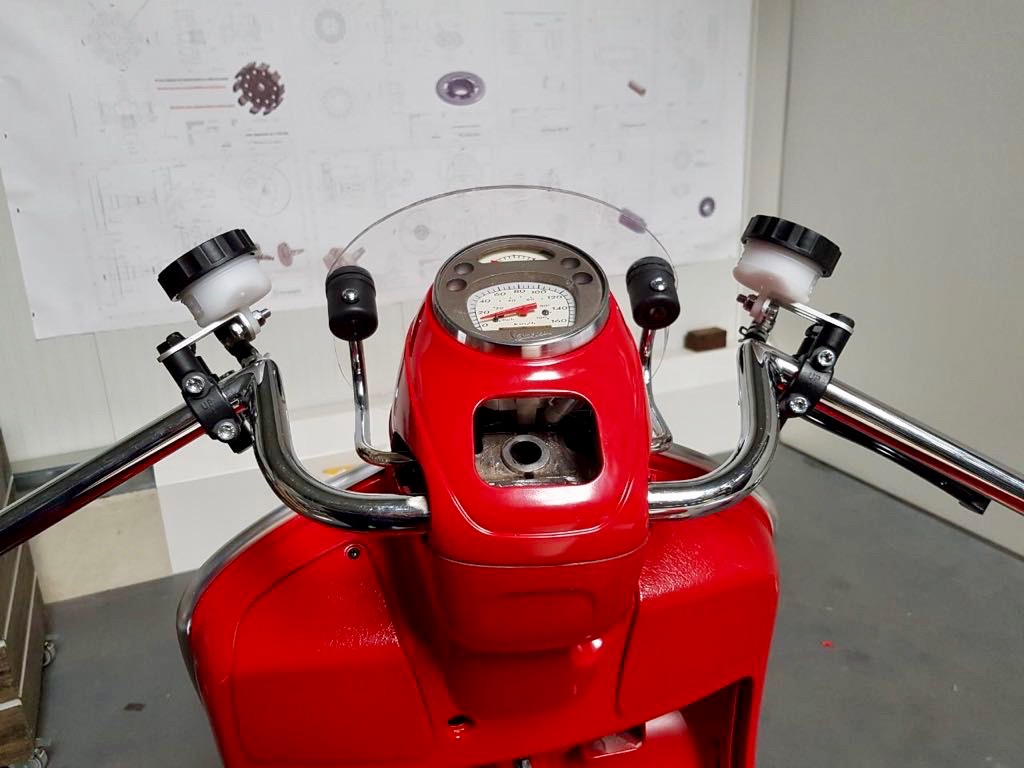
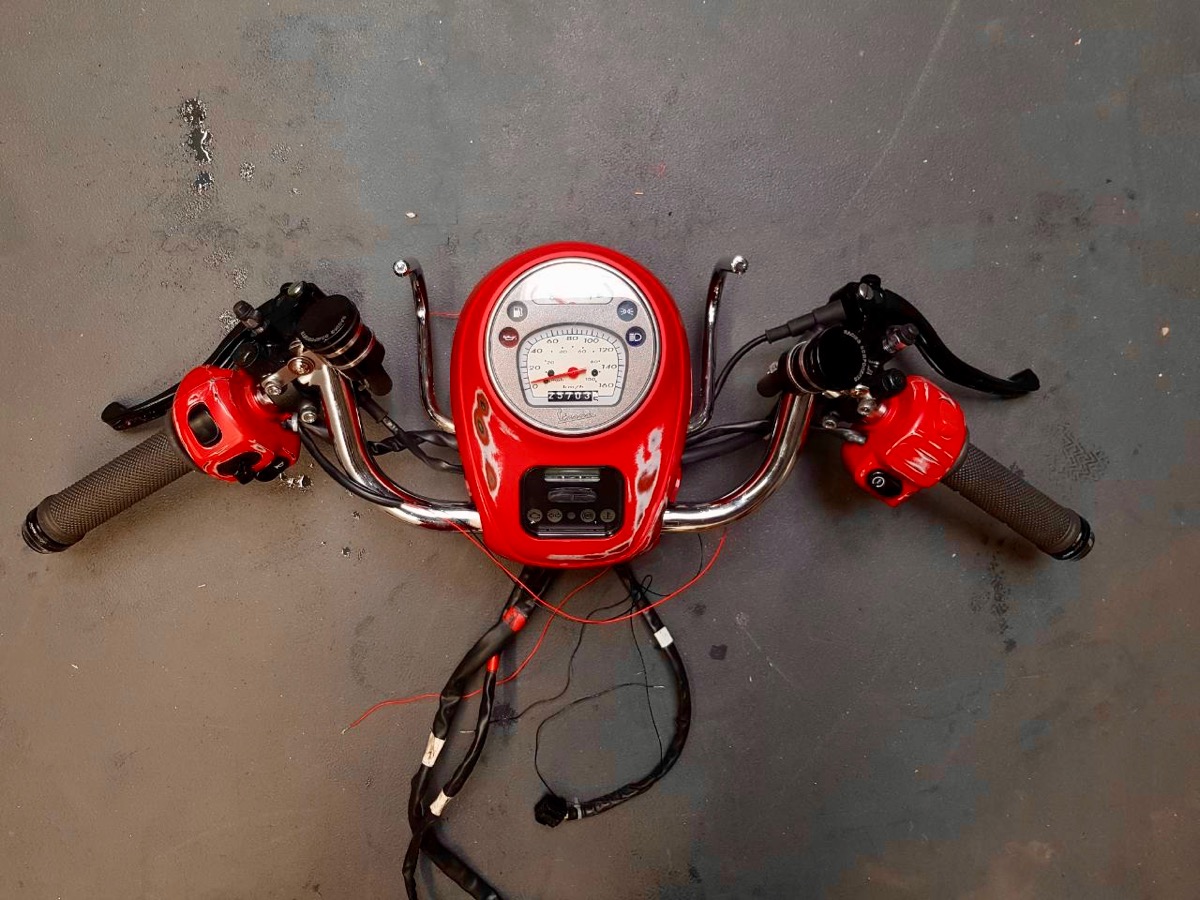
Racing handleable!

The handle bar was replaced with an M-shaped handle bar by Fehling.

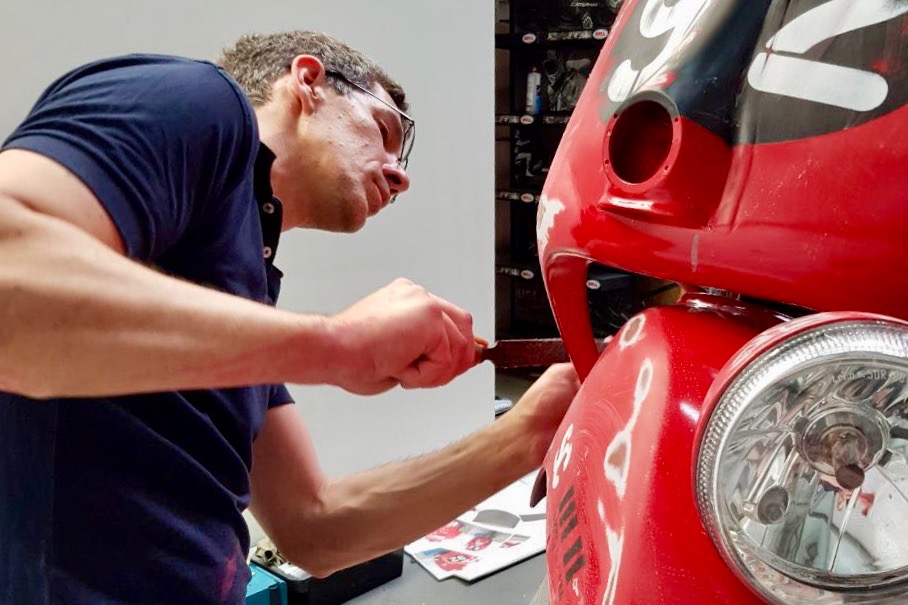
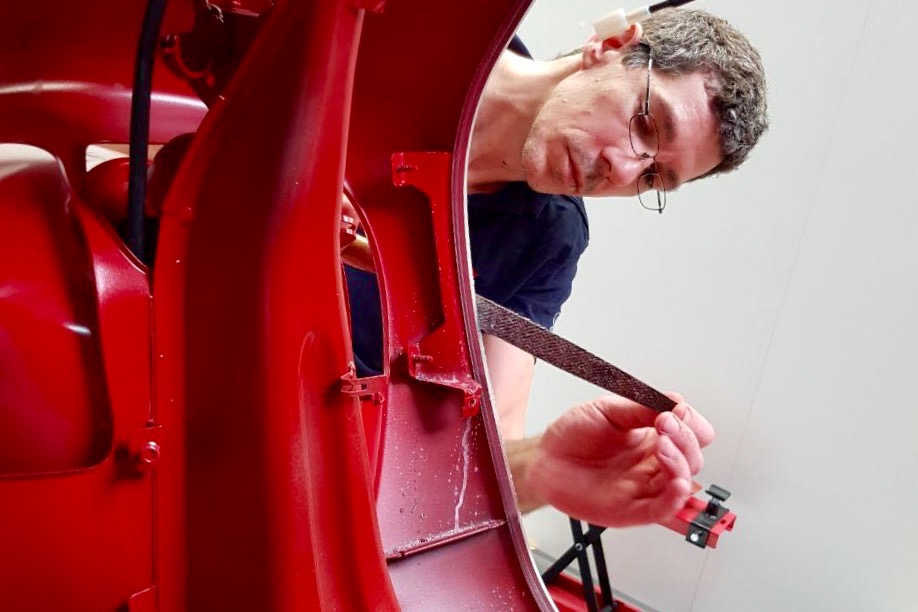
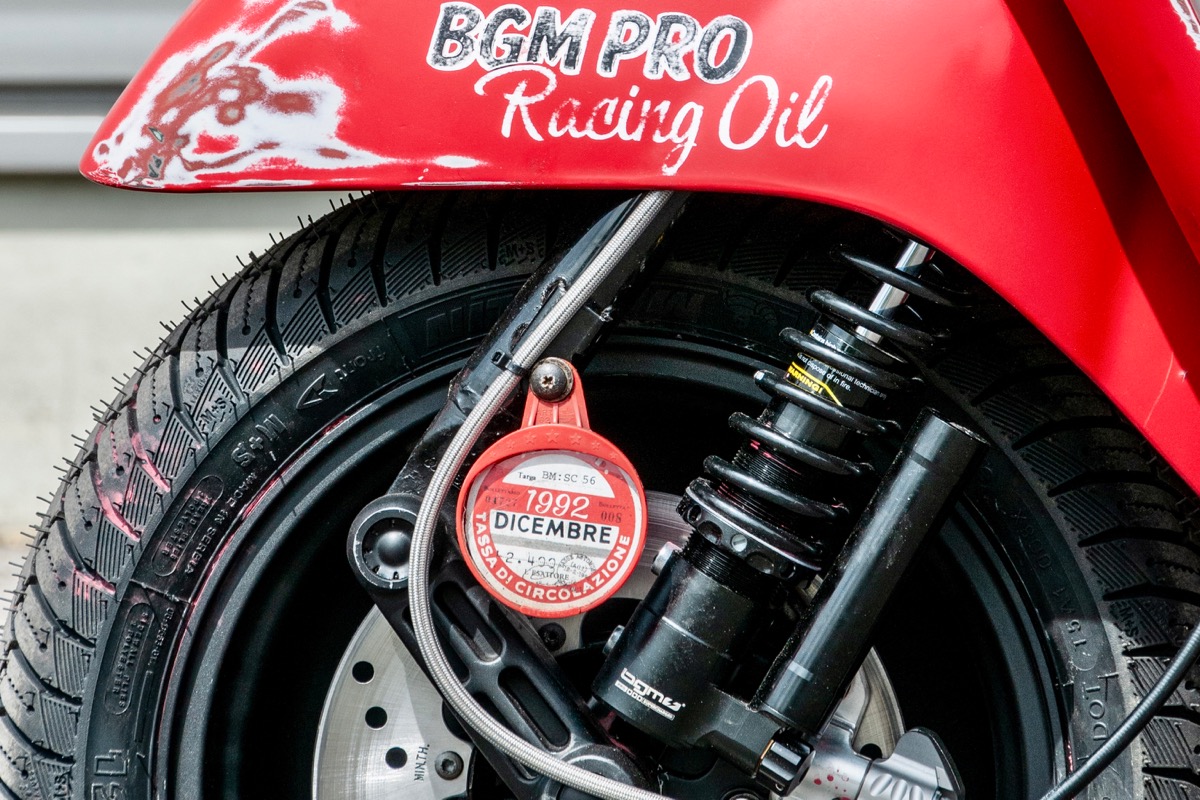
Vespa with race patina

In order to get the patina effect we used files and sandpaper!

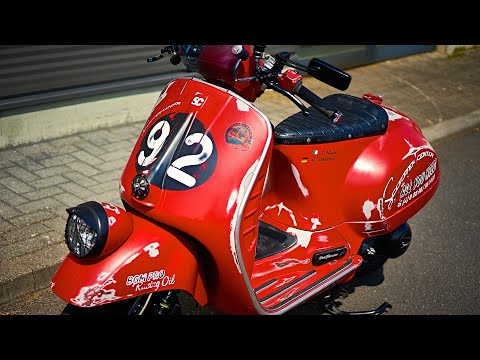
Vespa Be Giorni live!

Want to admire our customized Vespa Sei Giorni live? Then cume and visit us in our store in Kurt-Schumacher-Str. 1 in 50129 Bergheim-Glessen, Germany.

Vespa Be Giorni Vespa GTV 300 Tuning!

Scooter Center Vespa SC Be Giorni Scooter Center Vespa SC Be Giorni Scooter Center Vespa SC Be Giorni Scooter Center Vespa SC Be Giorni Scooter Center Vespa SC Be Giorni Scooter Center Vespa SC Be Giorni Scooter Center Vespa SC Be Giorni Scooter Center Vespa SC Be Giorni Scooter Center Vespa SC Be Giorni Scooter Center Vespa SC Be Giorni Scooter Center Vespa SC Be Giorni

For our 20 year old we wanted to set up a special project. Until the beginning of January there was only the idea as such and no concrete ideas what exactly it should be for a scooter. It is only clear until the Custom Show in Ried / Austria on 25.02.2012 the scooter should be ready. So a very sporty time limit to build a complete custom scooter from ZERO. The starting shot was that Monday 09.01.2012 We decided on a roadworthy ET3 as a basis. The beauty was completely dismantled…. .... and after successful slaughter, the frame and all sheet metal attachments are sandblasted. The footplate and the frame tunnel are cause for concern, because only after sandblasting can you see how much sheet metal is left. As long as the frame is sandblasting, you can worry about the “rest”. Hopefully enough of the frame remains :-). Since the direction of travel in this project is “Racer”, there is one disc brake inevitable. Maybe even front and back? In order to be able to install a disc brake at the front, we need one PK-XL fork . The original ET3 fork does not allow such a conversion. Apart from that, we also have something in preparation for the PK shock absorber. For the motor, we opted for a complete CNC housing from Gernot Penn, who with his label GP One offers beautiful CNC parts for the Vespa driver. The engine case is intended for one Polini Evo cylinder and Polini Evo crankshaft be manufactured to match. Friday 13.01.2012 Actually not a good date to pick up a frame from sandblasting. Fortunately and despite all fears, a lot of valuable Vespa sheet metal is left over after sandblasting. Of course, the elderly Italian lady reveals one or two dents after the over 30 year old paint is removed. All in all, nothing serious. Dirk, master of stripping pliers and body file, takes care of the sheet metal work. Monday 16.01.2012 Today we'll take them Bremsanlage in attack ... In order for the PK fork to stand properly in our frame, the fork must be processed. Without a corresponding processing, a “chopper chassis” would be obtained, because the PK fork in the lower area, i.e. the dimension from the lower bearing shell to the wheel center, is longer than with the V50 / ET3 forks. To do this, we send the fork to Würselen, to the yellow company. There the lower bearing seat on our fork is turned off by 10mm and the steering tube is shortened by 25mm. Armin has experience with conversions of this kind and will do this work for us. The matter is of course subject to a certain deadline pressure, since the parts still have to go to the painter. A separate wheel hub must be manufactured for the planned rear disc brake. To do this, we first have a sample made for the main shaft toothing - at first it sounds easier than it is ... :-) The sample is made by wire EDM from racing driver team colleague Dennis. At this point we would like to express our big thanks to “Denni” because he is always the one who, when things have to be quick and parts have to be finished “by yesterday”, is absolutely conscientious, reliable and very quick to handle such “ Little things ”. .... and it fits too. The front disc brake should be operated fully hydraulically. To do this, it is necessary to attach a brake pump to the handlebar. In our case, we'll choose one AJP brake pump with an 11mm piston. For this will be suitable Brake pump adapter which, however, make reworking the handlebars unavoidable. Together with one Grimeca brake caliper With a 30mm piston, you should be able to achieve good braking performance with a pleasantly soft pressure point. Here you can see the adapter simply placed on the handlebar from below, the original brake cable holder must be removed for installation: You have to invest a few minutes in order for the adapter to fit into the recording as shown here. All the better when everything goes well together afterwards. Tuesday 17.01.2012 In the meantime we have received a message from Austria that the motor housings are in production. Frame strut So that our racer always stays on track during fast load changes and strong braking maneuvers, he gets a frame strut on which the later steering damper is mounted. The double tube strut is attached directly to the head tube. Experience has shown that a support on the thin sheet metal of the frame tunnel does not last long and can tear off during heavy braking maneuvers. The struts are guided into the frame at the side below the seat bench nose and intercepted inside the frame with a cross strut. For the steering damper, we attach a spacer nut to the left strut. Just weld everything together and then the strut is in place. Wednesday 18.01.2012 Today the rims go for high gloss compression. At the moment you are still clad in Piaggio gray. Thursday 19.01.2012 The fork is finally back. In order to accommodate the 11 ″ rims and to compensate for the resulting track offset of 8mm, we have to twist the fork slightly before welding it together. All parts are first put together dry to measure how far the fork / rocker has to be turned. By turning the fork slightly, the shock absorber mount moves outward so far that of course the fender no longer fits. But more about that later, first the fork is welded. The fork is welded in layers together with the inserted sleeve, which is intended to reinforce the separation point. After welding, the seam is smoothed and plastered. Now for the fender, so that the PK shock absorber with its mount still fits under the fender, it must be widened. First the fender is separated. Then it is widened by approx. 10mm with sheet metal. The whole thing is then made pretty and adapted to the fork. As you can see in the side view, the fender is unfortunately now attached to the frame. With a little bit of gentle encouragement, it all works out in the end ... Friday 20.01.2012 By turning off the fork, the lower steering stop falls away. Of course, it has to be replaced again. Drawing the right position in the frame is a bit difficult. Then the steering stop is welded on. The ET3 originally has an ignition lock, since in the end we only use a kill switch, the hole in the steering head disturbs. Since we want to install a Fastflow fuel tap with a reserve indicator, the space that has become available is ideal for the indicator light of the reserve indicator. After the lock opening has to be welded, the handlebars must be smoothed again and a suitable cutout made for the indicator light. Now that all the work on the parts to be painted has been done, the preparation for painting begins. The scooter should get its color scheme at Pfeil Design in Austria. But before the frame and the add-on parts are sent to the neighboring country for painting, the frame is filled and primed here on site. Monday 23.01.2012 The frame and the attachments are primed and filled. All the glory is packed in a wooden box and prepared for shipping to Austria. Bon voyage! Gernot just wrote that the motor housings are on their way ... The Falc suction device that we want to use for the Polini Evo has already arrived. Tuesday 24.01.2012 The rims are back from the high-gloss compression :-) The engine case has also arrived :-) It's really tough stuff .. So that the rear wheel can also be braked hydraulically, I have to briefly tinker with a partial hydraulic system. The ingredients are the original brake pedal and the brake cylinder of a TPH 125.