
How to build a 35 hp engine for this year's racing season - ESC K2 engine
Not long until the first ESC races are started. Good for the ones who have their racing machines already sorted out and are waiting now. True to the motto: "Racing is life anything that happens before or after is just waiting."
If you haven't done your preparation yet, it is time to start things for the racing series everywhere.
We too have to build an engine. This will be used for the class 2 of the ESC. This is the cream of the crop class at the Euro Scooter Challenge. Nothing is hidden here and most things are allowed as well. All info about it can be found here: www.eurochallenge.de. The only restrictions that can be found is no larger capacity than 150 cc, while the top notch engines have a power output of 35 - 38 hp at the rear wheel.
On most of these engines you'll find the stroke of 53 mm combined with a 60 mm bore what gives 149.85 cc. This formula for power and success is used on our engine as well. The Falcon cylinder kit with 60 mm bore and a special made 53 mm stroke crank will be put onto the Quattrini engine casing.
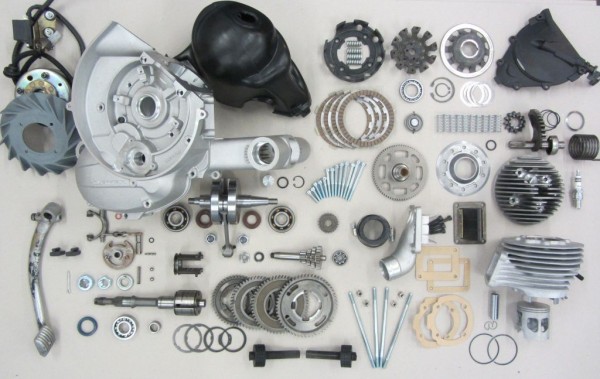
We don't want to keep back this awesome panorama of all the parts that make such a nice engine ...

… And we did a nice shopping list for recreating this view in your living or sleeping room. Wherever you like it more. This is the download file CSV file that you can upload to your shopping basket in the online shop.
Before we are even think about putting all the parts together, everysingle one gets a closer inspection. With such high power outputs even small mistakes can cause big trouble. If it happens while racing the trouble gets even bigger. Because racing is life, anything else is just waiting to bring this saying. Because we have used parts that are going to the engine, we take double care.
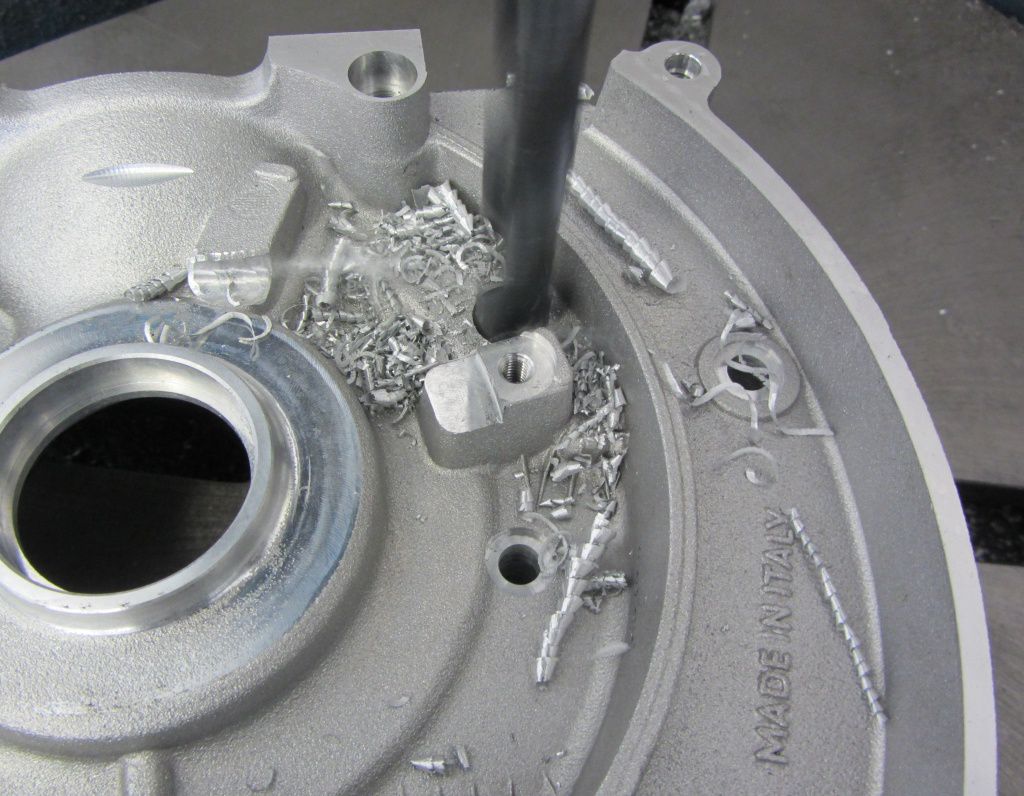
At the casings we start with checking the gasket surfaces and bearing seatings. the Christmas tree is not really free running ...
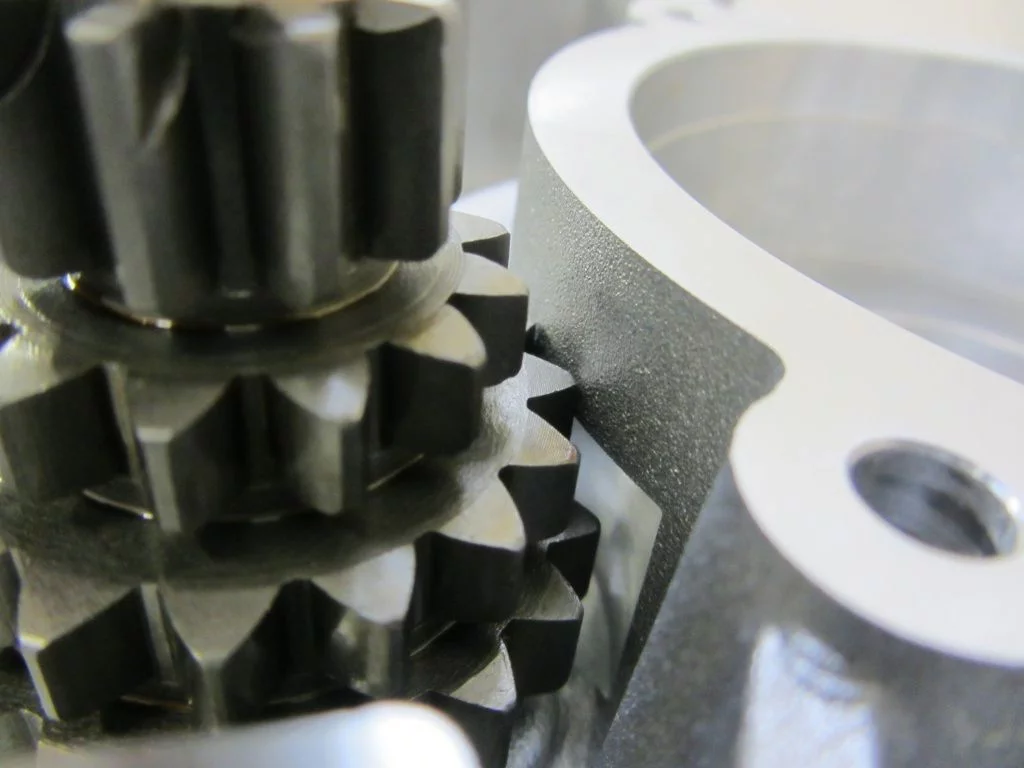
And fitting like it would cause problems. Latest if the bearing has been fitted. One more to watch: If you are on the race track and have to change the gear ratio a larger gear wheel would cause real problems. And this is nothing that will cure itself during running.
The clearance needs to be milled much larger to easily get the Xmas tree out and to fit taller gearing when this is needed.

At least we are so lucky that there are no further surprises in the bottom end.
The small casings helped give some nice little perfidy though. Normally you fit the stator plate of the ignition kit, take the cables put it through the hole for the cable. But ... wait ...
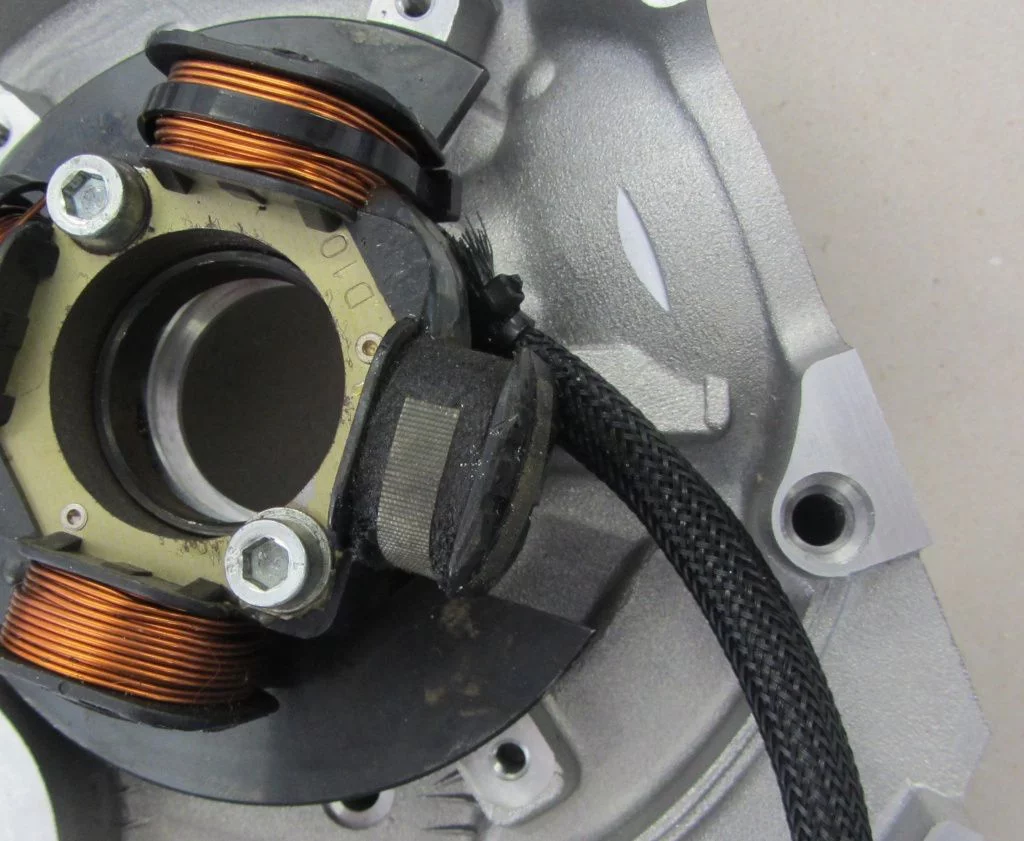
This is special, maybe this construction is for one of those WIFI ignitions. Where you no longer need wiring loom for the stator plates. Who knows? Anyway we opt for taken out the drill and get this sorted. The design of the original engine casings gives a good indication where to drill the hole makes sense.
As a protection for the stator wiring loom we take the rubber of the V50.
The right size for this is 12.5mm. For bore holes of more than 10 mm a good practice is to use a smaller drill to get the things done step by step.
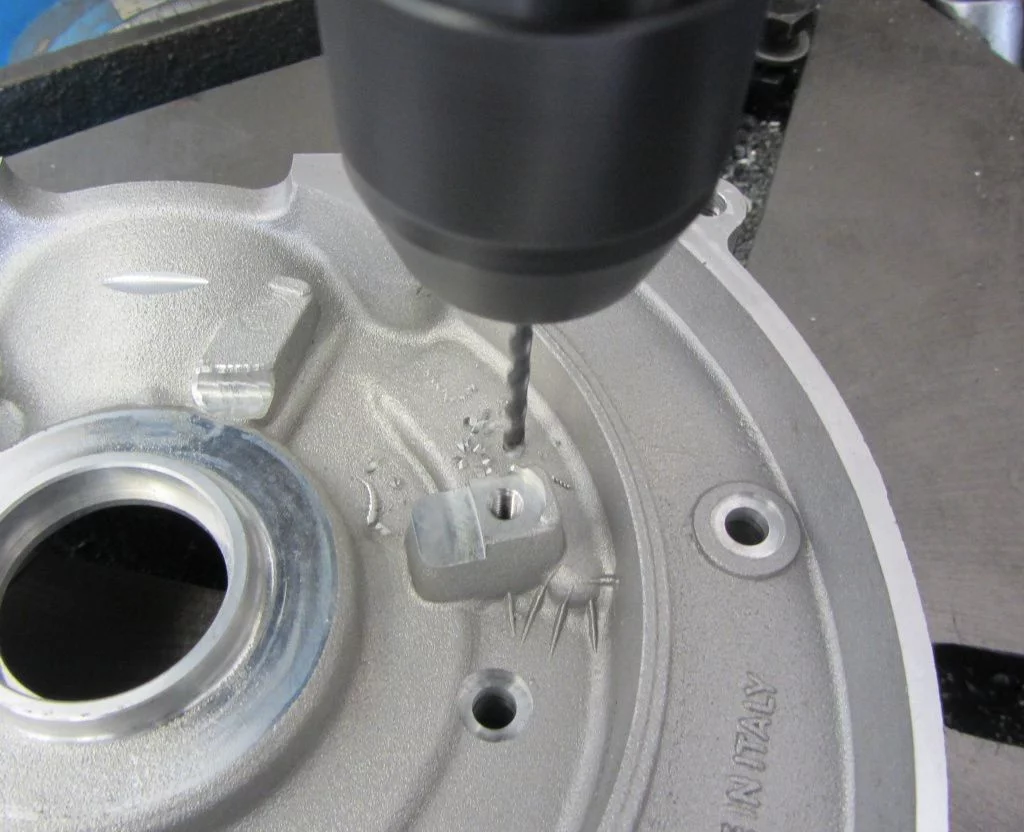
... and then you can work your way up to the desired size.
Chamfering done and then a quick try on.
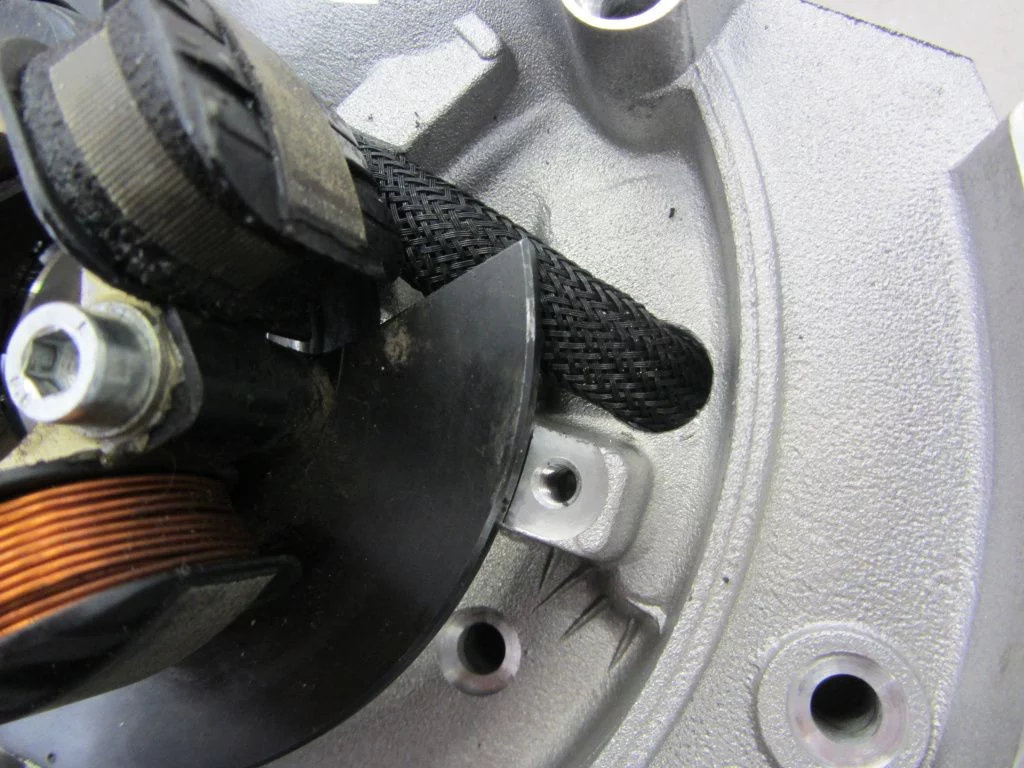
Everything is spot on. Now the dirty work on the small half of the casing is done.
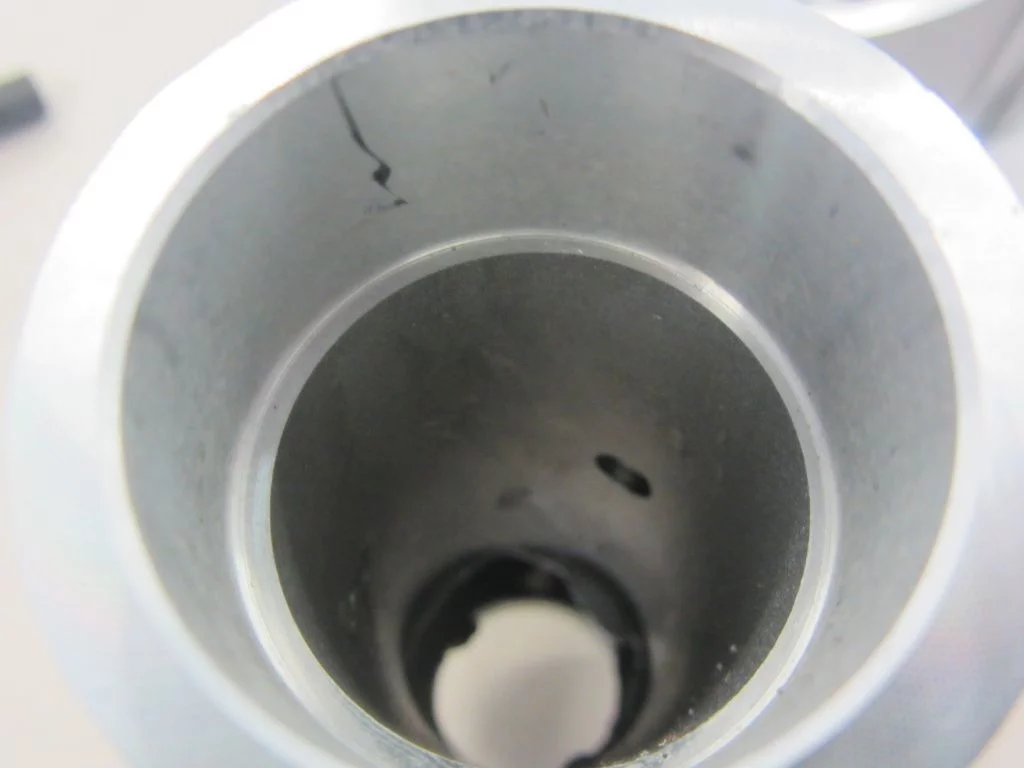
Next we check the area of the top end for any design faults or imperfections that need to be sorted out.
While the Falc cylinder kits are manufactured with a diameter of 66.5 mm, the Quattrini engine casings are machined to a diameter of 65.2 mm suited to the Quattrini cylinder kits. Standardization on these thing would be to nice. Why isn't it simply done in a way that items that were on the market earlier also fit?

So we know it's up to us what we do. There are two options that need to be considered:
1. The neck of the casing can be machined to the diameter of the casings.
2. The cylinder can be machined down to a new smaller diameter.
We opt for the second one.
If one wants to any other cylinder kit In future times, this can easily be done. The thickness of the spigot is more than enough.
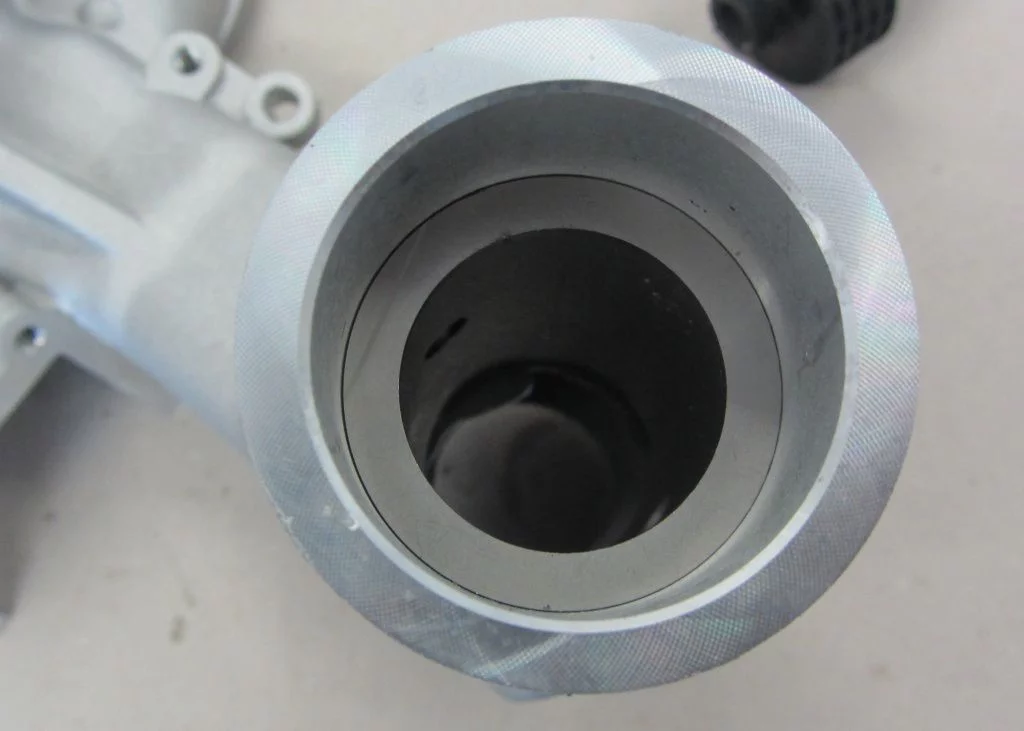
After the barrel is machined down we check that it really fits and everything is spot on. That is the case and we can now see what needs to grind out at the transfers.
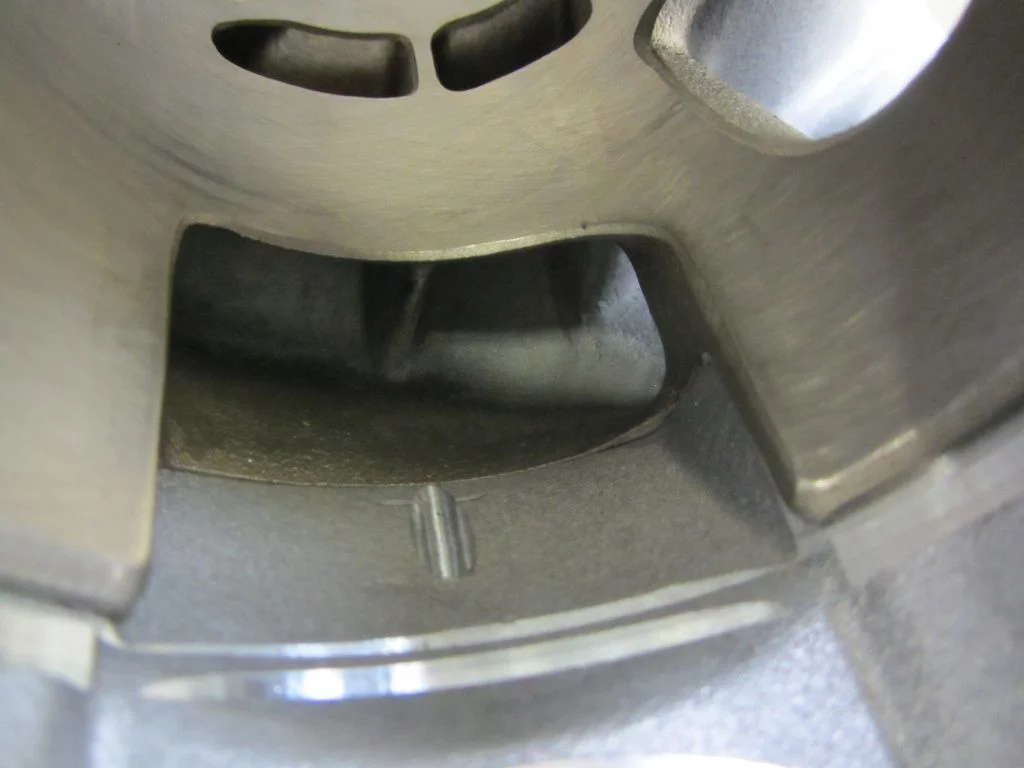
Very close to perfection! Just the cylinder needs to be matched very slightly to the surface are at the casings. The casings leaves at it is for the moment and we check port timings before anything else is done to the casings.
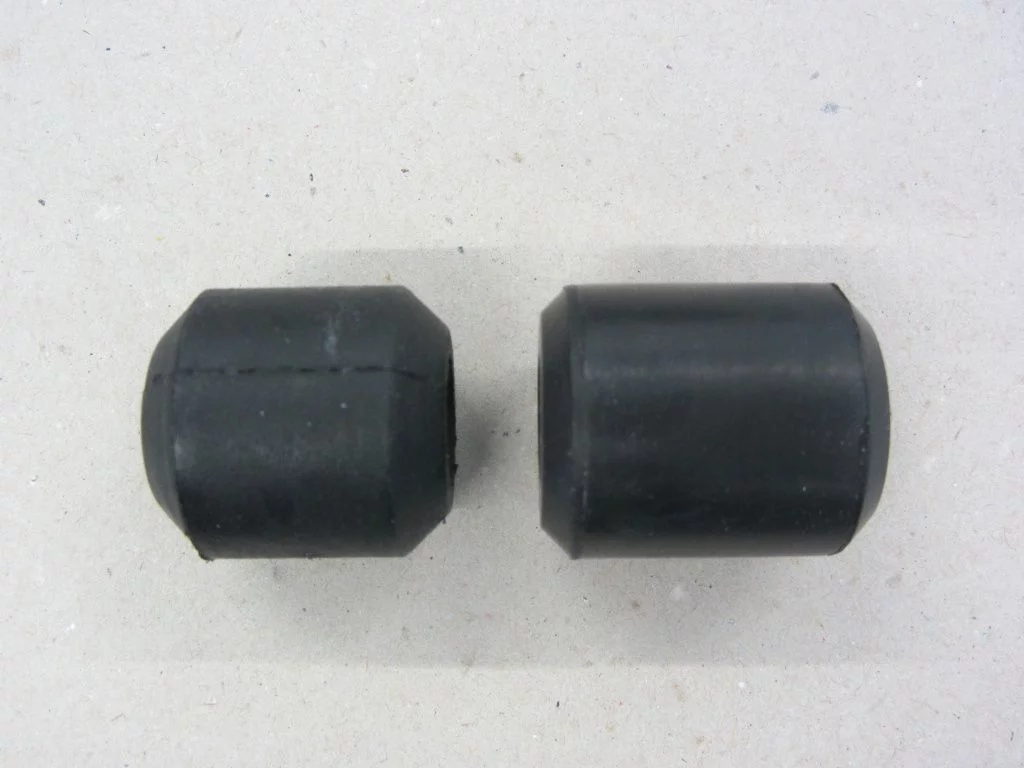
The engine casing comes bare without any silent bushings fitted. There are lots of solutions for this on the market. Some make more sense, other not so much. If the rubber is to stiff it is nice for going on fast and long straights. But as soon as you need to take some fast cornering those hard rubbers are no longer suited for the job. For the rubber it is the same as for the suspension: "As hard as necessary, as soft as possible."
Because this is done for the circuit we use the silent rubbers of the V50 / Primavera with roughly 50 50 shore hardness.
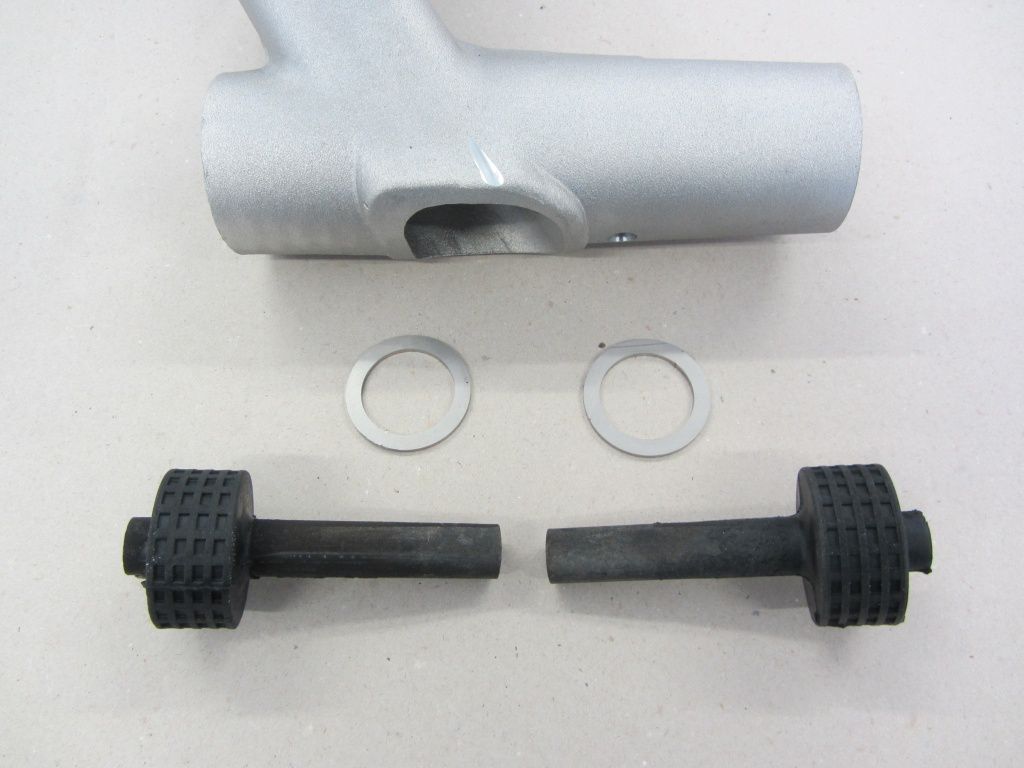
Even on a quick look it comes clear that the bed stop for the rubbers is not dimensioned right. With high side forces put on the rubber these could be pressed deeper into the casings. To prevent this we fit the stops of the PK range models also.
Here you see the too small bed stop:
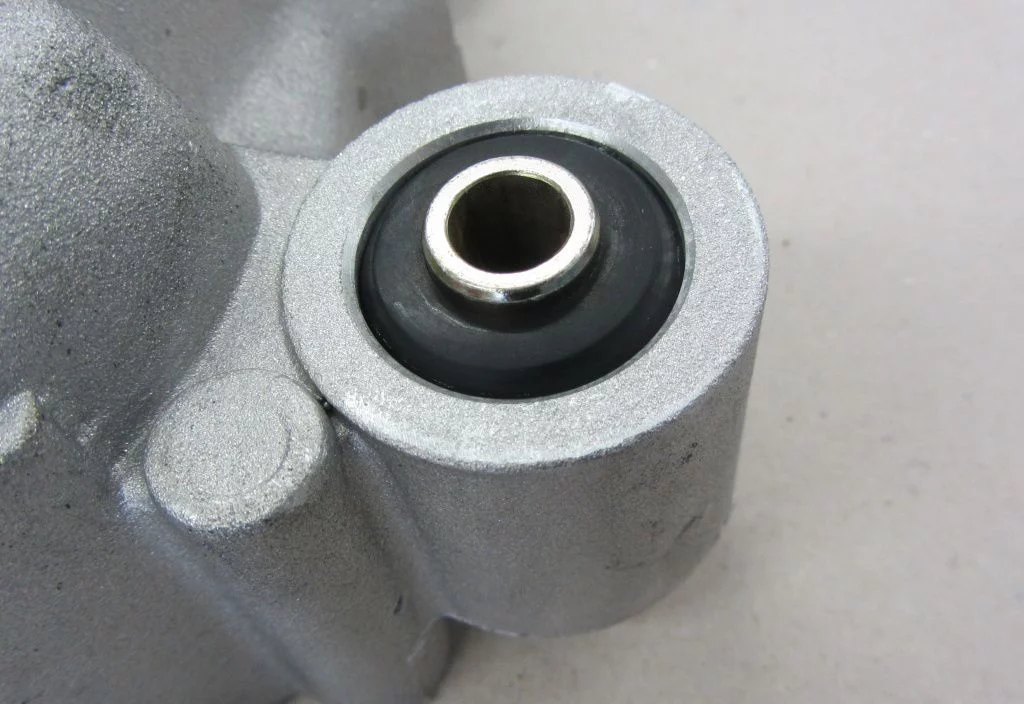
The stop of the PK range is simply put into place and prevents the rubber from getting forced deeper into the bore.
The relatively soft rubbers can be easily put into place using a little bit of talc or mounting paste.
For the rear shocker support we use our own rubber together with the original bushing
Compared to the original Piaggio rubber bear are a little bit wider ...
... and they match better to the casings. This gives a better side support.
The next episode will show how we fit the bearings and how to level up the crankshaft. Watch this space!


Leave a Reply
Want to join the discussion?Feel free to Contribute!